相对布局(RelativeContainer)
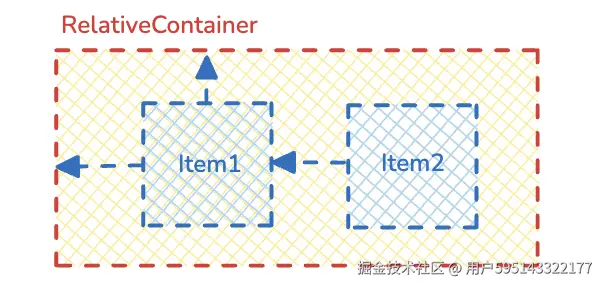
RelativeContainer相对布局的特是,RelativeContainer布局内的子组件可以已父组件或者兄弟组件为锚点来进行相对定位。
如下图所示:
- 子组件
Item1相对于父组件RelativeContainer确定自己位置。 - 子组件
Item2相对于兄弟组件Item1确定自己位置。
通过给子组件配置alignRules(value: LocalizedAlignRuleOptions) 来设置对齐规则。
设置对齐规则有如下必要点:
- 确定子组件的参考边线条:左、上、右、下、垂直中线、水平中线
- 确定锚点:父组件的锚点默认为
__container__ - 确定对齐方式:与父组件的那条对齐(上、中、下、左、中、右)
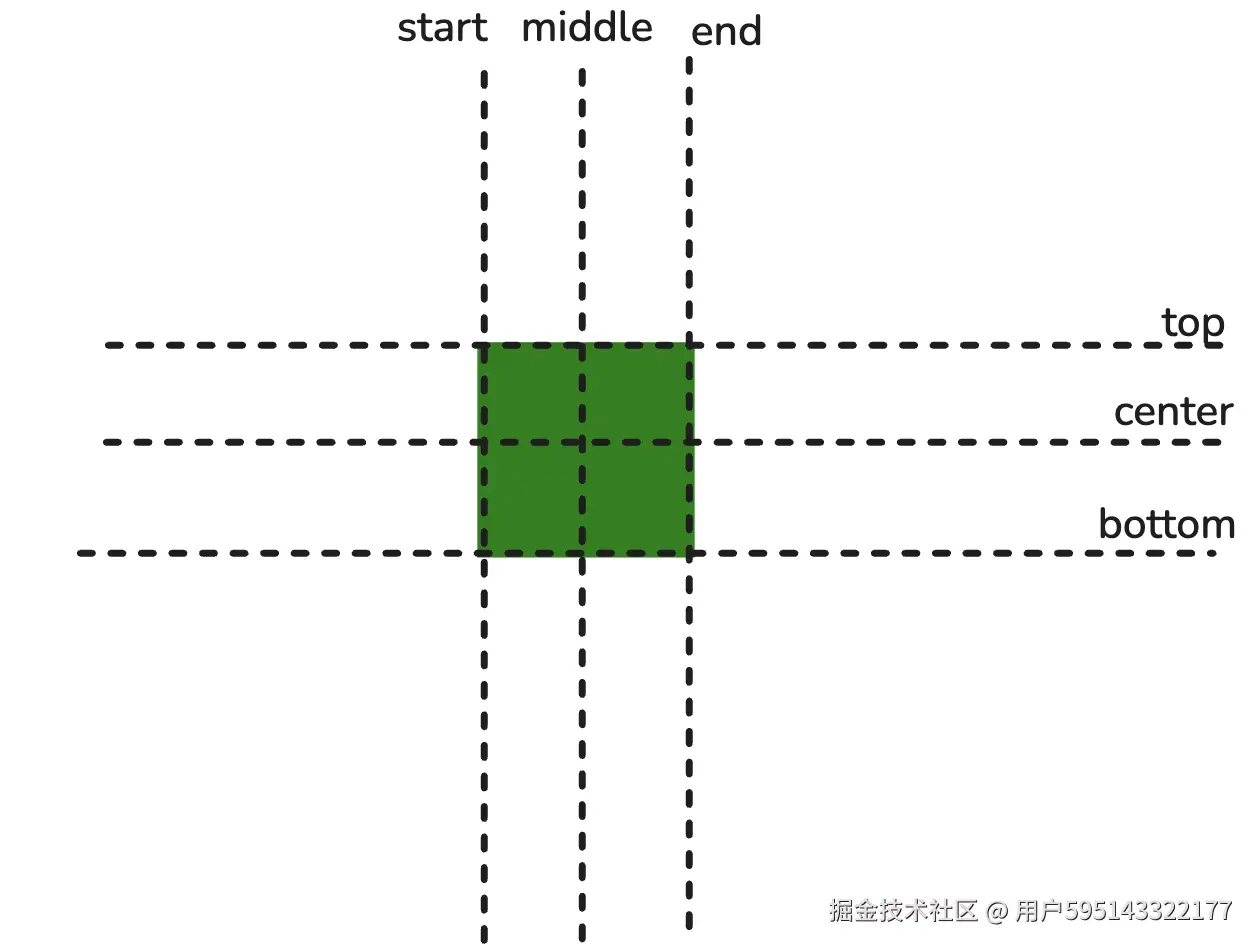
参考边线
对于RelativeContainer的任何一个子组件而言,它都有6条边线,分别时start、middle、end、top、center、bottom ,设置当前组件的哪个边界对齐到锚点,就可以确定自己在位置。
如图所示
锚点
锚点设置涉及子元素相对于其父元素或兄弟元素的位置依赖关系。具体而言,子元素可以将其位置锚定到相对布局容器(RelativeContainer)、辅助线(guideline)、屏障(barrier)或其他子元素上。
为了准确定义锚点,RelativeContainer的子元素必须拥有唯一的组件标识,用于指定锚点信息。父元素RelativeContainer的标识默认为__container__,其他子元素的组件标识,则通过id属性设置。
示例1:给RelativeContainer里面的子组件Row()设置对齐规则
- 左边与父组件的左边对齐
- 下班与父组件的下边对齐
ts{3-6}
RelativeContainer() {
	Row().width(100).height(100).backgroundColor(Color.Red)
      .alignRules({
        start: { anchor: '__container__', align: HorizontalAlign.Start },
        bottom: { anchor: '__container__', align: VerticalAlign.Bottom }
      })
}
.width(300)
.height(300)
.borderWidth(1)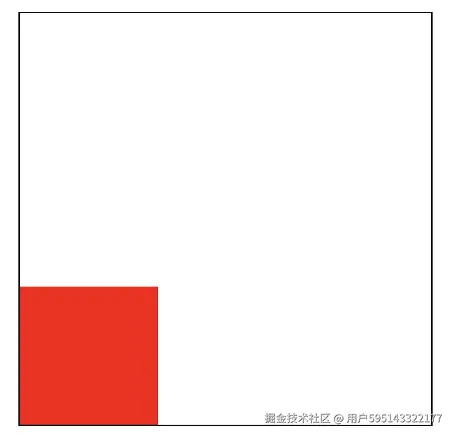
示例:给RelativeContainer的四个角,以及中间放置元素。
对于任何一个组件而言,它有6条线,分别时start、middle、end、top、center、bottom 通过这6条线与父组件或者其他兄弟组件设置对齐方式,就可以确定自己在位置。
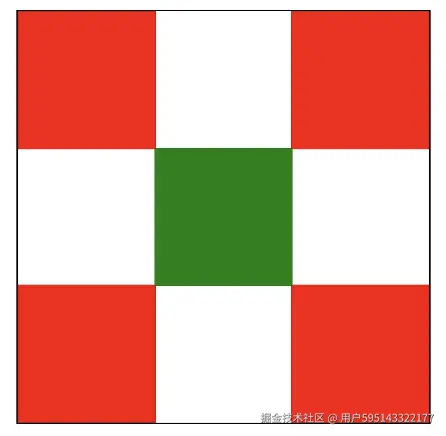
示例代码如下
ts
 RelativeContainer() {
    //对齐规则:左上对齐
    Row().width(100).height(100).backgroundColor(Color.Red)
      .alignRules({
        start: { anchor: '__container__', align: HorizontalAlign.Start },
        top: { anchor: '__container__', align: VerticalAlign.Top }
      })

    //对齐规则:右上对齐
    Row().width(100).height(100).backgroundColor(Color.Red)
      .alignRules({
        end: { anchor: '__container__', align: HorizontalAlign.End },
        top: { anchor: '__container__', align: VerticalAlign.Top }
      })

    //对齐规则:左下对齐
    Row().width(100).height(100).backgroundColor(Color.Red)
      .alignRules({
        start: { anchor: '__container__', align: HorizontalAlign.Start },
        bottom: { anchor: '__container__', align: VerticalAlign.Bottom }
      })

    //对齐规则:右下对齐
    Row().width(100).height(100).backgroundColor(Color.Red)
      .alignRules({
        end: { anchor: '__container__', align: HorizontalAlign.End },
        bottom: { anchor: '__container__', align: VerticalAlign.Bottom }
      })

    //对齐规则:水平垂直居中
    Row().width(100).height(100).backgroundColor(Color.Green)
      .alignRules({
        middle: { anchor: '__container__', align: HorizontalAlign.Center },
        center: { anchor: '__container__', align: VerticalAlign.Center }
      })
  }
  .width(300)
  .height(300)
  .borderWidth(1)
相对于兄弟组件定位
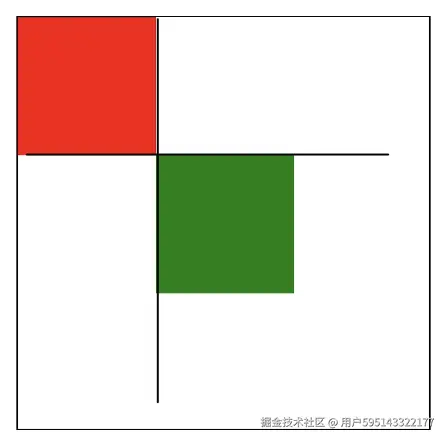
相对于兄弟组件的定位时,需要给兄弟组件设置id,然后锚点指向兄弟组件的id即可。
示例代码
ts
RelativeContainer() {
    Row().width(100).height(100).backgroundColor(Color.Red)
      .alignRules({
        start: { anchor: '__container__', align: HorizontalAlign.Start },
        top: { anchor: '__container__', align: VerticalAlign.Top }
      })
      .id("id1")

    Row().width(100).height(100).backgroundColor(Color.Green)
      .alignRules({
        //左边与id1的右边对齐
        //上边与id1的下边对齐
        start: { anchor: 'id1', align: HorizontalAlign.End },
        top: { anchor: 'id1', align: VerticalAlign.Bottom }
      })
}
.width(300)
.height(300)
.borderWidth(1)
效果如下图所示
设置偏移量
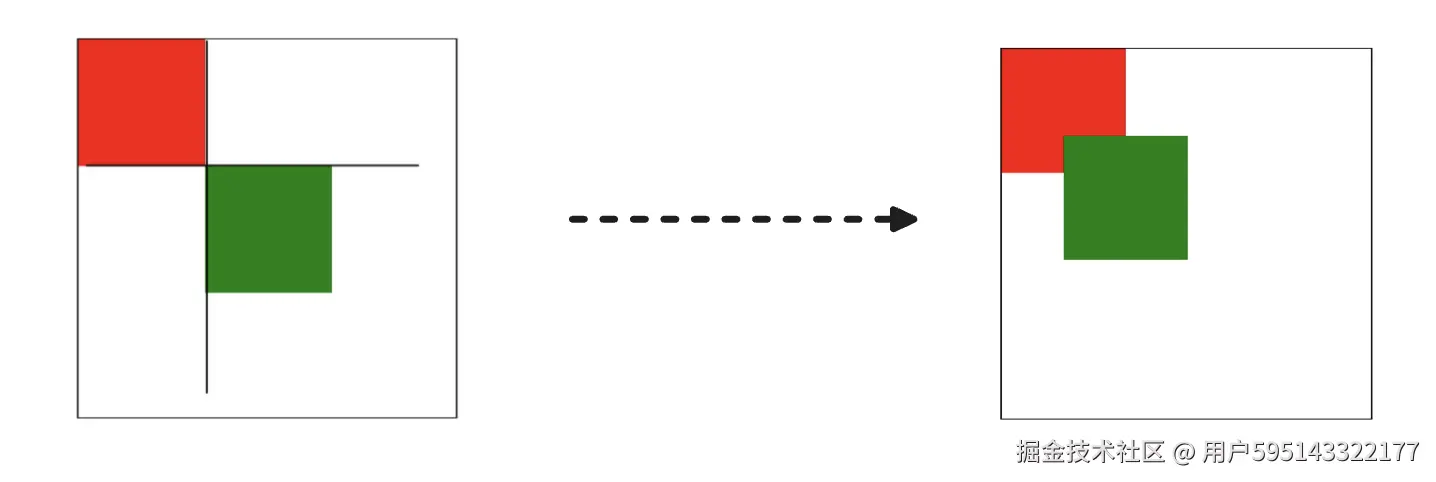
当通过alignRules设置相对位置还达不到目的时,可以使用offset设置编译量进一步调整。offset是相对于组件原来的位置进行偏移。
如图所示:对绿色块向上和左分偏移30个像素和50个像素。
示例代码:
ts
RelativeContainer() {
        Row()
          .width(100)
          .height(100)
          .backgroundColor(Color.Red)
          .alignRules({
            start: { anchor: '__container__', align: HorizontalAlign.Start },
            top: { anchor: '__container__', align: VerticalAlign.Top }
          })
          .id("id1")

        Row()
          .width(100)
          .height(100)
          .backgroundColor(Color.Green)
          .alignRules({
            //左边与id1的右边对齐
            //上边与id1的下边对齐
            start: { anchor: 'id1', align: HorizontalAlign.End },
            top: { anchor: 'id1', align: VerticalAlign.Bottom }
          })
          .offset({
            x: -50,	//向左偏移50个像素
            y: -30	//向上偏移30个像素
          })
      }
      .width(300)
      .height(300)
      .borderWidth(1)
到此,相对布局的用法就介绍完了。撒花🎉🎉🎉