1. 设计思路
1.1 架构目标
99.9%+ SLA :全年停机时间 < 8.76小时
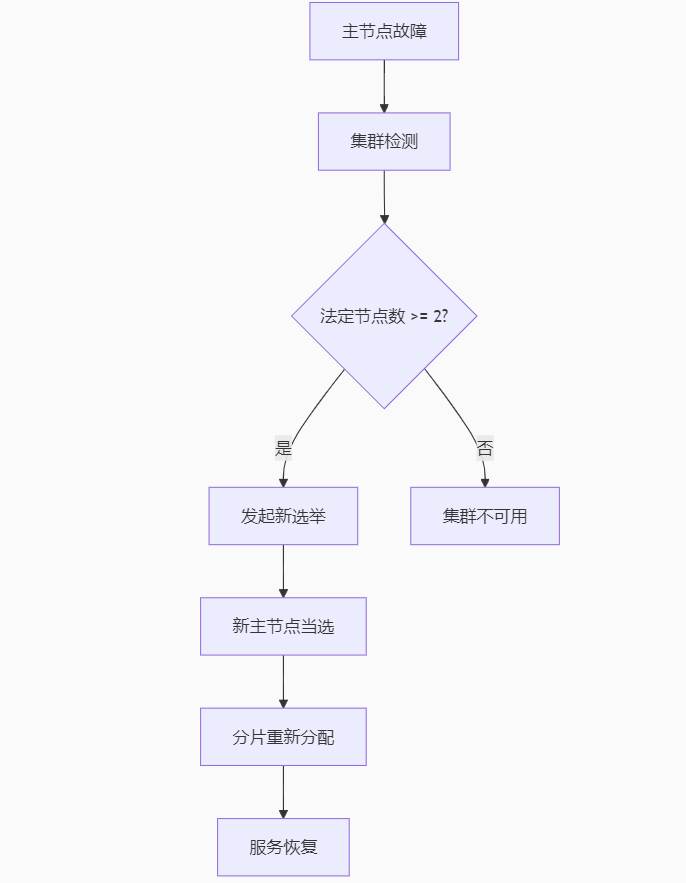
自动故障转移:节点故障时30秒内恢复服务
数据零丢失:通过副本机制保证数据持久性
无缝扩展:支持在线添加节点
1.2 节点规划
| 节点角色 | IP 地址 | 配置 | 资源建议 |
|---|---|---|---|
| 主节点 + 数据节点 | 192.168.88.11 | node.master: true node.data: true | 4 核8GB |
| 主节点 + 数据节点 | 192.168.88.12 | node.master: true node.data: true | 4 核8GB |
| 主节点 + 数据节点 | 192.168.88.13 | node.master: true node.data: true | 4 核8GB |
工具建议:elasticsearch7.14.1、OpenJDK 11
1.3 故障转移机制设计
2. 模块安装(三个节点)
2.1 安装 elasticsearch7.14.1
下载安装包:
方法一:Elasticsearch 7.14.1 | Elastic
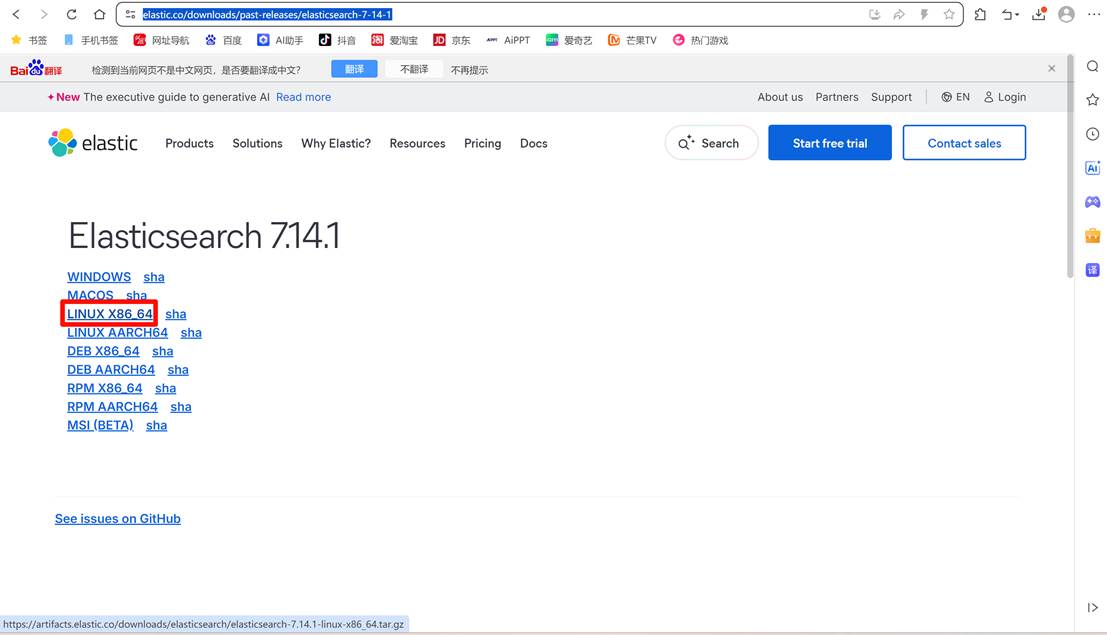

方法二:
|--------------------------------------------------------------------------------------------------------------------------------|
| yum install -y wget wget https://artifacts.elastic.co/downloads/elasticsearch/elasticsearch-7.14.1-linux-x86_64.tar.gz |
安装包解压:
|--------------------------------------------------------------------------------------------------------------------|
| sudo su -- es tar -zxvf elasticsearch-7.14.1-linux-x86_64.tar.gz mv elasticsearch-7.14.1 elasticsearch |
2.2 系统参数优化(三个节点)
2.2.1. 系统优化
|--------------------------------------------------------------------------------------------------------------------------------------------------------------------------------------------------------------------------------------------------------------------------------------------------------------------------------------|
| # 修改文件描述符限制 sudo tee -a /etc/security/limits.conf <<EOF * soft nofile 65535 * hard nofile 65535 es soft memlock unlimited es hard memlock unlimited EOF # 修改虚拟内存限制 sudo tee -a /etc/sysctl.conf <<EOF vm.max_map_count=655360 EOF sudo sysctl -p # 关闭透明大页 echo 'never' | sudo tee /sys/kernel/mm/transparent_hugepage/enabled |
2.2.2. 创建专用用户
|------------------------------------------------------------------------------------------------|
| sudo useradd es -m -p $(openssl passwd -1 "es123") # 设置密码 sudo usermod -aG wheel es # 添加sudo权限 |
2.2.3. 安装 Java
|-------------------------------------|
| sudo yum install -y java-11-openjdk |
2.2.4配置jvm
|-------------------------------------------------------------------------------------------------------------------------------------|
| cd elasticsearch/config vim jvm.options 改为 -Xms2g -Xmx2g  |
|
2.2.5 修改系统文件
|-----------------------------------------------------------------------------------------------------------|
| vim /etc/security/limits.d/20-nproc.conf 改为: * soft nofile 65536 * hard nofile 65536 * hard nproc 4096 |
3. 实现过程
3.1 副本集配置(高可用基础)
3.1.1 配置文件(elasticsearch.conf)(192.168.88.11节点)
|---------------------------------------------------------------------------------------------------------------------------------------------------------------------------------------------------------------------------------------------------------------------------------------------------------------------------------------------------------------------------------------------------------------------------------------------------------------------------------------------------------------------------------------------------------------------------------------------------------------------------------------------------------------------------------------------------------------------------------------------------------------------------------------------------------------------------------------------------------------------------------------------------------------------------------------------------------------------------------------------------------------------------------------------------------------------------------------------------------------------------------------------------------------------------------------------------------------------------------------------------------------------------------------------------------------------------------------------------------------------------------------------------------------------|
| cd /home/es/elasticsearch/config # 集群名称(所有节点必须相同) cluster.name: cluster-es # # # 节点名称(唯一) node.name: es-master # # # 网络绑定地址 network.host: 192.168.88.11 # # # 角色:主节点(可参与选举)+ 数据节点 node.master: true node.data: true # # # HTTP 端口 http.port: 9200 # # # Head 插件所需 CORS 配置 http.cors.allow-origin: "*" http.cors.enabled: true http.max_content_length: 200mb # # # 初始主节点选举候选者(所有节点必须一致) #cluster.initial_master_nodes: "es-master" # # # 节点发现列表(所有节点相同) #discovery.seed_hosts: "192.168.88.11:9300", "192.168.88.12:9300", "192.168.88.13:9300" # 所有节点通用配置 # cluster.name: cluster-es discovery.seed_hosts: "192.168.88.11:9300", "192.168.88.12:9300", "192.168.88.13:9300" cluster.initial_master_nodes: "es-master", "es-data1", "es-data2" # 必须包含所有候选主节点 # # # 集群设置 gateway.recover_after_nodes: 2 network.tcp.keep_alive: true network.tcp.no_delay: true transport.tcp.compress: true # # # 负载均衡设置 cluster.routing.allocation.cluster_concurrent_rebalance: 16 cluster.routing.allocation.node_concurrent_recoveries: 16 cluster.routing.allocation.node_initial_primaries_recoveries: 16 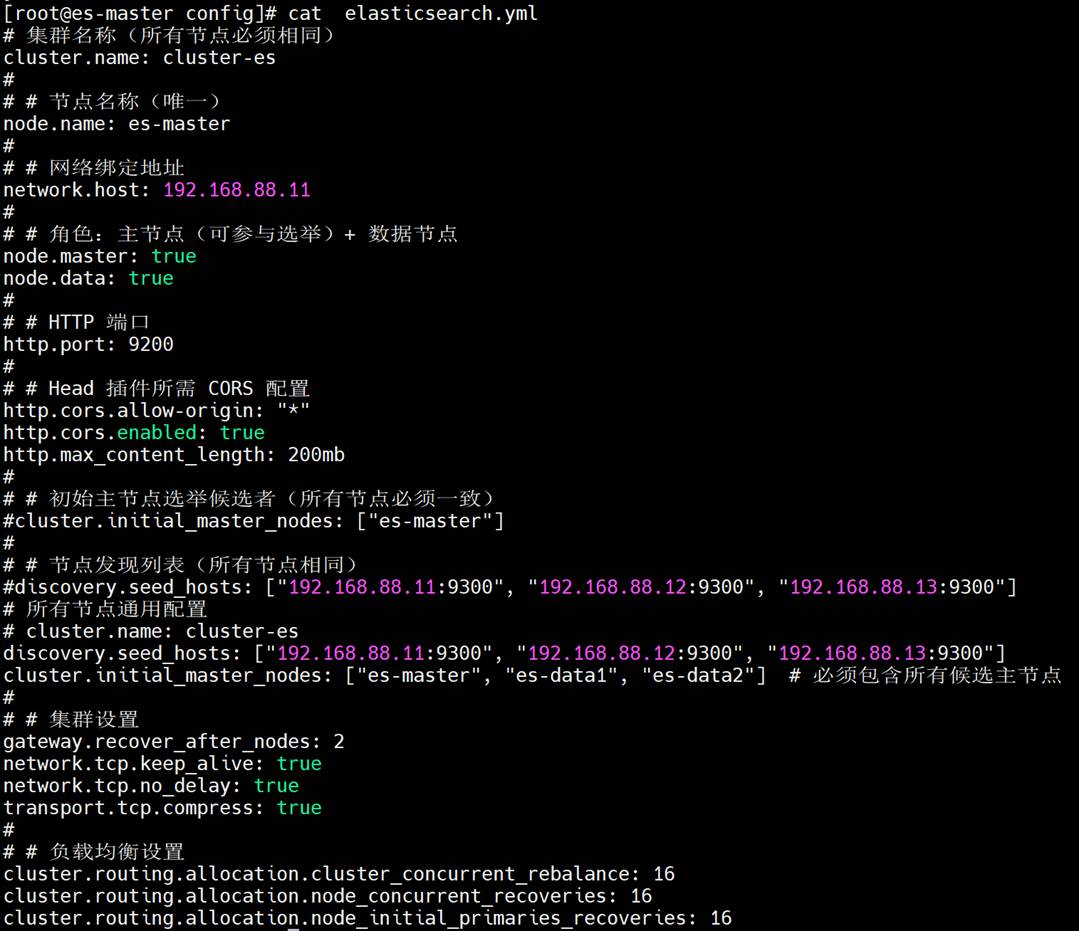 |
|
3.1.2 vim elasticsearch.yml(192.168.88.12****节点)
|----------------------------------------------------------------------------------------------------------------------------------------------------------------------------------------------------------------------------------------------------------------------------------------------------------------------------------------------------------------------------------------------------------------------------------------------------------------------------------------------------------------------------------------------------------------------------------------------------------------------------------------------------------------------------------------------------------------------------------------------------------------------------------------------------------------------------------------------------------------------------------------------------------------------------------------------------------|
| cd /home/es/elasticsearch/config cluster.name: cluster-es node.name: es-data1 network.host: 192.168.88.12 # 角色:仅数据节点(不参与主节点选举) node.master: true node.data: true # http.port: 9200 http.cors.allow-origin: "*" http.cors.enabled: true http.max_content_length: 200mb # # # 必须与主节点配置相同 discovery.seed_hosts: "192.168.88.11:9300", "192.168.88.12:9300", "192.168.88.13:9300" cluster.initial_master_nodes: "es-master", "es-data1", "es-data2" # gateway.recover_after_nodes: 2 network.tcp.keep_alive: true network.tcp.no_delay: true transport.tcp.compress: true cluster.routing.allocation.cluster_concurrent_rebalance: 16 cluster.routing.allocation.node_concurrent_recoveries: 16 cluster.routing.allocation.node_initial_primaries_recoveries: 16 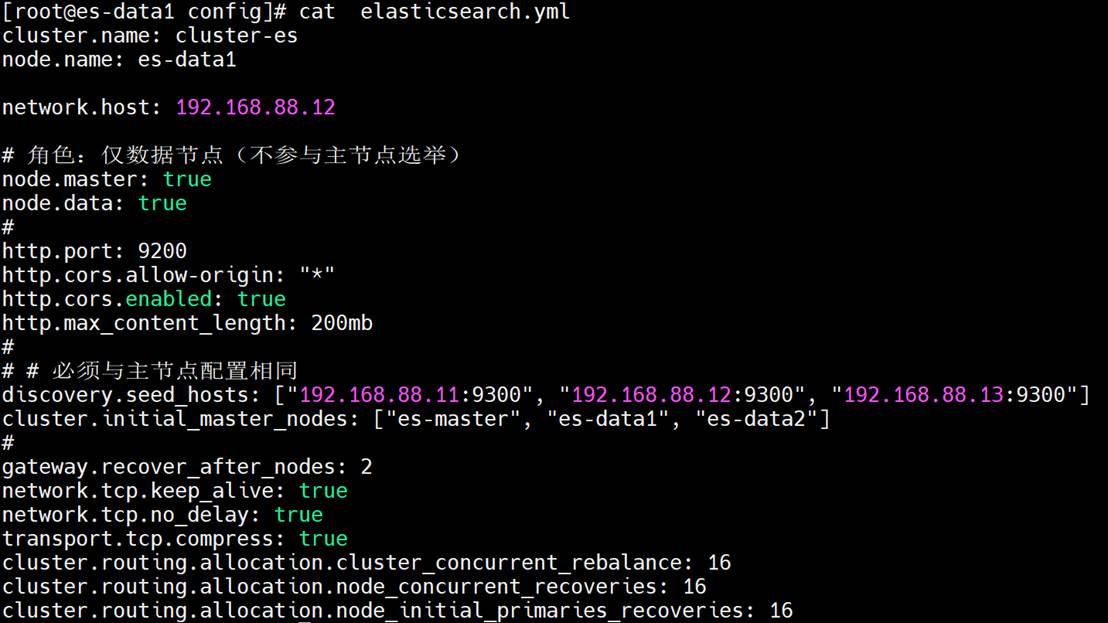 |
|
3.1.3 vim elasticsearch.yml(192.168.88.13 节点)
|---------------------------------------------------------------------------------------------------------------------------------------------------------------------------------------------------------------------------------------------------------------------------------------------------------------------------------------------------------------------------------------------------------------------------------------------------------------------------------------------------------------------------------------------------------------------------------------------------------------------------------------------------------------------------------------------------------------------------------------------------------------------------------------------------------------------------------------------------------------------------------------------------------------------------------------------|
| cd /home/es/elasticsearch/config cluster.name: cluster-es node.name: es-data2 network.host: 192.168.88.13 # 仅数据节点 node.master: true node.data: true # http.port: 9200 http.cors.allow-origin: "*" http.cors.enabled: true http.max_content_length: 200mb # # # 必须与主节点配置相同 cluster.initial_master_nodes: "es-master", "es-data1", "es-data2" discovery.seed_hosts: "192.168.88.11:9300", "192.168.88.12:9300", "192.168.88.13:9300" # gateway.recover_after_nodes: 2 network.tcp.keep_alive: true network.tcp.no_delay: true transport.tcp.compress: true cluster.routing.allocation.cluster_concurrent_rebalance: 16 cluster.routing.allocation.node_concurrent_recoveries: 16 cluster.routing.allocation.node_initial_primaries_recoveries: 16 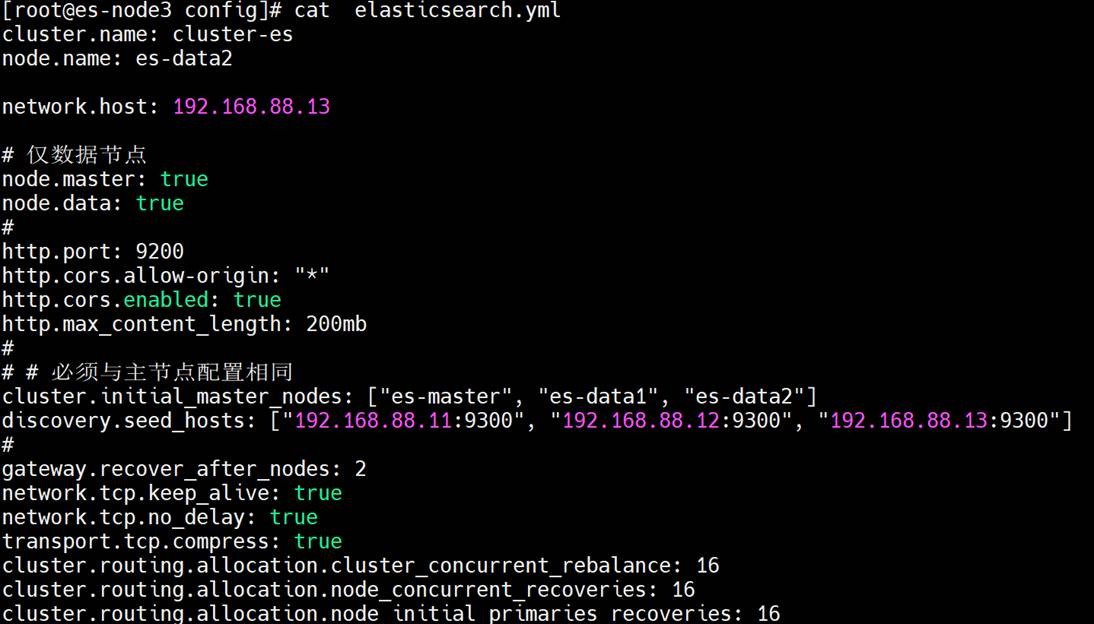 |
|
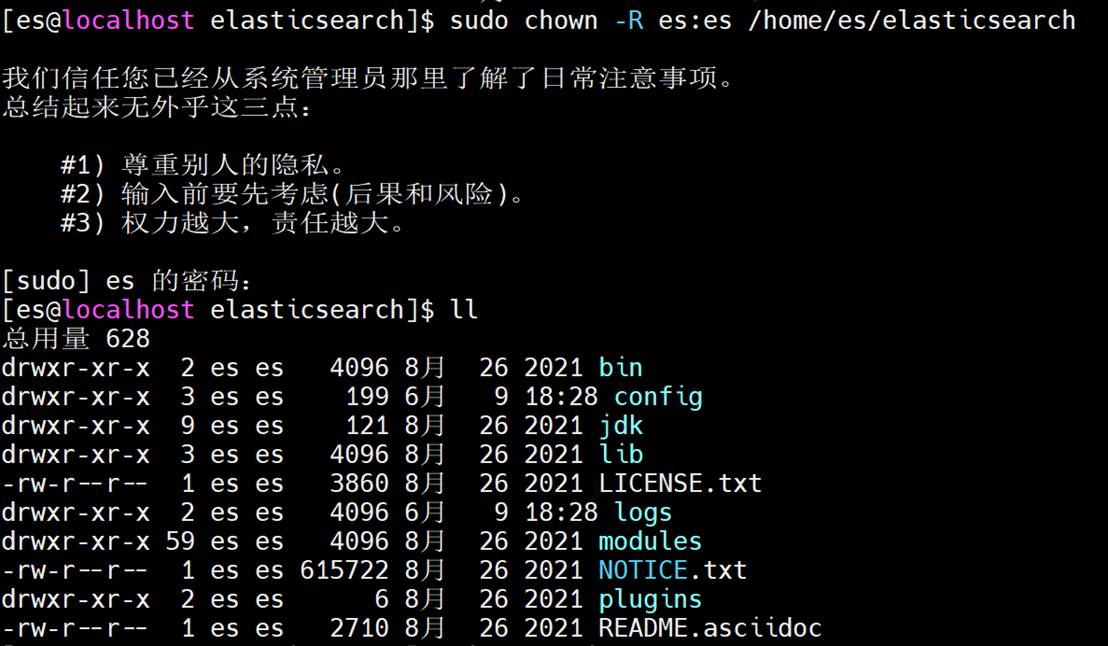
3.1.4 给/home/es/elasticsearch/
|----------------------------------------------------------------|
| sudo chown -R es:es /home/es/elasticsearch ll # 查看 |
3.1.5执行
|------------------------------------------------------------------------------------------------------------------------------------------------------------------------------------------------------------------------------|
| #首先在192.168.88.11: bin/elasticsearch 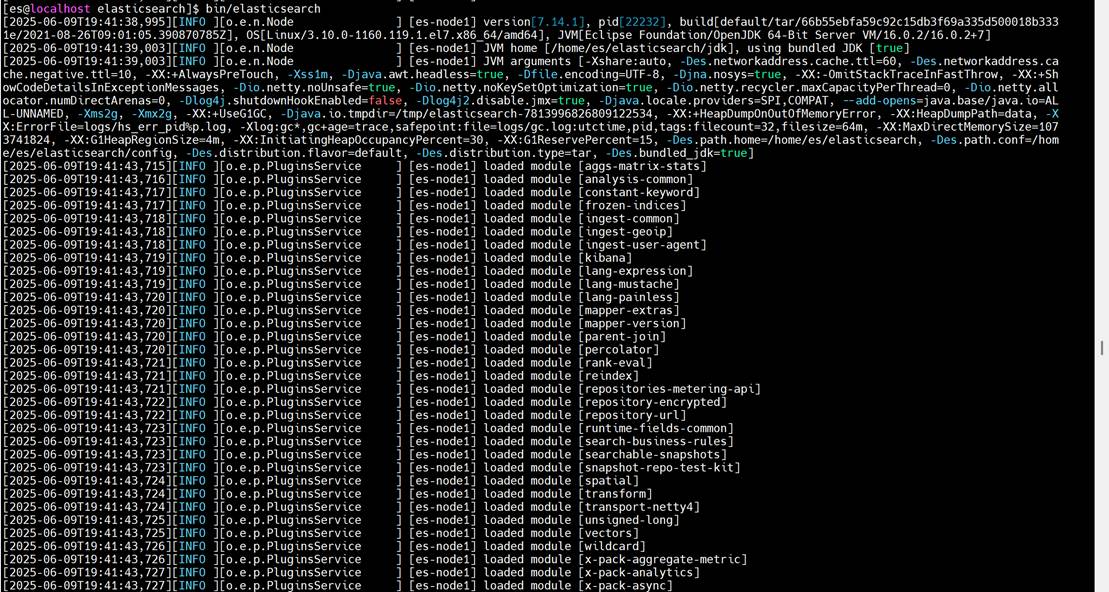 #然后再其它192.168.88.12/192.168.88.13
 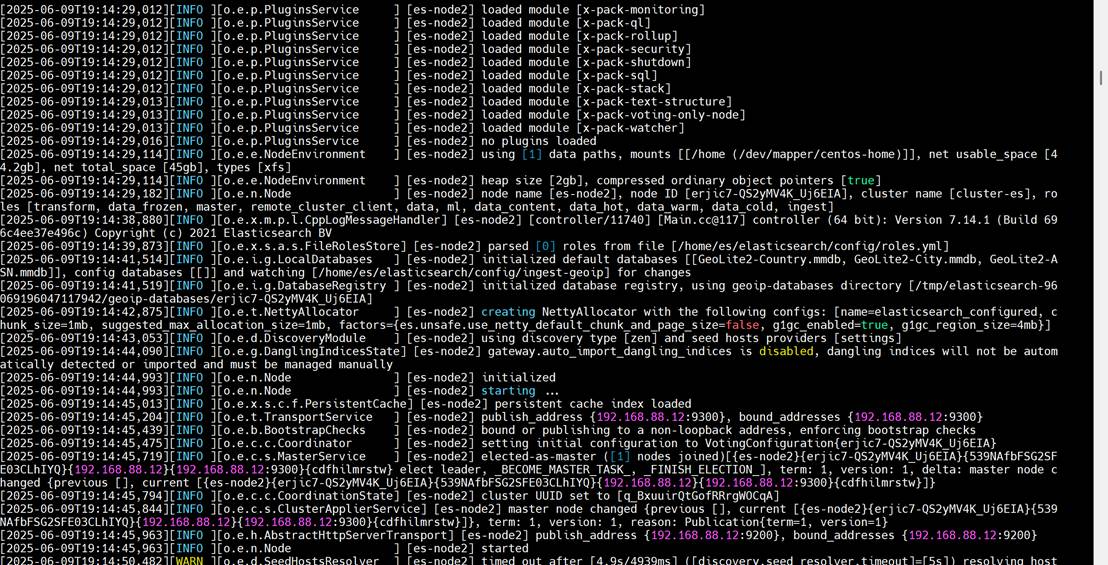 |
|
3.1.5查看集群的状态
|-------------------------------------------------------------------------------------------------------------------------------------------------------------------------------------------------------------------------------------------------------------------------------------------------------------------|
| curl http://192.168.88.11:9200/_cluster/health?pretty 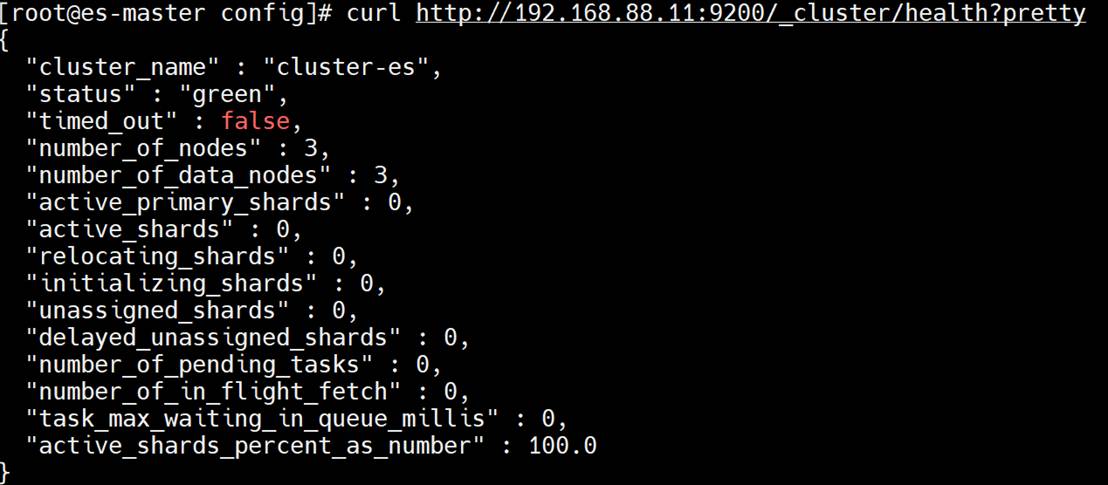 创建索引:curl -X PUT "http://192.168.88.11:9200/test_index?pretty" -H 'Content-Type: application/json' -d
  |
|
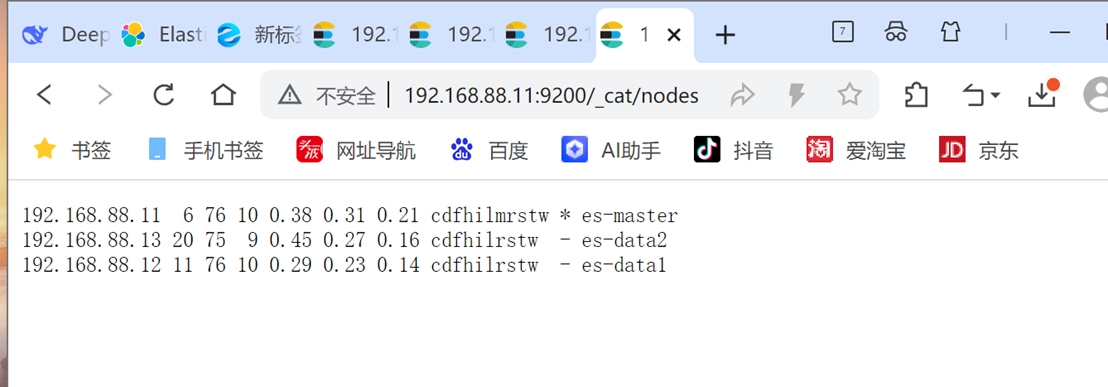
网页查看集群加入状态:
http://192.168.88.11:9200/_cat/nodes
- 测试与验证
4.1 创建测试索引
|-------------------------------------------------------------------------------------------------------------------------------------------------------------------------------------------------------------------------------------------------------------------------------------------------------------------------------------------------------------------------------------|
| curl -u es:es123 -X PUT "http://192.168.88.12:9200/products" -H 'Content-Type: application/json' -d' { "settings": { "number_of_shards": 3, "number_of_replicas": 1 }, "mappings": { "properties": { "name": { "type": "text" }, "price": { "type": "double" }, "category": { "type": "keyword" } } } }' 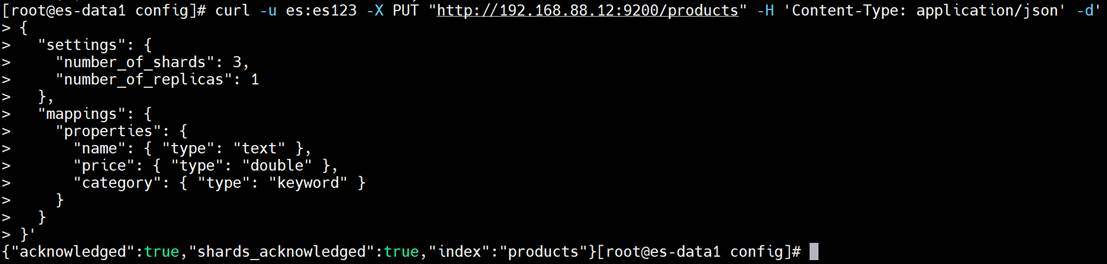 |
|
4.2 查询数据
|------------------------------------------------------------------------------------------------------------------------------------------------------------------------------------------------------------------------------------------------|
| curl -u es:es123 -X GET "http://192.168.88.12:9200/products/_search?pretty" -H 'Content-Type: application/json' -d' { "query": { "match": { "name": "laptop" } } }' 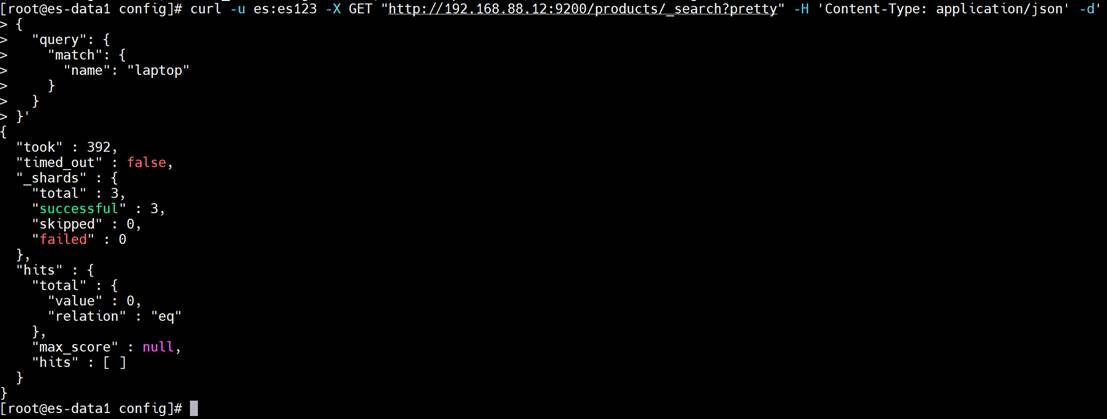 |
|
4.3故障转移:
|---------------------------------------------------------------------------------------------------------------------------------------------------------------------------------------------------------------------------------------------------------------------------------------------------------------------------------------------------------------------------------------------------------------------|
| 首先停掉192.168.88.11(ctrl+c)  查看节点状态
  或者http://192.168.88.12:9200/_cat/nodes
  可见该集群并没有因为主节点的宕机受影响 故障转移成功。 |