flask入门day03
错误处理
1.abort函数:放弃请求并返回错误代码
python
from flask import Flask,abort,render_template
app = Flask(__name__)
@app.route('/')
def index():
return '我是首页'
@app.route('/error')
def error():
abort(404)
return '没有找到页面'
if __name__ == '__main__':
app.run(debug=True,port=8088)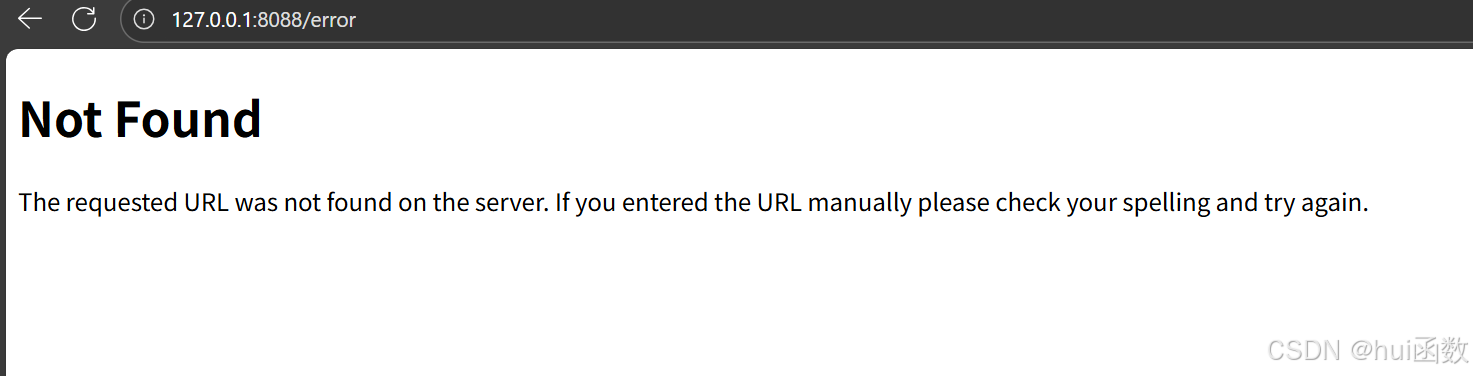
但是以上的方法,页面会直接显示成这样的,用户可能不是很聪明,会以为是网站的问题,为了解决以上的内容,请看下面的讲解
自定义错误处理视图
-
使用 errorhandler 装饰器,接受一个http状态码为参数。
-
自定义的错误视图不单单作用于abort函数抛出的错误,也作用于整个Flask应用对应错误码。
-
自定义错误处理视图接收一个参数,是Flask应用的默认报错信息
python
from flask import Flask,render_template
app = Flask(__name__)
@app.route('/')
def index():
return '我是首页'
@app.errorhandler(404)
def error(e):# 函数里面必须要传入一个参数
# 自定义错误处理视图函数
# 使用 errorhandler 装饰器,接受一个http状态码为参数。
# 自定义的错误视图不单单作用于abort函数抛出的错误,也作用于整个Flask应用对应错误码。
# 自定义错误处理视图接收一个参数,是Flask应用的默认报错信息
# 可以有多个errorhandler处理不同的错误
return render_template('error.html')
if __name__ == '__main__':
app.run(debug=True,port=8088)可以制作一个错误显示页面,当用户找不到页面的时候,让他可以跳转回首页
html
<!DOCTYPE html>
<html lang="zh-CN">
<head>
    <meta charset="UTF-8">
    <meta name="viewport" content="width=device-width, initial-scale=1.0">
    <title>页面未找到 - 404错误</title>
    <style>
        * {
            margin: 0;
            padding: 0;
            box-sizing: border-box;
            font-family: 'Segoe UI', 'Microsoft YaHei', sans-serif;
        }

        body {
            min-height: 100vh;
            display: flex;
            justify-content: center;
            align-items: center;
            background: #f8f9fa;
            padding: 20px;
            color: #333;
            line-height: 1.6;
        }

        .container {
            text-align: center;
            max-width: 500px;
            width: 100%;
            padding: 40px;
            background: white;
            border-radius: 12px;
            box-shadow: 0 5px 20px rgba(0, 0, 0, 0.05);
        }

        .error-code {
            font-size: 7rem;
            font-weight: 800;
            color: #6e8efb;
            margin-bottom: 15px;
            line-height: 1;
        }

        h1 {
            font-size: 2rem;
            margin-bottom: 20px;
            color: #444;
        }

        p {
            font-size: 1.1rem;
            margin-bottom: 30px;
            color: #666;
        }

        .home-btn {
            display: inline-block;
            padding: 14px 40px;
            background: #6e8efb;
            color: white;
            text-decoration: none;
            border-radius: 6px;
            font-weight: 600;
            font-size: 1.1rem;
            transition: all 0.2s ease;
            border: 2px solid #6e8efb;
            margin-top: 20px;
        }

        .home-btn:hover {
            background: white;
            color: #6e8efb;
        }

        .error-icon {
            font-size: 6rem;
            color: #6e8efb;
            margin-bottom: 20px;
            opacity: 0.8;
        }

        .links {
            display: flex;
            justify-content: center;
            gap: 25px;
            margin-top: 40px;
            flex-wrap: wrap;
        }

        .links a {
            color: #6e8efb;
            text-decoration: none;
            font-weight: 500;
        }

        .links a:hover {
            text-decoration: underline;
        }

        @media (max-width: 768px) {
            .container {
                padding: 30px 25px;
            }

            .error-code {
                font-size: 5.5rem;
            }

            h1 {
                font-size: 1.7rem;
            }

            p {
                font-size: 1rem;
            }
        }

        @media (max-width: 480px) {
            .error-code {
                font-size: 4.5rem;
            }

            h1 {
                font-size: 1.5rem;
            }

            .home-btn {
                padding: 12px 30px;
                font-size: 1rem;
            }

            .links {
                gap: 15px;
            }
        }
    </style>
</head>
<body>
    <div class="container">
        <div class="error-icon">❌</div>
        <div class="error-code">404</div>
        <h1>页面未找到</h1>
        <p>您访问的页面可能已被移除或暂时不可用。请检查URL是否正确,或返回首页继续浏览。</p>

        <a href="/" class="home-btn">
            返回首页
        </a>

        <div class="links">
            <a href="#">联系我们</a>
            <a href="#">帮助中心</a>
            <a href="#">网站地图</a>
        </div>
    </div>
</body>
</html>
响应数据
认识响应
视图函数的 return 值会自动转换为一个响应对象。如果返回值是一个字符串, 它被转换为该字符串为主体的、状态码为 200 的 ,MIME 类型是 text/html 的响应对象。
Flask 把返回值转换为响应对象的逻辑:
-
如果返回的是一个字符串,响应对象会用字符串数据和默认参数创建。
-
如果返回的是一个元组,且元组中的元素可以提供额外的信息。这样的元组必须是 (response,status, headers) 的形式,且至少包含一个元素。 status 值会覆盖状态代码, headers 可以是一个列表元素是元祖或字典,作为额外的消息标头值。
-
如果返回的是一个合法的响应对象,它会从视图直接返回。
我们之前都是直接返回字符串,Flask会帮我们自动创建response对象。
响应内容可以是列表套元组来构建
python
from flask import Flask
app = Flask(__name__)
@app.route('/')
def index():
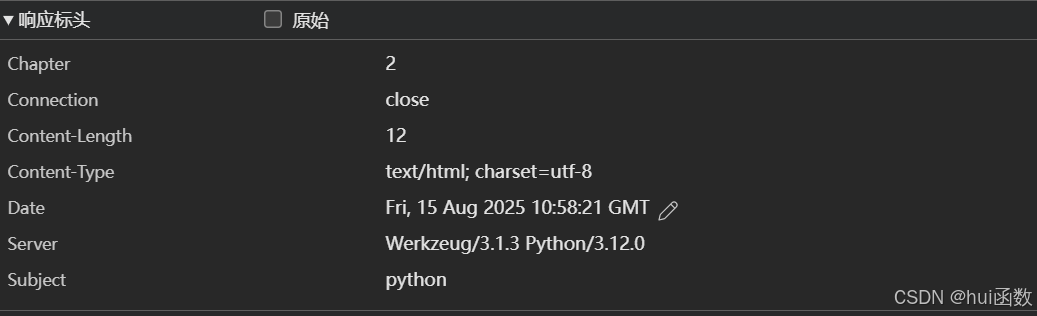
return '我是首页',200,[('subject','python'),( 'chapter', 2)]
if __name__ == '__main__':
app.run(debug=True,port=8088)响应也可以是字典的形式构建
python
from flask import Flask
app = Flask(__name__)
@app.route('/')
def index():
# [('subject','python'),( 'chapter', 2)]
return '我是首页',200,{'subject':'python','chapter':'2'}
if __name__ == '__main__':
app.run(debug=True,port=8088)查看返回的响应的内容
响应对象
make_response 创建响应对象
python
@app.route('/')
def index():
    response = make_response('hello world')
    # 方式1
    # response.status_code = 200
    # 方式2
    response.status = 200
    response.headers['subject'] = 'python'
    return response
返回json数据
在前面内容中我们都是返回字符串,但是很多web开发中都是要求前后端分离的,前端一般会要求后端返回json数据。
在django的学习中我们知道返回json数据有一个JsonResponse对象,接收一个python字典作为参数。Flask中也有一个类似的对象可以返回json数据。
make_response方式返回json对象
python
from flask import Flask,make_response,json
app = Flask(__name__)
@app.route('/')
def index():
my_dict = {"status":'200',"object":'python'}
response = make_response(json.dumps(my_dict),200)
response.headers['Content-Type'] = 'application/json'
return response
if __name__ == '__main__':
app.run(debug=True,port=8088)jsonify: 返回json格式的数据,更加简便
python
from flask import Flask,jsonify
app = Flask(__name__)
@app.route('/')
def index():
my_dict = {"status":'200',"object":'python'}
return jsonify(my_dict)
if __name__ == '__main__':
app.run(debug=True,port=8088)Cookie
设置cookie
cookie 是以键值对的形式保存在浏览器中。
设置cookie我们比较关心的三个参数:
key cookie的键
value cookie的值
max_age=None 超时时间,单位是秒
expires=None 超时时间,datatime对象
python
from flask import Flask,make_response
app = Flask(__name__)
@app.route('/')
def index():
response = make_response('设置Cookie')
response.status_code = 200
# 设置Cookie,键为name,值为python,存活时间为10秒
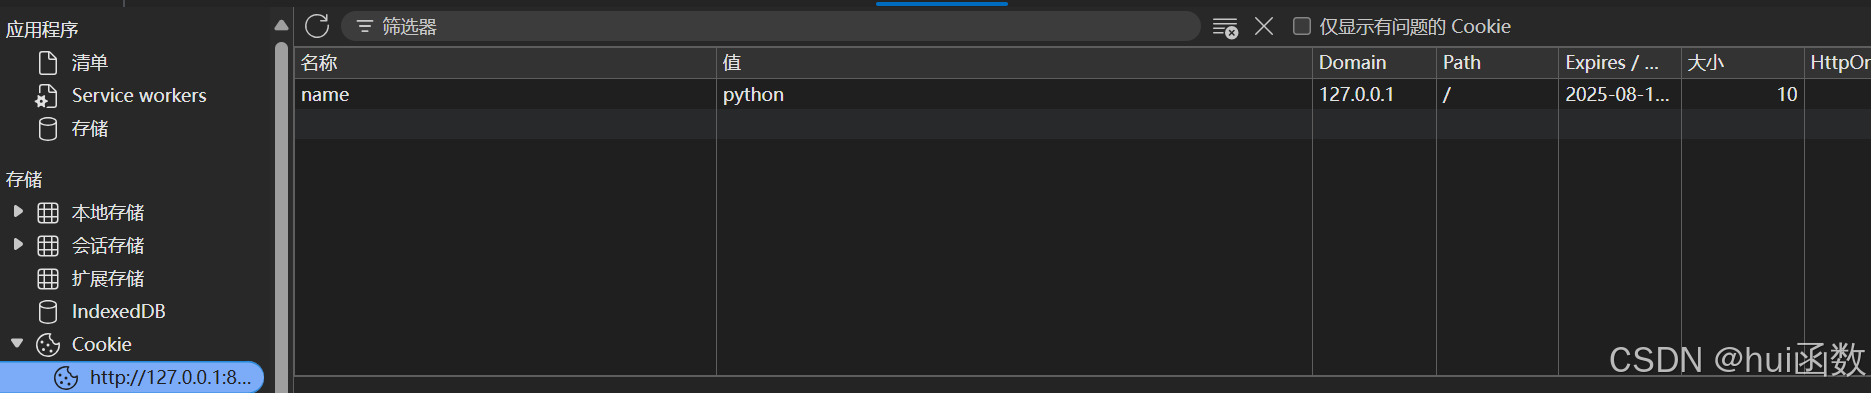
response.set_cookie('name','python',max_age=10)
return response
if __name__ == '__main__':
app.run(debug=True,port=8088)在浏览器控制台的缓存中,查看cookie值
获取cookie
python
@app.route('/getcookie')
def get_cookie():
    cookie = request.cookies.get('name','Not Font')
    return cookie
删除cookie
python
@app.route('/delcookie')
def del_cookie():
response = make_response('删除cookie')
response.delete_cookie('name')
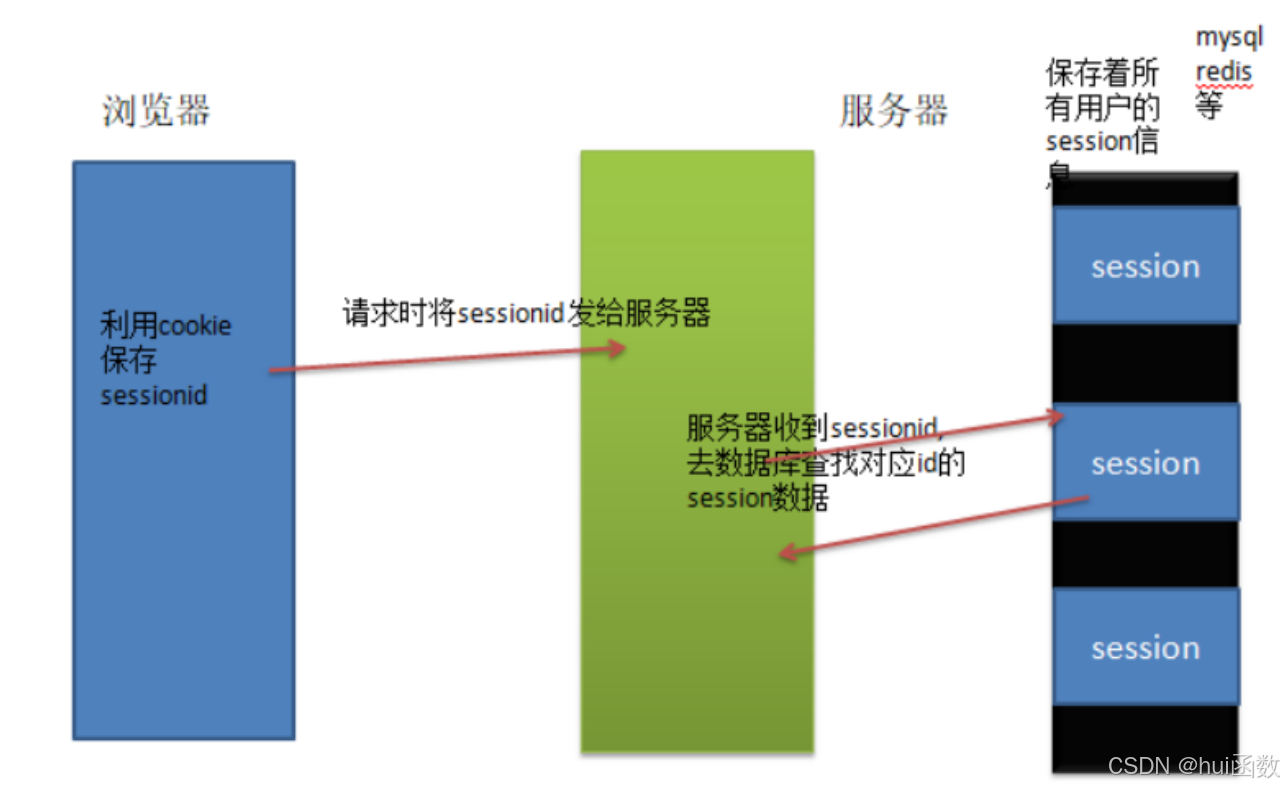
return responseSession
在Flask中,我们并没有数据库配置,实际上Flask的session是基于cookie加secret_key 进行加密后保存在cookie中的。
设置session
python
from flask import Flask,session
import os
app = Flask(__name__)
# 设置session要生成密钥SECRET_KEY
app.config['SECRET_KEY'] = os.urandom(24)
@app.route('/setcookie')
def set_cookie():
session['myname'] = 'python'
session['password'] = '123456'
return 'session'
if __name__ == '__main__':
app.run(debug=True,port=8088)
获取session
python
@app.route('/getsession')
def get_session():
    # 获取session采用[key]方式取值,如果key不存在会报错。
    myname = session['myname']
    # 获取session 采用get方式取值,如果key不存在返回None
    password = session.get('password',"none")
    return f'myname:{myname},password:{password}'
删除session
可以直接使用session.pop('key',None):
session.pop('name',None)
如果要删除session中所有数据使用:clear():
session.clear()
python
@app.route('/delsession')
def del_session():
    # 删除key为myname
    session.pop('myname',None)
    # 删除所有的
    session.clear()
    return '删除session'
设置session过期时间
Flask的默认session利用了Werkzeug的SecureCookie,把信息做序列化(pickle)后编码(base64),放到cookie里了。
过期时间是通过cookie的过期时间实现的。
为了防止cookie内容被篡改,session会自动打上一个叫session的hash串,这个串是经过session内容、SECRET_KEY计算出来的,看得出,这种设计虽然不能保证session里的内容不泄露,但至少防止了不被篡改。
过期时间是这样来设置:
python
from datetime import timedelta
app = Flask(__name__)
session.permanent = True
# session过期时间设置为5分钟
app.permanent_session_lifetime = timedelta(minutes=5)