Centos7 ------使用lamp架构部署wordpress
1关闭防火墙和selinux
bash
systemctl stop firewalld
systemctl disable firewallld
setenforce 0
2时钟同步服务
bash
systemctl restart chronyd
systemctl enable chronyd
hwclock -w
3配置网络下载路径的yum仓库
去阿里源里找Centos7的网络yum仓库
bash
cd /etc/yum.repos.d/
rm -rf *
wget -O /etc/yum.repos.d/CentOS-Base.repo https://mirrors.aliyun.com/repo/Centos-7.repo
#复制阿里源的yum仓库部署
yum -y install epel-release
4、安装httpd和mariadb数据库
bash
yum -y install httpd mariadb mariadb-server5、初始化数据库
bash
systemctl restart mariadb

systemctl enable mariadb

mysql_secure_installation
bash
NOTE: RUNNING ALL PARTS OF THIS SCRIPT IS RECOMMENDED FOR ALL MariaDB
      SERVERS IN PRODUCTION USE!  PLEASE READ EACH STEP CAREFULLY!

In order to log into MariaDB to secure it, we'll need the current
password for the root user.  If you've just installed MariaDB, and
you haven't set the root password yet, the password will be blank,
so you should just press enter here.

Enter current password for root (enter for none):
OK, successfully used password, moving on...

#验证 root 密码
#脚本首先要求输入当前 root 用户的密码。由于是新安装,密码为空,直接按回车即可。
#作用:确认当前登录者有权限修改数据库配置。

Setting the root password ensures that nobody can log into the MariaDB
root user without the proper authorisation.

Set root password? [Y/n] y
New password:
Re-enter new password:
Password updated successfully!
Reloading privilege tables..
 ... Success!
#设置 root 密码
#询问 "是否设置 root 密码?",选择y(是)。
#输入并确认新密码后,密码更新成功,同时重新加载权限表使设置生效。
#作用:为最高权限用户设置密码,防止未授权访问。

By default, a MariaDB installation has an anonymous user, allowing anyone
to log into MariaDB without having to have a user account created for
them.  This is intended only for testing, and to make the installation
go a bit smoother.  You should remove them before moving into a
production environment.

Remove anonymous users? [Y/n] y
 ... Success!
#移除匿名用户
#默认情况下,MariaDB 会创建匿名用户(无需账号即可登录),仅用于测试。
#询问 "是否移除匿名用户?",用户输入时虽有 typo(n^Hyy 是删除错误输入的痕迹),最终选择#y(是),成功移除。
#作用:避免陌生人无需账号即可登录数据库。
Normally, root should only be allowed to connect from 'localhost'.  This
ensures that someone cannot guess at the root password from the network.

Disallow root login remotely? [Y/n] n
 ... skipping.
#询问 "是否禁止 root 远程登录?",选择n(否),即保留 root 从远程登录的权限。
#说明:默认建议 root 仅从localhost登录(避免网络攻击猜测密码),但此处用户选择允许远程登录#(可能因管理需求)。
By default, MariaDB comes with a database named 'test' that anyone can
access.  This is also intended only for testing, and should be removed
before moving into a production environment.

Remove test database and access to it? [Y/n] y
 - Dropping test database...
 ... Success!
 - Removing privileges on test database...
 ... Success!
#删除 test 数据库
#默认情况下,MariaDB 会创建test数据库,任何人可访问(仅用于测试)。
#询问 "是否删除 test 数据库及访问权限?",选择y(是),成功删除数据库并移除相关权限。
#作用:清除无用的默认数据库,减少攻击面。

Reloading the privilege tables will ensure that all changes made so far
will take effect immediately.

Reload privilege tables now? [Y/n] y
 ... Success!
#重新加载权限表
#询问 "是否立即重新加载权限表?",选择y(是)。
#作用:使之前的所有配置(如密码、权限变更)立即生效,无需重启数据库。
Cleaning up...

All done!  If you've completed all of the above steps, your MariaDB
installation should now be secure.

Thanks for using MariaDB!
[root@hrz ~]
6安装php
bash
yum -y install http://rpms.remirepo.net/enterprise/remi-release-7.rpm

yum -y install yum-utils

yum-config-manager --enable remi-php70  #指定下载版本


 yum -y install php php-cli php-fpm php-gd php-curl php-zip php-mbstring php-opcache php-intl php-mysqlnd
# 使用yum包管理器安装PHP及相关扩展
# -y 选项表示自动确认所有安装提示,无需手动输入y
# 安装的组件包括:
# php:PHP核心程序
# php-cli:PHP命令行接口,用于在终端运行PHP脚本
# php-fpm:PHP FastCGI进程管理器,用于处理动态请求
# php-gd:处理图像的扩展
# php-curl:支持curl网络请求的扩展
# php-zip:处理ZIP压缩文件的扩展
# php-mbstring:支持多字节字符串的扩展,对中文处理很重要
# php-opcache:PHP opcode缓存扩展,提高PHP执行效率
# php-intl:国际化扩展,支持国际化相关功能
# php-mysqlnd:PHP的MySQL原生驱动,用于连接MySQL数据库
 php  -v
7、配置php,将时区改成亚洲/上海
bash
vim /etc/php.ini
date.timezone = Asia/Shanghai   #在877行记得把;去掉
systemctl restart php-fpm
systemctl enable php-fpm
8 配置默认网页
bash
vim /etc/httpd/conf/httpd.conf

<IfModule dir_module>

DirectoryIndex index.html index.php #164行

</IfModule>
9配置测试网页
bash
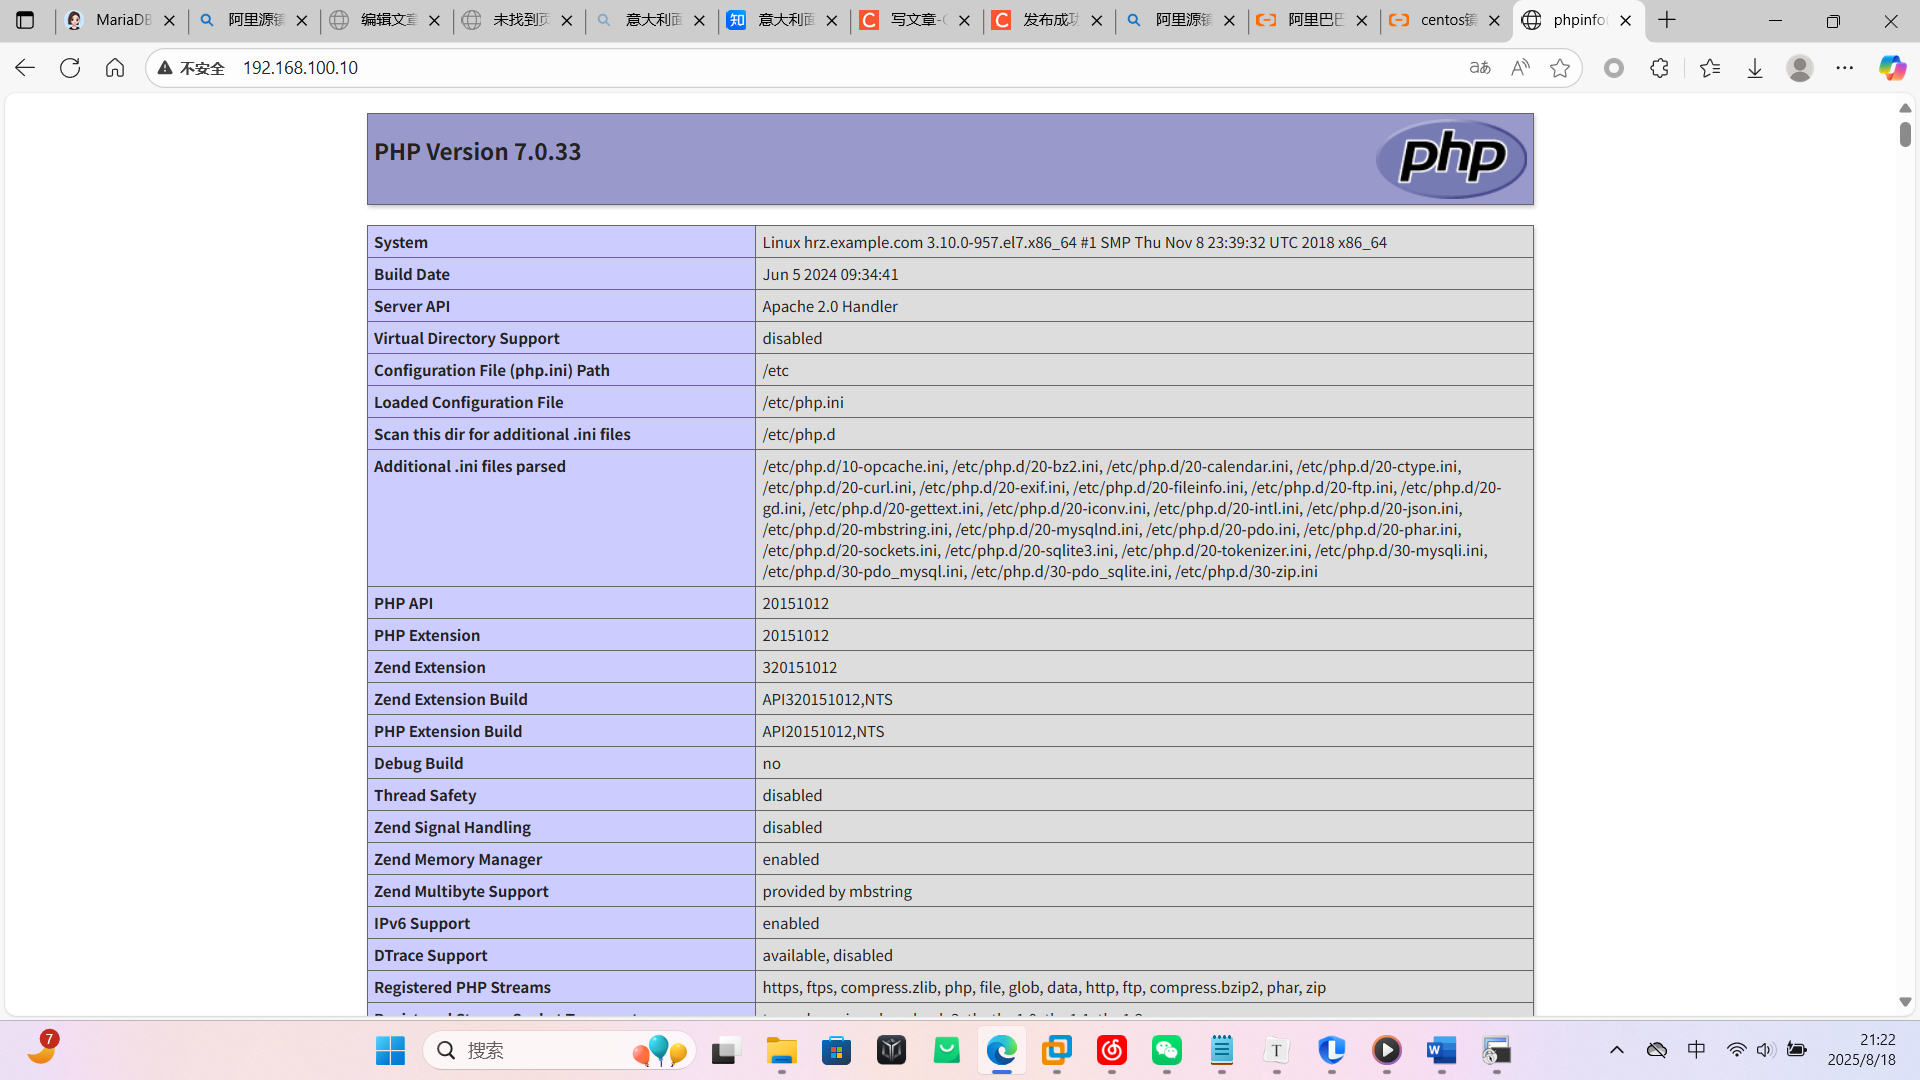
 vim /var/www/html/index.php
<?php
        phpinfo();
?>
systemctl restart httpd
systemctl enable httpd
测试进入网站
10、将wordpress压缩包上传到服务器的/opt/software下
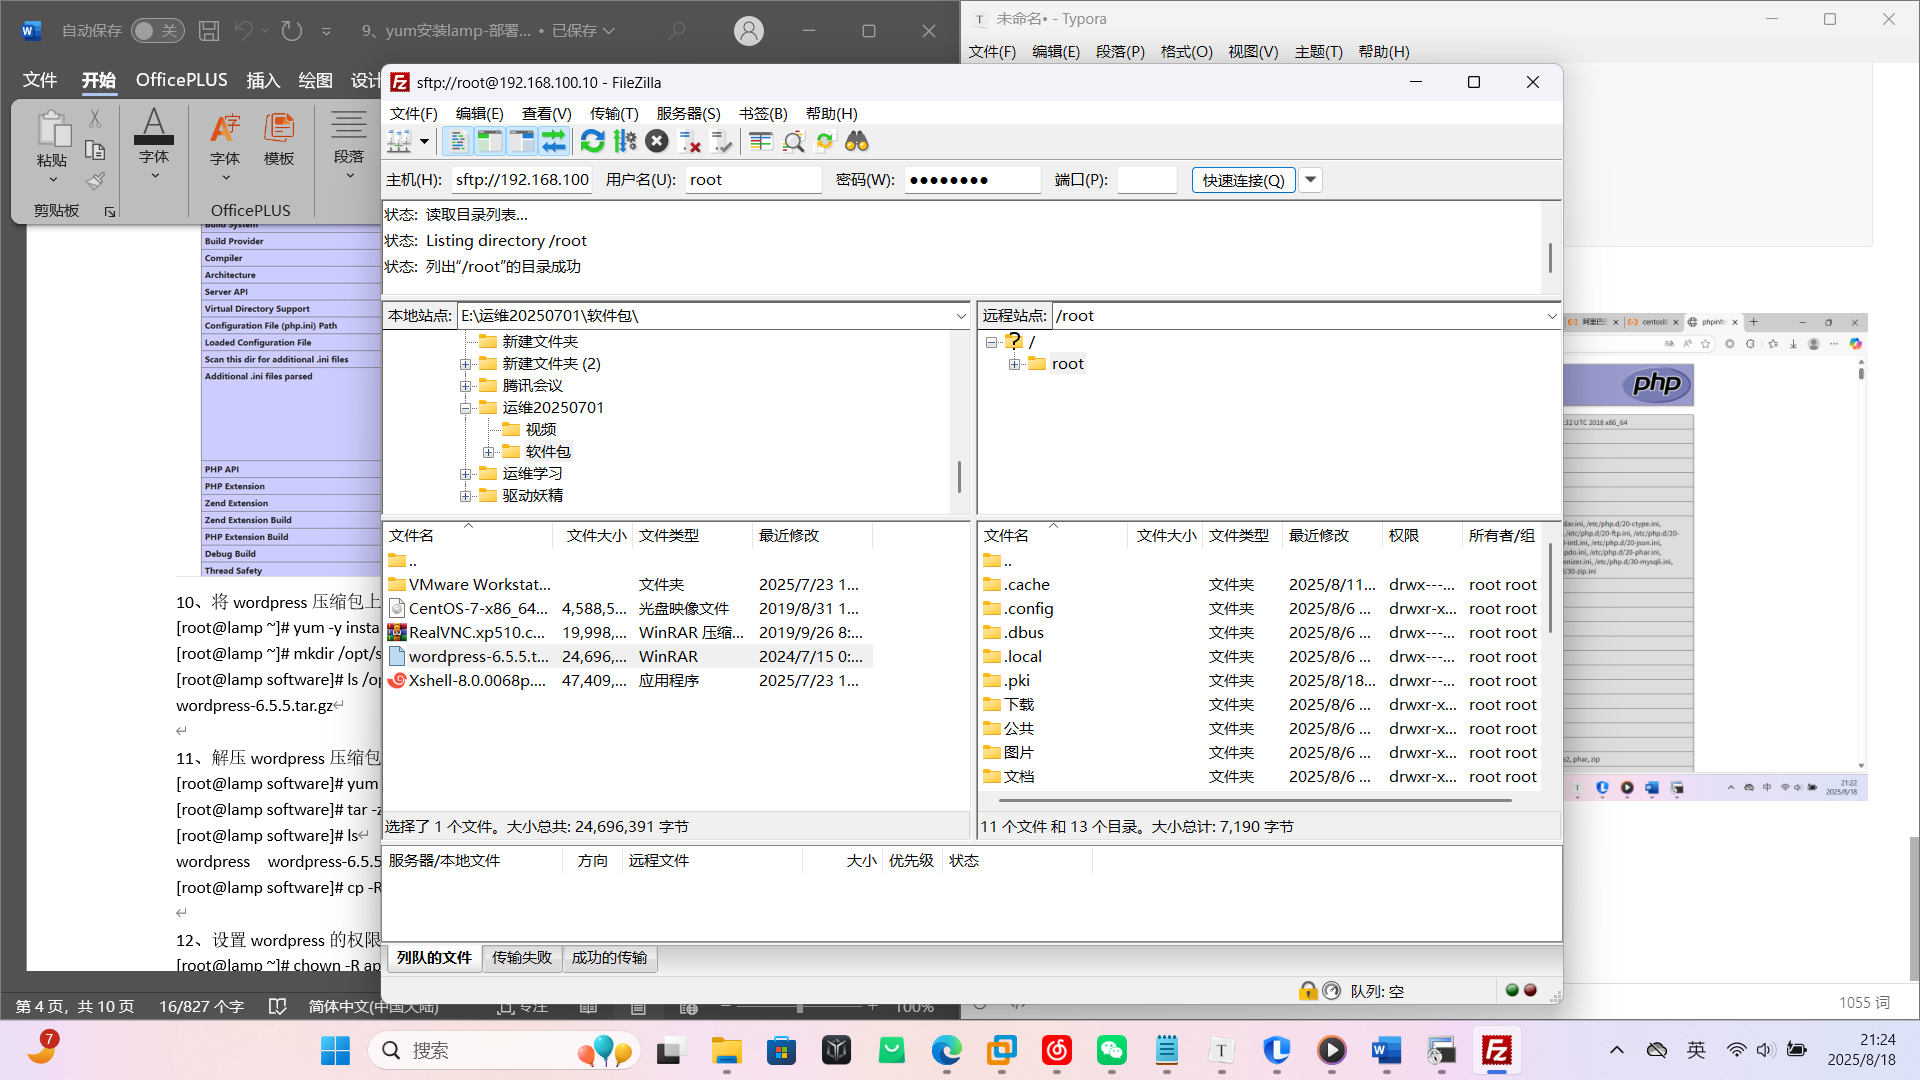
可以用其他的传输方式1
11、解压wordpress压缩包
bash
tar -zxvf wordpress-6.5.5.tar.gz
ls
anaconda-ks.cfg       wordpress               公共  视频  文档  音乐
initial-setup-ks.cfg  wordpress-6.5.5.tar.gz  模板  图片  下载  桌面
cp -r wordpress /var/www/html/
12、设置wordpress的权限
bash
 chown -R apache.apache /var/www/html/wordpress/

 chmod -R 775 /var/www/html/wordpress/
13、为wordpress配置数据库
bash
mysql -u root -p   # 以root用户登录MariaDB,-p表示需要输入密码
Enter password:
Welcome to the MariaDB monitor.  Commands end with ; or \g.
Your MariaDB connection id is 9
Server version: 5.5.68-MariaDB MariaDB Server # 显示数据库版本信息

Copyright (c) 2000, 2018, Oracle, MariaDB Corporation Ab and others.

Type 'help;' or '\h' for help. Type '\c' to clear the current input statement.

MariaDB [(none)]> create database mywordpress; # 创建名为mywordpress的数据库
Query OK, 1 row affected (0.00 sec)

MariaDB [(none)]> create user 'wordpress_user'@'localhost' identified by '3edc4rfv';
 # 创建数据库用户
# 'wordpress_user'@'localhost':用户名是wordpress_user,仅允许本地登录
# identified by '3edc4rfv':设置用户密码为3edc4rfv
Query OK, 0 rows affected (0.00 sec)

MariaDB [(none)]> grant all on mywordpress.* to 'wordpress_user'@'localhost'; # 分配权限
# all:授予所有权限(查询、插入、修改等)
# mywordpress.*:对mywordpress数据库的所有表生效
# 整体含义:允许wordpress_user用户操作mywordpress数据库的所有内容
Query OK, 0 rows affected (0.00 sec)

MariaDB [(none)]>  flush privileges; # 刷新权限表,使上述设置立即生效
Query OK, 0 rows affected (0.00 sec)

MariaDB [(none)]> exit
Bye
14、为wordpress配置站点
bash
# 复制默认虚拟主机配置文件到 Apache 配置目录
# -p 选项保留文件的权限和时间戳
cp -p /usr/share/doc/httpd-2.4.6/httpd-vhosts.conf /etc/httpd/conf.d/

 vim /etc/httpd/conf.d/httpd-vhosts.conf
# 虚拟主机配置块开始
# 指定该虚拟主机监听的 IP 地址和端口(192.168.100.10 的 80 端口)
<VirtualHost 192.168.100.10:80>
   # 设置网站的根目录,即网页文件存放的位置
   DocumentRoot "/var/www/html/wordpress"
   # 对网站根目录进行访问控制配置
   <Directory "/var/www/html/wordpress">
     # 允许目录索引和跟随符号链接
      # Indexes: 当目录下没有索引文件时显示文件列表
      # FollowSymLinks: 允许访问符号链接指向的文件
      Options Indexes FollowSymLinks
    # 允许 .htaccess 文件覆盖服务器配置
       AllowOverride all
      # 允许所有客户端访问该目录
       Require all granted

   </Directory>

</VirtualHost>
15、重启apache服务
bash
systemctl restart httpd16、使用浏览器访问wordpress站点

数据库名字和用户名1必须与之前设置的一样
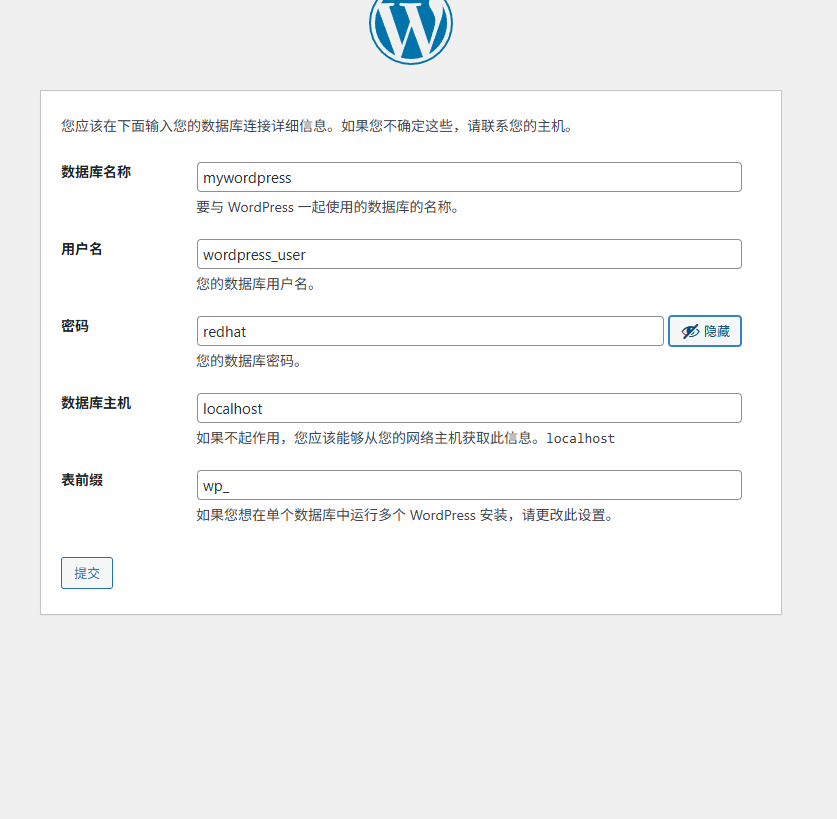
没有弹出我这里的这些话就直接运行安装
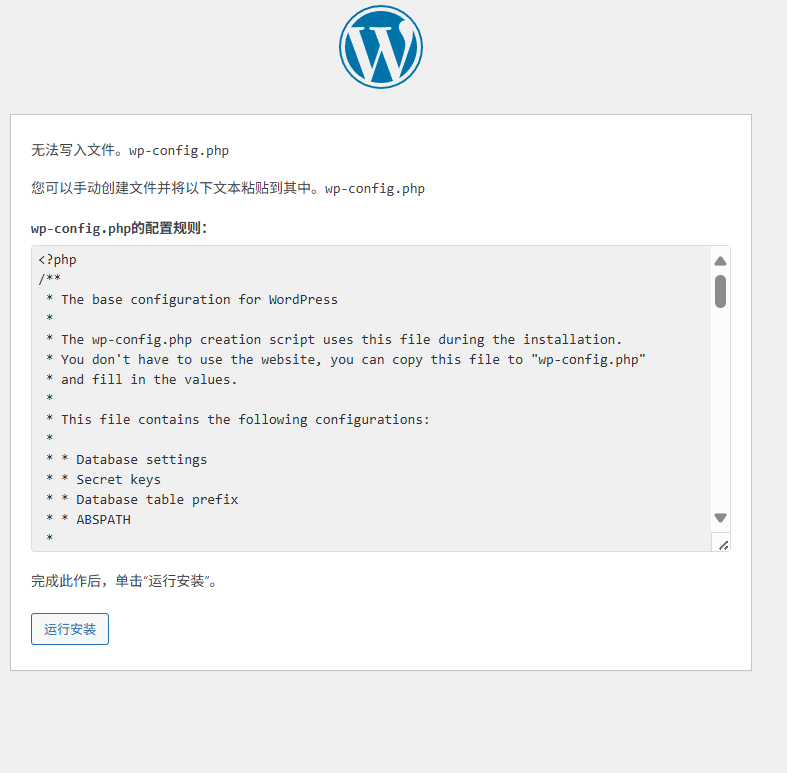
如果弹出了按它说的在wordpress中操作
bash
[root@hrz wordpress]# vim wp-config.php

[root@hrz wordpress]# chmod 775 wp-config.php
这个界面就可以随便写了
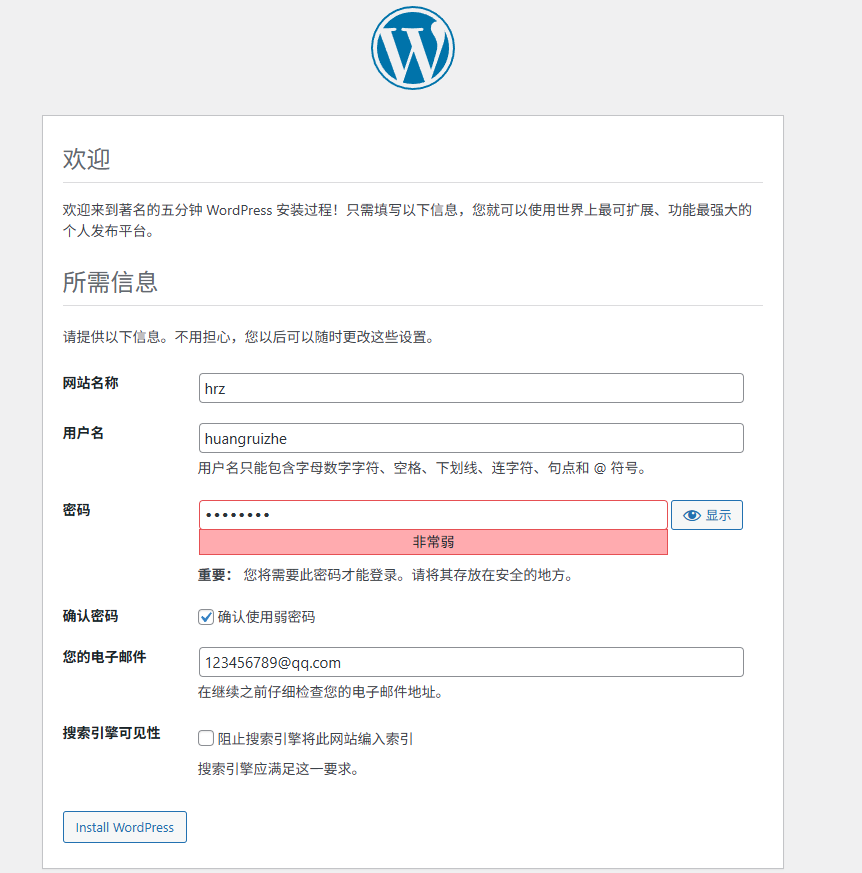
登录
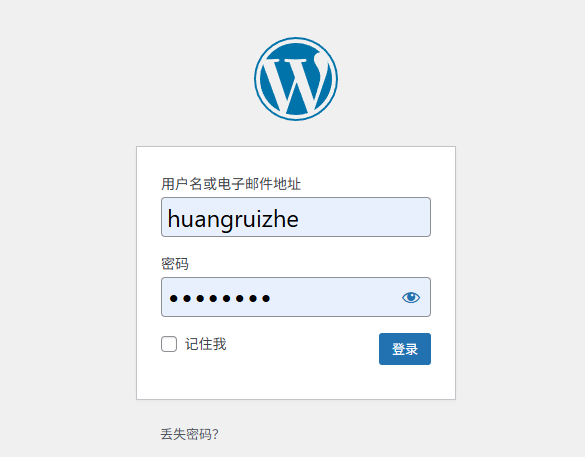
就成功创建论坛了

可以进行上传文档