书接上回,上一篇文章把 Coil 的基础用法铺陈清楚,就像降龙十八掌先把稳当劲儿练到位 ------ 毕竟技术学习最怕夹生饭。
这一回,我们就顺着这股稳当劲儿往前迈一步,专门拆解 Coil 的高级玩法。
ImageRequest
如果我们不满足于普通的在线加载图片,可以使用 ImageRequest 自定义加载。
在之前的文章中,简单的加载是:
Kotlin
AsyncImage(
    modifier = Modifier.size(400.dp).background(Color.Black),
    model = PIC_URL,
    contentScale = ContentScale.Crop,
    contentDescription = "ballon"
)
如果换成 ImageRequest,则是:
Kotlin
AsyncImage(
    modifier = Modifier.size(400.dp).background(Color.Black),
    model = ImageRequest
        .Builder(LocalContext.current)
        .data(PIC_URL)
        .build(),
    contentScale = ContentScale.Crop,
    contentDescription = "ballon"
)
查看 ImageRequest 的文档,会发现有很多接口,我们不会一一讲述,这里我们只讲解几个比较重要的接口。
渐入
ImageRequest 支持图片的渐入特效:
Kotlin
AsyncImage(
    modifier = Modifier.size(400.dp).background(Color.Black),
    model = ImageRequest
        .Builder(LocalContext.current)
        .data(PIC_URL)
        .crossfade(600)
        .build(),
    contentScale = ContentScale.Crop,
    contentDescription = "ballon"
)
使用 crossfade 函数来时间渐变,该函数的参数是渐变时间------这里我们给了 600 毫秒。
你也可以直接使用 crossfade(true) 来渐入,该方法默认 200 毫秒的渐变时间。
优化内存
通常我们不会直接加载原图,毕竟太大了。ImageRequest 支持设定图片的显示像素大小:
ini
AsyncImage(
    modifier = Modifier.size(400.dp).background(Color.Black),
    model = ImageRequest
        .Builder(LocalContext.current)
        .data(PIC_URL)
        .size(200)
        .crossfade(true)
        .build(),
    contentScale = ContentScale.Crop,
    contentDescription = "ballon"
)
使用 size 设定图片的像素大小,为了对比,这里我们只给了 200 像素:

不难看出,已经非常模糊了,证明尺寸起作用了。
ImageLoader
ImageLoader 是执行 ImageRequest 的服务对象。它们负责处理缓存、数据获取、图像解码、请求管理、内存管理等工作。
我们可以在应用程序中创建一个单一的 ImageLoader 并全局共享使用。
Kotlin
SingletonImageLoader.setSafe {
    ImageLoader.Builder(context)
        .build()
}
我们只需要执行上述代码,就可以设置全局的 ImageLoader。
通常在 Android 中的做法是使用 Application 进行初始化,这里我们展示一下使用 startup 库进行初始设置:
Kotlin
class CoilInitializer : Initializer<SingletonImageLoader> {
    override fun create(context: Context): SingletonImageLoader {
        SingletonImageLoader.setSafe {
            ImageLoader.Builder(context)
                .logger(DebugLogger()) // 设置一个日志,可选项
                .build()
        }
        return SingletonImageLoader
    }

    override fun dependencies(): MutableList<Class<out Initializer<*>>> {
        return mutableListOf()
    }
}
别忘了在 Manifest 中注册:
xml
<provider
    android:name="androidx.startup.InitializationProvider"
    android:authorities="${applicationId}.androidx-startup"
    android:exported="false"
    tools:node="merge">

    <meta-data
        android:name="com.momentum.ui.core.startup.CoilInitializer"
        android:value="androidx.startup" />
</provider>
我们可以通过 ImageLoader 定制内存缓存以及磁盘缓存:
Kotlin
ImageLoader.Builder(context)
    .memoryCache {
        MemoryCache.Builder()
            .maxSizeBytes(20 * 1024 * 1024) // 20MB 的内存缓存
            .build()
    }
    .diskCache {
        DiskCache.Builder()
            .directory(context.cacheDir.toOkioPath()) // 定制磁盘缓存的路径
            .maxSizeBytes(200 * 1024 * 1024) // 200MB 的磁盘缓存
            .build()
    }
    .logger(DebugLogger())
.build()如果你有清除缓存的需求,Coil 依然满足你!
Kotlin
SingletonImageLoader.get(context).memoryCache?.clear() // 清除内存缓存
SingletonImageLoader.get(context).diskCache?.clear() // 清除磁盘缓存
rememberAsyncImagePainter
在 Coil 内部,AsyncImage 使用 rememberAsyncImagePainter 来加载图像资源。
如果你需要的是 Painter 而不是一个可组合函数,那么可以使用 rememberAsyncImagePainter 来加载图像:
Kotlin
val painter = rememberAsyncImagePainter(
    model = ImageRequest.Builder(LocalPlatformContext.current)
        .data(PIC_URL)
        .build(),
)

Image(
    modifier = Modifier.size(400.dp).background(Color.Black),
    painter = painter,
    contentScale = ContentScale.Crop,
    contentDescription = "ballon",
)
这段代码和使用普通的 AsyncImage 的效果是一样的。

函数 rememberAsyncImagePainter 的第一个参数,就是提供一个 ImageRequest,ImageRequest 的用法上面已经讲述过了。
如果你只想获得一个 Painter,或者想提前缓存这张图片,rememberAsyncImagePainter 就非常适合。
当然,如果只是这样,rememberAsyncImagePainter 意义或许不大,rememberAsyncImagePainter 真正厉害的地方是构建更加复杂页面逻辑:
Kotlin
val painter = rememberAsyncImagePainter(
    model = ImageRequest.Builder(LocalPlatformContext.current).data(PIC_URL).build(),
)

val state by painter.state.collectAsState() // 获取状态

when (state) {

    AsyncImagePainter.State.Empty -> {} // empty 不管

    is AsyncImagePainter.State.Error -> { // 发生错误时展示一张 200dp 大小的图片
        Box(
            modifier = Modifier
                .size(400.dp)
        ) {
            Image(painter = painterResource(R.drawable.icn_failed), contentDescription = null, Modifier.size(200.dp))
        }
    }
    is AsyncImagePainter.State.Loading -> { // 加载过程中展示文字
        Box(
            modifier = Modifier
                .size(400.dp)
        ) {
            Text("加载中,请稍等", modifier = Modifier.align(Alignment.Center), fontSize = 48.sp)
        }
    }
    is AsyncImagePainter.State.Success -> { // 成功就展示图片
        Image(
            modifier = Modifier
                .size(400.dp),
            painter = painter,
            contentScale = ContentScale.Crop,
            contentDescription = "ballon",
        )
    }
}
rememberAsyncImagePainter 会返回一个 painter 对象,通过 painter.state 可以获取当前的加载状态。
如果一切顺利会是下面这个效果:

当然,如果请求有问题,会显示错误 UI:

如果你对错误处理特别在意,那么就需要特别关注 painter.state。
当发生错误的时候,painter.state 会返回 AsyncImagePainter.State.Error,它的实现是这样的:
Kotlin
data class Error(
    override val painter: Painter?,
    val result: ErrorResult, // 错误信息
) : State
result 表示当前的错误信息,深挖 ErrorResult:
Kotlin
class ErrorResult(
    /**
     * The error drawable.
     */
    override val image: Image?,

    /**
     * The request that was executed to create this result.
     */
    override val request: ImageRequest,

    /**
     * The error that failed the request.
     */
    val throwable: Throwable,
)
我们可以通过 throwable 来处理错误信息,这里稍微举一下例子:
Kotlin
when (val cur = state) {

    //...

    is AsyncImagePainter.State.Error -> {

        Box(
            modifier = Modifier.size(400.dp).background(Color.LightGray)
        ) {
            val text by remember {
                derivedStateOf {
                    when (val error = cur.result.throwable) {

                        is UnknownHostException -> { // 未知主机错误,可能是 url 不对,也有可能是解析问题
                            "未知主机"
                        }

                        is HttpException -> { // Http 错误
                            "Http 错误:${error.response.code}"
                        }

                        else -> { // 其他错误
                            "未知错误"
                        }
                    }

                }
            }

            Text(text, modifier = Modifier.align(Alignment.Center), fontSize = 48.sp)
        }
    }

    //...
}
我调试了几种错误显示效果,仅供参考:


SubcomposeAsyncImage
SubcomposeAsyncImage 是 AsyncImage 的一个变体,它使用子组合为 AsyncImagePainter 的状态提供插槽,而不是使用 Painters。
说人话就是 SubcomposeAsyncImage 通过 UI 去定义占位图,而 AsyncImag 只能使用图片作为占位图。
从灵活性上来讲,SubcomposeAsyncImage 会更加灵活,让你能够自定义很多效果。
不过先前已经掌握了 rememberAsyncImagePainter,现在再看 SubcomposeAsyncImage,有点索然无味。
Kotlin
SubcomposeAsyncImage(
    modifier = Modifier
                .size(400.dp),
    model = PIC_URL,
    contentDescription = "ballon"
) {
    val state by painter.state.collectAsState()
    when(state) {
        AsyncImagePainter.State.Empty -> TODO()
        is AsyncImagePainter.State.Error -> TODO()
        is AsyncImagePainter.State.Loading -> TODO()
        is AsyncImagePainter.State.Success -> TODO()
    }
}
熟悉吗?
如果你不想每次都处理 state,可以使用 SubcomposeAsyncImage 的另一个重载版本:
Kotlin
SubcomposeAsyncImage(
modifier = Modifier.size(400.dp).drawBackground(Color.Black),
model = PIC_URL,
contentDescription = "ballon",
contentScale = ContentScale.Crop,
loading = {
Box(Modifier.fillMaxSize()) {
val moving = rememberInfiniteTransition()
val yTrans by moving.animateFloat(-200f,200f, animationSpec = infiniteRepeatable(animation = tween(400), repeatMode = RepeatMode.Reverse))
Spacer(
modifier = Modifier
.align(Alignment.Center)
.size(40.dp)
.offset {
IntOffset(x = 0, y = yTrans.toInt())
}
.clip(CircleShape)
.background(Color.Blue)
)
}
},
error = {
Box(
modifier = Modifier.fillMaxSize().background(Color.LightGray)
) {
Text("我错了")
}
}
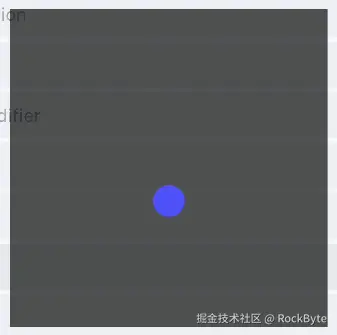
)SubcomposeAsyncImage 会提供 loading,success 以及 error 让开发者自定义 UI。上述代码我们自定义了 loading 和 error,我们看下 loading 的效果:
几乎所有的 AsyncImage 用法已经介绍完毕了,我相信之前的讲解已经能够满足 88% 的开发情况了。
当然,Coil 的强大还不止于此。Coil 还支持加载一些别的类型的资源。
加载其他资源
SVG
默认情况下,Coil 无法加载 SVG 图片的,不过,我们可以添加一行依赖,让 Coil 支持:
Kotlin
val coilBom = platform("io.coil-kt.coil3:coil-bom:3.3.0")
implementation(coilBom)
implementation("io.coil-kt.coil3:coil-compose")
implementation("io.coil-kt.coil3:coil-network-okhttp")
implementation("io.coil-kt.coil3:coil-svg") // 添加 SVG 的支持
我们会用到一张 SVG 图片------可爱的柴犬:

此时,Coil 就有了加载 SVG 的能力了:
Kotlin
AsyncImage(
    modifier = Modifier
        .size(400.dp)
        .background(Color.Black),
    model = PIC_SVG_URL, // 加载 SVG
    contentScale = ContentScale.Fit,
    contentDescription = "ballon"
)
GIF
默认情况下,Coil 无法完美加载 GIF,会停留在第一帧:

引入依赖之后,就可以正常加载了:
Kotlin
//...
implementation("io.coil-kt.coil3:coil-gif")
//...
Kotlin
AsyncImage(
    modifier = Modifier
        .size(400.dp)
        .background(Color.Black),
    model = PIC_GIF_URL,
    contentScale = ContentScale.Fit,
    contentDescription = "ballon"
)
Video
Coil 也支持加载视频的预览帧,并且支持的非常棒!
首先,添加依赖:
Kotlin
//...
implementation("io.coil-kt.coil3:coil-video")
//...
然后,通过 ImageLoader 设置解码库:
Kotlin
ImageLoader.Builder(context)
    .components {
        add(VideoFrameDecoder.Factory())
    }
    .build()
好的,准备工作已经完全做好,现在我们尝试一下加载视频的预览:
Kotlin
AsyncImage(
    modifier = Modifier
        .size(400.dp)
        .background(Color.Black),
    model = ImageRequest
        .Builder(LocalContext.current)
        .data(VID_URL)
        .videoFrameIndex(100) // 加载第 100 帧
        .build(),
    contentScale = ContentScale.Inside,
    contentDescription = "video"
)
Coil 支持多种方式加载预览帧:
videoFrameIndex,加载第n帧,如上述代码用到的那样,我们加载了第100帧作为预览图。videoFramePercent,记载基于视频总时长的百分比帧。videoFrameMillis,指定视频中提取帧的时间,也就是加载视频第n毫秒的帧。
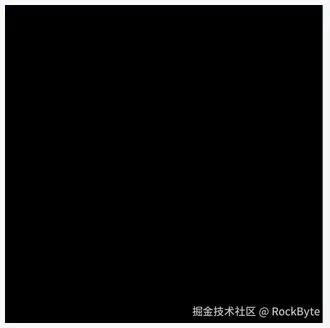
如果你在测试的时候发现一片漆黑,很有可能不是代码出了问题,而是视频的第一帧就是黑色的,大多数电影预告片的第一帧都是黑色的。
本地资源
如果想要加载本地资源,例如 R.drawable.bkg_naruto,你不需要添加任何其他依赖:
Kotlin
AsyncImage(
    model = R.drawable.bkg_naruto,
    contentDescription = null,
)
是的,就这么简单!

实际上,Coil 可以完美替代 Compose 中的原生控件 Image。
总结
本文承接 Coil 基础用法,介绍其高级功能与拓展应用。
如果你想在 Compose 中找到一款合适的图片加载组件,那么 Coil 一定是你的不二选择。
同时,Coil 还支持跨平台,在桌面端,网页端,依然可以使用 Coil 加载图片,这让 Coil 成为了 Compose 中图片加载的最佳组件。