封装一个openlayer的轨迹回放方法,使其满足多条路线的轨迹回放效果
思路:
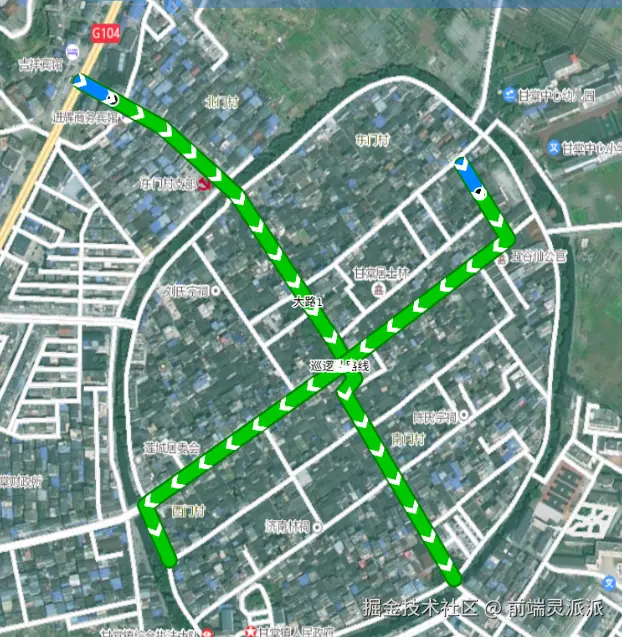
- 描绘出一两条轨迹图,得到该图形的feature,使用
new LineString(feature.getGeometry().getCoordinates(), "XY")得到线条的router点位数组。 - 监听图层
this.vectorLayer.on("postrender",()=>{})的方法,在里面实现移动的动画效果。 - 计算时间和速度进行取值,使用
track.route.getCoordinateAt(track.distance)获取当前的点位,并设置当前的点位为new Point()圆点。 - 将移动过的点的集合放进traveledCoordinates数组中,使用
new LineString(traveledCoordinates)生成一段线条,就是移动过路线。 vectorContext.setStyle(style)为移动点和移动线画上样式,在使用vectorContext.drawGeometry(track.position)绘制图层。this.map.render()更新地图渲染
js
import { Circle as CircleStyle, Fill, Stroke, Style, Icon } from "ol/style.js";
import { getVectorContext } from "ol/render.js";
import { LineString, Point } from "ol/geom.js";
import Feature from "ol/Feature.js";
import { stylesFunction } from "./index.js";
import { toLonLat, fromLonLat } from "ol/proj.js";

class TrackPlayer {
  constructor(map, vectorLayer) {
    this.animating = false;
    this.map = map;
    this.vectorLayer = vectorLayer;
    this.listener = null;
    this.tracks = []; // 存储多条轨迹信息
    this.lastTime = Date.now();
  }
  // 添加轨迹
  addTrack(feature, options = {}) {
    const track = {
      id: Date.now() + Math.random(), // 唯一ID
      feature: feature,
      route: new LineString(feature.getGeometry().getCoordinates(), "XY"),
      position: new Point(feature.getGeometry().getCoordinates()[0]),
      distance: 0,
      speed: options.speed || 5,
      color: options.color || "rgb(0, 132, 255)",
      iconScale: options.iconScale || 1,
      lineWidth: options.lineWidth || 6,
      enabled: options.enabled !== false, // 默认启用
    };

    this.tracks.push(track);
    return track.id;
  }

  // 移除轨迹
  removeTrack(trackId) {
    const index = this.tracks.findIndex((track) => track.id === trackId);
    if (index !== -1) {
      this.vectorLayer
        .getSource()
        .removeFeature(this.tracks[index].tempFeature);
      this.tracks.splice(index, 1);

      console.log("Removed track:", trackId);

      // 如果没有轨迹了,停止动画
      if (this.tracks.length === 0 && this.animating) {
        this.stop();
      }
    }
  }

  // 启用/禁用轨迹
  setTrackEnabled(trackId, enabled) {
    const track = this.tracks.find((track) => track.id === trackId);
    if (track) {
      track.enabled = enabled;
    }
  }

  // 设置轨迹速度
  setTrackSpeed(trackId, speed) {
    const track = this.tracks.find((track) => track.id === trackId);
    if (track) {
      track.speed = speed;
    }
  }

  // 设置轨迹颜色
  setTrackColor(trackId, color) {
    const track = this.tracks.find((track) => track.id === trackId);
    if (track) {
      track.color = color;
    }
  }

  // 播放所有轨迹
  play() {
    if (this.animating) return;

    this.animating = true;
    this.lastTime = Date.now();

    this.listener = this.vectorLayer.on("postrender", (event) => {
      const time = event.frameState.time;
      const elapsedTime = time - this.lastTime;
      this.lastTime = time;

      const vectorContext = getVectorContext(event);

      // 更新和绘制每条轨迹
      this.tracks.forEach((track) => {
        if (!track.enabled) return;

        // 更新距离
        track.distance =
          (track.distance + (track.speed * elapsedTime) / 1e6) % 1;

        // 更新当前位置
        const currentCoordinate = track.route.getCoordinateAt(track.distance);
        track.position.setCoordinates(currentCoordinate);

        // 绘制已走过的路线
        if (track.distance > 0) {
          const traveledCoordinates = [];

          // 获取已走过的路径坐标,确保每个点都被经过
          // 增加取样密度从100到500,使轨迹更平滑
          for (let i = 0; i <= track.distance * 500; i++) {
            const coord = track.route.getCoordinateAt(i / 500);
            if (coord) {
              traveledCoordinates.push(coord);
            }
          }

          if (traveledCoordinates.length > 1) {
            const traveledLine = new LineString(traveledCoordinates);

            vectorContext.setStyle(
              new Style({
                stroke: new Stroke({
                  color: track.color,
                  width: track.lineWidth,
                }),
              })
            );
            vectorContext.drawGeometry(traveledLine);
          }
        }

        // 绘制移动的图标
        vectorContext.setStyle(new Style({
            image: new CircleStyle({
                radius: track.pointRadius,
                fill: new Fill({ color: track.pointColor }),
                stroke: new Stroke({
                    color: 'white',
                    width: 2,
                }),
            }),

        }));

        vectorContext.drawGeometry(track.position);
      });

      // 继续动画
      this.map.render();
    });
  }

  // 停止播放
  stop() {
    this.animating = false;
    if (this.listener && this.vectorLayer) {
      try {
        this.vectorLayer.un(this.listener);
      } catch (error) {
        console.warn("Error removing listener:", error);
      }
      this.listener = null;
    }
  }

  // 清除所有轨迹
  clear() {
    if (this.animating) {
      this.stop();
    }
    this.tracks = [];
  }

  // 获取轨迹信息
  getTracks() {
    return this.tracks.map((track) => ({
      id: track.id,
      enabled: track.enabled,
      speed: track.speed,
      color: track.color,
      distance: track.distance,
    }));
  }
}

export default TrackPlayer;绘制的路线,可能会保存为geojson格式,因此需要读取路径的geojson。new GeoJSON().readFeatures(geoJson, { featureProjection: "EPSG:3857", });可以读取geojson为feacture对象,this.map.addLayer(vectorLayer)并添加到图层上。
js
 const feature = new GeoJSON().readFeatures(geoJson, {
      featureProjection: "EPSG:3857",
    });

    const vectorSource = new VectorSource({
      features: feature,
    });

    const vectorLayer = new VectorLayer({
      id: id,
      source: vectorSource,
      style: [
           new Style({
              stroke: new Stroke({
                color: "rgba(0, 125, 0)",
                width: 10,
              }),
            }),
            new Style({
              text: new Text({
                text: feature.get("name"), // 假设GeoJSON中有'name'属性
                font: "14px Calibri,sans-serif",
                fill: new Fill({
                  color: "#000",
                }),
                stroke: new Stroke({
                  color: "#fff",
                  width: 3,
                }),
              }),
              stroke: new Stroke({
                color: "rgba(0, 200, 0)",
                width: 8,
              }),
            })
      ]
      },
      renderMode: "image", // 提高渲染性能
    });
    this.map.addLayer(vectorLayer);
最后可以使用我们封装的轨迹回放方法。
js
 this.trackPlayer = new TrackPlayer(this.map, this.vector);
 this.trackPlayer.addTrack(feature[0]);
  // 播放所有轨迹
 this.trackPlayer.play();