功能演示
用户登录、商品增删改查

1.创建基于 Vite 的 Vue3 和 ts 项目
!!首先本地要安装配置 Node 环境
css
# 创建项目
npm create vite@latest zhifou-vue3-ts -- --template vue-ts
# 安装依赖
npm install
项目目录:
css
src/
├── assets/          # 静态资源
├── components/      # 组件
├── router/          # 路由
│   └── index.ts     # 路由入口文件
├── stores/          # Pinia状态管理
│   ├── index.ts     # Pinia入口配置
│   └── user.ts      # 用户相关状态
├── types/           # ts自定义类型
├── utils/           # 工具函数
│   └── axios.ts     # axios配置
├── views/           # 页面组件
│   ├── Home.vue     # 首页
│   └── Login.vue    # 登录页
├── App.vue          # 根组件
└── main.ts          # 入口文件
配置 vite.config.ts
- 配置路径别名
- 代理配置:配置后台接口请求路径
ts
import { defineConfig } from "vite";
import vue from "@vitejs/plugin-vue";
import { resolve } from "path";

export default defineConfig({
  plugins: [vue()],
  resolve: {
    alias: {
      "@": resolve(__dirname, "src"), // 设置路径别名
    },
  },
  server: {
    port: 3000,
    proxy: {
      // 代理配置,解决跨域问题
      "/api": {
        target: "http://localhost:8083/zhifou-blog",
        changeOrigin: true,
        rewrite: (path) => path.replace(/^\/api/, ""),
      },
    },
  },
});
2.安装配置 Element Plus
cs
npm install element-plus @element-plus/icons-vue在 main.ts 中配置 ElementPlus
css
import { createApp } from "vue";
import App from "./App.vue";

import ElementPlus from "element-plus";
import "element-plus/dist/index.css";
import locale from "element-plus/es/locale/lang/zh-cn";
import * as ElementPlusIconsVue from "@element-plus/icons-vue";
const app = createApp(App);

// 注册所有图标
for (const [key, component] of Object.entries(ElementPlusIconsVue)) {
  app.component(key, component);
}
app.use(ElementPlus, { locale }).mount("#app");
3.安装配置 Vue Router
css
npm install vue-router@4在 main.ts 中配置路由
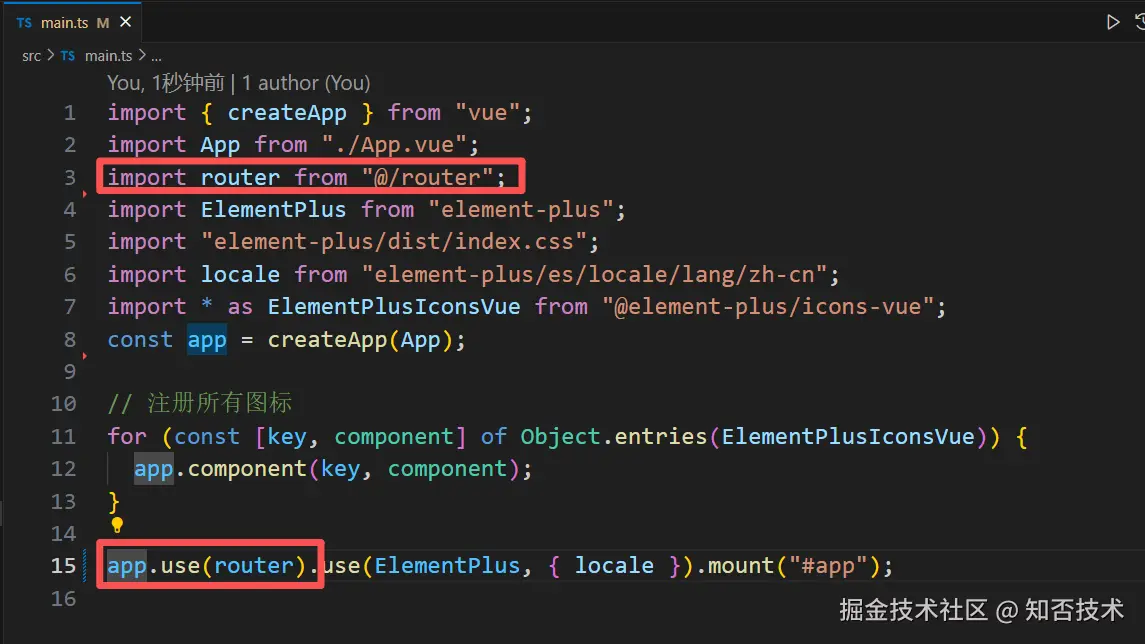
在 router 文件夹下新建 index.ts,然后配置路由:
ts
import { createRouter, createWebHistory, RouteRecordRaw } from "vue-router";
import { useUserStore } from "@/store/user";
const routes: Array<RouteRecordRaw> = [
  {
    path: "/",
    redirect: "/login",
  },
  {
    path: "/login",
    name: "Login",
    component: () => import("@/views/Login.vue"),
  },
  {
    path: "/home",
    name: "Home",
    component: () => import("@/views/Home.vue"),
  },
];

const router = createRouter({
  history: createWebHistory(),
  routes,
});

// 在之前的路由守卫基础上添加
router.beforeEach(async (to, from, next) => {
  const userStore = useUserStore();
  // 判断路由是否需要认证
  if (to.path === "/login") {
    if (userStore.isLoggedIn) {
      next("/home");
    } else {
      next();
    }
  } else {
    const token = localStorage.getItem("token");
    if (token) {
      try {
        // 获取最新用户信息
        // await userStore.getCurrentUser();
        next();
      } catch (error) {
        // 刷新失败,跳转到登录页
        next("/login");
      }
    } else {
      // 没有token,跳转到登录页
      next("/login");
    }
  }
});
export default router;
上面的例子中只配置了登录页面和主页的路由,路由守卫对登录和 token 进行了校验。
4.安装配置配置 Pinia
pinia-plugin-persistedstate 是为 Pinia 设计的持久化存储插件,主要用于解决页面刷新后状态丢失的问题。它通过自动将 Store 数据同步到 localStorage、sessionStorage 或Cookie 中实现持久化,并在应用初始化时从存储中恢复状态。
css
npm install pinia pinia-plugin-persistedstate在 store 文件夹下新建 index.ts 文件,然后配置 pina
ts
import { createPinia } from 'pinia'
import piniaPluginPersistedstate from 'pinia-plugin-persistedstate'
const pinia = createPinia()
pinia.use(piniaPluginPersistedstate)
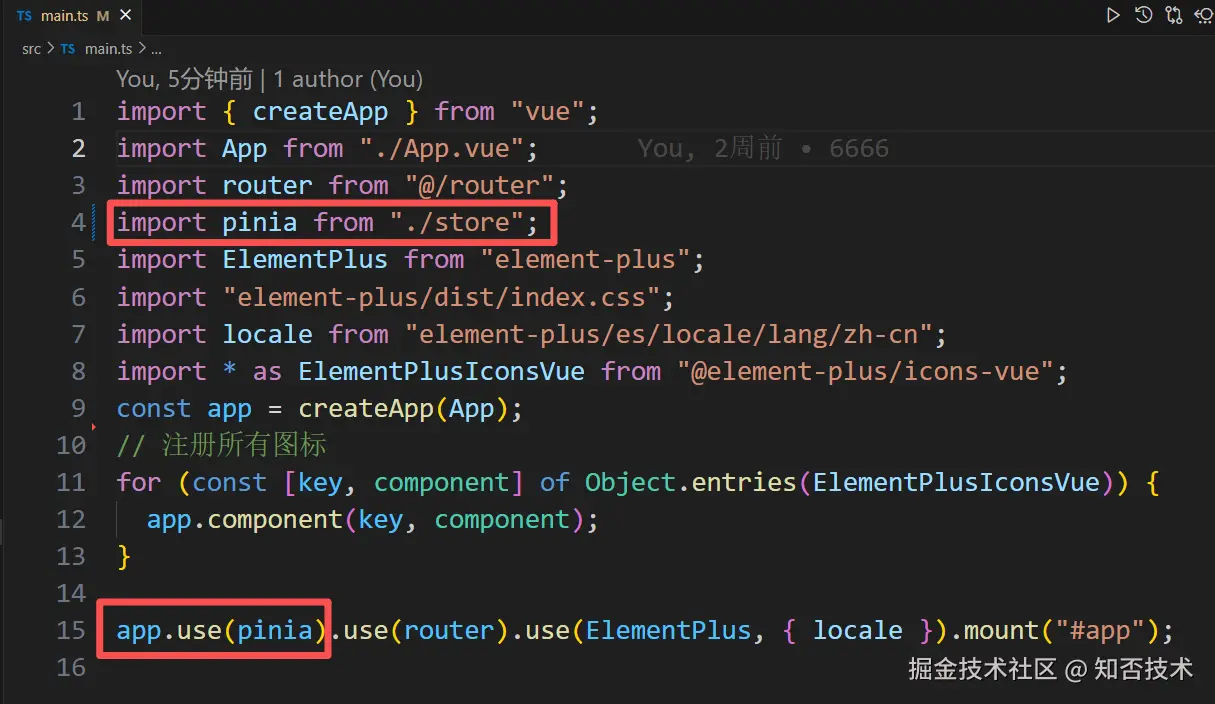
export default pinia在 main.ts 中配置 pina
5. 安装配置 axios
css
npm install axios在 utils 文件夹在新建 axios.ts 文件,配置 axios:
ts
import axios, {
  AxiosInstance,
  InternalAxiosRequestConfig,
  AxiosResponse,
} from "axios";
// 创建axios实例
const service: AxiosInstance = axios.create({
  baseURL: "/api", // API基础路径
  timeout: 10000, // 请求超时时间
  headers: {
    "Content-Type": "application/json;charset=utf-8",
  },
});

// 请求拦截器
service.interceptors.request.use(
  (config: InternalAxiosRequestConfig) => {
    // 在发送请求之前做些什么
    const token = localStorage.getItem("token");
    if (token) {
      config.headers["token"] = token;
    }
    return config;
  },
  (error: any) => {
    // 返回异常
    return Promise.reject(error);
  }
);

// 响应拦截器
service.interceptors.response.use(
  (response: AxiosResponse) => {
    const { code, message } = response.data;
    if (code === 200) {
      return response;
    } else {
      // 处理业务错误
      return Promise.reject(new Error(message || "Error"));
    }
  },
  (error: any) => {
    if (error.response?.status === 401) {
      localStorage.removeItem("token");
    }
    return Promise.reject(error);
  }
);

export default service;
上面我们主要配置了axios 的请求拦截器和响应拦截器。请求拦截器主要是在请求头中添加了 token。响应拦截器主要是返回响应信息和异常信息。
这里我们要注意一点,axios 的响应拦截器类型是 AxiosResponse,返回的数据格式是:
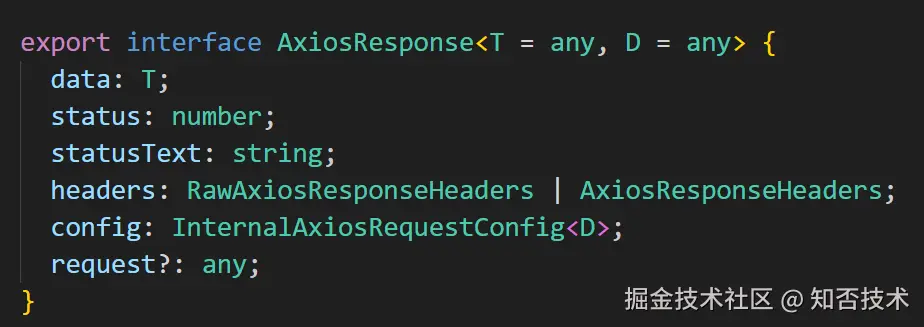
也就是说后台返回的数据实际在 res 的 data 里面。
6. 封装 http 请求
在 /src/api 文件夹下面新建 index.ts 文件:
ts
import axios from "../utils/axios";
import { ApiResponse, PageParams, PageResponse } from "../types";

/**
 * 通用GET请求
 * @param url 请求地址
 * @param params 请求参数
 * @returns 响应数据
 */
export const get = async <T>(url: string, params?: any): Promise<T> => {
  const res = await axios.get<ApiResponse<T>>(url, { params });
  return res.data.data;
};

/**
 * 通用POST请求
 * @param url 请求地址
 * @param data 请求体数据
 * @returns 响应数据
 */
export const post = async <T>(url: string, data?: any): Promise<T> => {
  const res = await axios.post<ApiResponse<T>>(url, data);
  return res.data.data;
};

/**
 * 通用PUT请求
 * @param url 请求地址
 * @param data 请求体数据
 * @returns 响应数据
 */
export const put = async <T>(url: string, data?: any): Promise<T> => {
  const res = await axios.put<ApiResponse<T>>(url, data);
  return res.data.data;
};

/**
 * 通用DELETE请求
 * @param url 请求地址
 * @param params 请求参数
 * @returns 响应数据
 */
export const del = async <T>(url: string, params?: any): Promise<T> => {
  const res = await axios.delete<ApiResponse<T>>(url, { params });
  return res.data.data;
};

/**
 * 分页请求
 * @param url 请求地址
 * @param params 分页参数
 * @returns 分页响应数据
 */
export const getPage = async <T>(
  url: string,
  params: PageParams
): Promise<PageResponse<T>> => {
  return get<PageResponse<T>>(url, params);
};
这里我们拿 get 请求举例,前面 axios 响应拦截器中返回的是 response,这里封装之后的 get 请求返回的是 res.data.data。如果后台返回的数据是:
json
{code:200,data:{username:'zhifou'},messeg:'请求成功'}那么经过封装之后的 get 请求取到的就是:
json
{username:'zhifou'}7. 用户登录
7.1 创建用户相关的 API
在 /src/api 文件夹下新建 user.ts 文件
ts
import { get, post } from "./index";
import { LoginParams, LoginResponse, User } from "../types";

/**
 * 用户登录
 * @param params 登录参数
 * @returns 登录结果
 */
export const userLogin = async (params: LoginParams) => {
  return post<LoginResponse>("/user/login", params);
};

/**
 * 获取当前用户信息
 * @returns 用户信息
 */
export const getCurrentUserInfo = async () => {
  return get<User>("/user/currentUserInfo");
};
7.2 创建用户状态管理
在用户的 store 里面我们主要存储用户信息、token、用户登录状态。
ts
import { defineStore } from "pinia";
import { User, LoginParams, UserState } from "../types";
import { userLogin, getCurrentUserInfo } from "../api/user";
import router from "../router";
export const useUserStore = defineStore("user", {
state: (): UserState => ({
userInfo: null,
token: null,
isLoggedIn: false,
}),
getters: {
// 获取用户名
getUsername: (state) => state.userInfo?.username || "",
},
actions: {
// 登录
async login(params: LoginParams) {
try {
const res = await userLogin(params);
this.userInfo = res.userInfo;
this.token = res.token;
this.isLoggedIn = true;
// 存储token到localStorage
localStorage.setItem("token", res.token);
return true;
} catch (error: any) {
throw new Error(error.message);
}
},
// 退出
logout() {
this.userInfo = null;
this.token = null;
this.isLoggedIn = false;
// 清除localStorage
localStorage.removeItem("token");
localStorage.removeItem("user-store");
// 跳转到登录页
router.push("/login");
},
// 获取当前用户信息
async getCurrentUser() {
try {
const res = await getCurrentUserInfo();
this.userInfo = res;
this.isLoggedIn = true;
return res;
} catch (error) {
console.error("获取用户信息失败:", error);
this.logout();
return null;
}
},
},
persist: {
// 存储键名,默认是 store 的 id
key: "user-store",
storage: localStorage,
// paths
pick: ["userInfo", "token", "isLoggedIn"],
},
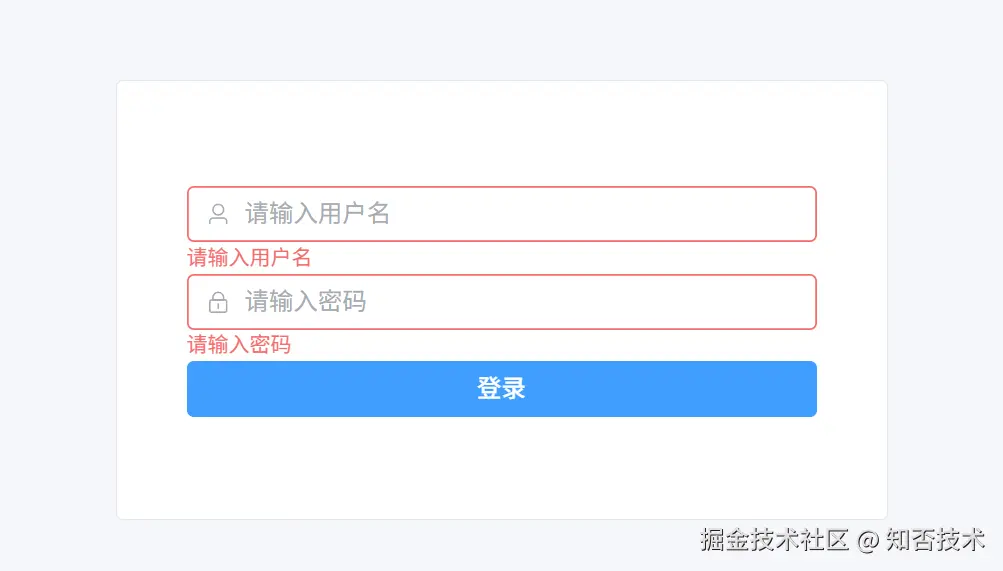
});7.3 用户登录页面
在 views 文件夹下面新建 Login.vue:
登录页面很简单,这里我们使用 el-card、el-form、el-button 完成登录页面的设计:
ini
 <el-card class="login-card" shadow="hover">
  <el-form
    :model="loginForm"
    :rules="loginRules"
    ref="loginFormRef"
    class="login-form"
  >
    <el-form-item prop="username">
      <el-input
        v-model="loginForm.username"
        placeholder="请输入用户名"
        prefix-icon="User"
      ></el-input>
    </el-form-item>

    <el-form-item prop="password">
      <el-input
        v-model="loginForm.password"
        type="password"
        placeholder="请输入密码"
        prefix-icon="Lock"
      ></el-input>
    </el-form-item>
    <el-form-item>
      <el-button
        type="primary"
        class="login-button"
        @click="handleLogin"
        :loading="loading"
      >
        登录
      </el-button>
    </el-form-item>
  </el-form>
</el-card>
在 js 代码中,我们要定义以下变量:
ts
import { ElMessage } from "element-plus";
import type { FormInstance, FormRules } from "element-plus";
import { ref, reactive } from "vue";
import { useRouter } from "vue-router";
import { useUserStore } from "../store/user";
import { LoginParams } from "../types";
// 路由实例
const router = useRouter();
// 用户状态管理
const userStore = useUserStore();
// 表单引用
const loginFormRef = ref<FormInstance>();
// 加载状态
const loading = ref<boolean>(false);
// 登录表单数据
const loginForm = reactive<LoginParams>({
  username: "",
  password: "",
});
// 表单验证规则
const loginRules = reactive<FormRules>({
  username: [{ required: true, message: "请输入用户名", trigger: "blur" }],
  password: [
    { required: true, message: "请输入密码", trigger: "blur" },
    { min: 6, message: "密码长度不能少于6位", trigger: "blur" },
  ],
});
点击登录按钮,首先要进行表单校验,然后调用 userStore 的登录方法,登录成功之后进入主页页面,否则捕获异常信息。
ts
// 处理登录
const handleLogin = async () => {
  if (!loginFormRef.value) return;
  try {
    // 表单验证
    await loginFormRef.value.validate();
    // 显示加载状态
    loading.value = true;
    // 调用登录方法
    const success = await userStore.login(loginForm);
    if (success) {
      ElMessage.success("登录成功");
      // 跳转到首页
      router.push("/home");
    }
  } catch (error: any) {
    if (error.message) {
      ElMessage.error(error.message);
    }
  } finally {
    // 隐藏加载状态
    loading.value = false;
  }
};
在 useStore 的登录方法中,如果登录成功存储 store 信息,否则抛出异常。 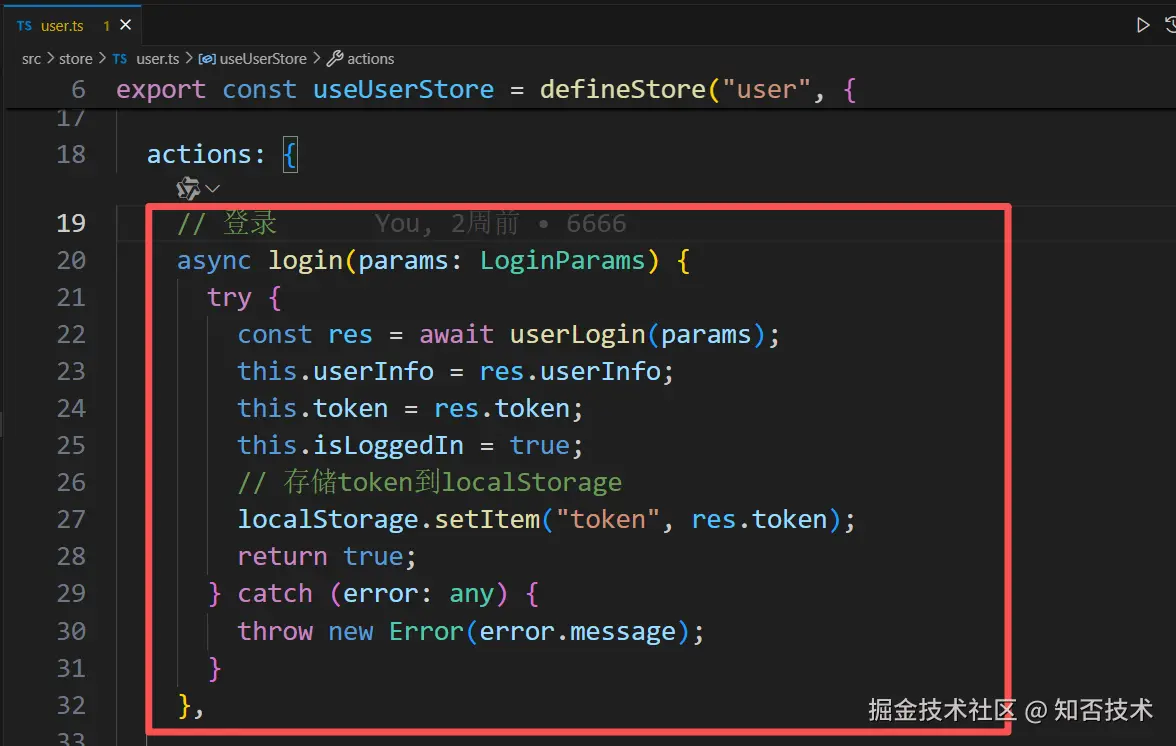
8. 商品的增删改查
8.1 创建商品相关的 API
在 /src/api 文件夹下面新建 product.ts 文件
ts
import { get, post, del, getPage } from "./index";
import { Product, PageParams } from "../types";
/**
* 获取商品列表(分页)
* @param params 分页查询参数
* @returns 分页商品列表
*/
export const getProductList = (params: PageParams) => {
return getPage<Product>("/product/page", params);
};
/**
* 获取商品详情
* @param id 商品ID
* @returns 商品详情
*/
export const getProductDetail = (id: number) => {
return get<Product>(`/product/info/${id}`);
};
/**
* 新增/修改商品
* @param data 商品数据
* @returns
*/
export const createUpdateProduct = (data: Product) => {
return post<Product>("/product/saveUpdate", data);
};
/**
* 删除商品
* @param id 商品ID
* @returns 删除结果
*/
export const deleteProduct = (id: number) => {
return del<{ success: boolean }>(`/product/delete/${id}`);
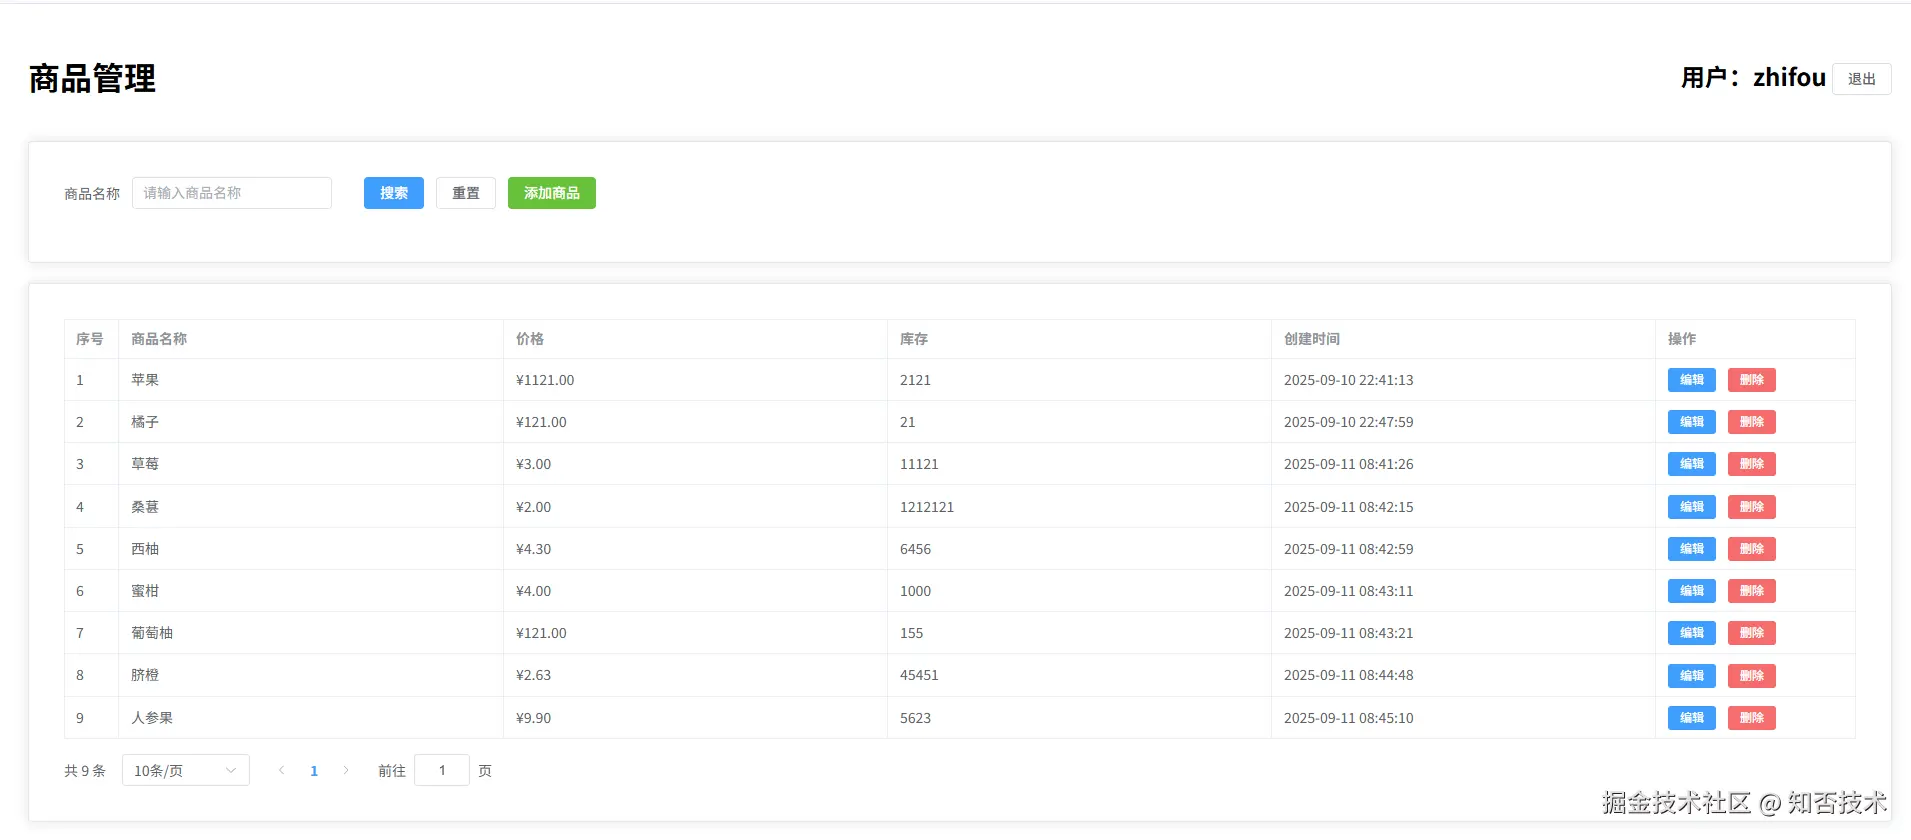
};8.2 商品查询
商品查询页面包含搜索区域、列表区域、分页区域
css
    <!-- 搜索区域 -->
    <el-card class="search-card">
      <el-form :model="searchForm" inline>
        <el-form-item label="商品名称">
          <el-input
            v-model="searchForm.name"
            clearable
            @clear="handleSearch"
            placeholder="请输入商品名称"
            style="width: 200px"
          ></el-input>
        </el-form-item>
        <el-form-item>
          <el-button type="primary" @click="handleSearch">搜索</el-button>
          <el-button @click="resetSearch">重置</el-button>
          <el-button type="success" @click="handleAddProduct"> 添加商品 </el-button>
        </el-form-item>
      </el-form>
    </el-card>

    <!-- 商品列表 -->
    <el-card class="table-card">
      <el-table :data="productList" border style="width: 100%" v-loading="loading">
        <el-table-column type="index" label="序号" width="55" />
        <el-table-column prop="name" label="商品名称"></el-table-column>
        <el-table-column prop="price" label="价格">
          <template #default="scope"> ¥{{ scope.row.price.toFixed(2) }} </template>
        </el-table-column>
        <el-table-column prop="stock" label="库存"></el-table-column>
        <el-table-column prop="createTime" label="创建时间"></el-table-column>
        <el-table-column label="操作" width="200">
          <template #default="scope">
            <el-button type="primary" size="small" @click="handleEdit(scope.row)">
              编辑
            </el-button>
            <el-button type="danger" size="small" @click="handleDelete(scope.row.id)">
              删除
            </el-button>
          </template>
        </el-table-column>
      </el-table>

      <!-- 分页 -->
      <div class="pagination">
        <el-pagination
          :current-page="pageParams.current"
          :page-size="pageParams.size"
          :page-sizes="[10, 20, 50]"
          :total="total"
          layout="total, sizes, prev, pager, next, jumper"
          @size-change="handleSizeChange"
          @current-change="handleCurrentChange"
        ></el-pagination>
      </div>
    </el-card>
商品查询相关变量和方法:
ts
import { ref, reactive, onMounted } from "vue";
import { ElForm, FormInstance, ElMessage, ElMessageBox, FormRules } from "element-plus";
import { Product, PageParams } from "../types";
import { getProductList, createUpdateProduct, deleteProduct } from "../api/product";
import { useUserStore } from "../store/user";
// 用户状态管理
const userStore = useUserStore();
// 初始化时加载数据
onMounted(() => {
fetchProductList();
});
// 加载状态
const loading = ref<boolean>(false);
// 商品列表数据
const productList = ref<Product[]>([]);
const total = ref<number>(0);
// 搜索表单
const searchForm = reactive({
name: "",
});
// 分页参数
const pageParams = reactive<PageParams>({
current: 1,
size: 10,
name: "",
});
// 获取商品列表
const fetchProductList = async () => {
try {
loading.value = true;
const res = await getProductList(pageParams);
productList.value = res.records;
total.value = res.total;
} catch (error) {
ElMessage.error("获取商品列表失败");
} finally {
loading.value = false;
}
};
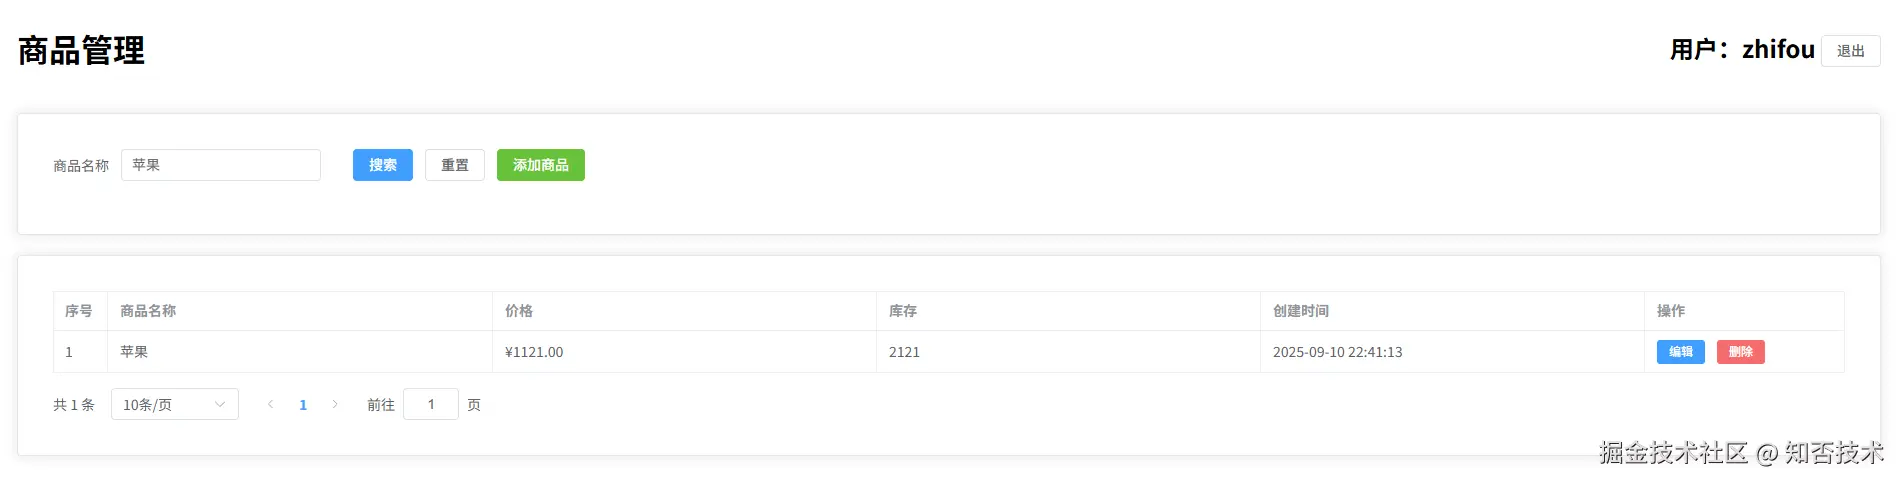
// 搜索
const handleSearch = () => {
pageParams.current = 1;
pageParams.name = searchForm.name;
fetchProductList();
};
// 重置搜索
const resetSearch = () => {
pageParams.current = 1;
pageParams.name = "";
fetchProductList();
};
// 分页大小变化
const handleSizeChange = (size: number) => {
pageParams.size = size;
fetchProductList();
};
// 当前页变化
const handleCurrentChange = (page: number) => {
pageParams.current = page;
fetchProductList();
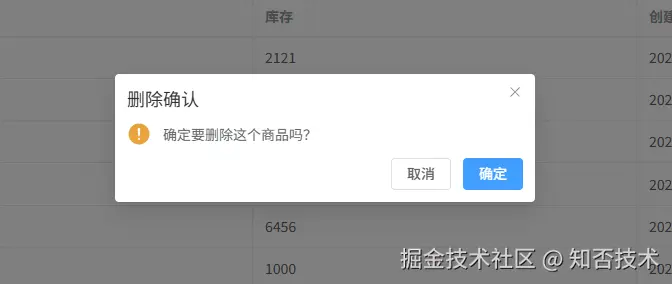
};8.3 删除商品
ts
// 删除商品
const handleDelete = async (id: number) => {
try {
const confirmResult = await ElMessageBox.confirm(
"确定要删除这个商品吗?",
"删除确认",
{
confirmButtonText: "确定",
cancelButtonText: "取消",
type: "warning",
}
);
if (confirmResult === "confirm") {
await deleteProduct(id);
ElMessage.success("商品删除成功");
fetchProductList();
}
} catch (error: any) {
// 如果是取消操作,不显示错误信息
if (error != "cancel") {
ElMessage.error("商品删除失败");
}
}
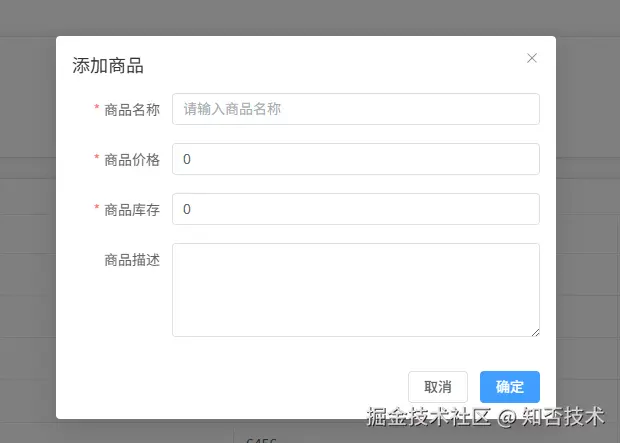
};8.4 新增编辑商品
ts
// 表单数据
let formData = reactive<Product>({
  id: "",
  name: "",
  price: 0,
  stock: 0,
  description: "",
});

// 打开添加商品弹窗
const handleAddProduct = () => {
  dialogTitle.value = "添加商品";
  dialogVisible.value = true;
};
// 打开编辑商品弹窗
const handleEdit = (product: Product) => {
  dialogTitle.value = "修改商品";
  // 填充表单数据
  formData = product;
  dialogVisible.value = true;
};
// 提交表单
const handleSubmit = async () => {
  if (!formRef.value) return;
  try {
    await formRef.value.validate();
    // 创建商品
    await createUpdateProduct(formData);
    ElMessage.success(`商品${formData.id ? "修改成功" : "添加成功"}`);
    // 重置提交
    resetSubmit(formRef.value);
  } catch (error: any) {
    if (error.message) {
      ElMessage.error(error.message);
    }
  }
};
9. 完整代码
前端:
css
git@gitee.com:zhifou-tech/zhifou-vue3-ts.git后端
css
通过网盘分享的文件:zhifou-vue3-ts-springboot.zip
链接: https://pan.baidu.com/s/1_42KmE68ucoCAuTMyg8iXQ?pwd=6666 提取码: 6666