Android主题切换
Android主题切换是很多成熟产品必备功能。记得刚工作时候,公司规划后台切换主题功能,作为菜鸟程序员,吓的我后背发凉。要是放在现在,我给他三四个方案去挑。所以,不要气馁,交给时间,走一步,再走一步。
1 常用主题切换方式
1.1 使用Android原生方式
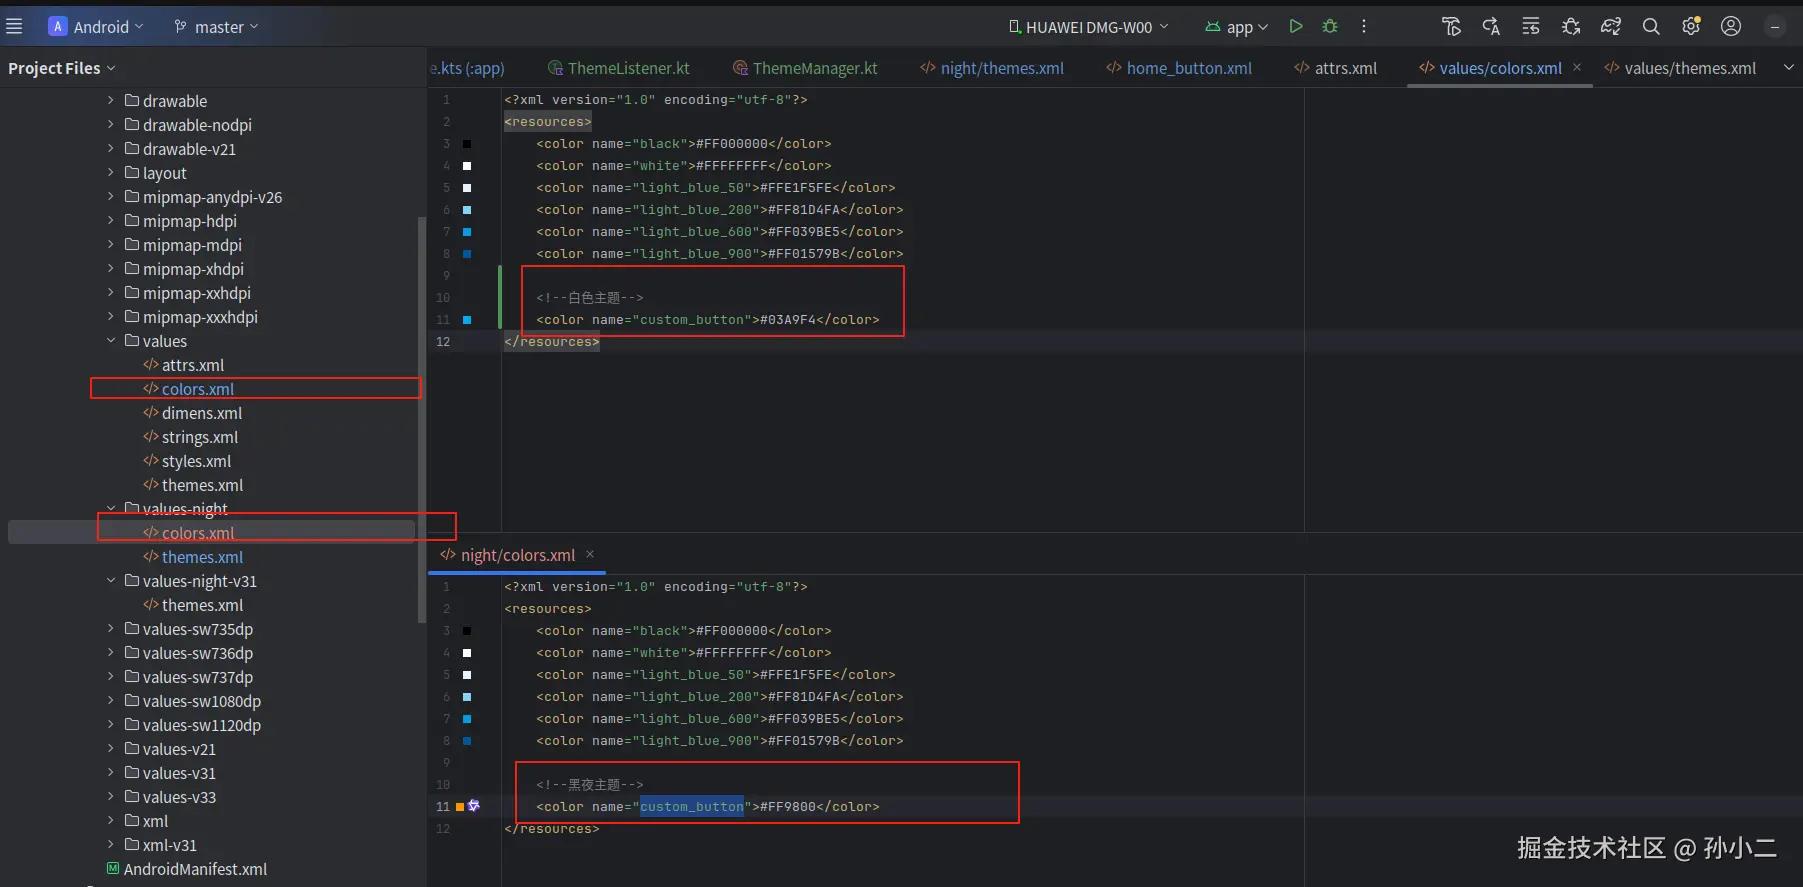
其实Android系统已经提供了一套黑白主题切换方式。上图所示,直接使用限制符方式。
- values 白天主题
- values-night 黑色主题
其他drawable等资源也可以使用添加night限制符方式区分深色主题。
我使用的是Android12设备,打开/关闭深夜模式,资源自动生效,无需做其他处理。
优点: 无需修改代码,使用方便。
缺点: APK发版后,不能动态切换主题。
1.2 资源包修改主题
首先,看下资源调用方式

可以看到资源调用使用了Resources对象,说明咱们的资源就是使用该对象进行处理。
其实,Android资源文件加载最终由Resources对象中AssetManager 进行控制。另外,AssetManager
还提供了加载APK资源的能力,可以让咱们加载其他APK文件。
所以,咱们最终可以使用AssetManager加载APK,并且创建新的Resources对象用来持有不同资源文件。
使用三方APK切换原APK自带资源核心:
首先,使用AssetManager通过路径加载APK:
kotlin
/**
 * 创建AssetManager并加载指定的APK路径
 */
@SuppressLint("PrivateApi")
private fun createAssetManager(apkPath: String): AssetManager? {
    return try {
        val assetManager = AssetManager::class.java.newInstance()
        val addAssetPathMethod: Method = AssetManager::class.java.getDeclaredMethod("addAssetPath", String::class.java)
        addAssetPathMethod.invoke(assetManager, apkPath)
        assetManager
    } catch (e: Exception) {
        e.printStackTrace()
        null
    }
}
其次,创建三方Resources对象。
kotlin
private fun loadResource(context: Context, path: String) {
    val assetManager = createAssetManager(context.filesDir.path+"/"+path)
    currentResource?.let {
        val metrics: DisplayMetrics = it.displayMetrics
        val config: Configuration = it.configuration
        resourcesOther = assetManager?.run {
            Resources(assetManager, metrics, config)
        }
    }
}
在应用的Resources和创建的三方Resources对象进行切换,便可以达到切换主题效果。
优点: 可以灵活进行APK更换,可适配多种类型主题。
缺点: 需要额外提供APK,占用内存。Android开发工作任务变多。
2 资源包修改主题
下面是使用资源包修改主题Demo,仅供参考。
2.1 主题切换基本框架
SkinManager.kt
kotlin
import android.content.Context


/**
 *  为外部提供接口
 */
object SkinManager {

    private val resourceManager by lazy { ResourceManager() }

    private val changeListenerList = mutableListOf<SkinChangeListener>()

    fun init(context: Context,path: String) {
        resourceManager.init(context,path)
    }

    fun addChangeListener(listener: SkinChangeListener) {
        changeListenerList.add(listener)
    }

    fun removeChangeListener(listener: SkinChangeListener) {
        changeListenerList.remove(listener)
    }

    private fun notifySkinChange(skinName: Int) {
        changeListenerList.forEach {
            it.onSkinChange(skinName)
        }
    }

    fun switchTheme(type: Int) {
        resourceManager.switchTheme(type)
        notifySkinChange(type)
    }

    fun getColor(resId: Int): Int {
        return resourceManager.getColor(resId)
    }

}
ResourceManager.kt
kotlin
import android.annotation.SuppressLint
import android.content.Context
import android.content.res.AssetManager
import android.content.res.Configuration
import android.content.res.Resources
import android.util.DisplayMetrics
import java.lang.reflect.Method
class ResourceManager {
private val TAG = "ResourceManager"
private var currentResource : Resources? = null
private var resources : Resources? = null
private var resourcesOther : Resources? = null
var appContext: Context? = null
fun init(context: Context, path: String) {
appContext = context
currentResource = context.resources
resources= currentResource
loadResource(context,path)
}
private fun loadResource(context: Context, path: String) {
val assetManager = createAssetManager(context.filesDir.path+"/"+path)
currentResource?.let {
val metrics: DisplayMetrics = it.displayMetrics
val config: Configuration = it.configuration
resourcesOther = assetManager?.run {
Resources(assetManager, metrics, config)
}
}
}
@SuppressLint("DiscouragedApi")
fun getColor(id: Int): Int {
Log.d("ResourceManager", " $currentResource getColor: $id")
return try {
// 获取资源名称
val resourceName = resources?.getResourceEntryName(id)
val resourceType = resources?.getResourceTypeName(id)
Log.d("ResourceManager", "getColor:resourceName = $resourceName resourceType = $resourceType ")
// 在当前主题中查找同名资源
val newResId = currentResource?.getIdentifier(resourceName ?: "", resourceType ?: "", appContext?.packageName)
newResId?.let { currentResource?.getColor(it, null) } ?: resources?.getColor(id, null)!!
}catch(e: Exception) {
e.printStackTrace()
resources?.getColor(id, null)!!
}
}
/**
* 创建AssetManager并加载指定的APK路径
*/
@SuppressLint("PrivateApi")
private fun createAssetManager(apkPath: String): AssetManager? {
return try {
val assetManager = AssetManager::class.java.newInstance()
val addAssetPathMethod: Method = AssetManager::class.java.getDeclaredMethod("addAssetPath", String::class.java)
addAssetPathMethod.invoke(assetManager, apkPath)
assetManager
} catch (e: Exception) {
e.printStackTrace()
null
}
}
fun switchTheme(type:Int) {
when(type) {
0 -> {
currentResource = resources
}
1 -> {
currentResource = resourcesOther
}
}
}
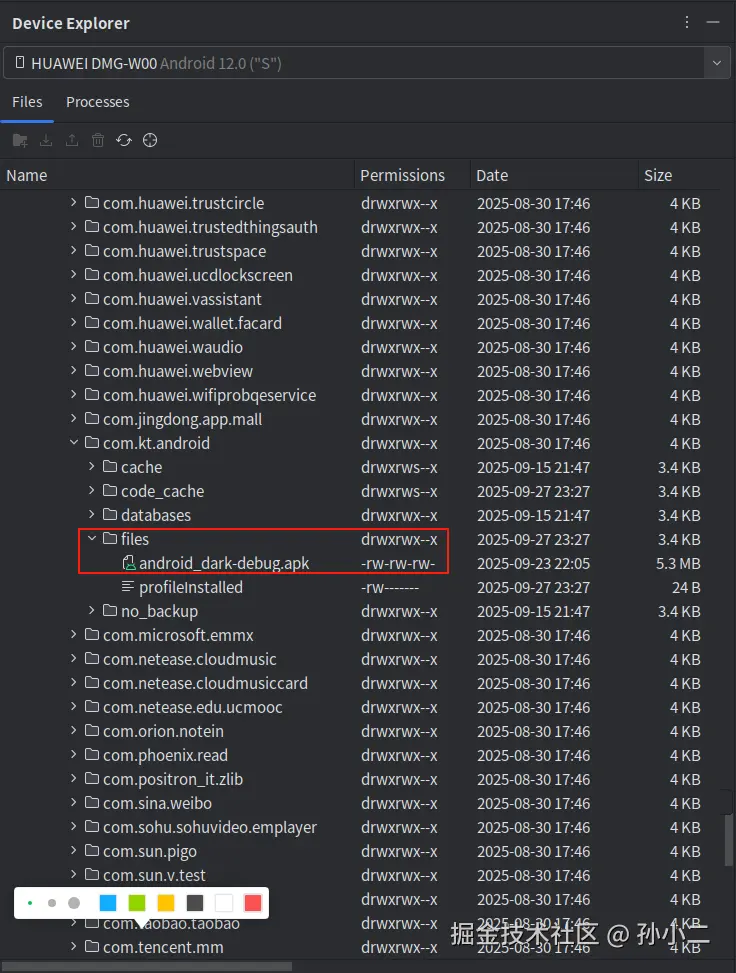
}上面代码 context.filesDir.path 就是加载如图:/data/data/包名/files/ 目录内容。通过
AssetManager对象加载事先准备好的APK资源文件,创建一个新的Resources对象进行管理资源。
SkinChangeListener.kt
kotlin
interface SkinChangeListener {

    fun onSkinChange(skinName: Int)

}
2.2 使用demo
布局
xml
<?xml version="1.0" encoding="utf-8"?>
<LinearLayout xmlns:android="http://schemas.android.com/apk/res/android"
    xmlns:app="http://schemas.android.com/apk/res-auto"
    xmlns:tools="http://schemas.android.com/tools"
    android:id="@+id/main"
    android:layout_width="match_parent"
    android:layout_height="match_parent"
    tools:context=".MainActivity"
    android:orientation="vertical"
    android:background="@color/main_bg">

<!--    <com.kt.android.widget.CustomRecyclerView-->
<!--        android:id="@+id/recyclerview"-->
<!--        android:layout_width="match_parent"-->
<!--        android:layout_height="match_parent"/>-->

    <TextView
        android:id="@+id/switch_button"
        android:text="主题切换"
        style="@style/CustomButton"/>

</LinearLayout>
MainActivity.kt
kotlin
import android.os.Bundle
import com.bo.baselibrary.base.base.BaseActivity
import com.bo.baselibrary.utils.jump
import com.example.skinmanager.SkinChangeListener
import com.example.skinmanager.SkinManager
import com.kt.android.databind.DataBindActivity
import com.kt.android.databinding.ActivityMainBinding
import com.kt.android.http.HttpActivity
import com.kt.android.ipc.IPCActivity
import com.kt.android.mvvm.DiceRollActivity
import com.kt.android.notification.NotificationActivity
import com.kt.android.test.test
import com.kt.android.view.ViewActivity
import com.kt.android.widget.CustomRecyclerView

class MainActivity : BaseActivity<ActivityMainBinding>(), SkinChangeListener {

    override fun onCreate(savedInstanceState: Bundle?) {
        super.onCreate(savedInstanceState)
        var b = true
        binding.switchButton.setOnClickListener {
            b = !b
            SkinManager.switchTheme(if (b) 1 else 0)
        }
    }

    override fun onSkinChange(skinName: Int) {
        binding.main.setBackgroundColor(SkinManager.getColor(R.color.main_bg))
    }

    override fun onResume() {
        super.onResume()
        SkinManager.addChangeListener(this)
    }

    override fun onPause() {
        super.onPause()
        SkinManager.removeChangeListener(this)
    }

}
App.kt
kotlin
package com.kt.android

import android.app.Application
import com.example.skinmanager.SkinManager

class App : Application(){

    override fun onCreate() {
        super.onCreate()
        SkinManager.init(this, "android_dark-debug.apk")
    }
}
2.2.1 资源文件
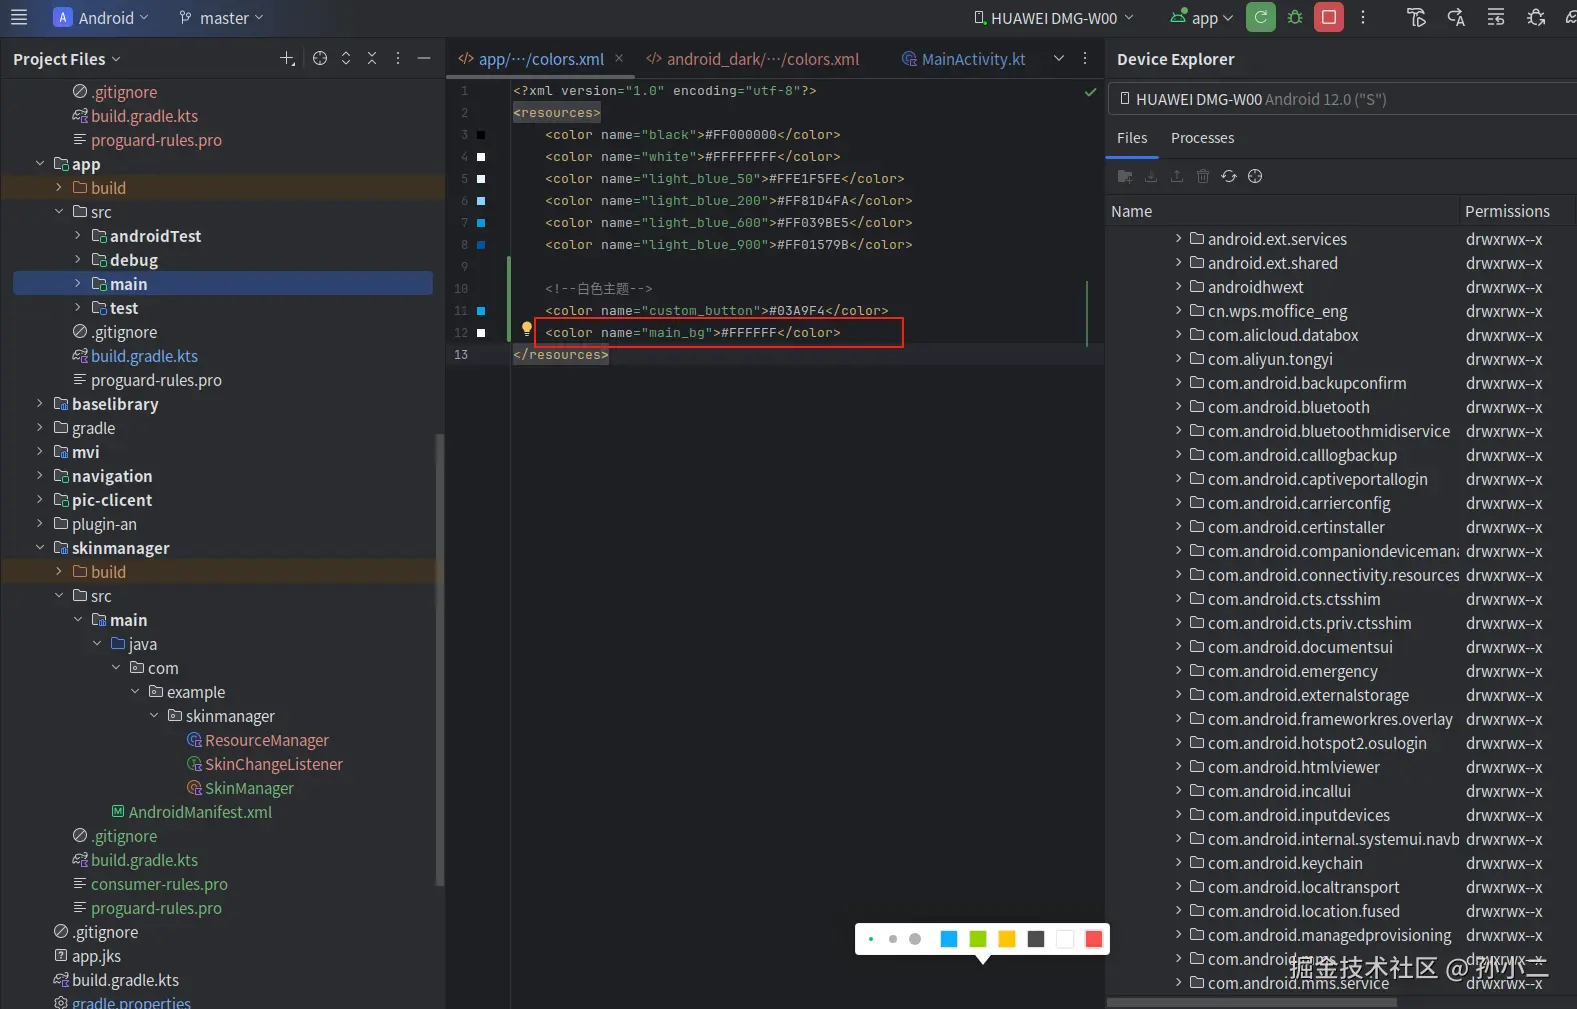
创建项目,只需保留资源文件。编译出一个APK包,将包放在指定的应用目录,便可以通过上述资源切换框架使用啦!
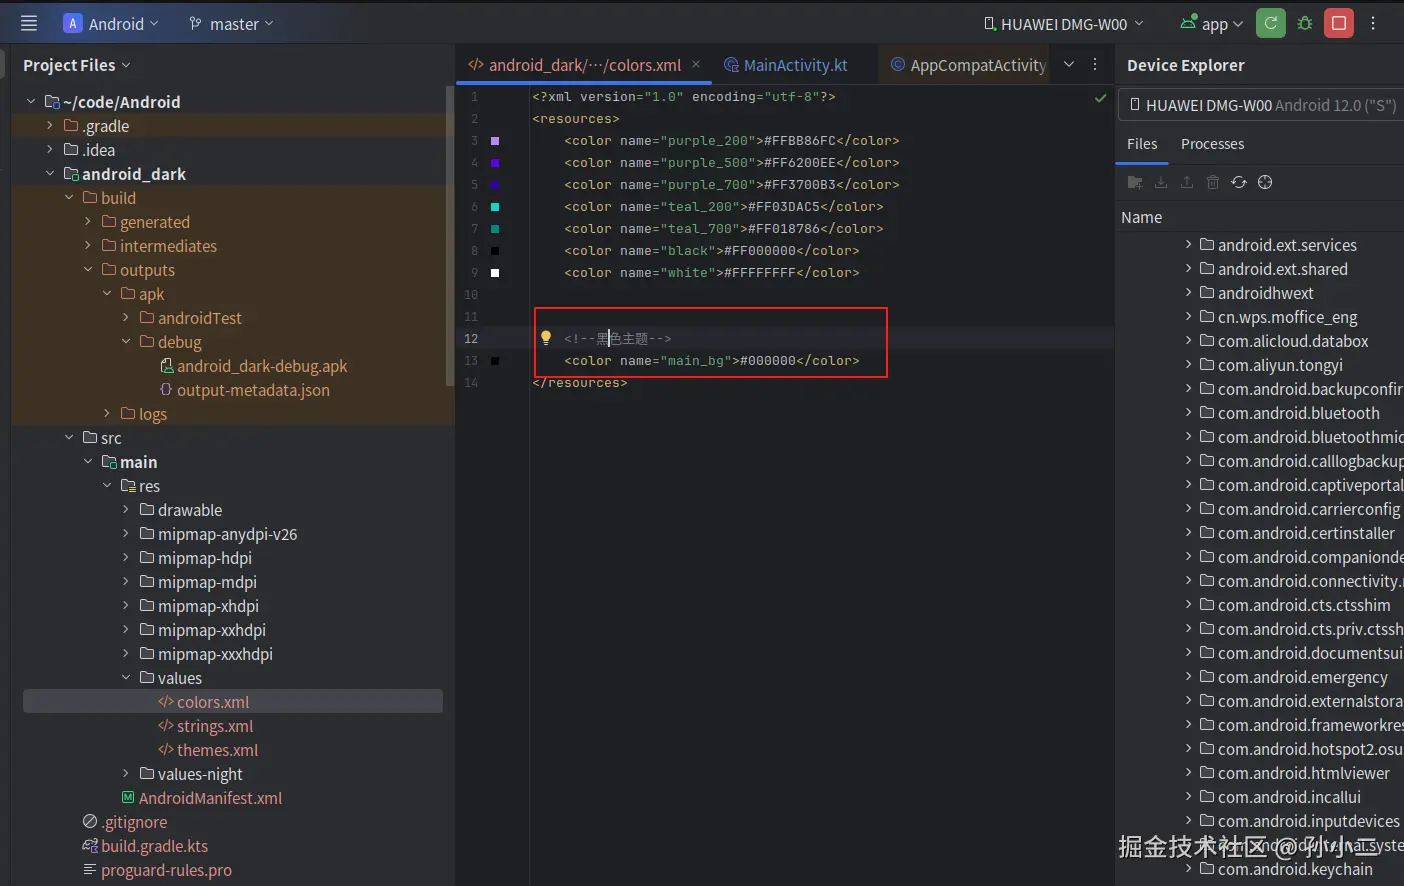
下面为原生项目自带资源内容。SkinManager中提供了一个主题切换的方法switchTheme,通过传递不同参数便可以切换不同resources对象。当切换主题后main_bg,就会根据不同的resources去加载不同资源。
对于资源包加载方式可以看出来是可以非常灵活进行定制化开发,还可以通过与后端获取APK形式对主题进行切换。