Day 1: React基础概念
学习时间:6-8小时 适合对象:有Vue3经验的开发者
📋 今日目标
- ✅ 掌握React项目创建和结构
- ✅ 熟练使用JSX语法
- ✅ 理解函数组件和Props
- ✅ 实现条件渲染和列表渲染
- ✅ 完成第一个React项目
🌅 上午课程(3-4小时)
1️⃣ React简介和环境搭建(1小时)
React是什么?
React是一个用于构建用户界面的JavaScript库,由Facebook开发。核心特点:
- 声明式:描述UI应该是什么样,React负责如何实现
- 组件化:UI由独立、可复用的组件构成
- 一次学习,随处编写:可用于Web、移动端、桌面端
React vs Vue 设计思想对比
| 特性 | Vue | React |
|---|---|---|
| 模板语法 | HTML模板 + 指令 | JSX (JavaScript + XML) |
| 响应式 | 自动依赖追踪 | 手动管理状态 |
| 学习曲线 | 平缓 | 稍陡(需要深入JS) |
| 灵活性 | 中等 | 很高(一切皆JS) |
| 官方路由/状态管理 | 有(Vue Router/Pinia) | 社区方案为主 |
创建你的第一个React项目
使用Vite创建项目(比Create React App更快):
bash
# 创建项目
npm create vite@latest my-react-app -- --template react

# 进入项目目录
cd my-react-app

# 安装依赖
npm install

# 启动开发服务器
npm run dev
项目创建过程
bash
npm create vite@latest my-react-app -- --template react
Need to install the following packages:
create-vite@8.0.1
Ok to proceed? (y) y


> npx
> create-vite my-react-app --template react

|
o  Use rolldown-vite (Experimental)?:
|  No
|
o  Install with npm and start now?
|  Yes
|
o  Scaffolding project in C:\MyLearn\my-react-app...
|
o  Installing dependencies with npm...

added 153 packages, and audited 154 packages in 17s

32 packages are looking for funding
  run `npm fund` for details

found 0 vulnerabilities
|
o  Starting dev server...

> my-react-app@0.0.0 dev
> vite


  VITE v7.1.7  ready in 374 ms

  ➜  Local:   http://localhost:5173/
  ➜  Network: use --host to expose
  ➜  press h + enter to show help
访问
http://localhost:5173/

项目结构解读
csharp
my-react-app/
├── node_modules/       # 依赖包
├── public/             # 静态资源
├── src/                # 源代码目录
│   ├── assets/         # 资源文件(图片、样式等)
│   ├── App.jsx         # 根组件
│   ├── App.css         # 根组件样式
│   ├── main.jsx        # 入口文件(类似Vue的main.js)
│   └── index.css       # 全局样式
├── index.html          # HTML模板
├── package.json        # 项目配置
└── vite.config.js      # Vite配置
实际初始化后,项目结构截图

关键文件解析
main.jsx(入口文件):
jsx
/**
 * 从 react 包中导入 StrictMode 组件
 * StrictMode 是 React 的严格模式组件,类似于 Vue 3 的开发模式检查
 * 它会在【开发环境】下进行额外的检查和警告,帮助你发现潜在问题
 * 不会渲染任何可见的 UI,也不会影响生产构建
 */
import { StrictMode } from 'react'

/**
 * 从 react-dom/client 包中导入 createRoot 方法
 * 这是 React 18 新的渲染 API,类似于 Vue 3 的 createApp()
 * 用于创建一个 React 根节点,然后将组件渲染到 DOM 中
 *
 * 对比 Vue 3:
 * Vue 3: createApp(App).mount('#app')
 * React: createRoot(document.getElementById('root')).render(<App />)
 */
import { createRoot } from 'react-dom/client'

/**
 * 导入全局样式文件
 * 类似于 Vue 3 中在 main.js 里 import './style.css'
 */
import './index.css'

/**
 * 导入根组件 App
 * 类似于 Vue 3 中的 import App from './App.vue'
 * 注意:React 组件文件通常使用 .jsx 或 .js 扩展名
 */
import App from './App.jsx'

/**
 * React 应用的启动流程(链式调用):
 *
 * 1. createRoot() - 创建 React 根节点
 *    参数:DOM 元素,这里获取 id 为 'root' 的 div
 *
 * 2. .render() - 将组件渲染到根节点
 *    参数:要渲染的 React 元素(JSX)
 *
 * 对比 Vue 3 的启动方式:
 *
 * Vue 3:
 * createApp(App).mount('#app')
 *
 * React 18:
 * createRoot(document.getElementById('root')).render(<App />)
 *
 * 主要区别:
 * - Vue 使用字符串选择器 '#app'
 * - React 需要传入实际的 DOM 元素对象
 */
createRoot(document.getElementById('root')).render(
  /**
   * StrictMode 包裹根组件
   * 在开发模式下会:
   * 1. 识别不安全的生命周期方法
   * 2. 检测意外的副作用
   * 3. 检测过时的 API
   * 4. 组件会渲染两次(仅开发模式),帮助发现副作用问题
   *
   * 类似于 Vue 3 开发工具的警告功能,但更严格
   */
  <StrictMode>
    {/*
      渲染 App 根组件
      JSX 语法:类似于 Vue 的模板语法,但实际上是 JavaScript
      <App /> 等同于 React.createElement(App)

      对比:
      Vue 3 模板: <App />
      React JSX: <App />

      看起来相同,但 React 的 JSX 需要编译成 JavaScript 函数调用
    */}
    <App />
  </StrictMode>,
)
App.jsx(根组件):
jsx
/**
 * 从 react 包中导入 useState Hook
 *
 * Hook 是 React 16.8 引入的新特性,让你在函数组件中使用状态和其他 React 特性
 *
 * 对比 Vue 3:
 * Vue 3 Composition API: import { ref } from 'vue'
 * React Hooks: import { useState } from 'react'
 *
 * 相似点:都是在函数式组件中管理状态
 * 不同点:
 * - Vue 3 使用 ref() 创建响应式数据
 * - React 使用 useState() 创建状态
 */
import { useState } from 'react'

/**
 * 导入图片资源
 *
 * 在 Vite 中,可以直接导入图片文件
 * 导入后得到的是图片的 URL 路径字符串
 *
 * 类似于 Vue 3 中:
 * import logo from './assets/logo.png'
 */
import reactLogo from './assets/react.svg'
import viteLogo from '/vite.svg' // 以 / 开头表示从 public 目录导入

/**
 * 导入组件样式
 * 这个样式只作用于当前组件相关的元素
 */
import './App.css'

/**
 * App 组件 - 函数组件写法
 *
 * React 组件的两种写法:
 * 1. 函数组件(推荐,现代写法)
 * 2. 类组件(旧写法,逐渐被淘汰)
 *
 * 对比 Vue 3:
 *
 * Vue 3 组件:
 * <script setup>
 * import { ref } from 'vue'
 * const count = ref(0)
 * </script>
 *
 * React 函数组件:
 * function App() {
 *   const [count, setCount] = useState(0)
 *   return (...)
 * }
 *
 * 主要区别:
 * - Vue 3 使用 <script setup> 语法糖,代码更简洁
 * - React 需要显式返回 JSX
 * - React 组件名必须大写开头(Pascal命名)
 */
function App() {
  /**
   * useState Hook - 状态管理
   *
   * 语法:const [状态变量, 更新函数] = useState(初始值)
   *
   * useState 返回一个数组,包含两个元素:
   * 1. count - 当前状态值(类似 Vue 的 count.value)
   * 2. setCount - 更新状态的函数(类似 Vue 的 count.value = newValue)
   *
   * 对比 Vue 3:
   *
   * Vue 3:
   * const count = ref(0)           // 创建响应式数据
   * count.value++                  // 修改需要 .value
   *
   * React:
   * const [count, setCount] = useState(0)  // 创建状态
   * setCount(count + 1)            // 通过 setCount 函数修改
   *
   * 重要区别:
   * - Vue 3 的 ref 是响应式对象,直接修改 .value
   * - React 的 state 是不可变的,必须通过 setState 函数更新
   * - React 的状态更新是异步的,可能会合并多次更新
   */
  const [count, setCount] = useState(0)

  /**
   * 返回 JSX (组件的渲染内容)
   *
   * JSX 是 JavaScript XML 的缩写,是 React 的模板语法
   * 看起来像 HTML,但实际是 JavaScript 表达式
   *
   * 对比 Vue 3:
   * Vue 3 使用 <template> 标签包裹模板
   * React 直接在 return 中返回 JSX
   */
  return (
    /**
     * Fragment (片段) - 空标签 <>...</>
     *
     * 用途:包裹多个子元素,但不会在 DOM 中创建额外节点
     *
     * 对比 Vue 3:
     * Vue 3: 可以直接写多个根元素(Vue 3.2+)
     * React: 必须有一个根元素,可以用 Fragment 避免额外的 div
     *
     * 完整写法:<React.Fragment>...</React.Fragment>
     * 简写:<>...</>
     *
     * 类似于 Vue 3 的 <template> 标签(但不完全一样)
     */
    <>
      <div>

        {/*
          target="_blank" 需要配合 rel="noopener noreferrer" 使用
          但这里省略了,不是最佳实践
        */}
        <a href="https://vite.dev" target="_blank">
          {/*
            JSX 中使用动态值需要用 {} 包裹

            属性对比:
            - class 在 JSX 中要写成 className (因为 class 是 JS 关键字)
            - for 在 JSX 中要写成 htmlFor

            Vue 3 vs React:
            Vue 3: <img :src="viteLogo" class="logo" />
            React: <img src={viteLogo} className="logo" />

            主要区别:
            - Vue 用 : 绑定动态属性
            - React 用 {} 包裹 JavaScript 表达式
          */}
          <img src={viteLogo} className="logo" alt="Vite logo" />
        </a>
        <a href="https://react.dev" target="_blank">
          <img src={reactLogo} className="logo react" alt="React logo" />
        </a>
      </div>

      <h1>Vite + React</h1>

      <div className="card">
        {/*
          事件处理 - onClick

          语法:onClick={事件处理函数}

          这里使用箭头函数调用 setCount:
          onClick={() => setCount((count) => count + 1)}

          详细解析:
          1. onClick={...} - 绑定点击事件
          2. () => ... - 箭头函数,点击时执行
          3. setCount(...) - 调用状态更新函数
          4. (count) => count + 1 - 函数式更新,推荐写法

          为什么用函数式更新?
          setCount(count + 1)     // ❌ 可能出现问题(基于旧值)
          setCount(c => c + 1)    // ✅ 推荐(总是基于最新值)

          对比 Vue 3:

          Vue 3:
          <button @click="count++">{{ count }}</button>
          或
          <button @click="increment">{{ count }}</button>

          React:
          <button onClick={() => setCount(c => c + 1)}>
            count is {count}
          </button>

          主要区别:
          - Vue 3 使用 @click 或 v-on:click
          - React 使用 onClick (驼峰命名)
          - Vue 3 可以直接修改响应式数据
          - React 必须使用 setState 函数
          - Vue 3 用 {{}} 插值
          - React 用 {} 插值
        */}
        <button onClick={() => setCount((count) => count + 1)}>
          count is {count}
        </button>

        <p>
          Edit <code>src/App.jsx</code> and save to test HMR
        </p>
      </div>

      <p className="read-the-docs">
        Click on the Vite and React logos to learn more
      </p>
    </>
  )
}

/**
 * 默认导出组件
 *
 * React 组件的导出方式:
 * 1. 默认导出:export default App (推荐)
 * 2. 命名导出:export { App } 或 export function App() {}
 *
 * 对比 Vue 3:
 * Vue 3 使用 <script setup> 时不需要显式导出
 * React 必须显式导出组件
 */
export default App
安装React DevTools
在Chrome或Edge浏览器中安装React DevTools扩展,用于调试React应用。
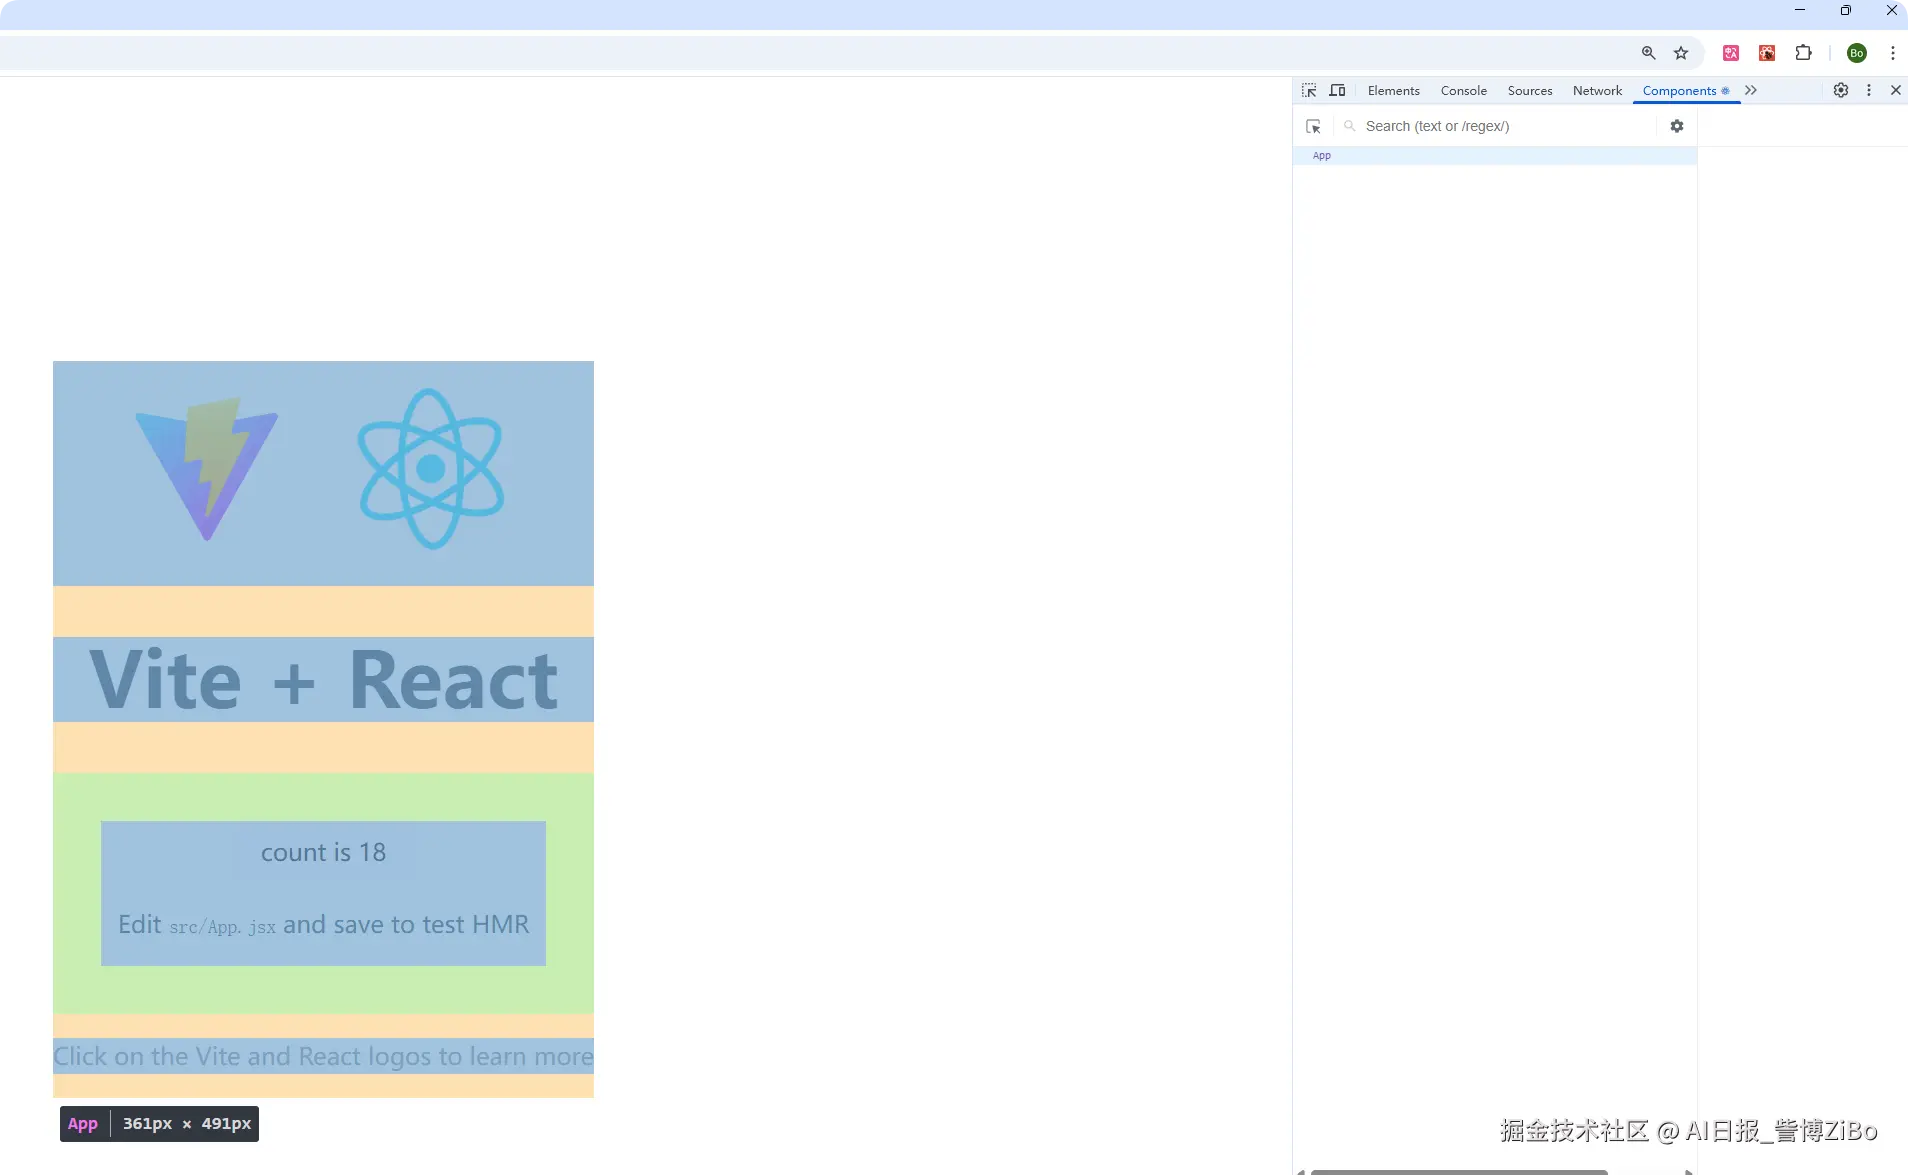
实践任务:
- 创建一个新的React项目
- 启动开发服务器
- 修改App.jsx中的内容,观察热更新效果
- 打开React DevTools查看组件树
效果演示:
2️⃣ JSX语法深入(1.5小时)
什么是JSX?
JSX = JavaScript + XML,是JavaScript的语法扩展 ,允许在JS中写类似HTML的标记。
关键理解:
- JSX不是字符串,也不是HTML
- JSX会被编译成
React.createElement()调用 - JSX本质上就是JavaScript表达式
JSX基础语法
1. 嵌入JavaScript表达式
jsx
const name = '訾博'
const age = 25

function Welcome() {
  return (
    <div>
      <h1>你好,{name}!</h1>
      <p>你今年 {age} 岁</p>
      <p>明年你将 {age + 1} 岁</p>
      <p>当前时间:{new Date().toLocaleTimeString()}</p>
    </div>
  )
}
2. JSX中的属性
jsx
// 字符串属性:直接用引号
<img src="avatar.jpg" alt="头像" />

// 动态属性:用花括号
const imageUrl = 'avatar.jpg'
<img src={imageUrl} alt="头像" />

// 注意:class要写成className(因为class是JS关键字)
<div className="container">内容</div>

// style是对象而不是字符串
<div style={{ color: 'red', fontSize: 16, marginTop: '10px' }}>
  红色文字
</div>
3. 条件渲染(没有v-if)
jsx
// 方式1:三元表达式
function Greeting({ isLogin }) {
  return (
    <div>
      {isLogin ? <h1>欢迎回来!</h1> : <h1>请先登录</h1>}
    </div>
  )
}

// 方式2:逻辑与运算符(适合只显示或不显示)
function Notification({ count }) {
  return (
    <div>
      {count > 0 && <span>你有 {count} 条新消息</span>}
    </div>
  )
}

// 方式3:提前return(适合多条件)
function UserStatus({ status }) {
  if (status === 'loading') {
    return <div>加载中...</div>
  }

  if (status === 'error') {
    return <div>出错了!</div>
  }

  return <div>加载完成</div>
}

// 方式4:立即执行函数(复杂逻辑)
function ComplexComponent({ value }) {
  return (
    <div>
      {(() => {
        if (value > 100) return '很大'
        if (value > 50) return '中等'
        return '很小'
      })()}
    </div>
  )
}
4. 列表渲染(没有v-for)
jsx
function TodoList() {
  const todos = [
    { id: 1, text: '学习React', done: false },
    { id: 2, text: '做项目', done: false },
    { id: 3, text: '休息', done: true }
  ]

  return (
    <ul>
      {todos.map(todo => (
        <li key={todo.id}>
          {todo.text} {todo.done ? '✅' : '⏳'}
        </li>
      ))}
    </ul>
  )
}
⚠️ key的重要性:
- key帮助React识别哪些元素改变了
- key必须在兄弟节点中唯一
- 不要用index作为key(除非列表不会重排)
- key应该是稳定的、可预测的
JSX与Vue Template对比
| Vue Template | React JSX | 说明 |
|---|---|---|
{{ message }} |
{message} |
插值表达式 |
v-if="isShow" |
{isShow && <div />} |
条件渲染 |
v-for="item in list" |
{list.map(item => ...)} |
列表渲染 |
:class="className" |
className={className} |
动态class |
:style="styleObj" |
style={styleObj} |
动态style |
@click="handler" |
onClick={handler} |
事件绑定 |
v-model="value" |
value={value} onChange={handler} |
双向绑定 |
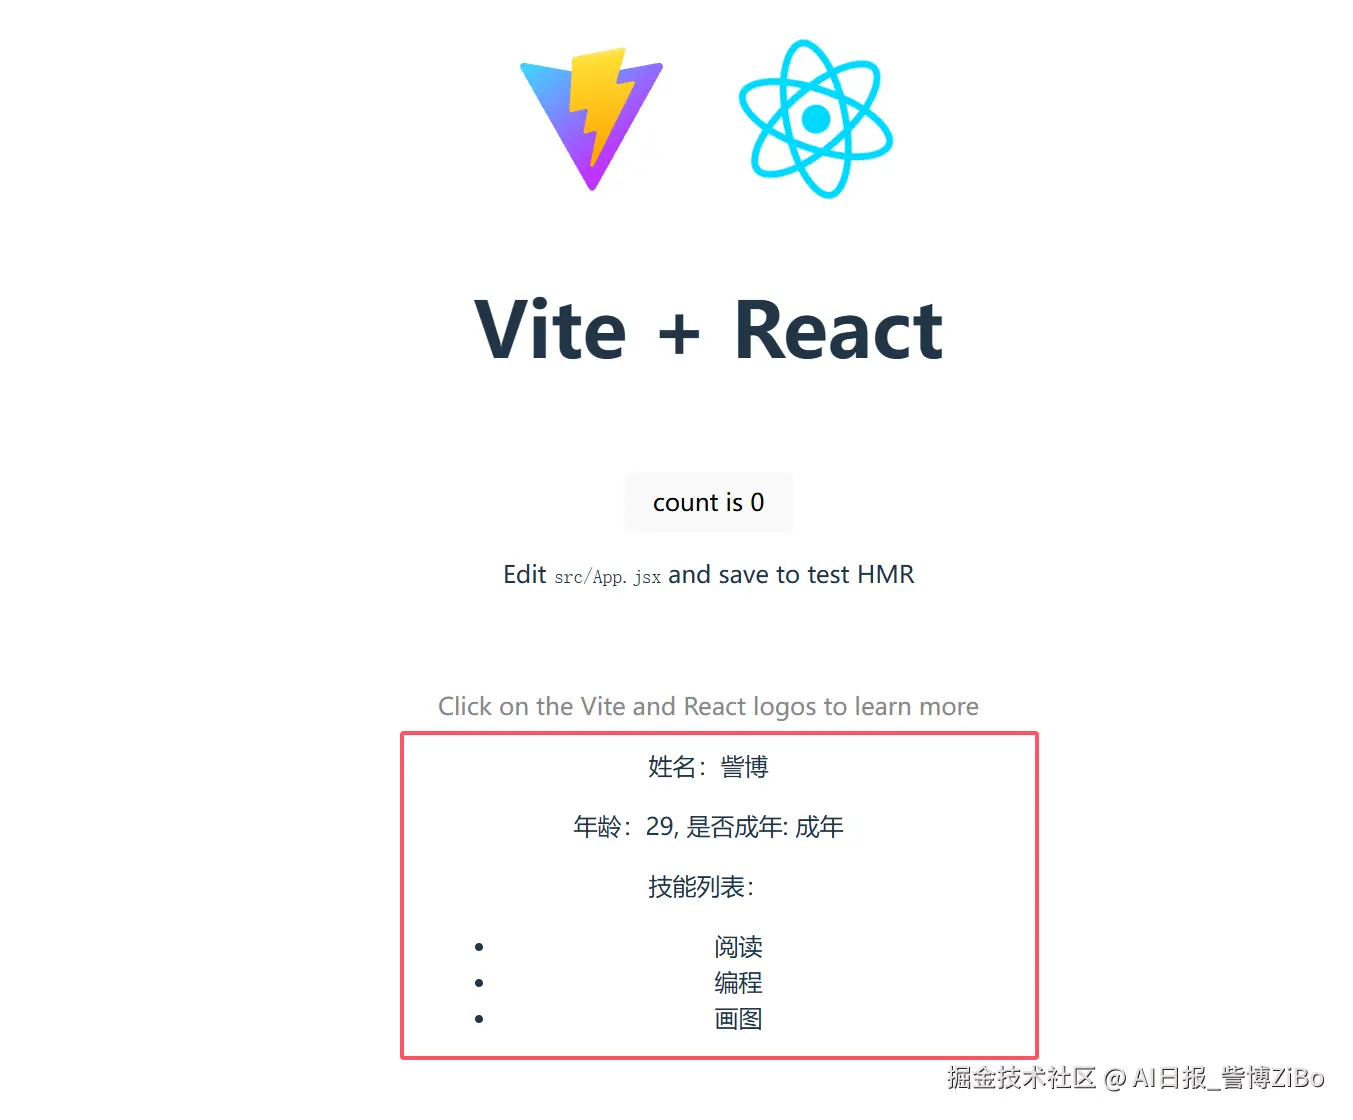
实践任务:
- 创建一个显示个人信息的组件,包含姓名、年龄、技能列表
- 根据年龄显示不同的称呼(未成年/成年)
- 用不同颜色标记不同技能等级
实践代码:
jsx
import { useState } from "react";

function UserInfo() {

    const [user] = useState({
        name: '訾博',
        age: 29,
        skills: [{ id: 1, name: '阅读' }, { id: 2, name: '编程' }, { id: 3, name: '画图' }]
    })

    return (
        <>
            <p>姓名:{user.name}</p>
            <p>年龄:{user.age}, 是否成年: { user.age > 18 ? '成年' : '未成年' }</p>
            <p>技能列表:</p>
            <ul>
                {
                    user.skills.map(skill => (
                        <li key={skill.id}>{skill.name}</li>
                    ))
                }
            </ul>
        </>
    );
}

export default UserInfo;
实践结果:
3️⃣ 组件基础(1.5小时)
函数组件
现代React推荐使用函数组件(配合Hooks),不再使用类组件。
基础组件定义:
jsx
// 组件名必须大写开头
function Welcome() {
  return <h1>Hello, React!</h1>
}

// 导出组件
export default Welcome

// 或者使用箭头函数
const Welcome = () => {
  return <h1>Hello, React!</h1>
}

export default Welcome
Props传递
Props类似于Vue的props,用于父组件向子组件传递数据。
基础用法:
jsx
// 父组件
function App() {
  return (
    <div>
      <Greeting name="訾博" age={25} />
      <Greeting name="张三" age={30} />
    </div>
  )
}

// 子组件(接收props)
function Greeting(props) {
  return (
    <div>
      <h2>你好,{props.name}!</h2>
      <p>年龄:{props.age}</p>
    </div>
  )
}
Props解构(推荐):
jsx
// 直接解构props
function Greeting({ name, age }) {
  return (
    <div>
      <h2>你好,{name}!</h2>
      <p>年龄:{age}</p>
    </div>
  )
}

// 设置默认值
function Greeting({ name = '游客', age = 0 }) {
  return (
    <div>
      <h2>你好,{name}!</h2>
      <p>年龄:{age}</p>
    </div>
  )
}

// 使用剩余参数
function Button({ children, ...restProps }) {
  return <button {...restProps}>{children}</button>
}

// 使用方式:<Button className="primary" onClick={handler}>点击</Button>
Props的特点:
-
只读性:不能修改props(单向数据流)
jsxfunction Greeting({ name }) { // ❌ 错误:不能修改props // name = '新名字' // ✅ 正确:需要修改时用state(明天学习) return <h1>{name}</h1> } -
可以传递任何类型:
jsx<Component string="文本" number={123} boolean={true} array={[1, 2, 3]} object={{ name: '张三' }} function={() => console.log('click')} element={<span>元素</span>} /> -
children特殊prop:
jsxfunction Card({ children }) { return ( <div className="card"> {children} </div> ) } // 使用 <Card> <h2>标题</h2> <p>内容</p> </Card>
组件组合
React推崇组合而非继承。
jsx
// 容器组件
function Container({ children }) {
return <div className="container">{children}</div>
}
// 布局组件
function Layout({ header, sidebar, content }) {
return (
<div className="layout">
<header>{header}</header>
<aside>{sidebar}</aside>
<main>{content}</main>
</div>
)
}
// 使用
function App() {
return (
<Layout
header={<Header />}
sidebar={<Sidebar />}
content={<Content />}
/>
)
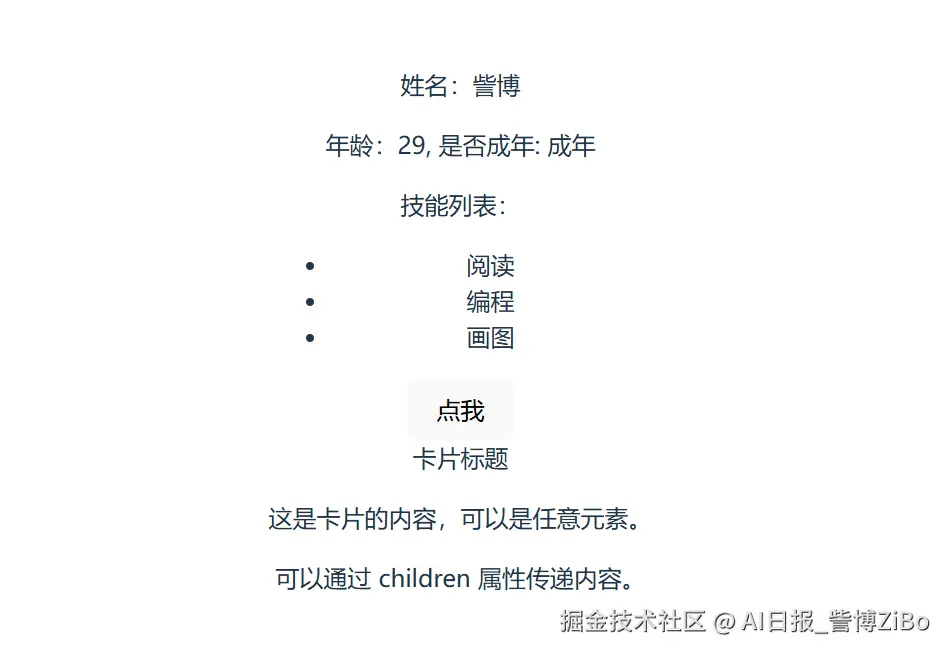
}实践任务:
- 创建一个UserCard组件,接收用户信息作为props
- 创建一个Button组件,可以接收不同的样式类型
- 创建一个Card容器组件,可以包裹任意内容
实践代码:
jsx
// UserCard组件
function UserCard({ name, age, skills}) {
    return (
        <>
            <p>姓名:{name}</p>
            <p>年龄:{age}, 是否成年: { age > 18 ? '成年' : '未成年' }</p>
            <p>技能列表:</p>
            <ul>
                {
                    skills.map(skill => (
                        <li key={skill.id}>{skill.}</li>
                    ))
                }
            </ul>
        </>
    );
}

export default UserCard

// Button组件
function Button({ func, ele}) {
    return (
        <>
            <button onClick={func}>{ele}</button>
        </>
    );
}

export default Button

// Card组件
function Card({ title, children }) {
    return (
        <>
            <div className="card-title">{title}</div>
            <div className="card-body">{children}</div>
        </>
    );
}

export default Card

// 使用演示代码
import './App.css'

import UserCard from './components/UserCard'
import Button from './components/Button'
import Card from './components/Card'

function App() {
  return (
    <>
      {/* UserCard */}
      <UserCard name="訾博" age="29" skills={
        [
          { id: 1, name: '阅读' },
          { id: 2, name: '编程' },
          { id: 3, name: '画图' }
        ]
      } />
      {/* Button */}
      <Button func={() => alert('按钮被点击了')} ele={<span>点我</span>} />
      {/* Card */}
      <Card title="卡片标题">
        <p>这是卡片的内容,可以是任意元素。</p>
        <p>可以通过 children 属性传递内容。</p>
      </Card>
    </>
  )
}

export default App
实践结果:
🌆 下午课程(3-4小时)
4️⃣ 条件渲染实战(1小时)
多条件渲染
jsx
function OrderStatus({ status }) {
  // 方式1:多个if语句
  if (status === 'pending') {
    return <span className="status-pending">待支付</span>
  }
  if (status === 'paid') {
    return <span className="status-paid">已支付</span>
  }
  if (status === 'shipped') {
    return <span className="status-shipped">已发货</span>
  }
  if (status === 'completed') {
    return <span className="status-completed">已完成</span>
  }
  return <span className="status-unknown">未知状态</span>
}

// 方式2:switch语句
function OrderStatus({ status }) {
  let content

  switch (status) {
    case 'pending':
      content = <span className="status-pending">待支付</span>
      break
    case 'paid':
      content = <span className="status-paid">已支付</span>
      break
    case 'shipped':
      content = <span className="status-shipped">已发货</span>
      break
    case 'completed':
      content = <span className="status-completed">已完成</span>
      break
    default:
      content = <span className="status-unknown">未知状态</span>
  }

  return content
}

// 方式3:对象映射(推荐)
function OrderStatus({ status }) {
  const statusMap = {
    pending: <span className="status-pending">待支付</span>,
    paid: <span className="status-paid">已支付</span>,
    shipped: <span className="status-shipped">已发货</span>,
    completed: <span className="status-completed">已完成</span>
  }

  return statusMap[status] || <span className="status-unknown">未知状态</span>
}
条件渲染最佳实践
jsx
// ✅ 好的做法:清晰的条件逻辑
function ProductCard({ product, isLoggedIn, isPremium }) {
// 提前处理复杂条件
const canPurchase = isLoggedIn && product.stock > 0
const showDiscount = isPremium && product.discount > 0
return (
<div className="product-card">
<h3>{product.name}</h3>
<p className="price">¥{product.price}</p>
{showDiscount && (
<span className="discount">-{product.discount}%</span>
)}
{canPurchase ? (
<button>立即购买</button>
) : (
<button disabled>暂不可购买</button>
)}
</div>
)
}
// ❌ 避免:过于复杂的嵌套条件
function BadExample({ a, b, c, d }) {
return (
<div>
{a ? (
b ? (
c ? <ComponentA /> : <ComponentB />
) : (
d ? <ComponentC /> : <ComponentD />
)
) : (
<ComponentE />
)}
</div>
)
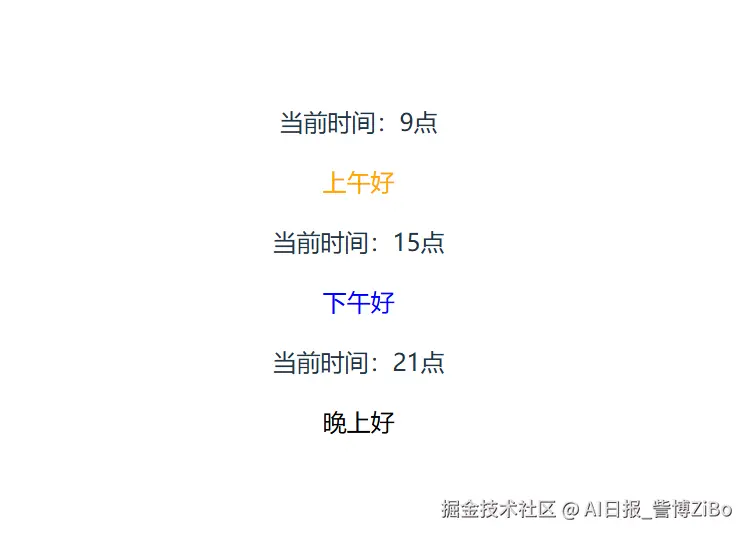
}实践任务: 创建一个根据时间显示不同问候语的组件,早上/中午/晚上显示不同内容和样式
实践代码:
jsx
// TimeShow 组件
function TimeShow({ hour }) {
    const morning = <p style={{
        color: 'orange'
    }}>上午好</p>
    const afternoon = <p style={{
        color: 'blue'
    }}>下午好</p>
    const night = <p style={{
        color: 'black'
    }}>晚上好</p>

    return (
        <>
            <div>当前时间:{hour}点</div>
            <div>
                {hour < 12 ? morning : hour < 18 ? afternoon : night}
            </div>
        </>
    )
}

export default TimeShow

// return 语句写法2
return (
    <>
        <div>当前时间:{hour}点</div>
        <div>
            {
            (() => {
                if (hour < 12) {
                    return morning
                } else if (hour < 18) {
                    return afternoon
                } else {
                    return night
                }
            })()
        }
        </div>
    </>
)

// 组件使用
import './App.css'

import TimeShow from './components/TimeShow'

function App() {
  return (
    <>
      {/* TimeShow */}
      <TimeShow hour='9' />
      <TimeShow hour='15' />
      <TimeShow hour='21' />
    </>
  )
}

export default App
实践结果:
5️⃣ 列表渲染实战(1小时)
基础列表渲染
jsx
function UserList() {
  const users = [
    { id: 1, name: '张三', age: 25, role: 'admin' },
    { id: 2, name: '李四', age: 30, role: 'user' },
    { id: 3, name: '王五', age: 28, role: 'user' }
  ]

  return (
    <ul>
      {users.map(user => (
        <li key={user.id}>
          {user.name} - {user.age}岁 - {user.role}
        </li>
      ))}
    </ul>
  )
}
列表过滤
jsx
function FilteredUserList() {
  const users = [
    { id: 1, name: '张三', age: 25, active: true },
    { id: 2, name: '李四', age: 30, active: false },
    { id: 3, name: '王五', age: 28, active: true }
  ]

  // 过滤出活跃用户
  const activeUsers = users.filter(user => user.active)

  return (
    <ul>
      {activeUsers.map(user => (
        <li key={user.id}>{user.name}</li>
      ))}
    </ul>
  )
}
列表排序
jsx
function SortedProductList() {
  const products = [
    { id: 1, name: '商品A', price: 99 },
    { id: 2, name: '商品B', price: 199 },
    { id: 3, name: '商品C', price: 49 }
  ]

  // 按价格排序
  const sortedProducts = [...products].sort((a, b) => a.price - b.price)

  return (
    <ul>
      {sortedProducts.map(product => (
        <li key={product.id}>
          {product.name} - ¥{product.price}
        </li>
      ))}
    </ul>
  )
}
空列表处理
jsx
function ProductList({ products }) {
  // 处理空列表
  if (products.length === 0) {
    return <div className="empty">暂无商品</div>
  }

  return (
    <ul>
      {products.map(product => (
        <li key={product.id}>{product.name}</li>
      ))}
    </ul>
  )
}

// 或者使用条件渲染
function ProductList({ products }) {
  return (
    <>
      {products.length === 0 ? (
        <div className="empty">暂无商品</div>
      ) : (
        <ul>
          {products.map(product => (
            <li key={product.id}>{product.name}</li>
          ))}
        </ul>
      )}
    </>
  )
}
复杂列表示例
jsx
function StudentList() {
const students = [
{ id: 1, name: '张三', score: 85, passed: true },
{ id: 2, name: '李四', score: 92, passed: true },
{ id: 3, name: '王五', score: 58, passed: false },
{ id: 4, name: '赵六', score: 75, passed: true }
]
// 统计信息
const passedCount = students.filter(s => s.passed).length
const avgScore = students.reduce((sum, s) => sum + s.score, 0) / students.length
return (
<div>
<div className="summary">
<p>总人数:{students.length}</p>
<p>及格人数:{passedCount}</p>
<p>平均分:{avgScore.toFixed(2)}</p>
</div>
<table>
<thead>
<tr>
<th>姓名</th>
<th>分数</th>
<th>状态</th>
</tr>
</thead>
<tbody>
{students.map(student => (
<tr key={student.id} className={student.passed ? 'passed' : 'failed'}>
<td>{student.name}</td>
<td>{student.score}</td>
<td>{student.passed ? '及格' : '不及格'}</td>
</tr>
))}
</tbody>
</table>
</div>
)
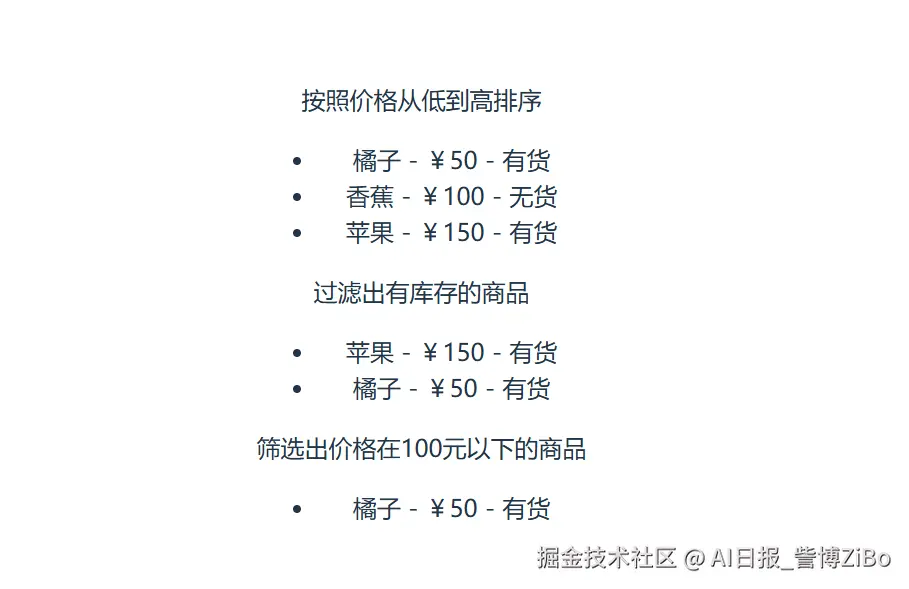
}实践任务: 创建一个商品列表组件,支持按价格过滤、排序,显示库存状态
实践代码:
jsx
// 商品列表组件
function GoodList({ tag }) {
    // 商品列表数据
    const goods = [
        { id: 1, name: '苹果', price: 150, inStock: true },
        { id: 2, name: '香蕉', price: 100, inStock: false },
        { id: 3, name: '橘子', price: 50, inStock: true }
    ]

    // 按照价格从低到高排序
    const sg = [...goods].sort((a, b) => a.price - b.price);

    // 过滤出有库存的商品
    const filteredGoods = [...goods].filter(good => good.inStock);

    // 筛选出价格在100元以下的商品
    const cheapGoods = [...goods].filter(good => good.price < 100);

    return (
        <div>
            {
                tag === 1 ? (
                    <>
                        <p>按照价格从低到高排序</p>
                        <ul>
                            {sg.map(good => (
                                <li key={good.id}>{good.name} - ¥{good.price} - {good.inStock ? '有货' : '无货'}</li>
                            ))}
                        </ul>
                    </>
                ) : tag === 2 ? (
                    <>
                        <p>过滤出有库存的商品</p>
                        <ul>
                            {filteredGoods.map(good => (
                                <li key={good.id}>{good.name} - ¥{good.price} - {good.inStock ? '有货' : '无货'}</li>
                            ))}
                        </ul>
                    </>
                ) : (
                    <>
                        <p>筛选出价格在100元以下的商品</p>
                        <ul>
                            {cheapGoods.map(good => (
                                <li key={good.id}>{good.name} - ¥{good.price} - {good.inStock ? '有货' : '无货'}</li>
                            ))}
                        </ul>
                    </>
                )
            }
        </div>
    )
}

export default GoodList

// 使用演示
import './App.css'

import GoodList from './components/GoodList'

function App() {
  return (
    <>
      {/* GoodList */}
      <GoodList tag={1} />
      <GoodList tag={2} />
      <GoodList tag={3} />
    </>
  )
}

export default App
实践结果:
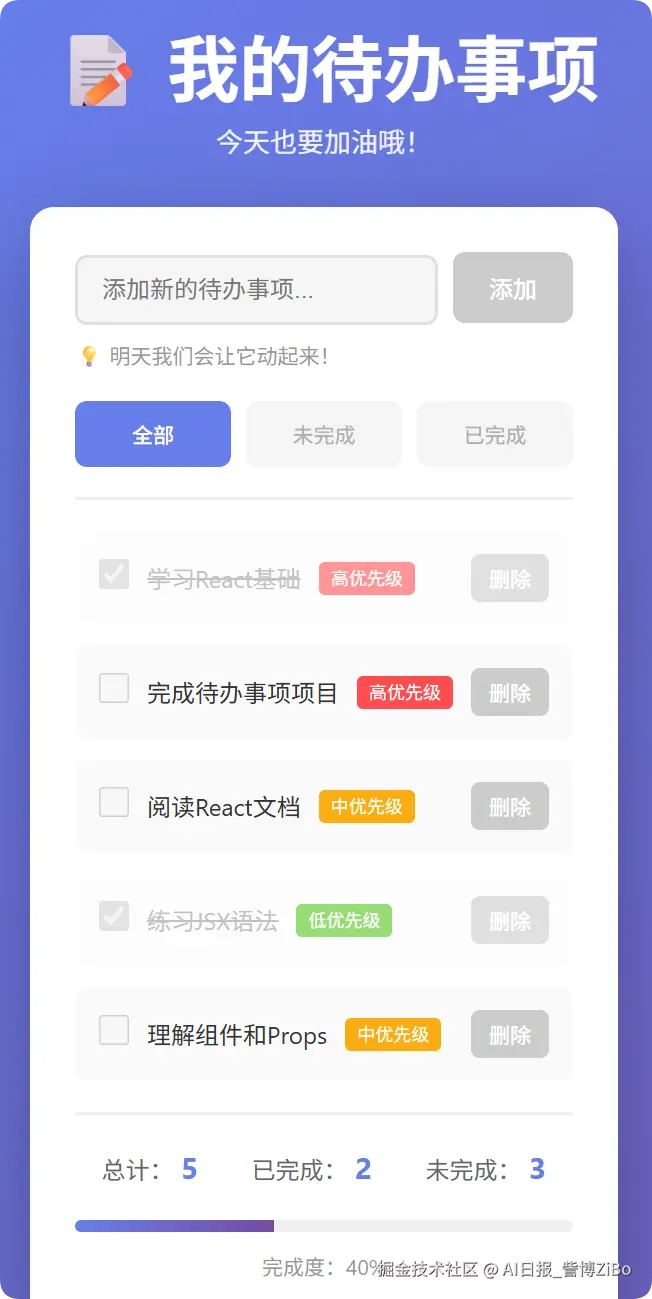
6️⃣ 实践项目:待办事项列表(2小时)
项目需求
创建一个静态版本的待办事项列表应用,包含以下功能:
- 显示待办事项列表
- 显示完成/未完成状态
- 统计总数、已完成数、未完成数
- 根据状态筛选显示(全部/未完成/已完成)
- 优先级标签显示
组件结构设计
scss
TodoApp (容器组件)
├── Header (头部标题)
├── TodoInput (输入框 - 暂不实现功能)
├── FilterBar (筛选栏)
├── TodoList (列表容器)
│   └── TodoItem (单个待办项)
└── Footer (统计信息)
完整代码实现
准备数据(App.jsx):
jsx
import './App.css'
import Header from './components/Header'
import TodoInput from './components/TodoInput'
import FilterBar from './components/FilterBar'
import TodoList from './components/TodoList'
import Footer from './components/Footer'

function App() {
  // 模拟数据(明天会用useState管理)
  const todos = [
    { id: 1, text: '学习React基础', completed: true, priority: 'high' },
    { id: 2, text: '完成待办事项项目', completed: false, priority: 'high' },
    { id: 3, text: '阅读React文档', completed: false, priority: 'medium' },
    { id: 4, text: '练习JSX语法', completed: true, priority: 'low' },
    { id: 5, text: '理解组件和Props', completed: false, priority: 'medium' }
  ]

  // 当前筛选条件(明天会用useState管理)
  const currentFilter = 'all' // all | active | completed

  // 根据筛选条件过滤todos
  const filteredTodos = todos.filter(todo => {
    if (currentFilter === 'active') return !todo.completed
    if (currentFilter === 'completed') return todo.completed
    return true
  })

  // 统计数据
  const stats = {
    total: todos.length,
    completed: todos.filter(t => t.completed).length,
    active: todos.filter(t => !t.completed).length
  }

  return (
    <div className="app">
      <Header />
      <div className="todo-container">
        <TodoInput />
        <FilterBar currentFilter={currentFilter} />
        <TodoList todos={filteredTodos} />
        <Footer stats={stats} />
      </div>
    </div>
  )
}

export default App
创建components目录和各个组件:
components/Header.jsx:
jsx
function Header() {
  return (
    <header className="header">
      <h1>📝 我的待办事项</h1>
      <p>今天也要加油哦!</p>
    </header>
  )
}

export default Header
components/TodoInput.jsx:
jsx
function TodoInput() {
  return (
    <div className="todo-input">
      <input
        type="text"
        placeholder="添加新的待办事项..."
        disabled
      />
      <button disabled>添加</button>
      <p className="hint">💡 明天我们会让它动起来!</p>
    </div>
  )
}

export default TodoInput
components/FilterBar.jsx:
jsx
function FilterBar({ currentFilter }) {
  const filters = [
    { key: 'all', label: '全部' },
    { key: 'active', label: '未完成' },
    { key: 'completed', label: '已完成' }
  ]

  return (
    <div className="filter-bar">
      {filters.map(filter => (
        <button
          key={filter.key}
          className={currentFilter === filter.key ? 'active' : ''}
          disabled
        >
          {filter.label}
        </button>
      ))}
    </div>
  )
}

export default FilterBar
components/TodoList.jsx:
jsx
import TodoItem from './TodoItem'

function TodoList({ todos }) {
  if (todos.length === 0) {
    return (
      <div className="empty-state">
        <p>🎉 暂无待办事项</p>
      </div>
    )
  }

  return (
    <ul className="todo-list">
      {todos.map(todo => (
        <TodoItem key={todo.id} todo={todo} />
      ))}
    </ul>
  )
}

export default TodoList
components/TodoItem.jsx:
jsx
function TodoItem({ todo }) {
  // 优先级颜色映射
  const priorityColors = {
    high: '#ff4d4f',
    medium: '#faad14',
    low: '#52c41a'
  }

  // 优先级文本映射
  const priorityLabels = {
    high: '高',
    medium: '中',
    low: '低'
  }

  return (
    <li className={`todo-item ${todo.completed ? 'completed' : ''}`}>
      <div className="todo-check">
        <input
          type="checkbox"
          checked={todo.completed}
          disabled
        />
      </div>

      <div className="todo-content">
        <span className="todo-text">{todo.text}</span>
        <span
          className="todo-priority"
          style={{
            backgroundColor: priorityColors[todo.priority],
            color: 'white',
            padding: '2px 8px',
            borderRadius: '4px',
            fontSize: '12px'
          }}
        >
          {priorityLabels[todo.priority]}优先级
        </span>
      </div>

      <div className="todo-actions">
        <button className="btn-delete" disabled>删除</button>
      </div>
    </li>
  )
}

export default TodoItem
components/Footer.jsx:
jsx
function Footer({ stats }) {
  return (
    <footer className="footer">
      <div className="stats">
        <span>总计:<strong>{stats.total}</strong></span>
        <span>已完成:<strong>{stats.completed}</strong></span>
        <span>未完成:<strong>{stats.active}</strong></span>
      </div>

      <div className="progress">
        <div className="progress-bar">
          <div
            className="progress-fill"
            style={{
              width: `${stats.total > 0 ? (stats.completed / stats.total * 100) : 0}%`
            }}
          />
        </div>
        <span className="progress-text">
          完成度:{stats.total > 0 ? Math.round(stats.completed / stats.total * 100) : 0}%
        </span>
      </div>
    </footer>
  )
}

export default Footer
样式文件(App.css)
css
* {
  margin: 0;
  padding: 0;
  box-sizing: border-box;
}

body {
  font-family: -apple-system, BlinkMacSystemFont, 'Segoe UI', 'Roboto', sans-serif;
  background: linear-gradient(135deg, #667eea 0%, #764ba2 100%);
  min-height: 100vh;
  padding: 20px;
}

.app {
  max-width: 800px;
  margin: 0 auto;
}

/* Header */
.header {
  text-align: center;
  color: white;
  margin-bottom: 30px;
}

.header h1 {
  font-size: 48px;
  margin-bottom: 10px;
}

.header p {
  font-size: 18px;
  opacity: 0.9;
}

/* Todo Container */
.todo-container {
  background: white;
  border-radius: 16px;
  padding: 30px;
  box-shadow: 0 20px 60px rgba(0, 0, 0, 0.3);
}

/* Todo Input */
.todo-input {
  margin-bottom: 20px;
}

.todo-input input {
  width: calc(100% - 90px);
  padding: 12px 16px;
  font-size: 16px;
  border: 2px solid #e0e0e0;
  border-radius: 8px;
  outline: none;
  transition: border-color 0.3s;
}

.todo-input input:focus {
  border-color: #667eea;
}

.todo-input input:disabled {
  background: #f5f5f5;
  cursor: not-allowed;
}

.todo-input button {
  width: 80px;
  padding: 12px;
  margin-left: 10px;
  font-size: 16px;
  background: #667eea;
  color: white;
  border: none;
  border-radius: 8px;
  cursor: pointer;
  transition: background 0.3s;
}

.todo-input button:hover:not(:disabled) {
  background: #5568d3;
}

.todo-input button:disabled {
  background: #ccc;
  cursor: not-allowed;
}

.todo-input .hint {
  margin-top: 10px;
  font-size: 14px;
  color: #999;
}

/* Filter Bar */
.filter-bar {
  display: flex;
  gap: 10px;
  margin-bottom: 20px;
  padding-bottom: 20px;
  border-bottom: 2px solid #f0f0f0;
}

.filter-bar button {
  flex: 1;
  padding: 10px;
  font-size: 14px;
  background: #f5f5f5;
  border: 2px solid transparent;
  border-radius: 8px;
  cursor: pointer;
  transition: all 0.3s;
}

.filter-bar button.active {
  background: #667eea;
  color: white;
  border-color: #667eea;
}

.filter-bar button:hover:not(:disabled):not(.active) {
  background: #e8e8e8;
}

/* Todo List */
.todo-list {
  list-style: none;
  margin-bottom: 20px;
}

.empty-state {
  text-align: center;
  padding: 60px 20px;
  color: #999;
  font-size: 18px;
}

/* Todo Item */
.todo-item {
  display: flex;
  align-items: center;
  gap: 12px;
  padding: 16px;
  margin-bottom: 12px;
  background: #fafafa;
  border-radius: 8px;
  transition: all 0.3s;
}

.todo-item:hover {
  background: #f0f0f0;
  transform: translateX(4px);
}

.todo-item.completed {
  opacity: 0.6;
}

.todo-item.completed .todo-text {
  text-decoration: line-through;
  color: #999;
}

.todo-check input[type="checkbox"] {
  width: 20px;
  height: 20px;
  cursor: pointer;
}

.todo-content {
  flex: 1;
  display: flex;
  align-items: center;
  gap: 12px;
}

.todo-text {
  font-size: 16px;
  color: #333;
}

.todo-priority {
  font-size: 12px;
  white-space: nowrap;
}

.todo-actions button {
  padding: 6px 12px;
  font-size: 14px;
  background: #ff4d4f;
  color: white;
  border: none;
  border-radius: 6px;
  cursor: pointer;
  transition: background 0.3s;
}

.todo-actions button:hover:not(:disabled) {
  background: #ff7875;
}

.todo-actions button:disabled {
  background: #ccc;
  cursor: not-allowed;
}

/* Footer */
.footer {
  padding-top: 20px;
  border-top: 2px solid #f0f0f0;
}

.stats {
  display: flex;
  justify-content: space-around;
  margin-bottom: 20px;
  font-size: 16px;
  color: #666;
}

.stats strong {
  color: #667eea;
  font-size: 20px;
  margin-left: 5px;
}

.progress {
  text-align: center;
}

.progress-bar {
  width: 100%;
  height: 8px;
  background: #f0f0f0;
  border-radius: 4px;
  overflow: hidden;
  margin-bottom: 10px;
}

.progress-fill {
  height: 100%;
  background: linear-gradient(90deg, #667eea 0%, #764ba2 100%);
  transition: width 0.3s ease;
}

.progress-text {
  font-size: 14px;
  color: #999;
}
运行结果
📝 今日总结
关键知识点
-
JSX = JavaScript + XML
- 用
{}嵌入JavaScript表达式 className代替class,style用对象- 条件渲染用三元表达式或
&& - 列表渲染用
map(),必须提供key
- 用
-
函数组件
- 组件名首字母大写
- 通过props接收数据
- props只读,不可修改
-
Vue → React思维转换
- 忘掉指令,拥抱JavaScript
- 一切皆JavaScript表达式
完成检查清单
- ✅ 创建React项目并理解项目结构
- ✅ 掌握JSX基础语法
- ✅ 理解函数组件和Props传递
- ✅ 实现条件渲染(三元、逻辑与、提前return)
- ✅ 实现列表渲染(map、key)
- ✅ 完成待办事项静态版本
📚 课后作业
必做
-
完善待办事项样式
- 调整颜色方案
- 添加hover效果
- 优化响应式布局
-
添加功能
- 显示创建时间
- 添加标签分类
- 显示紧急程度图标
选做
-
创建新组件
- 个人信息卡片(头像、姓名、简介)
- 文章列表(标题、摘要、标签)
- 天气卡片(城市、温度、图标)
-
思考题
- 如果要让待办事项支持编辑,需要什么?
- 如何实现拖拽排序?
- 组件如何与后端API交互?
🚀 明天预告
Day 2: 状态管理与事件处理
明天我们将学习:
useStateHook - 让组件拥有自己的状态- 事件处理 - 响应用户操作
- 表单处理 - 处理用户输入
- 组件通信 - 父传子、子传父
完成后,我们的待办事项将真正"动起来"!
加油,訾博!第一天的学习辛苦了! 💪