
前言
在 AR(增强现实)开发领域,复杂的环境配置、陌生的空间逻辑往往让新手望而却步。而 Rokid 推出的 JSAR(可嵌入空间 Web 运行时),恰好为 Web 开发者打开了一扇轻量化 AR 开发的大门 ------ 它无需掌握 Unity、Unreal 等重型引擎,只需用熟悉的 JavaScript/TypeScript 技术,就能快速开发可嵌入空间的 AR 小部件。
作为一名前端开发者,我一直好奇如何将 Web 技术与 AR 结合。这次通过 JSAR 开发 "AR 3D 魔方" 小部件,从环境搭建到最终在 Rokid 设备上运行,全程仅用了不到 2 小时,且没有遇到复杂的技术壁垒。本文将完整记录这次开发经历,带大家一步步实现一个能在桌面旋转的 AR 魔方,让你快速入门 Rokid JSAR 开发。
初识 Rokid JSAR
什么是 Rokid JSAR
Rokid JSAR 全称为 Rokid 可嵌入空间 Web 运行时,是 Rokid 为 YodaOS-Master 系统打造的轻量化 AR 开发框架。它的核心能力是将 Web 技术(HTML/CSS/JS/TS)与空间场景结合,让开发者能快速开发 "空间小部件"------ 这些小部件可嵌入到 AR 桌面、场景中,既可以是 2D 信息面板,也可以是 3D 交互模型(如本次的地球仪)。
简单来说,JSAR 解决了 "Web 开发者如何低成本入门 AR" 的问题:无需学习新的编程语言,只需用 Web 技术栈,就能让自己的作品 "进入" AR 空间。
JSAR 的核心功能
对新手最友好的核心功能,主要有以下 5 点:
-
Web 技术兼容:支持标准 Web API(如
fetch、Canvas)和 TypeScript,同时兼容 Babylon.js(轻量级 3D 引擎),Web 开发者可无缝迁移技术能力; -
VS Code 一体化开发:通过 JSAR DevTools 插件,在 VS Code 内就能完成代码编辑、3D 场景预览、真机调试,无需切换多工具;
-
空间隔离安全:每个 JSAR 小部件运行在独立沙箱中,不会相互干扰,避免了多应用冲突问题;
-
轻量化打包:最终产物为
.idp压缩包,包含所有资源(模型、脚本、图片),体积控制在 10MB 内,适合 AR 设备加载; -
多端预览:支持 VS Code 内置预览、Web 浏览器预览、Rokid 设备(如 Rokid Max)实时预览,开发过程中可快速验证效果。
- 使用场景
作为新手,优先选择以下场景入手 JSAR 开发,避开复杂需求:
-
推荐场景:
-
桌面装饰小部件:如 3D 地球仪、动态宠物、星座模型;
-
信息展示工具:如实时股票面板、天气卡片、待办事项列表;
-
轻交互工具:如计算器、单位转换器(2D 界面 + 简单逻辑)。
-
-
不推荐场景:
-
独立 AR 游戏(如 3D 射击游戏):JSAR 不支持复杂物理引擎;
-
大型场景应用(如虚拟展厅):小部件设计初衷是 "轻量化",不适合承载大量资源;
-
封闭交互体验(如需要全屏独占的应用):JSAR 小部件需嵌入现有 AR 空间,无法独占设备。
-
配置开发环境
JSAR 开发环境配置非常简单,全程围绕 VS Code 展开,核心是安装 3 个工具:VS Code、Node.js、JSAR DevTools 插件。
- 安装 Visual Studio Code
-
版本要求:≥ 1.80.0(低于此版本可能无法兼容 JSAR 插件)
若已安装 VS Code,可通过 "帮助 → 关于" 查看版本,低于要求则点击 "检查更新" 升级。
- 安装 Node.js
JSAR 项目依赖 npm 管理包,需先安装 Node.js:
-
下载地址:Node.js 官网
-
版本要求:≥ 18.0.0(推荐安装 LTS 版本,如 20.x,稳定性更高)
-
验证安装:打开 VS Code 终端(Ctrl + `),输入以下命令,若能显示版本号则安装成功:
node -v
npm -v
- 安装 JSAR DevTools 插件
这是 JSAR 开发的核心插件,支持项目创建、场景预览、打包,有两种安装方式:
(1)通过 VS Code 商店安装
-
打开 VS Code,点击左侧 "拓展" 图标(或按 Ctrl + Shift + X);
-
在搜索框输入 "JSAR DevTools",找到作者为 "RokidMCreativeLab" 的插件;
-
点击 "安装",等待安装完成后重启 VS Code 生效。
(2)通过 .vsix 安装(推荐)
-
下载 .vsix 安装包:vscode-jsar-devtools-latest.vsix;
-
打开vscode的拓展,后点击从vsix安装...

- 选择下载好的 .vsix 文件,等待安装完成并重启 VS Code。
安装完成后,在 VS Code 左侧会出现 "JSAR" 图标,说明插件已就绪。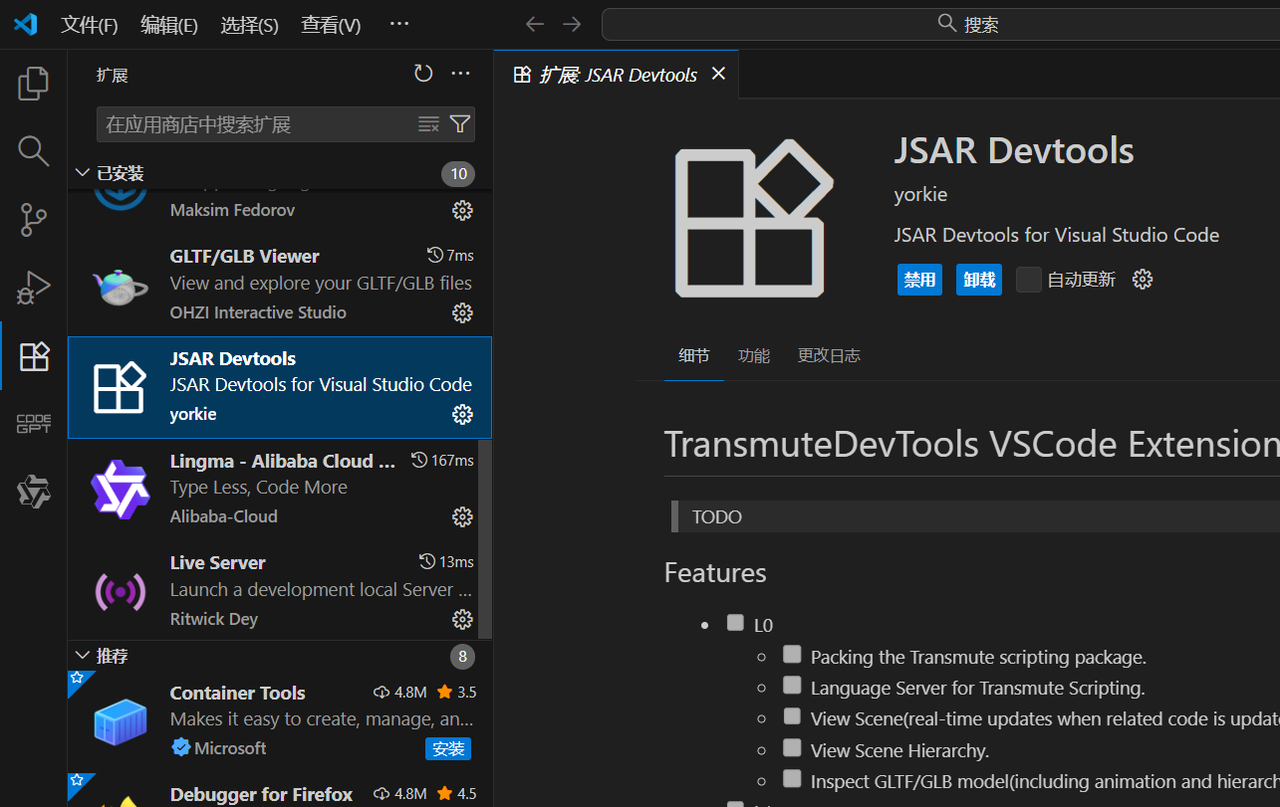
JSAR 小部件开发实践------3D魔方
项目概述
这是一个专为JSAR(JavaScript Augmented Reality)运行时环境设计的原生3D应用。该项目充分利用JSAR的平台特性,在AR/VR设备上提供高性能的3D魔方交互体验,展示了如何在跨平台扩展现实环境中构建沉浸式3D应用
项目结构解析
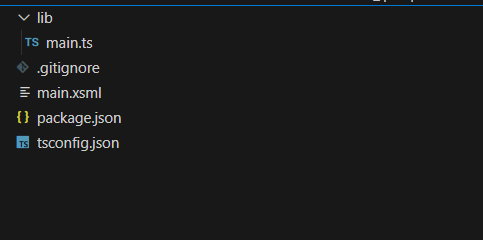
这就是目录结构,这需要简单的四个个文件。
pasckage.json
package.json 是项目的配置文件,记录项目名称、版本、依赖等信息,用于管理项目依赖和配置。
TypeScript
{
"name": "your-jsar-widget-name",
"displayName": "Display Name",
"version": "1.0.0",
"description": "The template widget",
"main": "main.xsml",
"scripts": {},
"files": [
"main.xsml",
"lib/*.ts",
],
"author": "Yorkie Liu <yorkiefixer@gmail.com>",
"license": "Apache-2.0",
"devDependencies": {
"@yodaos-jsar/types": "^0.2.1-rc0"
}
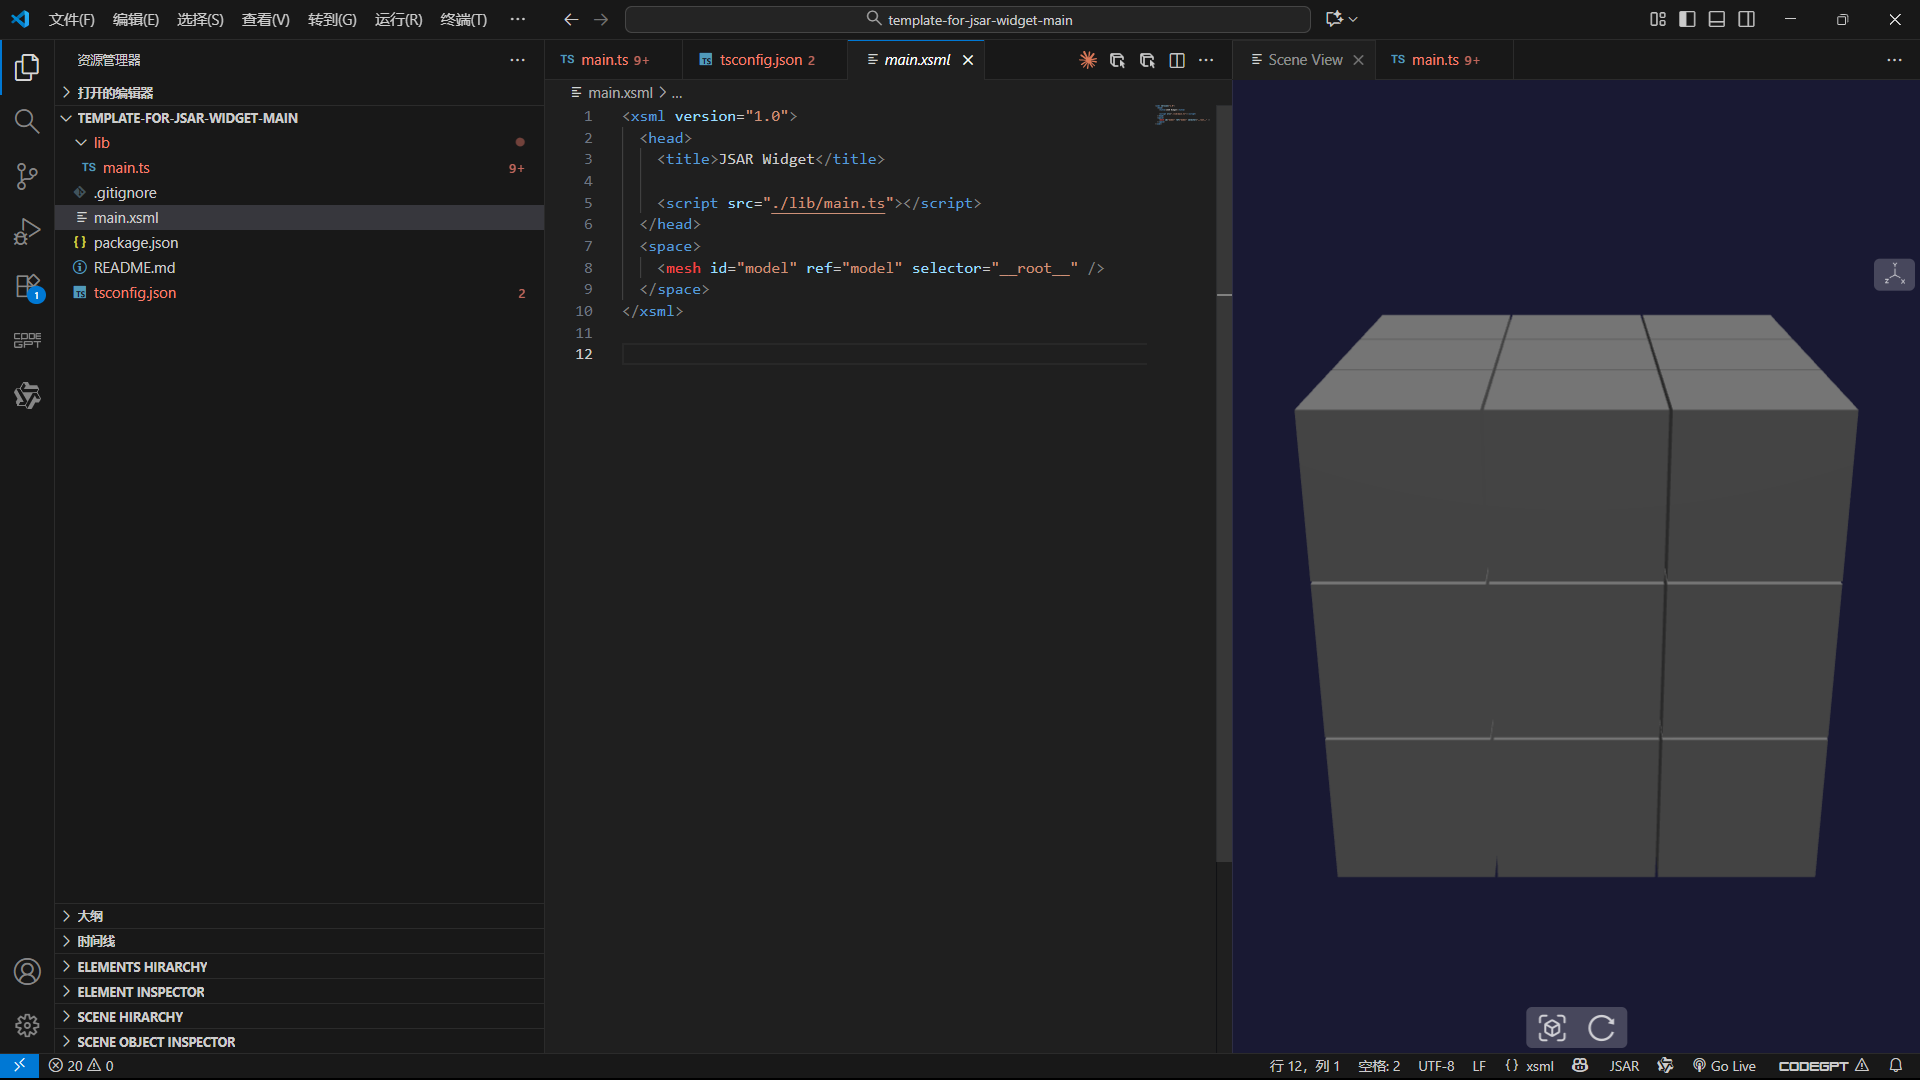
}main.xsml
main.xsml主要作用作为程序的入口,连接视图与逻辑代码。
XML
<xsml version="1.0">
  <head>
    <title>JSAR cube</title>

    <script src="./lib/main.ts"></script>
  </head>
  <space>
    <mesh id="model" ref="model" selector="__root__" />
  </space>
</xsml>
tsconfig.json
tsconfig.json 是 TypeScript 项目的配置文件,用于指定编译选项。
TypeScript
{
  "compilerOptions": {
    "module": "commonjs",
    "target": "es6",
    "types": [
      "node",
      "@yodaos-jsar/types"
    ]
  },
  "exclude": [
    "node_modules"
  ],
  "include": [
    "**/*.ts"
  ]
}
main.ts
第一步:搭建 3D 场景基础
先创建 3D 渲染的 "地基"------ 场景、背景色和光照,这是所有 3D 物体显示的前提(没有光照会导致物体漆黑不可见)。
TypeScript
/// <reference types="@yodaos-jsar/types" />

// 1. 获取JSAR环境的场景实例(核心容器,所有3D元素都放在这里)
const scene = spaceDocument.scene as BABYLON.Scene;

// 2. 设置场景背景色(深色调,突出后续的彩色魔方)
scene.clearColor = new BABYLON.Color4(0.1, 0.1, 0.2, 1.0); // rgba:前3个值控制颜色,最后1个是透明度

// 3. 添加环境光(柔和照亮整个场景,避免物体有"死角阴影")
const ambientLight = new BABYLON.HemisphericLight(
  "ambientLight",          // 光源名称(用于调试)
  new BABYLON.Vector3(0, 1, 0), // 光源方向:从下往上(y轴正方向)
  scene                    // 绑定到当前场景
);
ambientLight.intensity = 0.4; // 亮度(0-1,值越小越暗)

// 4. 添加主光源(模拟太阳光,产生明暗对比,让魔方有立体感)
const mainLight = new BABYLON.DirectionalLight(
  "mainLight",             // 光源名称
  new BABYLON.Vector3(-1, -2, -1), // 光线方向:左上→右下
  scene
);
mainLight.position = new BABYLON.Vector3(5, 8, 5); // 光源位置(模拟太阳在天空的位置)
mainLight.intensity = 0.8; // 主光源亮度(比环境光强,突出明暗层次)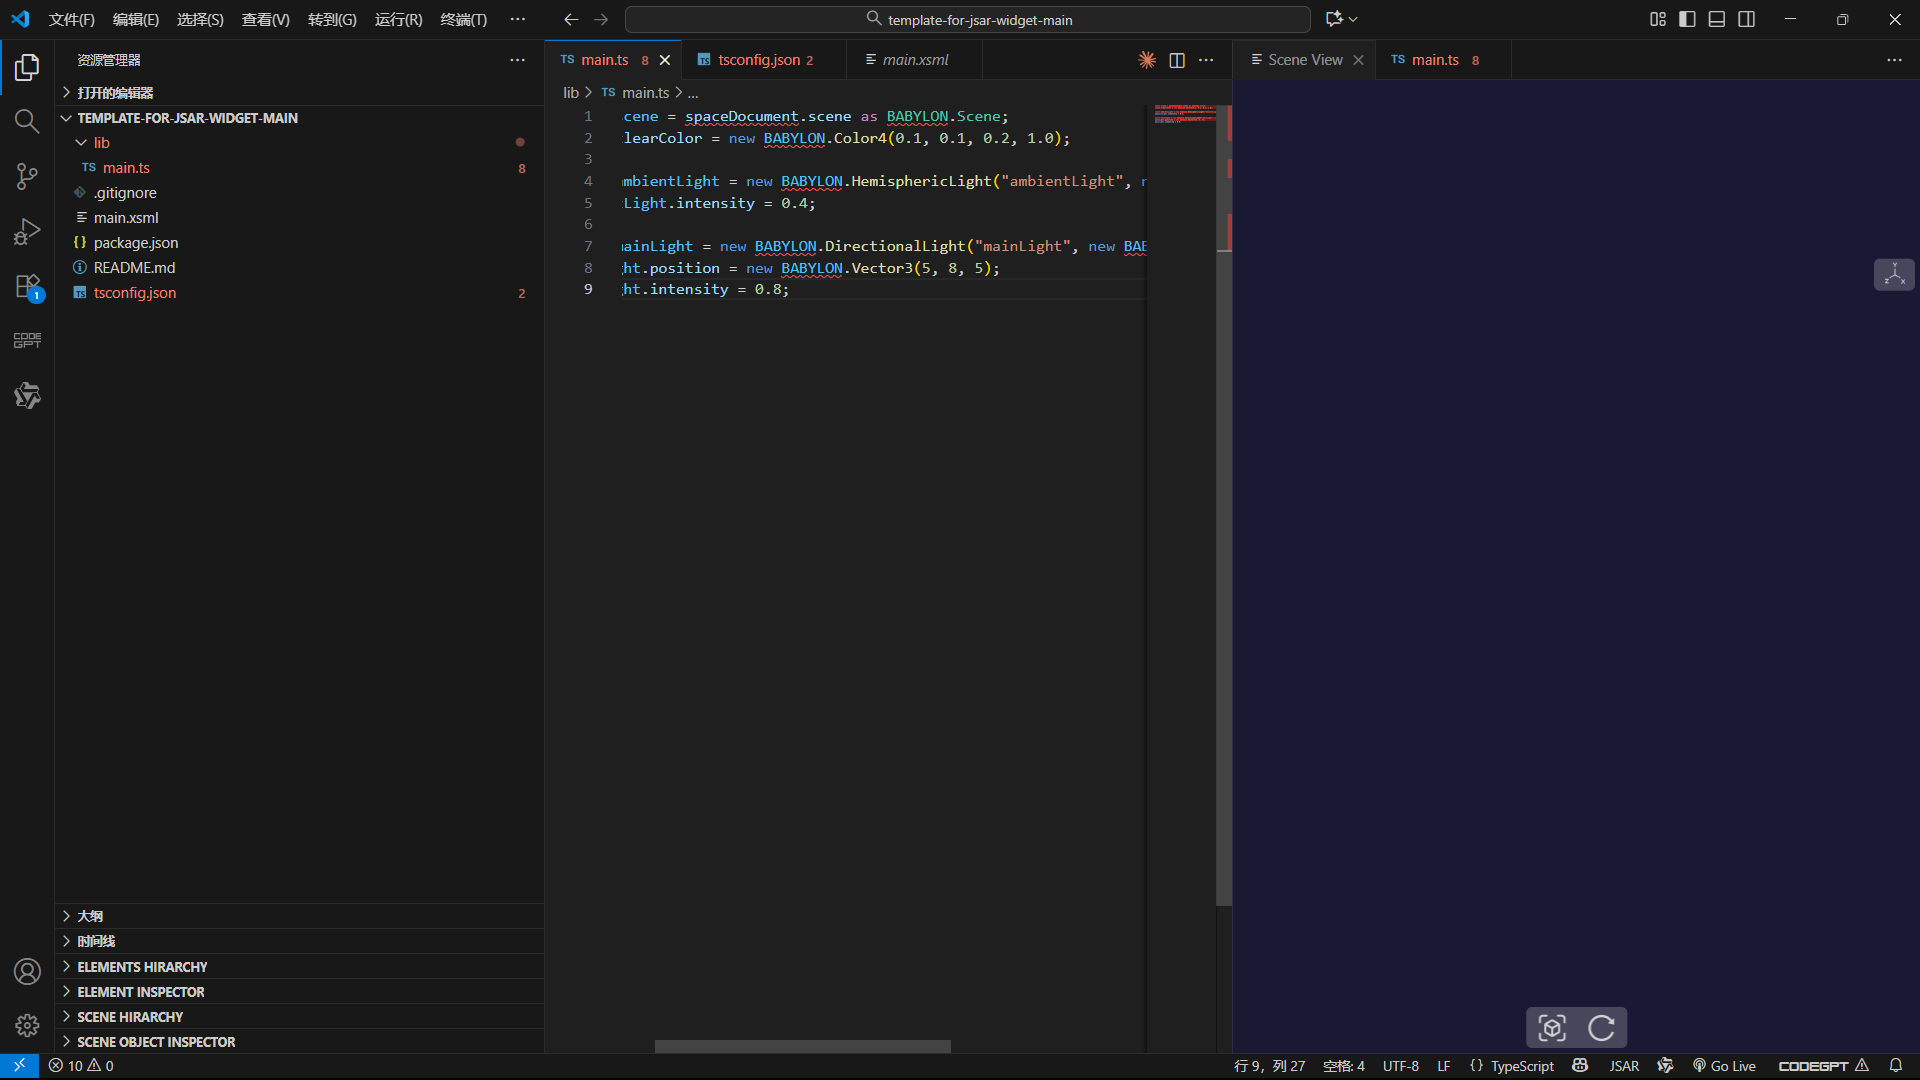
第二步:创建单个小立方体
魔方由 27 个小立方体组成,先从最基础的单元开始实现。定义好尺寸和间隙后,创建第一个小立方体并赋予基础材质。
TypeScript
const cubeSize = 1.1;
const gap = 0.02;
const totalSize = cubeSize + gap;

const rubiksCube = new BABYLON.TransformNode("rubiksCube", scene);

const testSmallCube = BABYLON.MeshBuilder.CreateBox("test-cube", { size: cubeSize }, scene);
testSmallCube.position.set(0, 0, 0);

const testMaterial = new BABYLON.StandardMaterial("test-mat", scene);
testMaterial.diffuseColor = new BABYLON.Color3(0.3, 0.3, 0.3);
testMaterial.specularColor = new BABYLON.Color3(0.2, 0.2, 0.2);
testSmallCube.material = testMaterial;

testSmallCube.parent = rubiksCube;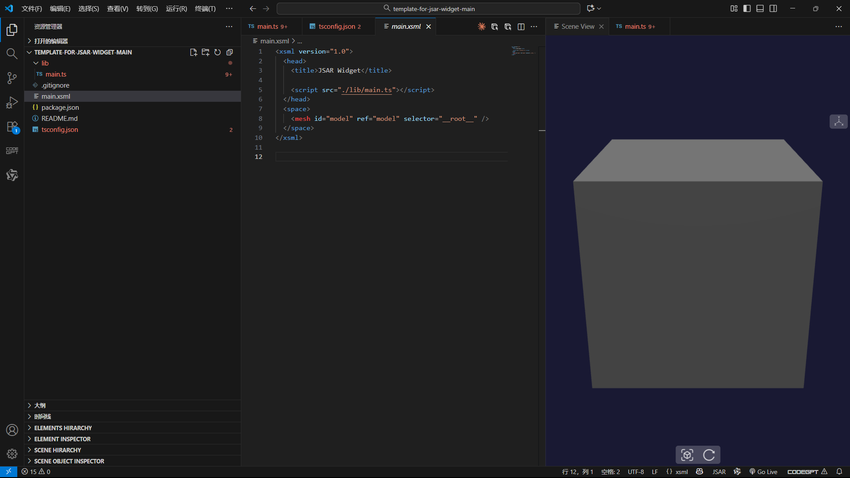
创建一个 TransformNode 作为魔方容器,后续所有小立方体都将作为它的子物体,方便整体控制旋转。小立方体使用灰色基础材质,既简洁又能为后续添加彩色面做铺垫。
第三步:生成 3x3x3 魔方矩阵
单个立方体只是基础,通过三重循环批量创建 27 个小立方体,按照 3x3x3 的结构排列,形成完整的魔方框架。
TypeScript
const smallCubes: BABYLON.Mesh[] = [];

for (let x = -1; x <= 1; x++) {
  for (let y = -1; y <= 1; y++) {
    for (let z = -1; z <= 1; z++) {
      const smallCube = BABYLON.MeshBuilder.CreateBox(`cube_${x}_${y}_${z}`, { size: cubeSize }, scene);
      smallCube.position.set(x * totalSize, y * totalSize, z * totalSize);

      const material = new BABYLON.StandardMaterial(`mat_${x}_${y}_${z}`, scene);
      material.diffuseColor = new BABYLON.Color3(0.3, 0.3, 0.3);
      material.specularColor = new BABYLON.Color3(0.2, 0.2, 0.2);
      smallCube.material = material;

      smallCube.parent = rubiksCube;
      smallCubes.push(smallCube);
    }
  }
}
循环变量 x、y、z 分别控制立方体在三个轴上的位置,从 - 1 到 1 各取三个值,刚好形成 3x3x3 的矩阵。通过 totalSize 计算每个立方体的位置,确保它们之间有均匀的间隙,不会重叠。
第四步:为外表面添加彩色面
标准魔方有 6 种颜色的外表面,我们只为最外层的立方体添加对应方向的彩色面 ------ 内部立方体不会被看到,无需额外上色。
TypeScript
const colors = {
  white: new BABYLON.Color3(1, 1, 1),
  yellow: new BABYLON.Color3(1, 1, 0),
  red: new BABYLON.Color3(1, 0, 0),
  orange: new BABYLON.Color3(1, 0.5, 0),
  blue: new BABYLON.Color3(0, 0, 1),
  green: new BABYLON.Color3(0, 1, 0)
};

const createColoredFace = (cube: BABYLON.Mesh, position: BABYLON.Vector3, rotation: BABYLON.Vector3, color: BABYLON.Color3) => {
  const face = BABYLON.MeshBuilder.CreatePlane(`face_${cube.name}`, { size: cubeSize * 0.9, sideOrientation: BABYLON.Mesh.DOUBLESIDE }, scene);
  const faceMaterial = new BABYLON.StandardMaterial(`faceMat_${cube.name}`, scene);
  faceMaterial.diffuseColor = color;
  faceMaterial.emissiveColor = color.scale(0.3);
  face.material = faceMaterial;
  face.position = position;
  face.rotation = rotation;
  face.parent = cube;
  return face;
};

for (let x = -1; x <= 1; x++) {
  for (let y = -1; y <= 1; y++) {
    for (let z = -1; z <= 1; z++) {
      const cube = smallCubes.find(item => item.name === `cube_${x}_${y}_${z}`);
      if (!cube) continue;

      if (z === 1) createColoredFace(cube, new BABYLON.Vector3(0, 0, cubeSize/2 + 0.01), new BABYLON.Vector3(0, 0, 0), colors.white);
      if (z === -1) createColoredFace(cube, new BABYLON.Vector3(0, 0, -cubeSize/2 - 0.01), new BABYLON.Vector3(0, Math.PI, 0), colors.yellow);
      if (x === 1) createColoredFace(cube, new BABYLON.Vector3(cubeSize/2 + 0.01, 0, 0), new BABYLON.Vector3(0, Math.PI/2, 0), colors.red);
      if (x === -1) createColoredFace(cube, new BABYLON.Vector3(-cubeSize/2 - 0.01, 0, 0), new BABYLON.Vector3(0, -Math.PI/2, 0), colors.orange);
      if (y === 1) createColoredFace(cube, new BABYLON.Vector3(0, cubeSize/2 + 0.01, 0), new BABYLON.Vector3(-Math.PI/2, 0, 0), colors.blue);
      if (y === -1) createColoredFace(cube, new BABYLON.Vector3(0, -cubeSize/2 - 0.01, 0), new BABYLON.Vector3(Math.PI/2, 0, 0), colors.green);
    }
  }
}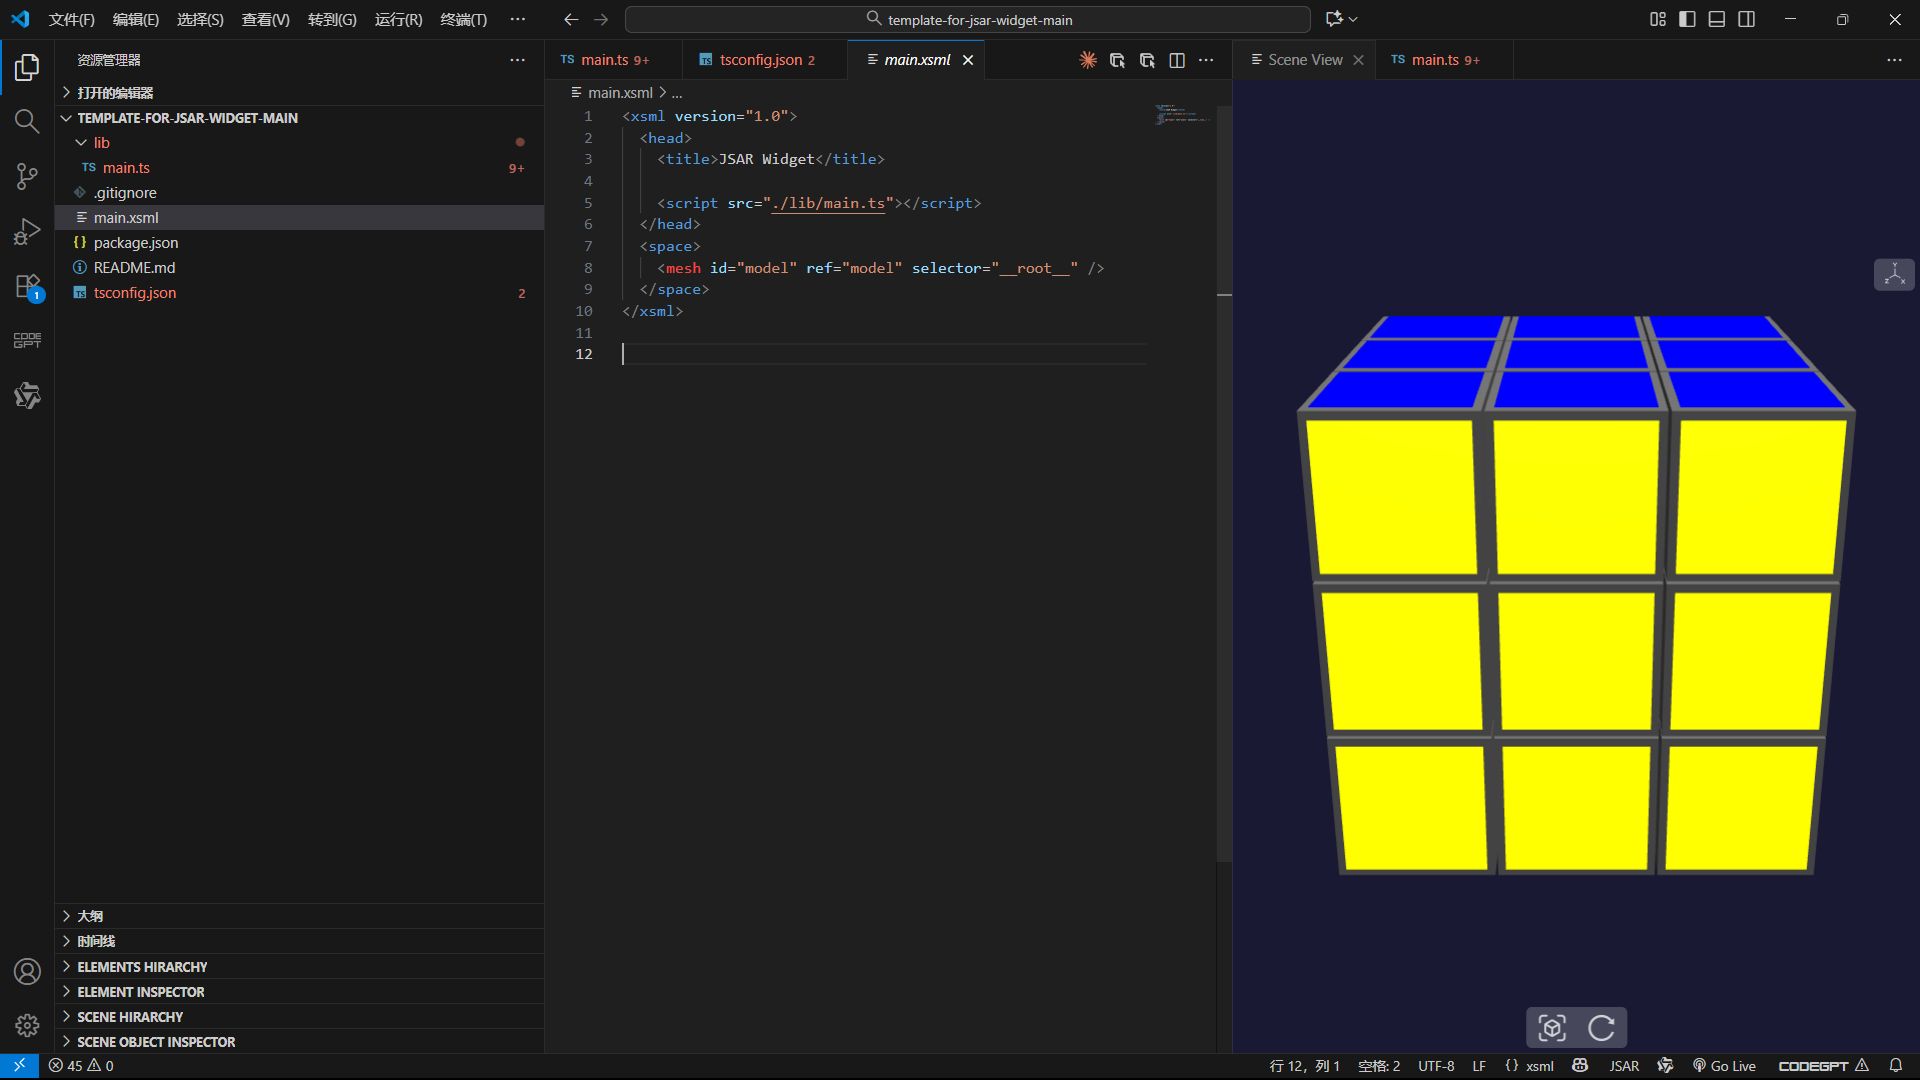
通过 createColoredFace 函数统一创建彩色面,根据立方体在矩阵中的位置(x、y、z 的极值)判断是否为外表面,再赋予对应的颜色。彩色面略小于立方体尺寸,避免边缘重叠,同时添加轻微自发光让颜色更鲜艳。
第五步:添加辉光效果增强视觉
为了让彩色面在深背景中更突出,添加辉光效果是个好办法,能增强色彩的视觉冲击力
TypeScript
const glowLayer = new BABYLON.GlowLayer("glow", scene);
glowLayer.intensity = 0.4;

// 在createColoredFace函数末尾添加
glowLayer.addIncludedOnlyMesh(face);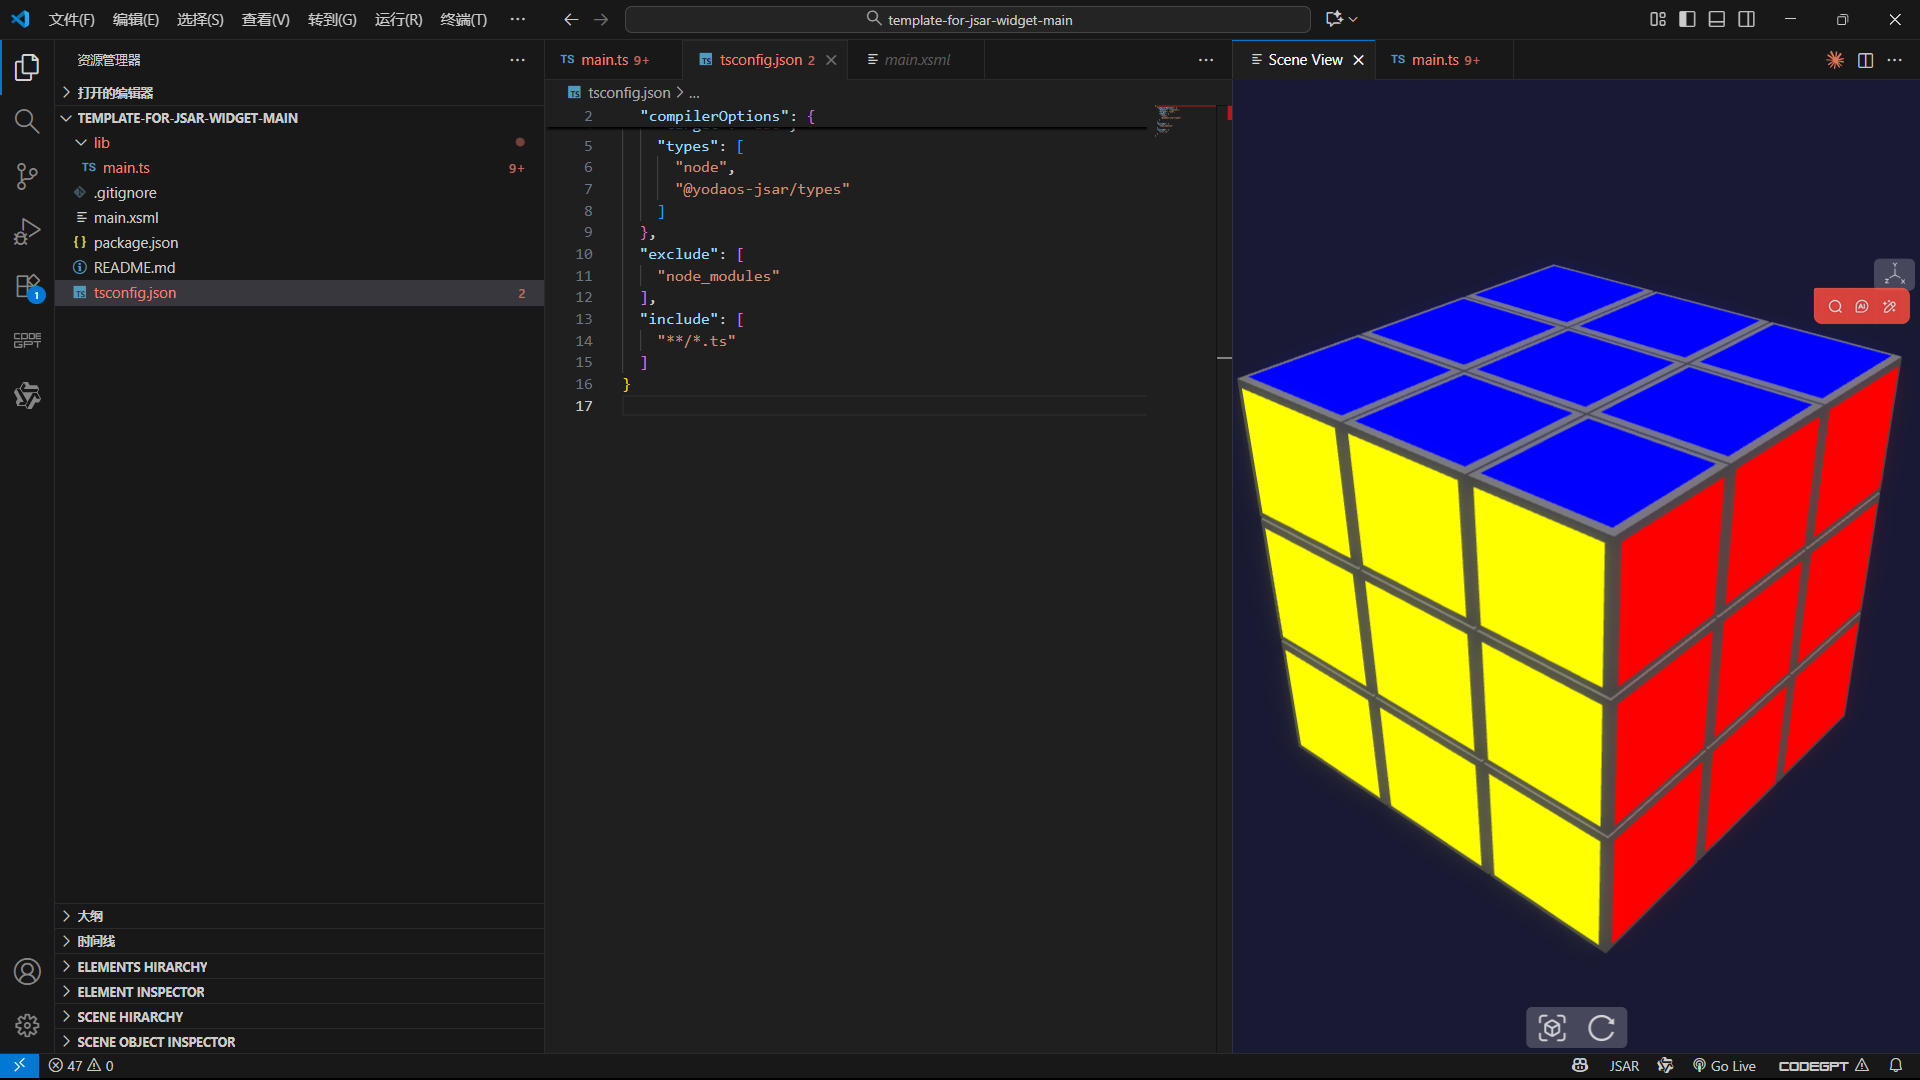
创建一个辉光层并设置强度,然后将每个彩色面添加到辉光层中。柔和的辉光让魔方的颜色边界更灵动,避免了生硬的色块感,整体视觉效果提升明显。
到这里,一个结构完整、色彩标准的 3D 魔方就基本成型了。从空白场景到能清晰看到六面颜色的魔方,每一步都是对前一步的延伸,这种循序渐进的方式不仅容易理解,也方便在开发中及时发现问题。接下来就可以在此基础上添加动画和交互,让魔方 "活" 起来。
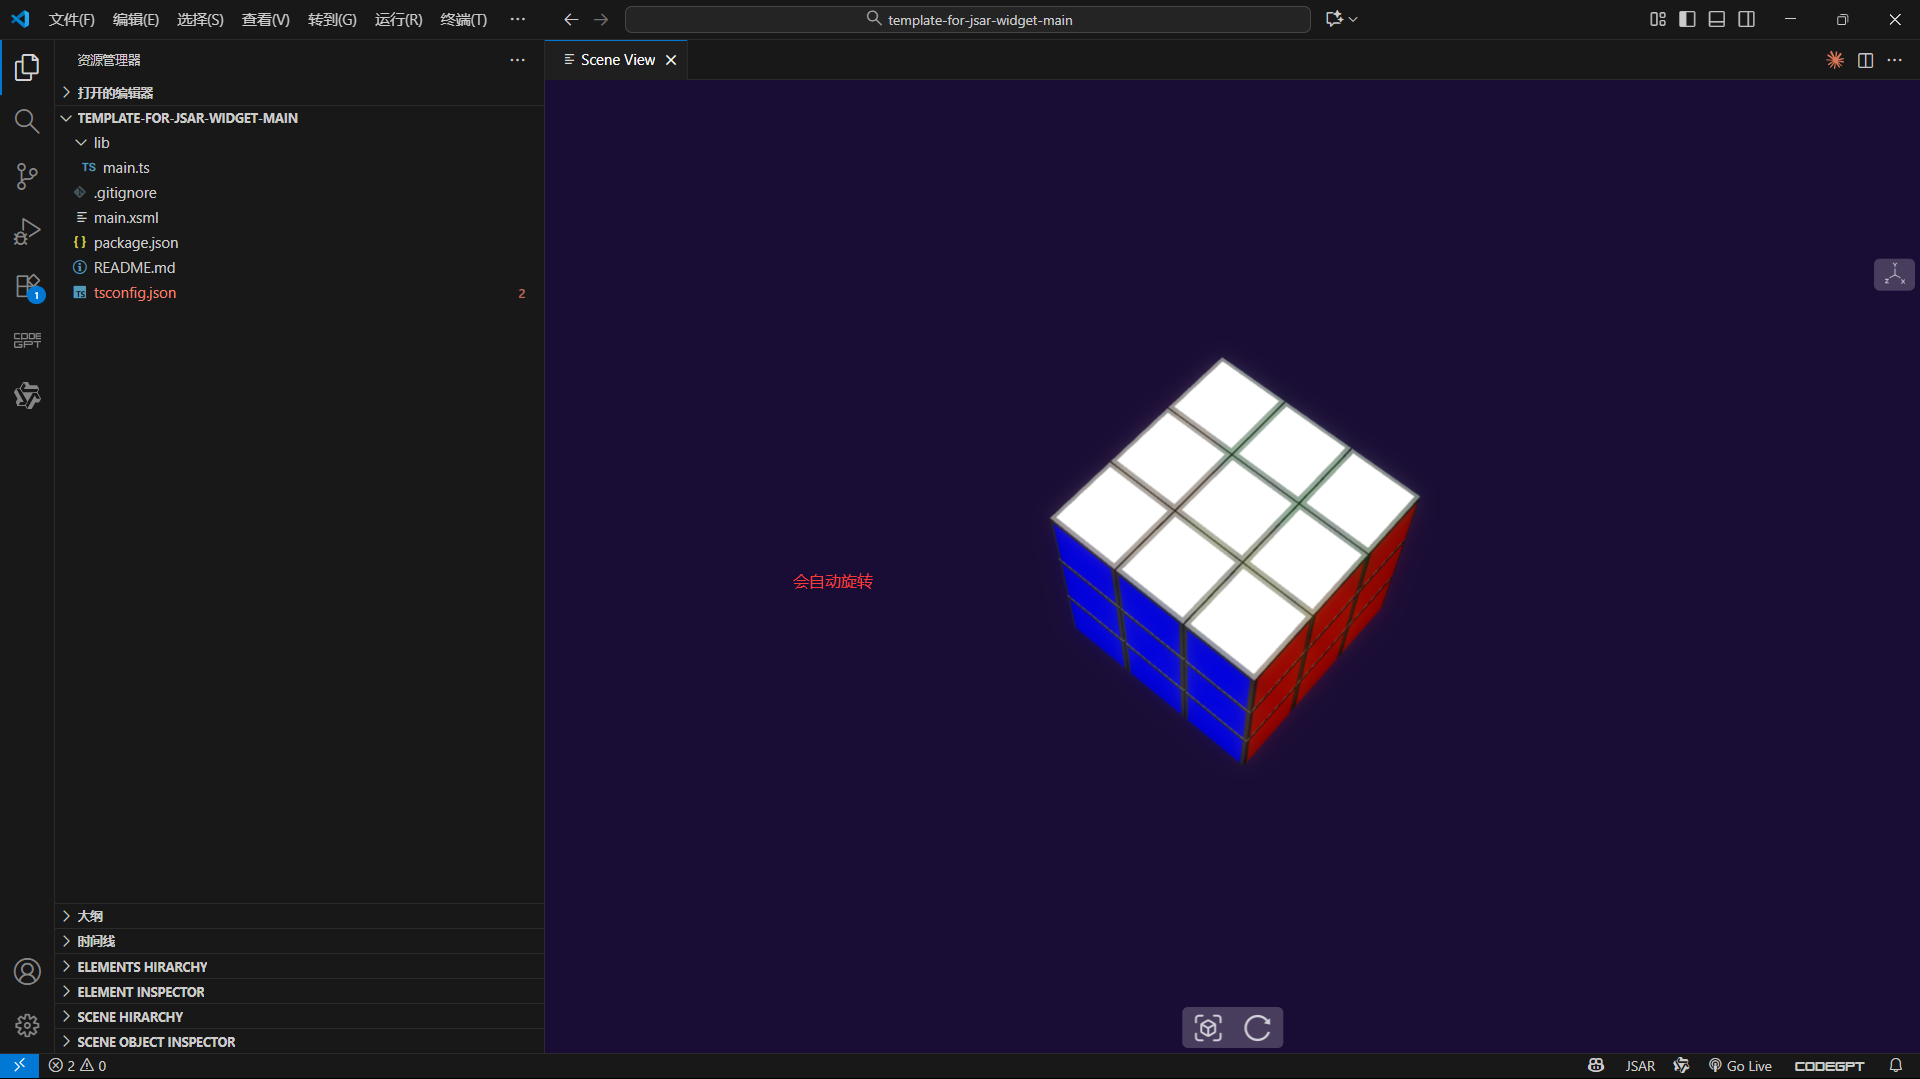
第六步:整合相机配置与动态动画,让魔方场景更生动
在完成魔方的静态模型构建后,最后一步需要把相机配置、动态动画(旋转 + 背景 + 光照变化)全部整合,让整个 3D 场景从 "静态展示" 升级为 "动态交互感",这也是你代码中最能体现视觉层次的部分。
TypeScript
const camera = scene.activeCamera as BABYLON.ArcRotateCamera;
if (camera) {
    camera.radius = 4;
    camera.alpha = Math.PI / 4;
    camera.beta = Math.PI / 3;
    camera.lowerRadiusLimit = 3;
    camera.upperRadiusLimit = 6;
}

let colorPhase = 0;
let cameraPhase = 0;

scene.registerBeforeRender(() => {
    const deltaTime = scene.getEngine().getDeltaTime() / 1000;
    const time = Date.now() * 0.001;

    if (isRotating) {
        rubiksCube.rotation.x += rotationSpeed * 0.3 * deltaTime;
        rubiksCube.rotation.y += rotationSpeed * 0.5 * deltaTime;
        rubiksCube.rotation.z += rotationSpeed * 0.1 * deltaTime;

        colorPhase += deltaTime * 0.5;
        const colorIntensity = 0.7 + Math.sin(colorPhase) * 0.3;
        ambientLight.diffuse = new BABYLON.Color3(
            colorIntensity * 0.8,
            colorIntensity * 0.9,
            colorIntensity * 1.0
        );

        const bgR = 0.1 + Math.sin(time * 0.1) * 0.05;
        const bgG = 0.1 + Math.cos(time * 0.15) * 0.05;
        const bgB = 0.2 + Math.sin(time * 0.2) * 0.1;
        scene.clearColor = new BABYLON.Color4(bgR, bgG, bgB, 1.0);

        if (camera) {
            cameraPhase += deltaTime * 0.2;
            camera.alpha = Math.PI / 4 + Math.sin(cameraPhase * 0.3) * 0.2;
            camera.beta = Math.PI / 3 + Math.cos(cameraPhase * 0.2) * 0.1;
            const zoom = 4 + Math.sin(cameraPhase * 0.5) * 0.8;
            camera.radius = zoom;
        }
    }
});
main.ts完整代码
TypeScript
const scene = spaceDocument.scene as BABYLON.Scene;

// 设置初始背景色
scene.clearColor = new BABYLON.Color4(0.1, 0.1, 0.2, 1.0);

// 添加环境光
const ambientLight = new BABYLON.HemisphericLight("ambientLight",
    new BABYLON.Vector3(0, 1, 0), scene);
ambientLight.intensity = 0.4;

// 添加主光源
const mainLight = new BABYLON.DirectionalLight("mainLight",
    new BABYLON.Vector3(-1, -2, -1), scene);
mainLight.position = new BABYLON.Vector3(5, 8, 5);
mainLight.intensity = 0.8;

// 添加辉光效果
const glowLayer = new BABYLON.GlowLayer("glow", scene);
glowLayer.intensity = 0.4;

// 魔方参数 - 稍微增大魔方尺寸
const cubeSize = 1.1;  // 从0.95增加到1.1
const gap = 0.02;
const totalSize = cubeSize + gap;

// 标准魔方颜色
const colors = {
    white: new BABYLON.Color3(1, 1, 1),      // 前
    yellow: new BABYLON.Color3(1, 1, 0),     // 后
    red: new BABYLON.Color3(1, 0, 0),        // 右
    orange: new BABYLON.Color3(1, 0.5, 0),   // 左
    blue: new BABYLON.Color3(0, 0, 1),       // 上
    green: new BABYLON.Color3(0, 1, 0)       // 下
};

// 存储所有小立方体的数组
const smallCubes: BABYLON.Mesh[] = [];

// 创建容器
const rubiksCube = new BABYLON.TransformNode("rubiksCube", scene);

// 状态变量
let isRotating = true;
let rotationSpeed = 0.5;

// 创建3x3x3魔方结构
for (let x = -1; x <= 1; x++) {
    for (let y = -1; y <= 1; y++) {
        for (let z = -1; z <= 1; z++) {
            // 创建小立方体
            const smallCube = BABYLON.MeshBuilder.CreateBox(`cube_${x}_${y}_${z}`, {
                size: cubeSize
            }, scene);

            // 设置位置
            smallCube.position.x = x * totalSize;
            smallCube.position.y = y * totalSize;
            smallCube.position.z = z * totalSize;

            // 创建材质 - 所有小立方体都是灰色基础色
            const material = new BABYLON.StandardMaterial(`mat_${x}_${y}_${z}`, scene);
            material.diffuseColor = new BABYLON.Color3(0.3, 0.3, 0.3);
            material.specularColor = new BABYLON.Color3(0.2, 0.2, 0.2);

            smallCube.material = material;

            // 为每个面的中心位置创建彩色平面
            const createColoredFace = (position: BABYLON.Vector3, rotation: BABYLON.Vector3, color: BABYLON.Color3, faceName: string) => {
                const face = BABYLON.MeshBuilder.CreatePlane(`face_${x}_${y}_${z}_${faceName}`, {
                    size: cubeSize * 0.9,
                    sideOrientation: BABYLON.Mesh.DOUBLESIDE
                }, scene);

                const faceMaterial = new BABYLON.StandardMaterial(`faceMat_${faceName}`, scene);
                faceMaterial.diffuseColor = color;
                faceMaterial.specularColor = new BABYLON.Color3(0.1, 0.1, 0.1);
                faceMaterial.emissiveColor = color.scale(0.3); // 增加自发光让颜色更鲜艳

                face.material = faceMaterial;
                face.position = position;
                face.rotation = rotation;
                face.parent = smallCube;

                // 为彩色面添加辉光效果
                glowLayer.addIncludedOnlyMesh(face);
            };

            // 为外表面的小立方体添加彩色面
            if (z === 1) createColoredFace(new BABYLON.Vector3(0, 0, cubeSize/2 + 0.01), new BABYLON.Vector3(0, 0, 0), colors.white, "front");
            if (z === -1) createColoredFace(new BABYLON.Vector3(0, 0, -cubeSize/2 - 0.01), new BABYLON.Vector3(0, Math.PI, 0), colors.yellow, "back");
            if (x === 1) createColoredFace(new BABYLON.Vector3(cubeSize/2 + 0.01, 0, 0), new BABYLON.Vector3(0, Math.PI/2, 0), colors.red, "right");
            if (x === -1) createColoredFace(new BABYLON.Vector3(-cubeSize/2 - 0.01, 0, 0), new BABYLON.Vector3(0, -Math.PI/2, 0), colors.orange, "left");
            if (y === 1) createColoredFace(new BABYLON.Vector3(0, cubeSize/2 + 0.01, 0), new BABYLON.Vector3(-Math.PI/2, 0, 0), colors.blue, "top");
            if (y === -1) createColoredFace(new BABYLON.Vector3(0, -cubeSize/2 - 0.01, 0), new BABYLON.Vector3(Math.PI/2, 0, 0), colors.green, "bottom");

            smallCube.parent = rubiksCube;
            smallCubes.push(smallCube);
        }
    }
}

// 获取相机并设置更近的初始位置
const camera = scene.activeCamera as BABYLON.ArcRotateCamera;
if (camera) {
    camera.radius = 4; // 进一步减小相机距离,让魔方更大
    camera.alpha = Math.PI / 4; // 水平角度
    camera.beta = Math.PI / 3;  // 垂直角度
    camera.lowerRadiusLimit = 3; // 最小缩放距离
    camera.upperRadiusLimit = 6; // 最大缩放距离
}

// 动画变量
let colorPhase = 0;
let cameraPhase = 0;

console.log(`魔方已创建完成 - 带有辉光效果和动态相机`);

// 主动画循环
scene.registerBeforeRender(() => {
    const deltaTime = scene.getEngine().getDeltaTime() / 1000;
    const time = Date.now() * 0.001;

    if (isRotating) {
        // 魔方旋转
        rubiksCube.rotation.x += rotationSpeed * 0.3 * deltaTime;
        rubiksCube.rotation.y += rotationSpeed * 0.5 * deltaTime;
        rubiksCube.rotation.z += rotationSpeed * 0.1 * deltaTime;

        // 动态颜色变化 - 环境光
        colorPhase += deltaTime * 0.5;
        const colorIntensity = 0.7 + Math.sin(colorPhase) * 0.3;

        ambientLight.diffuse = new BABYLON.Color3(
            colorIntensity * 0.8,
            colorIntensity * 0.9,
            colorIntensity * 1.0
        );

        // 动态背景色
        const bgR = 0.1 + Math.sin(time * 0.1) * 0.05;
        const bgG = 0.1 + Math.cos(time * 0.15) * 0.05;
        const bgB = 0.2 + Math.sin(time * 0.2) * 0.1;

        scene.clearColor = new BABYLON.Color4(bgR, bgG, bgB, 1.0);

        // 相机动画 - 更小的运动范围
        if (camera) {
            cameraPhase += deltaTime * 0.2;

            // 相机缓慢环绕 - 减小运动幅度
            camera.alpha = Math.PI / 4 + Math.sin(cameraPhase * 0.3) * 0.2;
            camera.beta = Math.PI / 3 + Math.cos(cameraPhase * 0.2) * 0.1;

            // 相机轻微缩放 - 减小缩放范围
            const zoom = 4 + Math.sin(cameraPhase * 0.5) * 0.8;
            camera.radius = zoom;
        }
    }
});
展望未来
通过这次基于 JSAR 开发「骰子」的实践,我深切感受到 JSAR 开发者工具的优秀。它大幅降低了 AR 应用开发的门槛,让我能轻松将 3D 模型、交互逻辑与真实空间融合,整个开发流程顺畅且高效。JSAR 强大的功能与友好的易用性,对于开发者尤其是新手而言,是探索 AR 世界的有力跳板。
展望未来,希望 JSAR 能持续迭代升级,带来更多创新功能,比如更丰富的模型库、更智能的场景识别能力等,助力开发者们更便捷地打造出多元且精彩的 AR 应用。同时,也诚挚建议每一位对 AR 开发感兴趣的伙伴,去尝试 JSAR 这类优秀工具,它会成为你在 AR 开发之路上,突破技术瓶颈、释放创意潜力的重要助力,陪伴你在探索前沿技术的旅程中不断前行。