概述
在前端开发中,我们经常会用到各种 icon 图标。
你通常是如何管理这些图标的呢?是从蓝湖或 Figma 下载 .png 文件直接放到项目中?还是从 Iconfont 拷贝 SVG 代码嵌入到页面里?相信大多数人已经很少再使用"雪碧图"这种老方法了。
对于需要根据状态切换颜色的图标,早期的常见做法是下载两张图片,分别表示默认与激活状态。但使用 SVG 后,只需在状态变化时切换 fill 或 stroke 属性即可,灵活又高效。
不过,当项目图标越来越多,直接将 SVG 代码嵌入到组件中会让代码臃肿、难以维护。那么,我们该如何更优雅地加载与管理 SVG 呢?
本文将带你实现一个自动化、类型安全、可配置的 SVG 管理方案。
本文主要包含以下几点:
- 项目准备
- 编写自动生成 SVG 类型定义的脚本
- 封装一个可复用的 SVG 加载组件
项目准备
本文基于 React + Vite + TypeScript 技术栈构建。
1)创建项目
shell
$ pnpm create vite svg-examples --template react-ts
│
◇  Use rolldown-vite (Experimental)?:
│  No
│
◇  Install with pnpm and start now?
│  Yes
│
◇  Scaffolding project in /Users/leo/Desktop/svg-examples...
│
◇  Installing dependencies with pnpm...
$  cd svg-examples && code .
2)配置 tailwindcss
🔵 安装依赖
shell
$ pnpm add tailwindcss @tailwindcss/vite🔵 配置 Vite 插件:在 vite.config.ts 配置文件中添加 @tailwindcss/vite 插件
vite.config.ts
ts
import { defineConfig } from "vite";
import react from "@vitejs/plugin-react";
import tailwindcss from "@tailwindcss/vite";
// https://vite.dev/config/
export default defineConfig({
  plugins: [react(), tailwindcss()],
});
🔵 导入 Tailwind CSS
index.css
css
@import "tailwindcss";

:root {
  --text-primary-color: green;
}
提示 :这里我定义了一个 css 变量
--text-primary-color,后续我们在尝试设置 svg 的颜色时会用到。
创建脚本
接下来我们编写一个脚本,用于自动扫描项目中的 SVG 文件 并生成对应的 TypeScript 类型定义,这样我们在组件中使用图标时,就能享受智能提示和类型检查。
图标统一存放在 public/icons 目录下,脚本会自动遍历该目录、生成类型文件,并支持监听模式,自动更新。
在开始前,你可以先从 iconfont ↪ 下载一些 SVG 图标放到该目录中。
推荐按模块分类,比如我的目录结构如下:
erlang
.
├── icons
│   ├── profile
│   │   └── orders.svg
│   ├── tiktok.svg
│   └── wx.svg
└── vite.svg
脚本需要以下开发依赖:
shell
$ pnpm add chokidar chalk prettier --save-dev依赖解读:
chokidar:监听文件变化chalk:命令行输出美化prettier:格式化生成的代码
在 package.json 中添加脚本命令:
json
{
   "gen-svg": "npx tsx scripts/gen-svg-list.ts",
   "gen-svg-watch": "npx tsx scripts/gen-svg-list.ts --watch"
}
然后创建文件 scripts/gen-svg-list.ts,粘贴以下代码 👇
ts
/**
 * 自动扫描 public/icons 下的所有 .svg 文件
 * 并生成 src/components/Icon/svgPath_all.ts
 * 支持 --watch 模式实时监听变动
 *
 * 用法:
 *   npx tsx scripts/gen-svg-list.ts          # 一次性生成
 *   npx tsx scripts/gen-svg-list.ts --watch  # 实时监听模式
 *
 *  "gen-svg": "npx tsx scripts/gen-svg-list.ts",
 *  "gen-svg-watch": "npx tsx scripts/gen-svg-list.ts --watch"
 *
 * 依赖:
 *   pnpm add chokidar chalk prettier --save-dev
 */
import fs from "node:fs/promises";
import fssync from "node:fs";
import path from "node:path";
import { fileURLToPath } from "node:url";
import chokidar, { FSWatcher } from "chokidar";
import prettier from "prettier";
import chalk from "chalk";

const __filename = fileURLToPath(import.meta.url);
const __dirname = path.dirname(__filename);

// ==================== 路径配置 ====================
/** 项目根目录 */
const projectRoot = path.resolve(__dirname, "..");
/** SVG 图标目录 */
const ICONS_DIR = path.join(projectRoot, "public", "icons");
/** 输出文件路径 */
const outputFile = path.join(projectRoot, "src", "components", "IconSvg/svgPath_all.ts");

// ==================== 工具函数 ====================
/**
 * 递归扫描指定目录下的所有 SVG 文件
 * @param dir 要扫描的目录路径
 * @returns 返回包含所有 SVG 文件完整路径的数组
 */
async function walkDir(dir: string): Promise<string[]> {
  const entries = await fs.readdir(dir, { withFileTypes: true });
  const results: string[] = [];

  for (const entry of entries) {
    const fullPath = path.join(dir, entry.name);
    if (entry.isDirectory()) {
      results.push(...(await walkDir(fullPath)));
    } else if (entry.isFile() && fullPath.endsWith(".svg")) {
      results.push(fullPath);
    }
  }

  return results;
}

/**
 * 生成 svgPath_all.ts 文件
 * - 扫描 ICONS_DIR 下所有 SVG 文件
 * - 输出为 TypeScript const 数组及类型
 * - 使用 prettier 格式化
 * @param showLog 是否打印生成日志,默认为 true
 */
async function generate(showLog = true): Promise<void> {
  const svgFiles = (await walkDir(ICONS_DIR)).sort();

  const svgNames = svgFiles.map((fullPath) => {
    const relative = path.relative(ICONS_DIR, fullPath);
    const noExt = relative.replace(/\.svg$/i, "");
    return noExt.split(path.sep).join(path.posix.sep);
  });

  const timestamp = new Date().toISOString();
  const output = `
// ⚠️ 此文件由脚本自动生成,请勿手动修改
// 生成时间: ${timestamp}
export const SVG_PATH_NAMES = [
  ${svgNames.map((n) => `"${n}"`).join(",\n  ")}
] as const;

export type SvgPathName = typeof SVG_PATH_NAMES[number];
`;

  const prettierConfig = (await prettier.resolveConfig(projectRoot)) ?? {};
  const formatted = await prettier.format(output, { ...prettierConfig, parser: "typescript" });

  await fs.mkdir(path.dirname(outputFile), { recursive: true });
  await fs.writeFile(outputFile, formatted, "utf8");

  if (showLog) {
    console.log(chalk.green(`✔️ 已生成 ${chalk.yellow(outputFile)},共 ${svgNames.length} 个图标`));
  }
}

// ==================== 防抖函数 ====================
/**
 * 防抖函数
 * @template F 原始函数类型
 * @param fn 要防抖的函数
 * @param delay 防抖延迟(毫秒)
 * @returns 返回防抖后的函数
 */
function debounce<F extends (...args: unknown[]) => void>(fn: F, delay: number): F {
  let timer: NodeJS.Timeout | null = null;
  return ((...args: Parameters<F>) => {
    if (timer) clearTimeout(timer);
    timer = setTimeout(() => fn(...args), delay);
  }) as F;
}

// ==================== 监听逻辑 ====================
/**
 * 主函数
 * - 首次生成 svgPath_all.ts
 * - 可选择开启监听模式 (--watch) 实时生成
 */
async function main(): Promise<void> {
  await generate(true);

  if (process.argv.includes("--watch")) {
    console.log(chalk.cyan("👀 正在监听 SVG 目录变动..."));

    if (!fssync.existsSync(ICONS_DIR)) {
      console.log(chalk.red(`❌ 图标目录不存在: ${ICONS_DIR}`));
      process.exit(1);
    }

    const watcher: FSWatcher = chokidar.watch(ICONS_DIR, {
      ignoreInitial: true,
      depth: 10,
    });

    // 防抖生成函数,延迟 300ms
    const debouncedGenerate = debounce(() => generate(false), 300);

    /**
     * 文件变动事件处理
     * @param event 事件类型,例如 'add', 'unlink', 'change'
     * @param file 触发事件的文件完整路径
     */
    const onChange = (event: string, file: string) => {
      const fileName = path.relative(ICONS_DIR, file);
      console.log(chalk.gray(`[${event}]`), chalk.yellow(fileName));
      debouncedGenerate();
    };

    watcher
      .on("add", (file) => onChange("➕ 新增", file))
      .on("unlink", (file) => onChange("➖ 删除", file))
      .on("change", (file) => onChange("✏️ 修改", file))
      .on("error", (err) => console.error(chalk.red("监听错误:"), err));
  }
}

// ==================== 执行入口 ====================
main().catch((err) => {
  console.error(chalk.red("❌ 生成 svgPath_all.ts 失败:"), err);
  process.exit(1);
});
执行命令:
shell
$ pnpm gen-svg控制台输出如下:
cons
✔️ 已生成 /your path/svg-examples/src/components/IconSvg/svgPath_all.ts,共 3 个图标最后,我们看看生成的内容
/src/components/IconSvg/svgPath_all.ts
tsx
// ⚠️ 此文件由脚本自动生成,请勿手动修改
// 生成时间: 2025-10-13T19:38:41.919Z

export const SVG_PATH_NAMES = ["profile/orders", "tiktok", "wx"] as const;

export type SvgPathName = (typeof SVG_PATH_NAMES)[number];
这个文件主要是方便我们后续创建组件时用于定义 icon 名称,调用者在使用组件时也可以方便的选中对应的图标。
提示:如果不想手动执行脚本,可以使用
pnpm gen-svg-watch开启监听模式,新增或删除图标后会自动更新类型定义。
创建组件
下面我们来封装一个高可用的 SVG 组件,具备以下特性:
-
动态加载 SVG 图标文件
- 根据传入的 name 从 /public/icons 目录按需加载对应 .svg 文件。
- 支持从本地缓存(svgCache)中读取,避免重复请求。
-
SVG 内容安全清理
- 自动移除 <script>、<foreignObject>、onClick 等危险标签与属性。
- 去掉不必要的属性(如 width、height、version 等),保证安全可控。
-
智能尺寸处理
- 自动识别是否存在 w-、h-、size- 等 Tailwind 尺寸类。
- 若无显式尺寸,默认渲染为 16x16。
- 若用户传入 size 或样式宽高,则自适应容器(width="100%" height="100%")。
-
颜色智能替换
- 优先读取 props.color 或 style.fill / style.stroke。
- 支持 TailwindCSS 的 fill-* 与 stroke-* 类名解析。
- 自动为未定义颜色的路径加上 fill="currentColor",支持继承文本颜色。
-
SVG 预处理与渲染
- 整合清理、尺寸、颜色逻辑,生成最终可直接注入的安全 SVG 字符串。
- 使用 dangerouslySetInnerHTML 安全地插入 SVG。
-
错误与占位处理
- 若加载失败或找不到图标名,渲染 fallback(默认显示 ⚠)。
-
性能优化与防抖逻辑
- 对已加载过的图标结果进行内存缓存(最多 200 个)。
- 清理旧缓存,保证内存占用稳定。
-
完备的类型定义与可扩展性
- 提供了 SvgPathTypes 类型自动推导(由生成脚本生成)。
- 支持 wrapperClass、onClick 等常用交互属性。
话不多说,我直接贴上代码:
tsx
import React, { useEffect, useMemo, useRef, useState, type CSSProperties } from "react";
import { SVG_PATH_NAMES } from "./svgPath_all";

// ==================== 类型定义 ====================
export type SvgPathTypes = (typeof SVG_PATH_NAMES)[number];
export interface IconProps {
  /** SVG 文件名(不含后缀) */
  name: SvgPathTypes;
  /** 应用于 <svg> 容器 div 的类名(Tailwind 或自定义类) */
  className?: string;
  /** 图标主色,可为颜色值 / Tailwind 类名(fill-xxx / stroke-xxx)/ CSS 变量 */
  color?: string;
  /** 图标尺寸,可为数字或字符串(如 20 / '1.5rem') */
  size?: number | string;
  /** 内联样式 */
  style?: React.CSSProperties;
  /** 最外层 div 的类名 */
  wrapperClass?: string;
  /** 加载或解析异常时的占位符 */
  fallback?: React.ReactNode;
  /** 点击事件 */
  onClick?: () => void;
}

// ====================  缓存逻辑  ====================
const MAX_CACHE_SIZE = 200;
const svgCache = new Map<string, string>();
function cacheSet(key: string, value: string) {
  if (svgCache.has(key)) svgCache.delete(key);
  svgCache.set(key, value);
  if (svgCache.size > MAX_CACHE_SIZE) {
    const firstKey = svgCache.keys().next().value;
    if (typeof firstKey === "string") {
      svgCache.delete(firstKey);
    }
  }
}

// ====================  工具函数  ====================
/** 保留这些颜色(不替换为 currentColor) */
const preserveColors = ["none", "transparent", "inherit", "currentcolor"];
function shouldPreserve(color: string) {
  const c = (color || "").trim().toLowerCase();
  return c === "" || preserveColors.includes(c) || c.startsWith("url(");
}

/** 检查 className 是否包含尺寸类(w-, h-, size-, min/max-w/h-) */
function hasSizeClass(className?: string): boolean {
  if (!className) return false;
  return /\b(?:w|h|size|(?:min|max)-(?:w|h))-/.test(className);
}
/**
 * 清理 SVG:
 * - 去除危险标签与事件属性
 * - 去除 width/height/xml 声明
 * - 转换 JSX 兼容属性(如 class → className)
 */
function sanitizeSvg(svgText: string): string {
  if (!svgText) return "";

  return (
    svgText
      // 移除 script / foreignObject
      .replace(/<script[\s\S]*?>[\s\S]*?<\/script>/gi, "")
      .replace(/<foreignObject[\s\S]*?>[\s\S]*?<\/foreignObject>/gi, "")
      // 移除事件属性与 js 协议
      .replace(/\son\w+="[^"]*"/gi, "")
      .replace(/\son\w+='[^']*'/gi, "")
      .replace(/javascript:[^"']*/gi, "")
      .replace(/<!ENTITY[\s\S]*?>/gi, "")
      // 移除 XML 声明和 DOCTYPE
      .replace(/<\?xml[\s\S]*?\?>/gi, "")
      .replace(/<!DOCTYPE[\s\S]*?>/gi, "")
      // 去除 width / height / 其他无意义属性
      .replace(/\s+(width|height|t|p-id|version)\s*=\s*(["'][^"']*["']|\S+)/gi, "")
      // JSX 属性名转换
      .replace(/\bclass=/gi, "className=")
      .replace(/\bclip-rule=/gi, "clipRule=")
      .replace(/\bfill-rule=/gi, "fillRule=")
      .replace(/\bstroke-width=/gi, "strokeWidth=")
      .replace(/\bstroke-linecap=/gi, "strokeLinecap=")
      .replace(/\bstroke-linejoin=/gi, "strokeLinejoin=")
      // 清理多余空格
      .replace(/\s{2,}/g, " ")
      .trim()
  );
}

// ====================  颜色处理  ====================
/** 从 props 中提取 SVG 的 fill / stroke 颜色 */
function extractSvgColor({ color, className, style }: Pick<IconProps, "color" | "className" | "style">): {
  fill?: string;
  stroke?: string;
} {
  const result: { fill?: string; stroke?: string } = {};

  // 1️⃣ 优先使用显式 props
  if (style?.fill) result.fill = style.fill;
  if (style?.stroke) result.stroke = style.stroke;
  if (color) result.fill = color;

  // 2️⃣ TailwindCSS 类名解析
  if (className) {
    const fillMatch = className.match(/\bfill-([a-zA-Z0-9-_]+)/);
    const strokeMatch = className.match(/\bstroke-([a-zA-Z0-9-_]+)/);
    if (fillMatch) result.fill = `var(--${fillMatch[0]})`;
    if (strokeMatch) result.stroke = `var(--${strokeMatch[0]})`;
  }

  return result;
}

/** 替换 SVG 内部 fill/stroke 颜色 */
function applySvgColors(svg: string, { fill, stroke }: { fill?: string; stroke?: string }): string {
  if (!svg) return svg;

  if (fill) {
    svg = svg.replace(/\bfill\s*=\s*(['"]?)([^"'\s>]+)\1/gi, (m, _q, color) => (shouldPreserve(color) ? m : `fill="${fill}"`));
    svg = svg.replace(/<path(?![^>]*fill=)/gi, `<path fill="${fill}"`);
  }

  if (stroke) {
    svg = svg.replace(/\bstroke\s*=\s*(['"]?)([^"'\s>]+)\1/gi, (m, _q, color) => (shouldPreserve(color) ? m : `stroke="${stroke}"`));
    svg = svg.replace(/<path(?![^>]*stroke=)/gi, `<path stroke="${stroke}"`);
  }

  return svg;
}

// ====================  SVG 主处理函数  ====================
/** 整合 SVG 处理:清理 + 尺寸 + 颜色 */
function processSvg(svgText: string, props: Pick<IconProps, "color" | "className" | "style" | "size">): string {
  // 1️⃣ 清理
  svgText = sanitizeSvg(svgText);

  // 2️⃣ 确保存在 viewBox
  if (!svgText.includes("viewBox=")) {
    svgText = svgText.replace("<svg", '<svg viewBox="0 0 16 16"');
  }

  // 3️⃣ 若存在显式尺寸类 / props,则让 SVG 自适应外层容器
  const hasExplicitSize = hasSizeClass(props.className) || props.size || (props.style && (props.style.width || props.style.height));
  if (hasExplicitSize) {
    svgText = svgText.replace("<svg", '<svg width="100%" height="100%" preserveAspectRatio="xMidYMid meet"');
  } else {
    // 没有显式尺寸,给一个默认尺寸,比如 16x16
    svgText = svgText.replace("<svg", '<svg width="16" height="16" preserveAspectRatio="xMidYMid meet"');
  }

  // 4️⃣ 颜色处理
  const { fill, stroke } = extractSvgColor(props);

  if (!fill && !stroke) {
    // 若无显式颜色,默认加 fill="currentColor"
    svgText = svgText.replace("<path", '<path fill="currentColor"');
  } else {
    svgText = applySvgColors(svgText, { fill, stroke });
  }

  console.log(svgText);
  return svgText;
}

// ====================  组件主体部分     ====================
export default function Icon({ name, wrapperClass, className, color, style, size, fallback, onClick }: IconProps) {
  const [svgContent, setSvgContent] = useState<string>("");
  const [error, setError] = useState(false);
  const controllerRef = useRef<AbortController | null>(null);

  const iconPath = `/icons/${name}.svg`;

  useEffect(() => {
    if (!SVG_PATH_NAMES.includes(name)) {
      setError(true);
      return;
    }

    const loadSvg = async () => {
      controllerRef.current?.abort();
      controllerRef.current = new AbortController();

      if (svgCache.has(iconPath)) {
        // ✅ 缓存命中,不重新请求
        setSvgContent(svgCache.get(iconPath)!);
        return;
      }

      try {
        const res = await fetch(iconPath, { signal: controllerRef.current.signal });
        if (!res.ok) throw new Error(`HTTP ${res.status}`);
        const text = await res.text();
        cacheSet(iconPath, text);
        setSvgContent(text);
      } catch (e) {
        if (!(e instanceof DOMException && e.name === "AbortError")) {
          console.warn("❌ SVG load failed:", iconPath, e);
          setError(true);
        }
      }
    };

    loadSvg();
    return () => controllerRef.current?.abort();
    // eslint-disable-next-line react-hooks/exhaustive-deps
  }, [name]);

  const processedSvg = useMemo(() => {
    return processSvg(svgContent, { color, className, style, size });
  }, [svgContent, color, className, style, size]);

  /** 计算最终样式 */
  const finalStyle = useMemo(() => {
    const baseStyle: CSSProperties = {
      display: "inline-block",
      lineHeight: "0",
      flexShrink: "0",
      ...(size ? { width: size, height: size } : {}),
      ...(style ? style : {}),
    };
    return baseStyle;
  }, [style, size]);

  if (error) return <>{fallback ?? <span className="text-general-warning">⚠</span>}</>;

  return (
    <div className={wrapperClass} onClick={onClick}>
      <div id={name} className={className} style={finalStyle} dangerouslySetInnerHTML={{ __html: processedSvg }} />
    </div>
  );
}
验证调用
执行后,你就能在项目中优雅地使用 <Icon name="tiktok" size={24} color="red" /> 等写法,图标会自动加载、清理、渲染并继承颜色。
代码示例:
tsx
import IconSvg from "./components/IconSvg";
export default function App() {
  return (
    <div className="p-20 flex flex-col gap-6">
      {/* 默认 */}
      <IconSvg name="wx" color="var(--text-primary-color)" />
      {/* 尺寸 */}
      <div className="flex items-center gap-4">
        <IconSvg name="profile/orders" style={{ width: 24, height: 24 }} />
        <IconSvg name="profile/orders" size={24} />
        <IconSvg name="profile/orders" className="w-6 h-6" />
        <IconSvg name="profile/orders" className="size-6" />
      </div>
      {/* 颜色 */}
      <div className="flex items-center gap-4">
        <IconSvg name="tiktok" style={{ color: "blue" }} />
        <IconSvg name="tiktok" color="red" />
        <IconSvg name="tiktok" color="var(--text-primary-color)" />
        <IconSvg name="tiktok" className=" fill-amber-600" />
      </div>
    </div>
  );
}
生成结果:
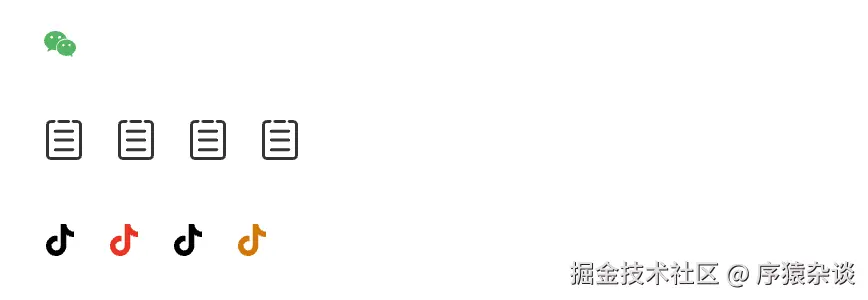
总结
本文介绍了一种 自动化 + 类型安全 + 高可维护 的 SVG 管理方案:
- 使用脚本自动生成类型定义,避免手动维护。
- 封装通用 Icon 组件,实现动态加载与安全清理。
- 结合 TailwindCSS,让尺寸与颜色控制更加灵活
通过这套方案,你可以让项目中的图标管理更加高效、统一、可控。
感谢各位看官阅读,如果觉得这边文章帮到了您,希望您能点个赞~