1、部署规划
|---------------|----------------------|-----|---------------|
| ip地址 | 同步目录 | 端口 | 安装软件 |
| 192.168.52.15 | /data/ftp /data/sftp | 873 | rsync、sersync |
| 192.168.52.16 | /data/ftp /data/sftp | 873 | rsync、sersync |
2、安装rsync
yum -y install rsync
vim /etc/rsyncd.conf
uid=root
gui=root
auth users = rsyncuser
secrets file = /etc/rsync.password
port=873
tongbu
comment = tongbu
path = /data
read only = no
3、创建密码文件,启动rsync
vi /etc/rsync.password
rsyncuser:123456
chmod 600 /etc/rsync.password
systemctl restart rsyncd
4、客户端配置
yum -y install rsync
vi /etc/rsyncd_users.pas
123456
chmod 600 /etc/rsyncd_users.pas
验证同步:
rsync -avz /data rsyncuser@192.168.52.15::tongbu --password-file=/etc/rsyncd_users.pas
rsync -avz /data rsyncuser@192.168.52.16::tongbu --password-file=/etc/rsyncd_users.pas
5、双向同步部署
1.安装sersync
cd /root
sersync下载地址:
wget --no-check-certificate https://raw.githubusercontent.com/orangle/sersync/master/release/sersync2.5.4_64bit_binary_stable_final.tar.gz
tar -xzf sersync2.5.4_64bit_binary_stable_final.tar.gz
mv GNU-Linux-x86 sersync
mv sersync /usr/local/
2.配置sersync
cd /usr/local/sersync/
cp confxml.xml confxml.xml-bak
192.168.52.15配置:
vi /usr/local/sersync/confxml.xml<?xml version="1.0" encoding="ISO-8859-1"?><head version="2.5"> <host hostip="localhost" port="8008"></host> <debug start="false"/> <fileSystem xfs="false"/> <filter start="false"> <exclude expression="(.*)\.svn"></exclude> <exclude expression="(.*)\.gz"></exclude> <exclude expression="^info/*"></exclude> <exclude expression="^static/*"></exclude> </filter> <inotify> <delete start="true"/> <createFolder start="true"/> <createFile start="true"/> <closeWrite start="true"/> <moveFrom start="true"/> <moveTo start="true"/> <attrib start="true"/> <modify start="true"/> </inotify> <sersync> <localpath watch="/data"> <remote ip="192.168.52.16" name="tongbu"/> <!--<remote ip="192.168.8.39" name="tongbu"/>--> <!--<remote ip="192.168.8.40" name="tongbu"/>--> </localpath> <rsync> <commonParams params="-artuz"/> <auth start="true" users="rsyncuser" passwordfile="/etc/rsyncd_users.pas"/> <userDefinedPort start="false" port="874"/><!-- port=874 --> <timeout start="false" time="100"/><!-- timeout=100 --> <ssh start="false"/> </rsync> <failLog path="/tmp/rsync_fail_log.sh" timeToExecute="60"/><!--default every 60mins execute once--> <crontab start="false" schedule="600"><!--600mins--> <crontabfilter start="false"> <exclude expression="*.php"></exclude> <exclude expression="info/*"></exclude> </crontabfilter> </crontab> <plugin start="false" name="command"/> </sersync> <plugin name="command"> <param prefix="/bin/sh" suffix="" ignoreError="true"/> <!--prefix /opt/tongbu/mmm.sh suffix--> <filter start="false"> <include expression="(.*)\.php"/> <include expression="(.*)\.sh"/> </filter> </plugin> <plugin name="socket"> <localpath watch="/opt/tongbu"> <deshost ip="192.168.138.20" port="8009"/> </localpath> </plugin> <plugin name="refreshCDN"> <localpath watch="/data0/htdocs/cms.xoyo.com/site/"> <cdninfo domainname="ccms.chinacache.com" port="80" username="xxxx" passwd="xxxx"/> <sendurl base="http://pic.xoyo.com/cms"/> <regexurl regex="false" match="cms.xoyo.com/site([/a-zA-Z0-9]*).xoyo.com/images"/> </localpath> </plugin></head>192.168.52.16配置:
vi /usr/local/sersync/confxml.xml<?xml version="1.0" encoding="ISO-8859-1"?><head version="2.5"> <host hostip="localhost" port="8008"></host> <debug start="false"/> <fileSystem xfs="false"/> <filter start="false"> <exclude expression="(.*)\.svn"></exclude> <exclude expression="(.*)\.gz"></exclude> <exclude expression="^info/*"></exclude> <exclude expression="^static/*"></exclude> </filter> <inotify> <delete start="true"/> <createFolder start="true"/> <createFile start="true"/> <closeWrite start="true"/> <moveFrom start="true"/> <moveTo start="true"/> <attrib start="true"/> <modify start="true"/> </inotify> <sersync> <localpath watch="/data"> <remote ip="192.168.52.15" name="tongbu"/> <!--<remote ip="192.168.8.39" name="tongbu"/>--> <!--<remote ip="192.168.8.40" name="tongbu"/>--> </localpath> <rsync> <commonParams params="-artuz"/> <auth start="true" users="rsyncuser" passwordfile="/etc/rsyncd_users.pas"/> <userDefinedPort start="false" port="874"/><!-- port=874 --> <timeout start="false" time="100"/><!-- timeout=100 --> <ssh start="false"/> </rsync> <failLog path="/tmp/rsync_fail_log.sh" timeToExecute="60"/><!--default every 60mins execute once--> <crontab start="false" schedule="600"><!--600mins--> <crontabfilter start="false"> <exclude expression="*.php"></exclude> <exclude expression="info/*"></exclude> </crontabfilter> </crontab> <plugin start="false" name="command"/> </sersync> <plugin name="command"> <param prefix="/bin/sh" suffix="" ignoreError="true"/> <!--prefix /opt/tongbu/mmm.sh suffix--> <filter start="false"> <include expression="(.*)\.php"/> <include expression="(.*)\.sh"/> </filter> </plugin> <plugin name="socket"> <localpath watch="/opt/tongbu"> <deshost ip="192.168.138.20" port="8009"/> </localpath> </plugin> <plugin name="refreshCDN"> <localpath watch="/data0/htdocs/cms.xoyo.com/site/"> <cdninfo domainname="ccms.chinacache.com" port="80" username="xxxx" passwd="xxxx"/> <sendurl base="http://pic.xoyo.com/cms"/> <regexurl regex="false" match="cms.xoyo.com/site([/a-zA-Z0-9]*).xoyo.com/images"/> </localpath> </plugin></head>3、设置sersync监控开机自动执行
cat /etc/rsyncd_users.pas #sersync密码文件
123456
chmod 600 /etc/rsyncd_users.pas
启动sersync:
/usr/local/sersync/sersync2 -d -r -o /usr/local/sersync/confxml.xml
4、配置systemd启动sersync服务
vim /etc/systemd/system/sersync.service
Unit
Description=Sersync File Synchronization Service
After=network.target
Service
Type=simple
User=root
ExecStart=/usr/local/sersync/sersync2 -r -o /usr/local/sersync/confxml.xml
Restart=on-failure
RestartSec=5
Install
WantedBy=multi-user.target
systemctl daemon-reload
systemctl start sersync
systemctl enable sersync
systemctl status sersync
5、在客户机监测数据同步
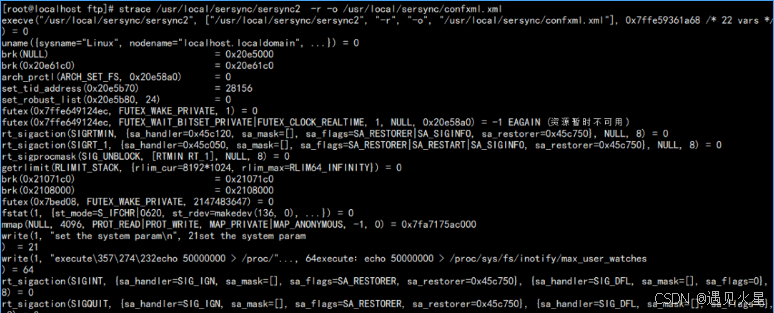
yum install strace -y
strace /usr/local/sersync/sersync2 -r -o /usr/local/sersync/confxml.xml
 6、验证文件同步
192.168.52.15服务器:

192.168.52.16服务器:
