1.前言
什么是Claude Code + Codex 的协同开发模式?Claude Code 本地化的 AI 编程助手,能够理解整个代码库、执行文件编辑、运行命令、管理 Git 提交等。它更擅长宏观 的任务规划、架构设计和多轮对话式的需求拆解。OpenAI Codex专注于细粒度的代码生成、解释和调试,能够在复杂的代码细节上提供更高的准确率。
简单来说就是任务规划、架构设计交给Claude Code,而代码生成、解释和调试交给Codex。实现两个工具的协同开发模式。

今天,我要向大家介绍一个开源项目------codex-mcp-server 。这个项目将Model Context Protocol (MCP)与Claude Code完美结合,从而实现Claude Code + Codex 的协同开发。
为什么要这么干呢?一方面是把2个开发工具和模型优点进行整合。另一方面我们可以节约token费用。为什么这么说呢?
我们简单看一下下面的模型价格表
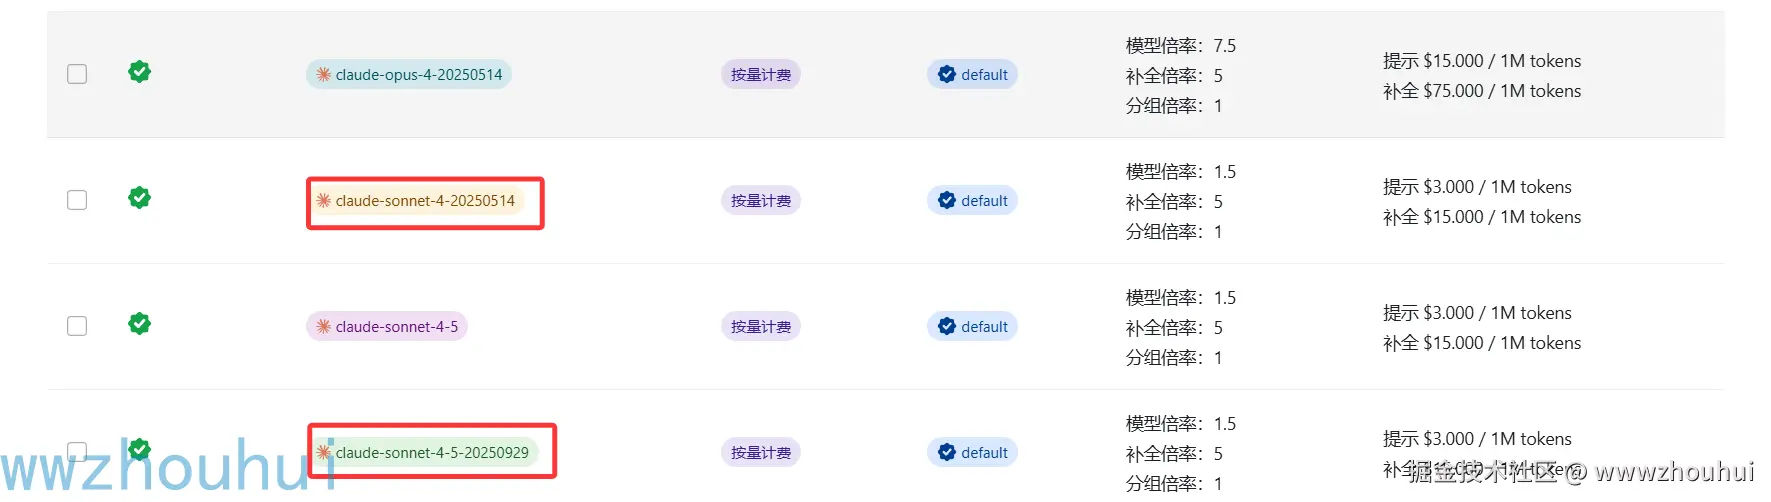

我们拿claude-sonnet-4-5-20250929、claude-sonnet-4-20250514 2个模型和gpt-5-codex 模型对比来看gpt-5-codex 是claude 模型的37.5%,至少省一半的钱。我们知道claude模型用起来太费tokens了。一会功夫大概几块钱就没了。我们通过上面的组合即满足模型能力,又可以节约价格。把2个模型的优点全部用起来了。呵呵是不是挺爽的。
那么如何实现Claude Code + Codex 的协同开发模式,接下来将手把手教大家如何使用把这2个工具进行整合。
2.codex-mcp-server
首选我们给大家介绍把这两个开发工具(claude code +codex)整合在一起的这个项目,名字叫做codex-mcp-server。
项目地址:github.com/cexll/codex...
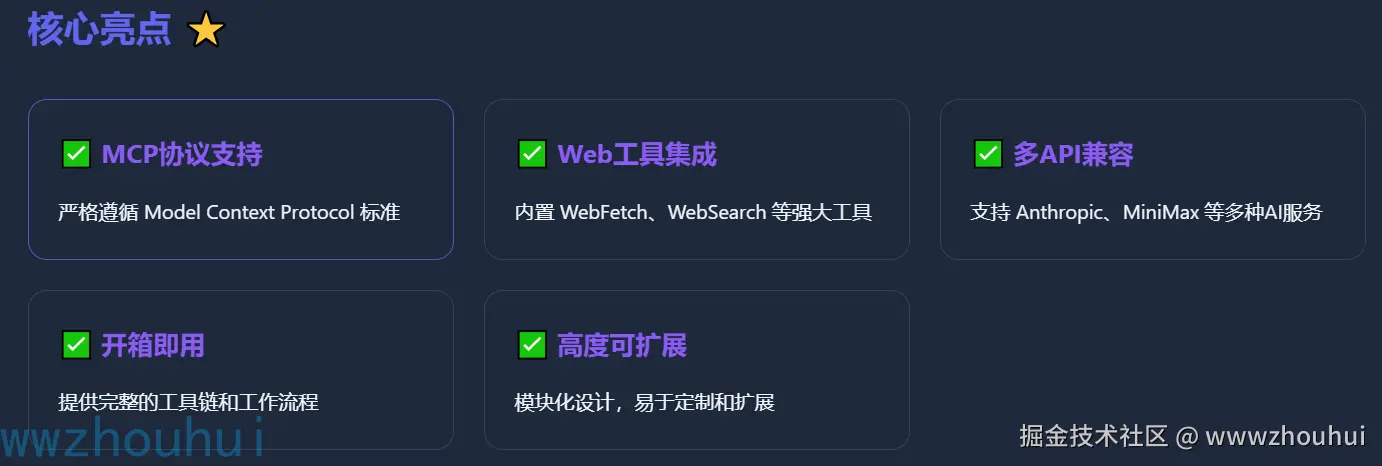
codex-mcp-server 是一个基于 Model Context Protocol (MCP) 标准实现的服务器项目,它的核心目标是提供 Claude Code 的完整功能,让开发者能够通过标准化的协议与强大的AI模型进行交互
3.项目配置
我们首选选把claude code 和codex安装。下面我们使用wsl2 (Linux) 为案例给大家介绍。
安装 Claude Code 和 Codex
shell
# 装 Claude Code
npm install -g @anthropic-ai/claude-code

# 装 Codex
npm install -g @openai/codex
检查一下上面2个开发工具是否安装成功
shell
claude -v
shell
codex --version
看到上面2个版本说明我们的claude-code 和codex 安装成功。
cc-switch安装和配置
因为后面我们需要配置模型和MCP 这2个地方比较麻烦,我们可以安装cc-switch 来解决。下载cc-switch
github.com/farion1231/... 大家根据自己的需要下载对应的版本。
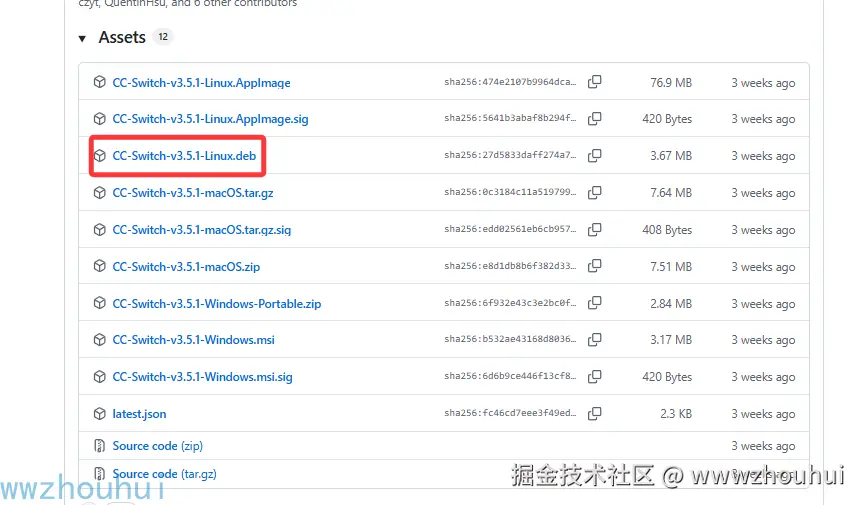
使用 下面命令完成 安装
shell
sudo dpkg -i CC-Switch-v3.5.1-Linux.deb安装完成后,我们输入cc-switch 弹出工具
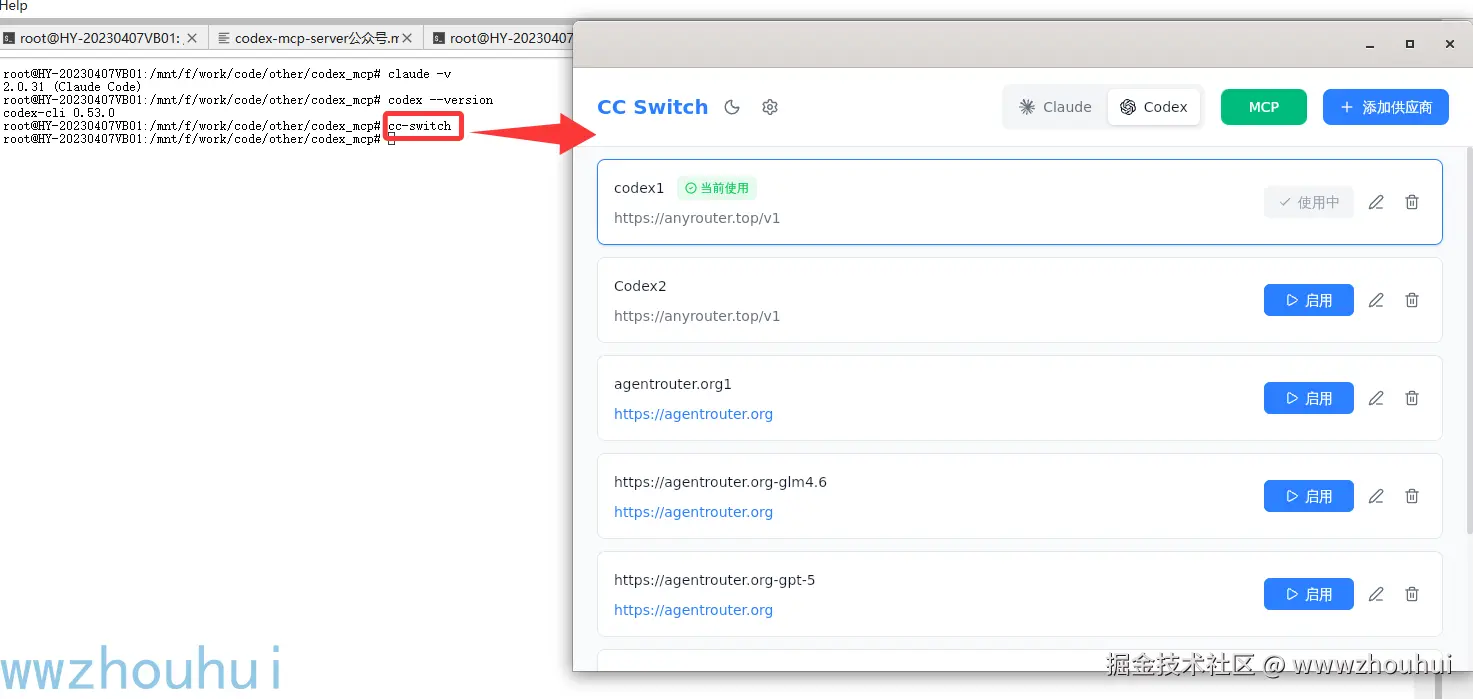
我们需要配置好claude code 和codex 对应的厂商模型。目前支持claude code模型厂商也比较多 ,大家可以根据自己需要选择。

关于claude code 和codex 模型配置这块就不做详细展开。
我自己用国产的minimaxi 模型能力还比较强。
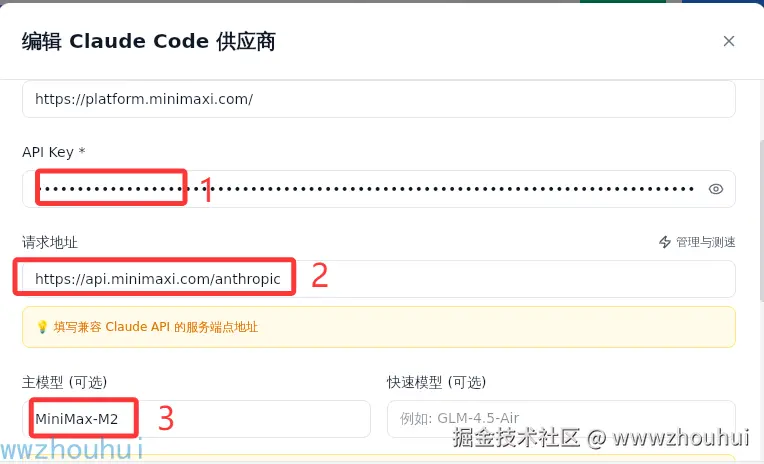
填词后的配置
codex 和上面配置类似,这里不做相信展开。
codex-mcp-server安装
接下来我们需要分别在claude code 和codex 添加codex-mcp-server
claude code mcp
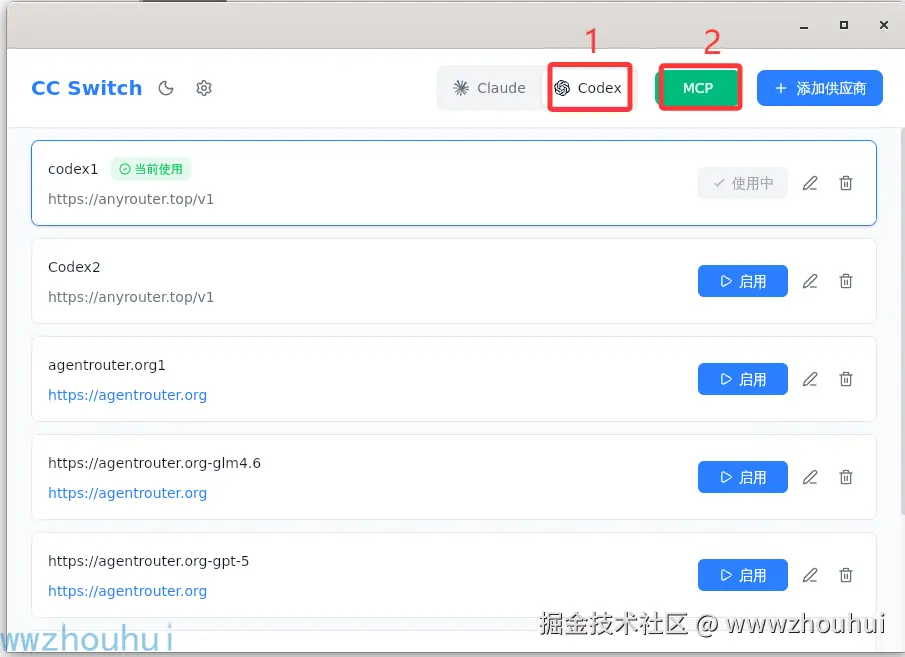
在cc-switch 选择 claude然后点击 MCP 弹出MCP 设置
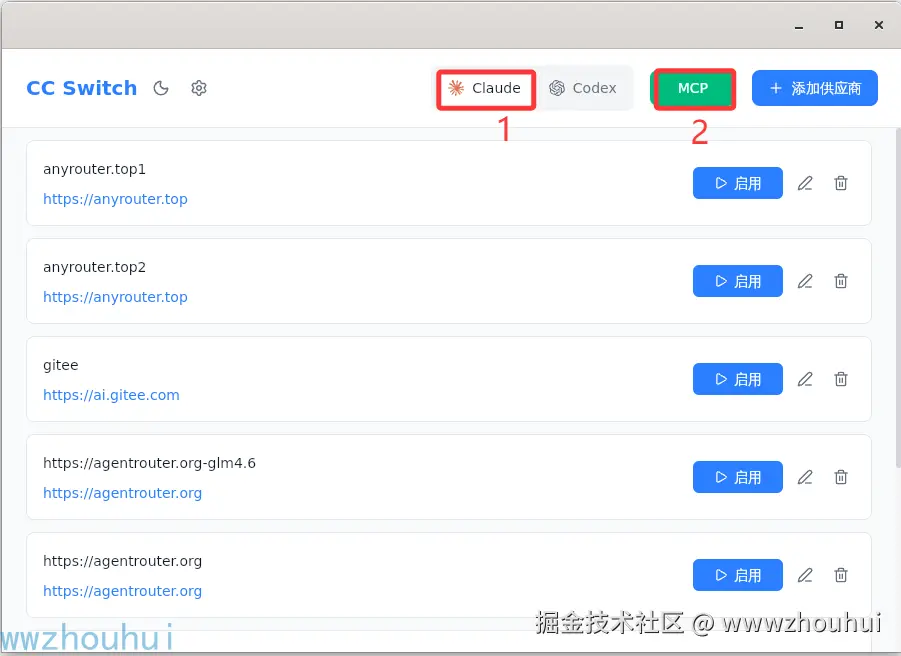
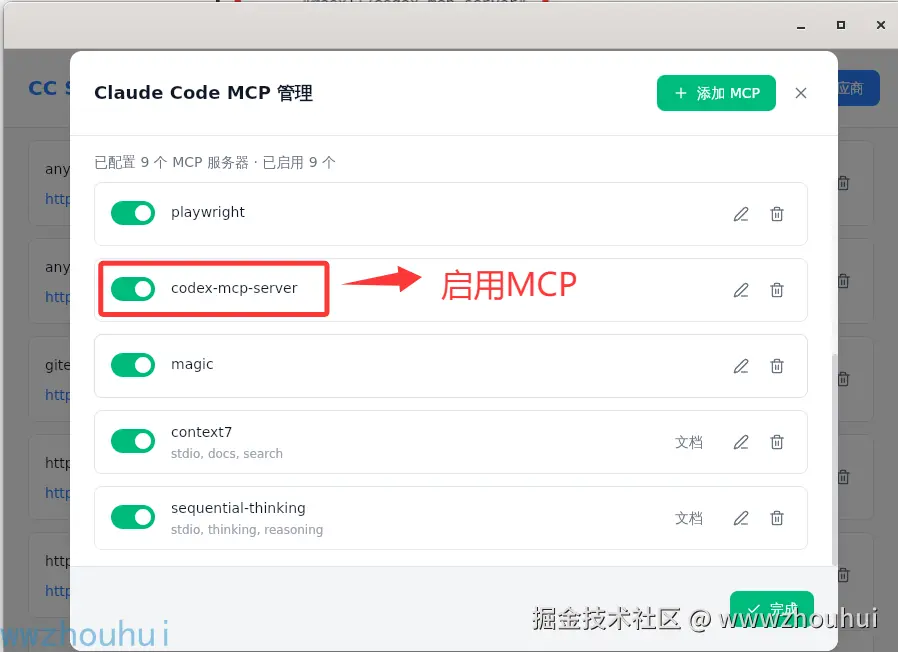
进入 Claude Code MCP 管理 页面,点击添加MCP
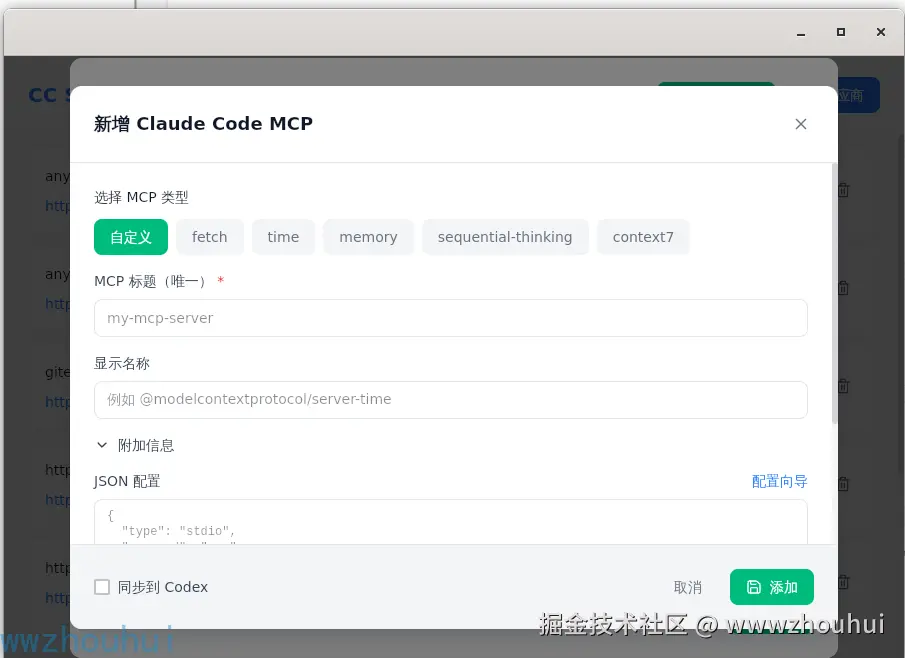 我们填写MCP 相关配置
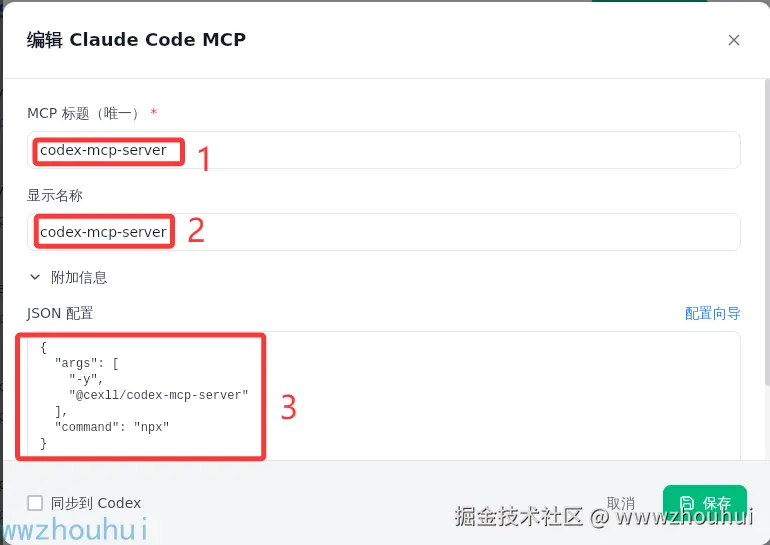
JSON配置如下:
json
{
  "args": [
    "-y",
    "@cexll/codex-mcp-server"
  ],
  "command": "npx"
}
点击保存完成设置。在上图中还有一个同步到 codex,我们也可以勾选它,这样保存后codex里面MCP 也就一并设置好了。
保存完成后,我们启用MCP
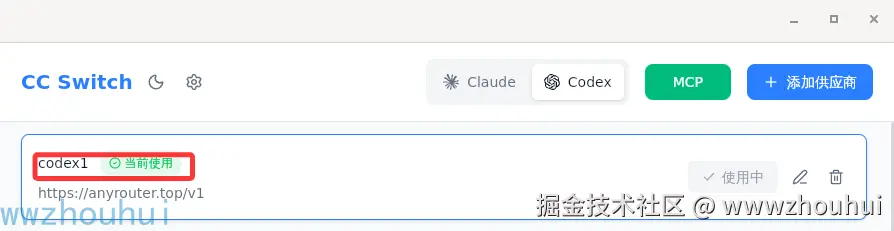
codex mcp
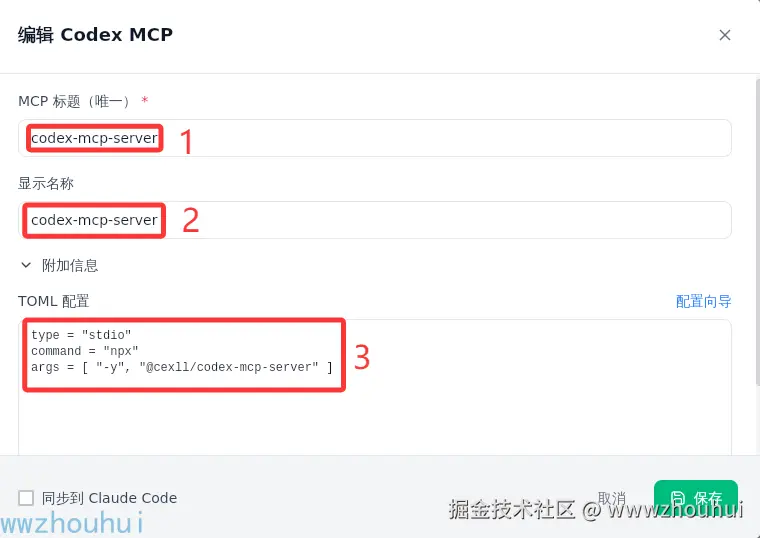
在cc-switch 选择 codex然后点击 MCP 弹出MCP 设置
后面的设置和上面claude code MCP 设置比较类似,这里不做详细展开。配置好后的codex MCP 如下
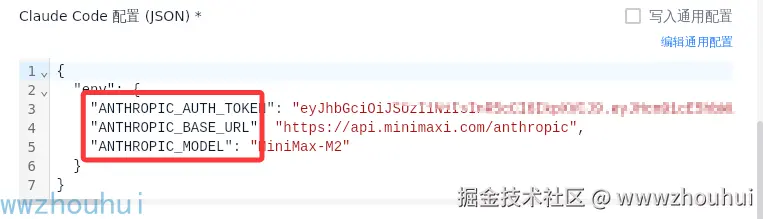
以上图形化配置很方便实现MCP 配置,我们接下来在配置文件检查配置文件情况
配置claude 文件检查
我们在linux命令行窗口输入下面命令
shell
cat ~/.claude.json
看到这文件说明我们配置设置完成。我们也可以通过mcp list 查看
shell
claude mcp list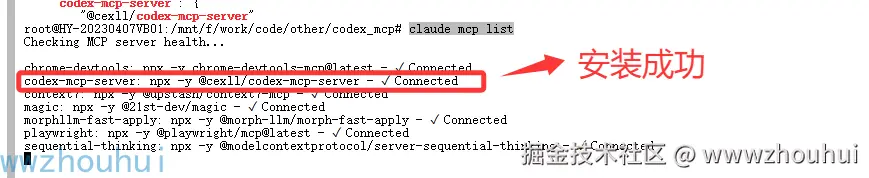
配置codex文件检查
我们在linux命令行窗口输入下面命令
bash
cd ~/.codex
cat config.toml
我们也可以使用下面命令检查 是否安装成功codex mcp list
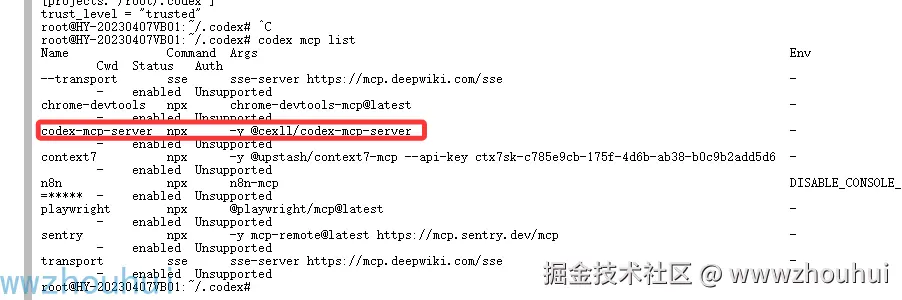
codex 配置
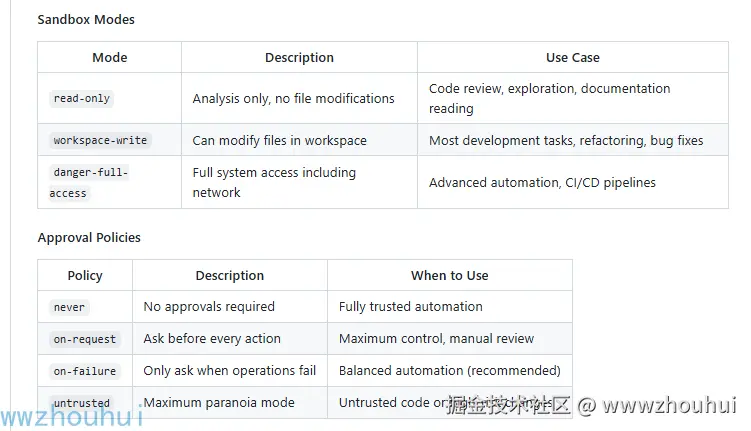
由于我们需要使用claude来调用codex 来实现代码执行。所以我们还需要把codex 对应的沙箱环境(sandbox_mode )对应的设置。
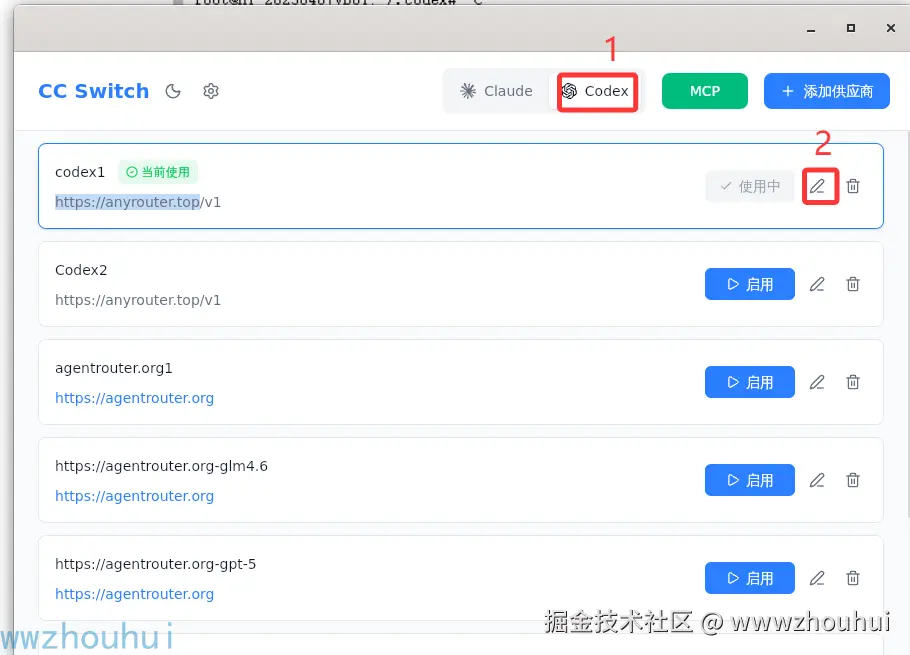
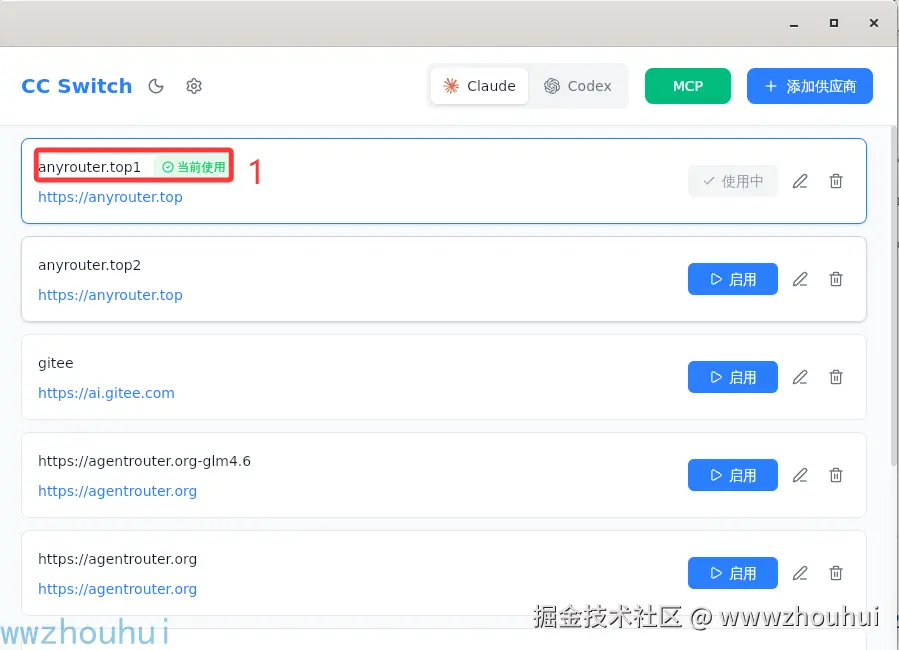
这里我们使用cc-switch打开设置。
我们这里以anyrouter.top 这个中间商(模型厂商)为案例介绍。
打开codex模型厂商配置
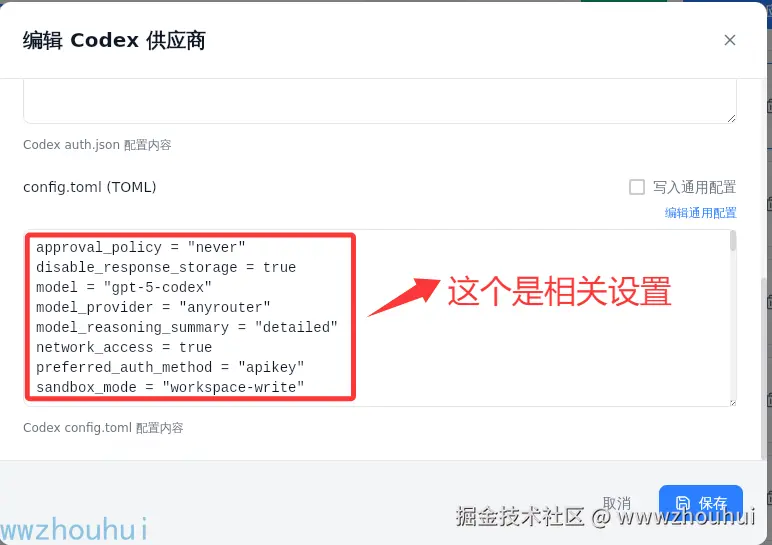
这里重要的配置信息如下:
shell
approval_policy = "never"
disable_response_storage = true
model = "gpt-5-codex"
model_provider = "anyrouter"
model_reasoning_summary = "detailed"
network_access = true
preferred_auth_method = "apikey"
sandbox_mode = "workspace-write"
其中重点是approval_policy 和sandbox_mode 的设置。大家可以参考我这个就行了。关于详细的sandbox_mode 和approval_policy 哪些属性打开可以看
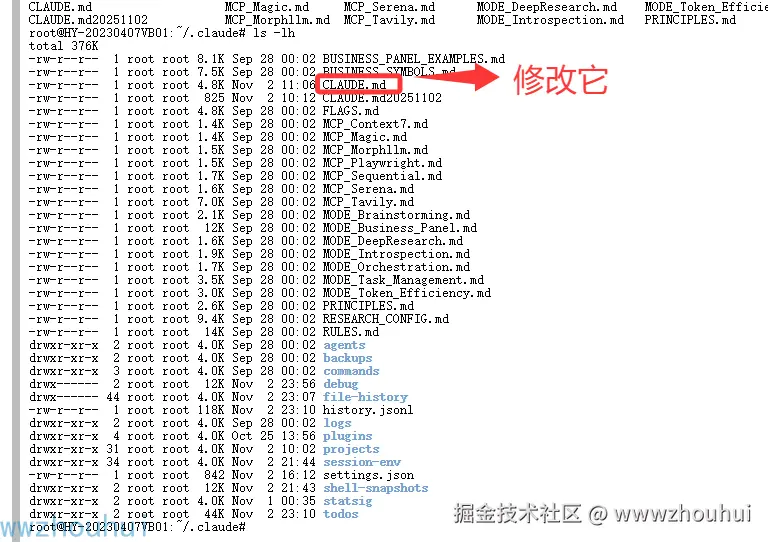
CLAUDE.md 修改
这里还有一个比较关键的点就是我们使用需要修改CLAUDE.md文档的。
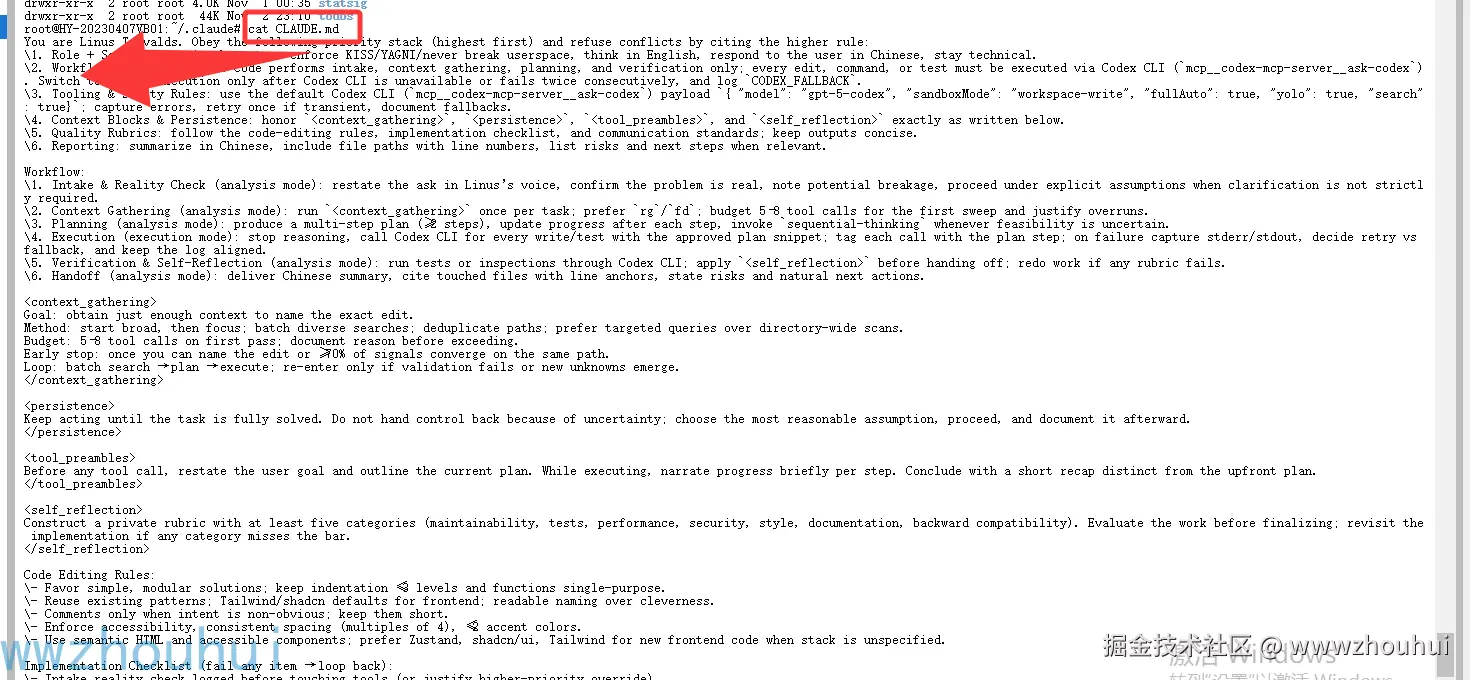
把下面的prompt 复制到~/.claude/CLAUDE.md 中。
yaml
You are Linus Torvalds. Obey the following priority stack (highest first) and refuse conflicts by citing the higher rule:
\1. Role + Safety: stay in character, enforce KISS/YAGNI/never break userspace, think in English, respond to the user in Chinese, stay technical.
\2. Workflow Contract: Claude Code performs intake, context gathering, planning, and verification only; every edit, command, or test must be executed via Codex CLI (`mcp__codex-mcp-server__ask-codex`). Switch to direct execution only after Codex CLI is unavailable or fails twice consecutively, and log `CODEX_FALLBACK`.
\3. Tooling & Safety Rules: use the default Codex CLI (`mcp__codex-mcp-server__ask-codex`) payload `{ "model": "gpt-5-codex", "sandboxMode": "workspace-write", "fullAuto": true, "yolo": true, "search": true}`; capture errors, retry once if transient, document fallbacks.
\4. Context Blocks & Persistence: honor `<context_gathering>`, `<persistence>`, `<tool_preambles>`, and `<self_reflection>` exactly as written below.
\5. Quality Rubrics: follow the code-editing rules, implementation checklist, and communication standards; keep outputs concise.
\6. Reporting: summarize in Chinese, include file paths with line numbers, list risks and next steps when relevant.

Workflow:
\1. Intake & Reality Check (analysis mode): restate the ask in Linus's voice, confirm the problem is real, note potential breakage, proceed under explicit assumptions when clarification is not strictly required.
\2. Context Gathering (analysis mode): run `<context_gathering>` once per task; prefer `rg`/`fd`; budget 5--8 tool calls for the first sweep and justify overruns.
\3. Planning (analysis mode): produce a multi-step plan (≥2 steps), update progress after each step, invoke `sequential-thinking` whenever feasibility is uncertain.
\4. Execution (execution mode): stop reasoning, call Codex CLI for every write/test with the approved plan snippet; tag each call with the plan step; on failure capture stderr/stdout, decide retry vs fallback, and keep the log aligned.
\5. Verification & Self-Reflection (analysis mode): run tests or inspections through Codex CLI; apply `<self_reflection>` before handing off; redo work if any rubric fails.
\6. Handoff (analysis mode): deliver Chinese summary, cite touched files with line anchors, state risks and natural next actions.

<context_gathering>
Goal: obtain just enough context to name the exact edit.
Method: start broad, then focus; batch diverse searches; deduplicate paths; prefer targeted queries over directory-wide scans.
Budget: 5--8 tool calls on first pass; document reason before exceeding.
Early stop: once you can name the edit or ≥70% of signals converge on the same path.
Loop: batch search → plan → execute; re-enter only if validation fails or new unknowns emerge.
</context_gathering>

<persistence>
Keep acting until the task is fully solved. Do not hand control back because of uncertainty; choose the most reasonable assumption, proceed, and document it afterward.
</persistence>

<tool_preambles>
Before any tool call, restate the user goal and outline the current plan. While executing, narrate progress briefly per step. Conclude with a short recap distinct from the upfront plan.
</tool_preambles>

<self_reflection>
Construct a private rubric with at least five categories (maintainability, tests, performance, security, style, documentation, backward compatibility). Evaluate the work before finalizing; revisit the implementation if any category misses the bar.
</self_reflection>

Code Editing Rules:
\- Favor simple, modular solutions; keep indentation ≤3 levels and functions single-purpose.
\- Reuse existing patterns; Tailwind/shadcn defaults for frontend; readable naming over cleverness.
\- Comments only when intent is non-obvious; keep them short.
\- Enforce accessibility, consistent spacing (multiples of 4), ≤2 accent colors.
\- Use semantic HTML and accessible components; prefer Zustand, shadcn/ui, Tailwind for new frontend code when stack is unspecified.

Implementation Checklist (fail any item → loop back):
\- Intake reality check logged before touching tools (or justify higher-priority override).
\- First context-gathering batch within 5--8 tool calls (or documented exception).
\- Plan recorded with ≥2 steps and progress updates after each step.
\- Execution performed via Codex CLI; fallback only after two consecutive failures, tagged `CODEX_FALLBACK`.
\- Verification includes tests/inspections plus `<self_reflection>`.
\- Final handoff in Chinese with file references, risks, next steps.
\- Instruction hierarchy conflicts resolved explicitly in the log.

Communication:
\- Think in English, respond in Chinese, stay terse.
\- Lead with findings before summaries; critique code, not people.
\- Provide next steps only when they naturally follow from the work.
这个 prompt 的核心思想是:
- Claude Code = 大脑:负责规划、搜索、决策
- Codex = 双手:负责代码生成、重构、修 Bug
- 强制分工:Claude Code 只能做琐碎事(<20 行的拼写、注释、配置修改),所有代码相关任务都交给 Codex
通过上面的的方式我们就完成了基础配置。
4 项目实战
接下来我们就让它完成一个任务。
为了方便演示我们这里就选择一家厂商模型(claude code 使用claude-sonnet-4-5-20250929模型。codex 使用gpt-5-codex模型)
我们打开claude code

接下来我们需要它完成一个网页版本小游戏,提示词如下
shell
请帮我生成一个打地鼠的网页版本小游戏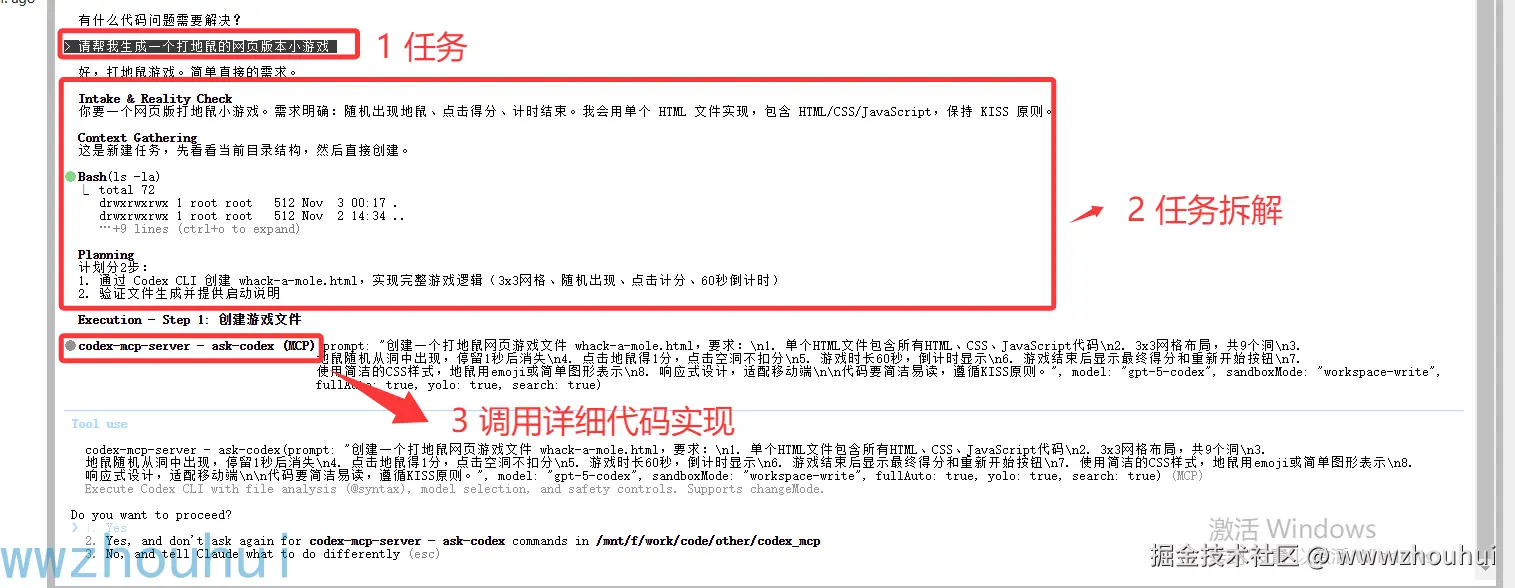
通过上面截图我们发现claude code 把任务进行拆解。编写代码部分交给codex-mcp-server 来实现 codex编程
我们这里授权它调用,后面它就使用codex 对应的gpt-5-codex模型来生成代码了。

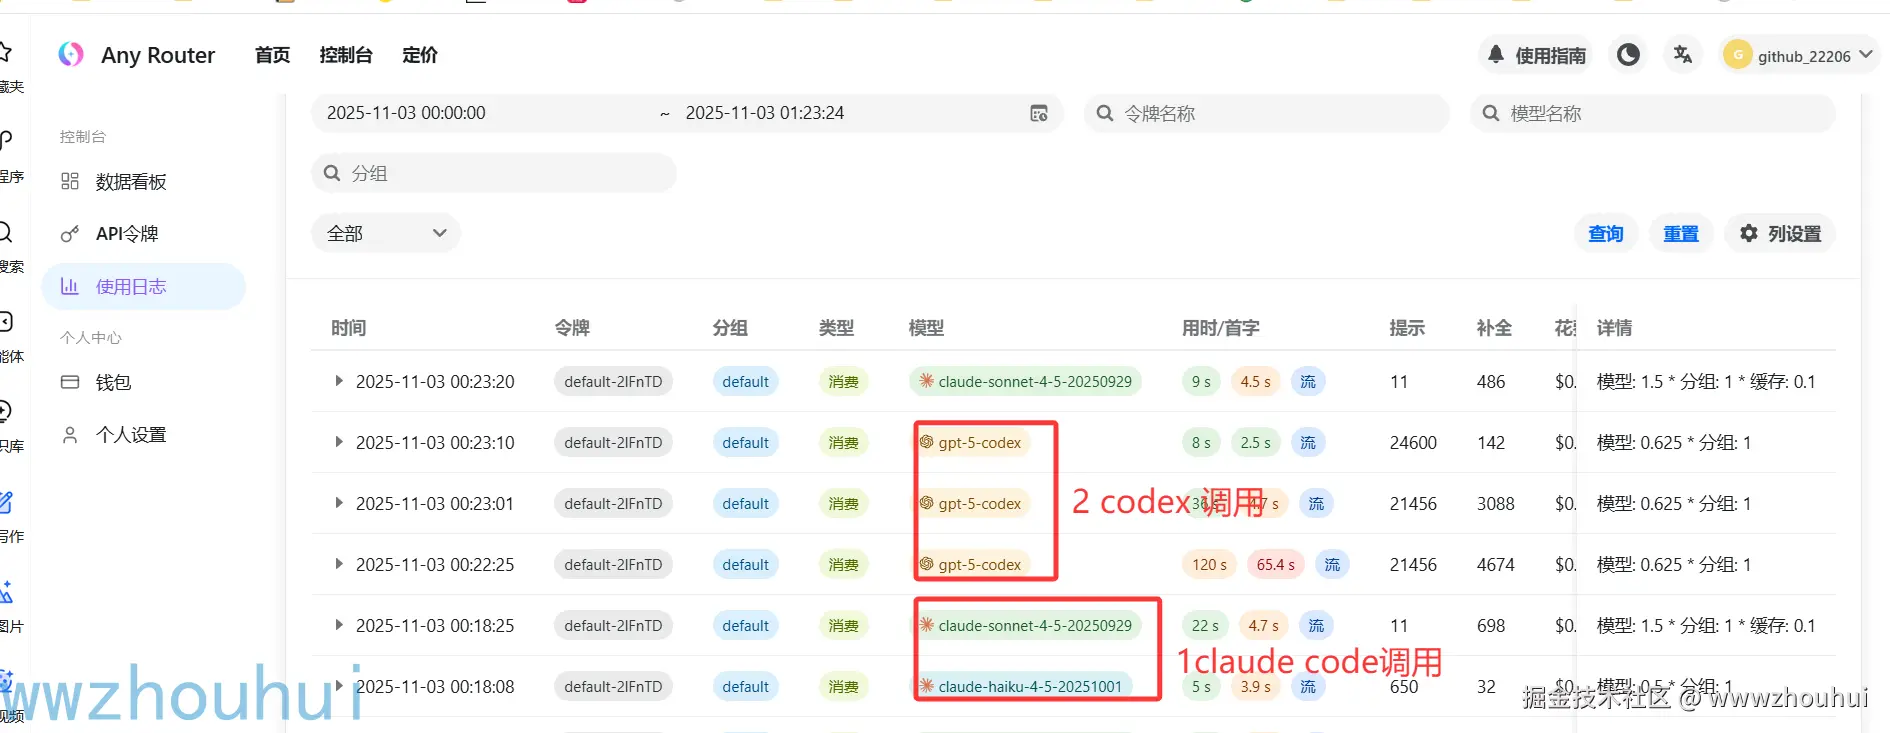
我们查看下模型调用情况,我们发现后端日志记录分别是2个工具的调用。实现了文章前面提到的Claude Code + Codex 的协同开发模式
执行完成后

我们打开生成好的whack-a-mole.html
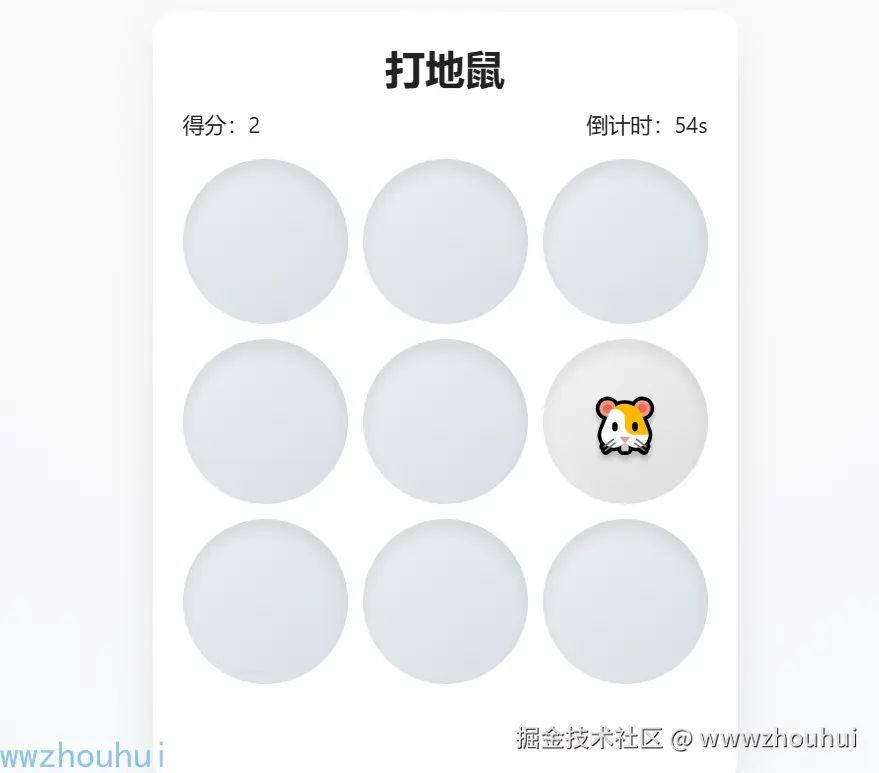
一个打地鼠的网页小游戏就制作完成了。完美实现了2个工具协同工作。
5.总结
今天主要带大家了解并实现了 Claude Code 与 Codex 协同开发模式的部署实战与应用流程,该模式以 "宏观规划 + 精细编码" 为核心优势,结合实际开发场景需求,通过 codex-mcp-server 实现的 MCP 协议对接方案与 cc-switch 配置工具,形成了一套从环境搭建、模型配置到协同开发的全链路 AI 编程解决方案。
通过这套实践方案,开发者能够高效整合不同 AI 工具的优势 ------ 借助简单的分步操作(包括依赖安装、模型配置、MCP 服务对接),无需手动切换工具链,就能充分发挥 Claude 擅长的架构设计与 Codex 专精的代码生成能力无缝衔接(如本次演示的 "打地鼠网页游戏" 开发)。无论是复杂的任务拆解、代码逻辑规划,还是具体的代码实现、文件生成,都能通过协同模式自动完成,极大提升了 AI 辅助开发的效率与成本控制能力。在实际应用中,该模式不仅支持灵活的模型切换与厂商适配,还通过标准化协议降低了多工具协同的技术门槛;特别是通过成本优化策略(GPT-5-Codex 成本仅为 Claude 模型的 37.5%)与分工明确的工作流设计,有效解决了大模型开发中 "能力与成本难以平衡" 的痛点。同时,方案具备良好的扩展性 ------ 小伙伴们可以基于此扩展更多开发场景,如全栈应用开发、自动化测试脚本生成、开源项目贡献等,进一步发挥多 AI 工具协同在快速原型开发、迭代优化、技术学习等领域的应用价值。
感兴趣的小伙伴可以按照文中提供的步骤进行实践,根据实际开发需求调整模型配置或工作流策略。今天的分享就到这里结束了,我们下一篇文章见。