一:传统的爬虫:requests +BS4
传统爬虫一般形式是请求、解析和存储,每个步骤之间属于同步处理,适合简单爬虫。没有用到专业的爬虫框架,都是简单的HTTP请求工具及传统网页解析工具。
下面分别介绍解析JSON返回(采用Excel存储)的和解析网页格式的(用到BS4,采用数据库存储)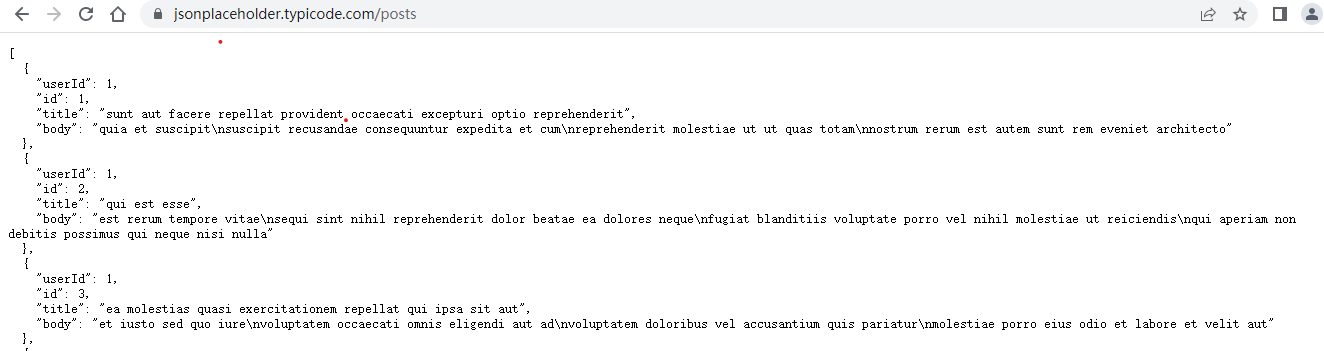
python
import pandas as pd
import requests

response = requests.get('https://jsonplaceholder.typicode.com/posts')  # 返回格式为JSON,其中data里面对应数组
json_data = response.json()
newList=[]
for product in json_data:
     # 只提取返回的部分字段
     userId= product["id"]
     title = product["title"]

     item={"用户名":id,"文章":title}
     newList.append(item)
df = pd.DataFrame(newList)## 字典列表(每个字典代表一行数据)
df.to_excel('20251108.xlsx', index=False)
print("Excel文件保存成功!")
python
import requests                      # 导入网络请求模块
from fake_useragent import UserAgent # 导入请求头模块
from multiprocessing import Pool     # 导入进程池
import re                            # 导入正则表达式模块
from bs4 import BeautifulSoup        # 导入解析html代码的模块
import time                          # 导入时间模块
from pymysql import *                # 导入数据库模块

# 创建connection对象,连接MySQL数据库
conn = connect(host='localhost', port=3306, database='db_movie', user='root',
               password='root', charset='utf8')
#创建cursor对象
cs1 = conn.cursor()

class Spider():
    def __init__(self):
        self.info_urls = []         # 所有电影详情页的请求地址

    # 向数据库中添加数据
    def sql_insert(self,data):
        # 添加的SQL语句
        query = f'insert into tb_movieinfo (name,date,imdb,douban,length)' \
                f'values(%s, %s, %s, %s, %s)'
        # 获取要添加的数据
        values = (data[0], data[1], data[2], data[3], data[4])
        cs1.execute(query, values)  # 执行SQL语句
        conn.commit()  # 提交数据库操作

    # 获取所有电影的详情页地址信息
    def get_home(self, home_url):
        header = UserAgent().random  # 创建随机请求头
        home_response = requests.get(home_url, header,verify=True)  # 发送主页网络请求
        if home_response.status_code == 200:  # 判断请求是否成功
            home_response.encoding = 'gb2312'  # 设置编码方式
            html = home_response.text  # 获取返回的HTML代码
            # 获取所有电影详情页地址
            details_urls = re.findall('<a href="(.*?)" class="ulink">', html)
            self.info_urls.extend(details_urls)  # 添加请求地址列表

    # 爬取电影的详细信息
    def get_info(self, url):
        header = UserAgent().random  # 创建随机请求头
        info_response = requests.get(url, header,verify=True)  # 发送获取每条电影信息的网络请求
        if info_response.status_code == 200:  # 判断请求是否成功
            info_response.encoding = 'gb2312'
            html = BeautifulSoup(info_response.text, "html.parser")  # 获取返回的HTML代码
            try:
                # 获取电影下载地址
                # download_url = re.findall('<a href=".*?">(.*?)</a></td>',info_response.text)[0]
                name = html.select('div[class="title_all"]')[0].text  # 获取电影名称
                # 将电影的详细信息进行处理,先去除所有HTML中的空格(\u3000),然后用◎将数据进行分割
                info_all = (html.select('div[id="Zoom"]')[0]).span.text.replace('\u3000', '').split('◎')
                date = str(info_all[8]).replace('上映日期','')  # 获取上映时间
                imdb = str(info_all[9].replace('\xa0','')).replace('IMDb评分','')  # 获取IMDb评分
                douban = str(info_all[10]).replace('豆瓣评分','')  # 获取豆瓣评分
                length = str(info_all[11]).replace('片长','')  # 获取片长
                # 电影信息
                info = {'电影名称': name, '上映日期': date, 'IMDb评分': imdb,
                        '豆瓣评分': douban, '片长': length}
                print(info)    # 打印电影信息
                # 将电影信息插入数据库中
                self.sql_insert([name, date, imdb, douban, length])
            except Exception as e:
                print('出现异常:',e)
                # 出现异常不再爬取,直接开始爬取下一个电影的信息
                return

if __name__ == '__main__':       # 定义程序入口
    # 创建主页请求地址的列表(前10页)
    home_url = ['https://www.ygdy8.net/html/gndy/dyzz/list_23_{}.html'.format(str(i))for i in range(1,11)]
    s = Spider()   # 创建自定义爬虫类对象
    start_time = time.time()              # 记录普通爬取电影详情页地址的起始时间
    for i in home_url:                    # 循环遍历主页请求地址
        s.get_home(i)               # 发送网络请求,获取每个电影详情页地址
    end_time = time.time()                 # 记录普通爬取电影详情页地址的结束时间
    print('普通爬取电影详情页地址耗时:',end_time-start_time)

    start_time_4 = time.time()             # 记录多进程爬取电影详情页地址起始时间
    pool = Pool(processes=4)               # 创建进程池对象,最大进程数为4
    pool.map(s.get_home,home_url)          # 通过多进程获取每个电影详情页地址
    end_time_4 = time.time()               # 记录多进程爬取电影详情页地址结束时间
    print('通过多进程爬取电影详情页地址耗时:', end_time_4 - start_time_4)

    # 以下代码用于爬取电影详细信息
    info_urls = ['https://www.ygdy8.net' + i for i in s.info_urls]  # 组合每个电影详情页的请求地址
    info_start_time = time.time()  # 记录普通爬取电影详细信息的起始时间
    for i in info_urls:  # 循环遍历电影详情页请求地址
        s.get_info(i)  # 发送网络请求,获取每个电影的详细信息
    info_end_time = time.time()  # 记录普通爬取电影详细信息的结束时间
    print('普通爬取电影详情信息耗时:', info_end_time - info_start_time)

    info_start_time_4 = time.time()  # 记录多进程爬取电影详细信息的起始时间
    pool = Pool(processes=4)  # 创建进程池对象,最大进程数为4
    pool.map(s.get_info, info_urls)  # 通过进程获取每个电影详细信息
    info_end_time_4 = time.time()  # 记录通过多进程爬取电影详细信息结束时间
    print('通过多进程爬取电影详情信息耗时:', info_end_time_4 - info_start_time_4)
二:分布式爬虫框架:scrapy(内部解析网页是采用LXML框架实现)
分布式爬虫框架scrapy是自己的一套项目工程目录,可以解析JSON或网页。
分布式是通过Scrapy-Redis间接实现,middlewares.py是锦上添花的扩展处理,默认可以不配置,
新建项目 :scrapy startproject 项目名
新建爬虫文件 :scrapy genspider 文件名 域名
明确目标字段(items.py)
写爬虫程序(文件名.py)
管道文件(pipelines.py)
(1)爬虫文件爬取到数据后,需要将数据封装到items对象中。
(2)使用yield关键字将items对象提交给pipelines管道进行持久化操作。
(3)settings.py配置文件中开启管道
全局配置(settings.py)
python
BOT_NAME = "JDspider"
SPIDER_MODULES = ["JDspider.spiders"]
NEWSPIDER_MODULE = "JDspider.spiders"
ADDONS = {}
# Obey robots.txt rules
# 1. 禁用robots协议(京东robots禁止爬虫,需关闭)
ROBOTSTXT_OBEY = False

# 2. 配置随机User-Agent(使用scrapy-user-agents中间件)
DOWNLOADER_MIDDLEWARES = {
    'scrapy.downloadermiddlewares.useragent.UserAgentMiddleware': None,
    'scrapy_user_agents.middlewares.RandomUserAgentMiddleware': 400,
}

# 3. 设置爬取延迟(1秒/次,避免触发反爬)
DOWNLOAD_DELAY = 1

# 4. 启用数据管道(优先级300,数值越小优先级越高)
ITEM_PIPELINES = {
    'JDspider.pipelines.JdspiderPipeline': 300,
}

# Concurrency and throttling settings
#CONCURRENT_REQUESTS = 16
CONCURRENT_REQUESTS_PER_DOMAIN = 1
DOWNLOAD_DELAY = 1
运行爬虫 :scrapy crawl 爬虫名,不想手动输入命令的话,可以写一个python文件
python
from scrapy.cmdline import execute
execute("scrapy crawl jd_phone_spider".split())
存储的话,就可以使用数据库或保存到Excel等文件中
python
import pymysql            # 导入数据库连接pymysql模块
class Mysql:
    # 初始化数据库参数
    def __init__(self,host,database,user,password,port):
        self.host = host
        self.database = database
        self.user = user
        self.password = password
        self.port = port

    def executemany(self, item):
        data = dict(item)  # 将item转换成字典类型
        # sql语句
        sql = 'insert into news (title,synopsis,url,time) values(%s,%s,%s,%s)'
        # 执行插入多条数据
        self.cursor.executemany(sql, [(data['news_title'], data['news_synopsis'],data['news_url'],data['news_time'])])
        self.db.commit()  # 提交
        return item  # 返回item
Scrapy 提供了多种强大的网页解析方法,主要使用 选择器 (Selectors) 来提取数据。以下是几种主要的解析方法:
2.1 CSS 选择器
基本用法
import scrapy

class MySpider(scrapy.Spider):
    name = 'example'

    def parse(self, response):
        # 提取单个元素
        title = response.css('h1::text').get()

        # 提取多个元素
        links = response.css('a::attr(href)').getall()

        # 提取类名包含 "price" 的元素
        prices = response.css('.price::text').getall()

        # 嵌套选择
        for product in response.css('.product'):
            name = product.css('h2::text').get()
            price = product.css('.price::text').get()

            yield {
                'name': name,
                'price': price
            }
常用 CSS 选择器语法
def parse(self, response):
    # 元素选择器
    titles = response.css('h1::text').getall()

    # 类选择器
    items = response.css('.item::text').getall()

    # ID 选择器
    header = response.css('#header::text').get()

    # 属性选择器
    images = response.css('img[src*="logo"]::attr(src)').getall()

    # 后代选择器
    descriptions = response.css('div.content p::text').getall()

    # 伪类选择器
    first_item = response.css('li:first-child::text').get()
2.2 XPath 选择器
基本用法
class MySpider(scrapy.Spider):
    name = 'example'

    def parse(self, response):
        # 提取文本
        title = response.xpath('//h1/text()').get()

        # 提取属性
        links = response.xpath('//a/@href').getall()

        # 使用条件筛选
        active_items = response.xpath('//li[@class="active"]/text()').getall()

        # 复杂的 XPath 查询
        products = response.xpath('//div[contains(@class, "product")]')

        for product in products:
            name = product.xpath('.//h2/text()').get()
            price = product.xpath('.//span[@class="price"]/text()').get()

            yield {
                'name': name.strip() if name else None,
                'price': price
            }
常用 XPath 表达式
def parse(self, response):
    # 绝对路径
    absolute = response.xpath('/html/body/div/text()').get()

    # 相对路径
    relative = response.xpath('//div/text()').getall()

    # 属性条件
    images = response.xpath('//img[@alt="example"]/@src').getall()

    # 包含特定文本
    elements = response.xpath('//a[contains(text(), "Click")]/@href').getall()

    # 位置选择
    first_div = response.xpath('//div[1]/text()').get()
    last_li = response.xpath('//li[last()]/text()').get()

    # 逻辑运算
    special = response.xpath('//div[@class="special" or @id="unique"]/text()').getall()

    # 字符串函数
    normalized = response.xpath('normalize-space(//div/text())').get()
2.3混合使用 CSS 和 XPath
class MixedSpider(scrapy.Spider):
    name = 'mixed'

    def parse(self, response):
        # 根据情况选择最适合的方法
        products = response.css('.product-item')

        for product in products:
            # CSS 用于简单的类选择
            name = product.css('h3::text').get()

            # XPath 用于复杂的选择逻辑
            price = product.xpath('.//span[contains(@class, "price")]/text()').get()

            # 混合使用
            link = product.css('a::attr(href)').get()
            description = product.xpath('.//p[starts-with(@class, "desc")]/text()').get()

            yield {
                'name': name,
                'price': price,
                'link': response.urljoin(link) if link else None,
                'description': description.strip() if description else None
            }
2.4使用 Item Loaders(推荐)
定义 Items
import scrapy
from itemloaders import ItemLoader
from itemloaders.processors import TakeFirst, MapCompose, Join

def clean_price(value):
    """清理价格数据"""
    return value.replace('$', '').strip()

class ProductItem(scrapy.Item):
    name = scrapy.Field()
    price = scrapy.Field()
    description = scrapy.Field()
    image_urls = scrapy.Field()

class ProductSpider(scrapy.Spider):
    name = 'product'

    def parse(self, response):
        loader = ItemLoader(item=ProductItem(), response=response)

        # 添加处理器
        loader.default_output_processor = TakeFirst()

        # 使用 CSS 选择器
        loader.add_css('name', 'h1::text')
        loader.add_css('price', '.price::text', MapCompose(clean_price))
        loader.add_css('description', '.description::text')

        # 使用 XPath 选择器
        loader.add_xpath('image_urls', '//img[@class="product-image"]/@src')

        return loader.load_item()
2.5 响应对象的方法
直接使用响应方法
class ResponseMethodsSpider(scrapy.Spider):
    name = 'response_methods'

    def parse(self, response):
        # URL 相关信息
        current_url = response.url
        domain = response.urljoin('/')  # 基础 URL

        # 文本处理
        body_text = response.text
        body_encoding = response.encoding

        # 选择器快捷方式
        title = response.css('title::text').get()
        first_h1 = response.xpath('//h1/text()').get()

        # 链接提取
        absolute_links = [response.urljoin(link) for link in response.css('a::attr(href)').getall()]

        # 表单处理
        form_data = response.css('form input::attr(name)').getall()
实际项目示例
电商网站爬虫
import scrapy
from itemloaders import ItemLoader
from myproject.items import ProductItem

class EcommerceSpider(scrapy.Spider):
    name = 'ecommerce'
    start_urls = ['https://example.com/products']

    def parse(self, response):
        # 解析产品列表页
        products = response.css('.product-card')

        for product in products:
            loader = ItemLoader(item=ProductItem(), selector=product)

            # 使用相对 URL 并转换为绝对 URL
            product_url = product.css('a::attr(href)').get()
            if product_url:
                yield response.follow(
                    product_url,
                    callback=self.parse_product,
                    meta={'loader': loader}
                )

        # 分页处理
        next_page = response.css('.next-page::attr(href)').get()
        if next_page:
            yield response.follow(next_page, callback=self.parse)

    def parse_product(self, response):
        loader = response.meta['loader']

        # 提取产品详情
        loader.add_css('name', 'h1.product-title::text')
        loader.add_css('price', '.price::text',
                      MapCompose(lambda x: x.replace('$', '').strip(), float))
        loader.add_css('description', '.product-description ::text', Join())
        loader.add_css('category', '.breadcrumb a::text', TakeFirst())
        loader.add_xpath('sku', '//span[@itemprop="sku"]/text()')
        loader.add_xpath('availability', '//link[@itemprop="availability"]/@href')

        # 图片处理
        loader.add_css('image_urls', '.product-gallery img::attr(src)',
                      MapCompose(lambda x: response.urljoin(x)))

        return loader.load_item()
💡 最佳实践总结
-
CSS vs XPath:
-
CSS:语法简单,适合类、ID 等简单选择
-
XPath:功能强大,适合复杂的选择逻辑
-
-
选择器性能:
-
尽量使用具体的 CSS 类或 ID
-
避免过于复杂的 XPath 表达式
-
使用
::text和::attr()提取具体内容
-
-
数据清洗:
-
使用
MapCompose进行数据预处理 -
使用
TakeFirst获取单个值 -
使用
Join合并多个文本节点
-
-
错误处理:
-
总是检查
get()返回的可能为None -
使用
getall()获取列表,避免空列表错误
-
-
URL 处理:
-
使用
response.urljoin()或response.follow()处理相对 URL -
避免手动拼接 URL
-
根据具体的网页结构和数据需求,灵活组合这些方法可以高效地解析各种复杂的网页。