好的,我们开始 仓库 (Storage) 与 渲染器 (Painter) 的实现。
这一步的目标是把"手动挡"变成"自动挡"。我们将不再手动调用 circle.brush(ctx),而是构建一个自动化系统:Storage 负责管理所有图形,Painter 负责把 Storage 里的东西画出来。
为了让 Storage 的逻辑完整,我们需要先补充一个简单的 Group 类(容器),因为 Storage 本质上是在遍历一棵树。
1. 容器类实现 (src/graphic/Group.ts)
Group 继承自 Element。它不画任何东西(没有 brush 方法),它的作用是把子元素"打包",并且传递变换矩阵。
typescript
// src/graphic/Group.ts
import { Element } from './Element';
export class Group extends Element {
readonly isGroup = true;
// 子节点列表
children: Element[] = [];
/**
* 添加子节点
*/
add(child: Element) {
if (child && child !== this && child.parent !== this) {
this.children.push(child);
child.parent = this; // 建立父子链接
}
}
/**
* 移除子节点
*/
remove(child: Element) {
const idx = this.children.indexOf(child);
if (idx >= 0) {
this.children.splice(idx, 1);
child.parent = null;
}
}
}2. 仓库模块 (src/storage/Storage.ts)
Storage 是内存中的数据库。它的核心职责是:将场景图(树状结构)扁平化为一个渲染列表(数组),并按层级排序。
typescript
// src/storage/Storage.ts
import { Element } from '../graphic/Element';
import { Displayable } from '../graphic/Displayable';
import { Group } from '../graphic/Group';
// 类型守卫:判断是否为 Group
function isGroup(el: Element): el is Group {
return (el as Group).isGroup;
}
// 类型守卫:判断是否为 Displayable
function isDisplayable(el: Element): el is Displayable {
return el instanceof Displayable;
}
export class Storage {
// 根节点列表 (Scene Graph 的入口)
private _roots: Element[] = [];
// 扁平化的渲染列表 (缓存结果)
private _displayList: Displayable[] = [];
// 标记列表是否脏了(需要重新遍历和排序)
private _displayListDirty: boolean = true;
addRoot(el: Element) {
this._roots.push(el);
this._displayListDirty = true;
}
/**
* 核心方法:获取排序后的渲染列表
* 逻辑:
* 1. 深度优先遍历所有根节点
* 2. 收集所有的 Displayable
* 3. 按 zLevel 和 z 排序
*/
getDisplayList(): Displayable[] {
if (this._displayListDirty) {
this._updateDisplayList();
this._displayListDirty = false;
}
return this._displayList;
}
private _updateDisplayList() {
const list: Displayable[] = [];
// 1. 递归遍历 (DFS)
const traverse = (el: Element) => {
if (isDisplayable(el)) {
list.push(el);
}
if (isGroup(el)) {
for (let i = 0; i < el.children.length; i++) {
traverse(el.children[i]);
}
}
};
for (let i = 0; i < this._roots.length; i++) {
traverse(this._roots[i]);
}
// 2. 排序
// 优先级:zLevel (Canvas层) > z (同层叠加顺序) > 插入顺序
list.sort((a, b) => {
if (a.zLevel === b.zLevel) {
return a.z - b.z;
}
return a.zLevel - b.zLevel;
});
this._displayList = list;
}
}3. 渲染器模块 (src/painter/Painter.ts)
Painter 是也是最"脏"的地方,因为它要直接操作 DOM。为了保持简单,我们暂时只实现单层 Canvas (假设所有图形 zLevel 都是 0)。
核心逻辑:
- 初始化时创建
<canvas>并插入 DOM。 refresh方法负责清空画布、获取列表、更新矩阵、绘制。
typescript
// src/painter/Painter.ts
import { Storage } from '../storage/Storage';
export class Painter {
private _dom: HTMLElement;
private _storage: Storage;
private _canvas: HTMLCanvasElement;
private _ctx: CanvasRenderingContext2D;
private _width: number = 0;
private _height: number = 0;
constructor(dom: HTMLElement, storage: Storage) {
this._dom = dom;
this._storage = storage;
// 1. 创建 Canvas
this._canvas = document.createElement('canvas');
// 简单的样式设置
this._canvas.style.cssText = 'position:absolute;left:0;top:0;width:100%;height:100%';
dom.appendChild(this._canvas);
this._ctx = this._canvas.getContext('2d')!;
// 初始化大小
this.resize();
// 监听窗口大小变化(简单版)
window.addEventListener('resize', () => this.resize());
}
resize() {
// 获取容器宽高
const width = this._dom.clientWidth;
const height = this._dom.clientHeight;
// 处理高清屏 (Retina)
const dpr = window.devicePixelRatio || 1;
this._canvas.width = width * dpr;
this._canvas.height = height * dpr;
// 缩放 Context,这样绘图时直接用逻辑坐标,不用管 dpr
this._ctx.scale(dpr, dpr);
this._width = width;
this._height = height;
// 大小变了,必须重绘
this.refresh();
}
/**
* 渲染入口
*/
refresh() {
const list = this._storage.getDisplayList();
const ctx = this._ctx;
// 1. 清空画布
ctx.clearRect(0, 0, this._width, this._height);
// 2. 遍历绘制
for (let i = 0; i < list.length; i++) {
const el = list[i];
// 优化:看不见的直接跳过
// if (el.invisible) continue;
// 3. 关键步骤:更新变换矩阵
// 注意:必须从根节点开始 update,这里为了简化,
// 假设 Storage 里的顺序已经保证了父级在子级之前,或者 el.updateTransform 内部会自动回溯父级。
// 在真正的 MiniRender 中,会在 refresh 前统一更新一遍所有节点的 globalTransform。
el.updateTransform();
// 4. 绘制
el.brush(ctx);
}
}
}4. 入口类 (src/core/MiniRender.ts)
这是给开发者用的"门面"(Facade)。它把 Storage 和 Painter 组装起来。
typescript
// src/core/MiniRender.ts
import { Storage } from '../storage/Storage';
import { Painter } from '../painter/Painter';
import { Element } from '../graphic/Element';
export class MiniRender {
storage: Storage;
painter: Painter;
constructor(dom: HTMLElement) {
this.storage = new Storage();
this.painter = new Painter(dom, this.storage);
}
/**
* 添加图形元素
*/
add(el: Element) {
this.storage.addRoot(el);
this.refresh(); // 暂时:每次添加都立即刷新
}
/**
* 触发重绘
*/
refresh() {
// 在真实 MiniRender 中,这里会使用 requestAnimationFrame 进行防抖
this.painter.refresh();
}
}
/**
* 工厂函数
*/
export function init(dom: HTMLElement) {
return new MiniRender(dom);
}5. 测试
现在我们拥有了一个完整的静态渲染引擎。我们可以创建一个带有层级关系的场景。
index.ts (测试代码):
typescript
import { init } from './core/MiniRender';
import { Group } from './graphic/Group';
import { Circle } from './graphic/shape/Circle';
// 1. 初始化
const container = document.getElementById('main')!;
const miniRender = init(container);
// 2. 创建一个 Group (当作太阳系中心)
const sunGroup = new Group();
sunGroup.x = 300;
sunGroup.y = 300;
// 3. 创建一个红色的太阳 (加入 Group)
const sun = new Circle({
shape: { r: 50 },
style: { fill: '#F00' }
});
sunGroup.add(sun);
// 4. 创建一个蓝色的地球 (加入 Group,相对太阳偏移)
const earth = new Circle({
shape: { r: 20 },
style: { fill: '#00F' },
position: [100, 0] // 距离太阳中心 100px
});
sunGroup.add(earth);
// 5. 创建一个月亮 (加入地球 Group? 这里为了简单,我们让月亮单独在地球旁边)
// 演示层级:我们把月亮直接加到 Group 里,但是 Z 设低一点
const moon = new Circle({
shape: { r: 10 },
style: { fill: '#CCC' },
position: [120, 0], // 在地球右边
z: -1 // 放在最下面 (测试排序)
});
sunGroup.add(moon);
// 6. 添加到 miniRender
miniRender.add(sunGroup);
// --- 动起来!(简单的动画循环) ---
// 这验证了 Painter 的 refresh 和 Storage 的 updateTransform
let angle = 0;
function loop() {
angle += 0.02;
// 旋转整个太阳系
sunGroup.rotation = angle;
// 自转地球 (修改属性,标记 dirty)
// 注意:MiniRender 还没实现 dirty 标记,我们需要手动调 refresh
miniRender.refresh();
requestAnimationFrame(loop);
}
loop();此时会发现一个问题,各图形位置不正确
6.图形位置问题
当前存在两个问题:
group内各图形相对位置错误- 整个
group位置错误
A.解决group内的相对位置错误问题
回顾我们使用的代码:
错误原因 :我们在 Circle 的构造函数中只处理了 shape 和 style,完全忽略了继承自 Element 的通用属性(position, scale, rotation) 。
我们需要在基类中处理这些通用属性的初始化。
1. 修改 src/graphic/Element.ts
增加一个初始化方法,用于解析 opts。
typescript
// src/graphic/Element.ts
import * as matrix from '../utils/matrix';
import { MatrixArray, Point } from '../utils/types';
export interface ElementProps {
position?: Point; // [x, y]
rotation?: number;
scale?: Point; // [sx, sy]
origin?: Point; // [ox, oy]
}
export abstract class Element {
// ... 之前的属性定义 ...
constructor(opts?: ElementProps) {
this.id = `el_${idBase++}`;
if (opts) {
this.attr(opts);
}
}
/**
* 仿照 MiniRender 的 attr 方法,用于更新属性
*/
attr(opts: ElementProps) {
if (opts.position) {
this.x = opts.position[0];
this.y = opts.position[1];
}
if (opts.rotation != null) {
this.rotation = opts.rotation;
}
if (opts.scale) {
this.scaleX = opts.scale[0];
this.scaleY = opts.scale[1];
}
if (opts.origin) {
this.originX = opts.origin[0];
this.originY = opts.origin[1];
}
}
// ... updateTransform 等方法保持不变 ...
}2. 修改 src/graphic/Displayable.ts
让子类将 opts 传递给 super。
typescript
// src/graphic/Displayable.ts
import { Element, ElementProps } from './Element';
// 组合类型
export interface DisplayableProps extends ElementProps {
style?: any;
z?: number;
zLevel?: number;
invisible?: boolean;
}
export abstract class Displayable extends Element {
// ... 属性定义 ...
constructor(opts?: DisplayableProps) {
super(opts); // 关键!把 opts 传给 Element 处理 position/rotation
if (opts) {
if (opts.style) this.style = opts.style;
if (opts.z != null) this.z = opts.z;
if (opts.zLevel != null) this.zLevel = opts.zLevel;
if (opts.invisible != null) this.invisible = opts.invisible;
}
}
// ... brush 等方法 ...
}3.修改 src/graphic/shape/Circle.ts
typescript
// src/graphic/shape/Circle.ts
import { Displayable, DisplayableProps } from '../Displayable';
interface CircleProps extends DisplayableProps {
shape?: { cx?: number, cy?: number, r?: number };
}
export class Circle extends Displayable {
shape: { cx: number, cy: number, r: number };
constructor(opts?: CircleProps) {
// 传递 opts 给父类
super(opts);
// 处理自己特有的 shape
this.shape = { cx: 0, cy: 0, r: 0, ...opts?.shape };
}
// ... buildPath ...
}B.解决group的位置问题
在之前的 Painter.ts 代码中,我们在 refresh 循环渲染列表时调用 updateTransform。但存在一个问题,我们获取到的是displayable类型的图形,没有计算group这种根元素的矩阵。
解决方案: 将"计算矩阵"和"渲染绘制"分成了两个独立的遍历过程。
- Update 阶段 :从根节点开始,递归(DFS)遍历整棵树,计算所有节点的 globalTransform。保证父级一定比子级先计算。
- Render 阶段:获取扁平化的 displayList(已排序),直接使用计算好的矩阵进行绘制。
我们需要修改 Painter.ts 或 Storage.ts 来体现这个逻辑。最简单的方法是在 Painter.refresh 中先更树,再画表。
修改 src/painter/Painter.ts
typescript
// src/painter/Painter.ts

export class Painter {
    // ...

    refresh() {
        const list = this._storage.getDisplayList();
        const roots = this._storage.getRoots(); // 假设 Storage 暴露了 _roots
        const ctx = this._ctx;

        // 步骤 0: 确保 Canvas 尺寸正确 (防止 resize 没触发导致 width=0)
        if (this._width === 0) this.resize();

        // 步骤 1: 优先更新全场景图的变换矩阵 (MiniRender 核心逻辑)
        // 必须从根节点开始递归,确保父级矩阵先于子级生成
        roots.forEach(el => this._updateElementTransform(el));

        // 步骤 2: 清空画布
        ctx.clearRect(0, 0, this._width, this._height);

        // 步骤 3: 绘制扁平列表
        for (let i = 0; i < list.length; i++) {
            const el = list[i];
            // 此时 el.globalTransform 已经是正确的了,直接画
            el.brush(ctx);
        }
    }

    // 递归更新帮助函数
    private _updateElementTransform(el: Element) {
        el.updateTransform();
        // 如果是 Group,递归更新子节点
        if ((el as any).isGroup) {
            const children = (el as any).children;
            for (let i = 0; i < children.length; i++) {
                this._updateElementTransform(children[i]);
            }
        }
    }
}
注意:你需要在 Storage.ts 中增加一个 getRoots() 方法来返回 _roots 数组。
arduino
// src/storage/Storage.ts
public getRoots(): Element[] {
    return this._roots;
}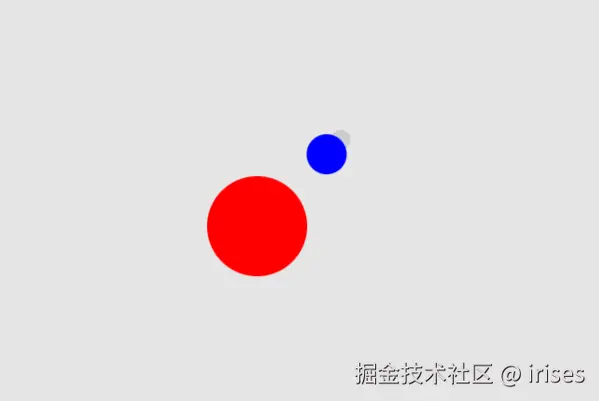
此时各图形位置将正确展示在画布中。
!