原型
目录
-
组件设计思路
-
Props 设计
-
TypeScript 类型设计
-
组件实现
-
样式实现
-
总结
1. 组件设计思路
1.1 组件的作用
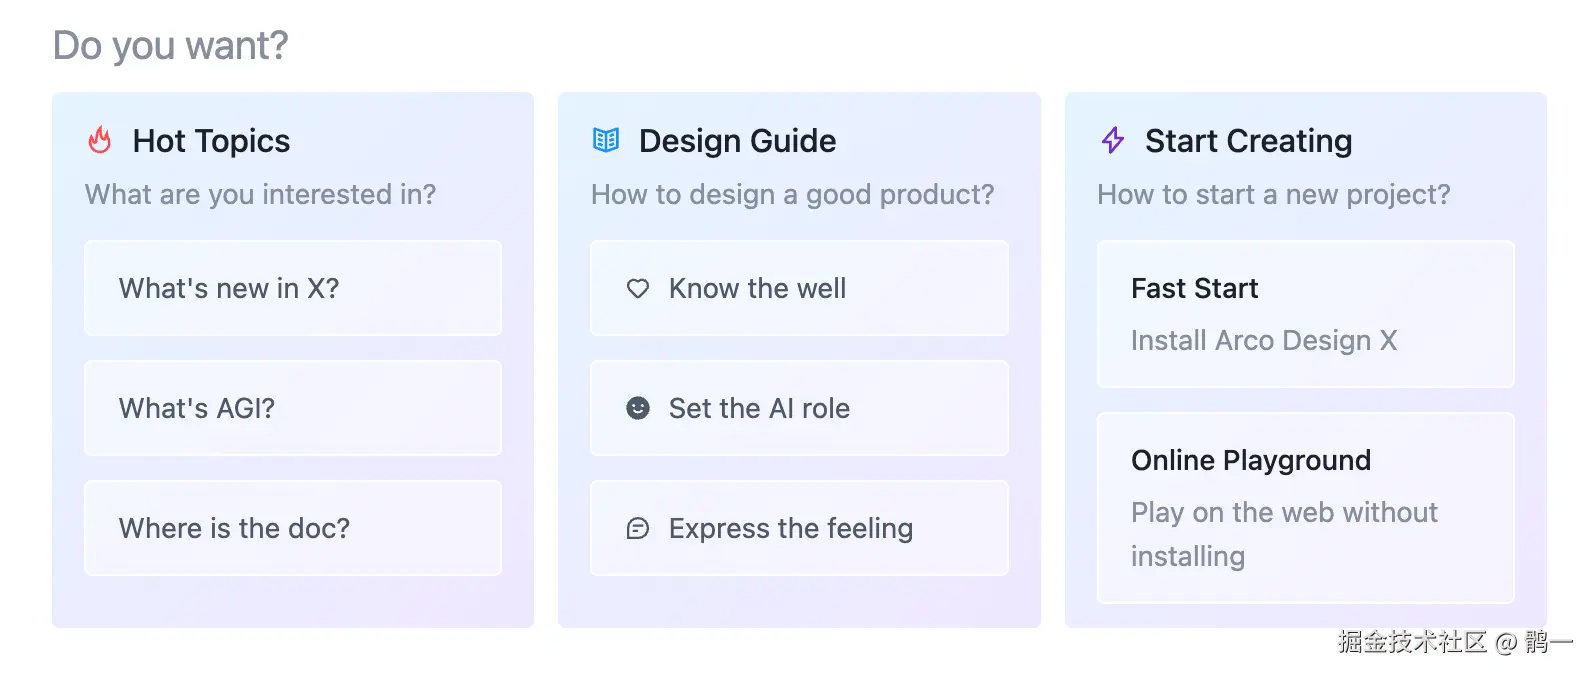
Prompts 组件是一个提示词列表组件,通常用于 AI 应用中展示预设的问题或提示,用来:
- 展示一组可点击的提示词卡片
- 支持图标、标签、描述的展示
- 支持嵌套的子提示词(多级结构)
- 支持禁用状态
- 支持垂直/水平布局、换行等布局方式
1.2 特性
- 支持提示词列表数据
- 支持嵌套子提示词(递归渲染)
- 支持点击回调
- 支持禁用状态
- 支持多种布局方式(垂直、换行)
- 支持语义化样式定制
1.3 设计原则
-
保持 API 一致性:与原组件保持相同的 Props 接口
-
适配 Arco Design:使用 Arco 的组件和设计规范
-
类型安全:完整的 TypeScript 类型定义
-
递归渲染:支持嵌套的子提示词
-
可定制性:支持样式和类名的语义化定制
2. Props 设计
2.1 核心 Props 分析
Prompts 组件比 Welcome 组件更复杂,因为它需要处理列表数据和嵌套结构。
typescript
// 单个提示词的数据结构
interface PromptProps {
  key: string;                    // 唯一标识
  icon?: React.ReactNode;         // 图标
  label?: React.ReactNode;        // 标签文字
  description?: React.ReactNode;  // 描述文字
  disabled?: boolean;             // 是否禁用
  children?: BasePromptItem[];    // 子提示词(支持嵌套)
}

// 组件的 Props
interface PromptsProps extends Omit<React.HTMLAttributes<HTMLDivElement>, 'onClick' | 'title'> {
  items?: PromptProps[];          // 提示词列表
  title?: React.ReactNode;        // 标题
  onItemClick?: (info: { data: PromptProps }) => void;  // 点击回调
  vertical?: boolean;             // 垂直布局
  wrap?: boolean;                 // 是否换行
  classNames?: Partial<Record<SemanticType, string>>;  // 语义化类名
  styles?: Partial<Record<SemanticType, React.CSSProperties>>;  // 语义化样式
  prefixCls?: string;             // 类名前缀
  rootClassName?: string;         // 根元素类名
}
2.2 为什么这样设计?
Q: 为什么 PromptsProps 要继承 HTMLAttributes?
java
interface PromptsProps extends Omit<React.HTMLAttributes<HTMLDivElement>, 'onClick' | 'title'>A: 这样设计有以下好处:
- 支持所有原生 div 属性
- 用户可以传递
className、style、id、data-*等原生属性 - 组件会自动将这些属性传递给根元素
- 为什么使用 Omit 排除 onClick 和 title?
onClick:组件有自己的onItemClick回调,避免与原生 onClick 冲突title:组件有自己的titleprop(React.ReactNode 类型),与原生 title(string 类型)冲突
- 实际使用示例
ini
<Prompts
  items={items}
  className="my-prompts"      // ✅ 支持
  style={{ padding: 20 }}     // ✅ 支持
  id="prompts-1"              // ✅ 支持
  data-testid="prompts"       // ✅ 支持
  onClick={() => {}}          // ❌ 不支持(被 Omit 排除)
/>
Q: 为什么需要 children 字段?
A: 支持嵌套的提示词结构,例如:
css
{
  key: '1',
  label: '学习 Arco Design',
  children: [
    { key: '1-1', label: '快速开始' },
    { key: '1-2', label: '组件文档' },
  ]
}
Q: 为什么 onItemClick 传递 { data } 对象?
A:
- 提供完整的提示词数据,方便使用
- 未来可以扩展更多信息(如 event, index 等)
Q: 为什么需要 vertical 和 wrap?
A: 提供灵活的布局方式:
vertical={false}, wrap={false}:水平单行(默认)vertical={false}, wrap={true}:水平多行(自动换行)vertical={true}:垂直排列
Q: 为什么需要 prefixCls 和 rootClassName?
A:
prefixCls:自定义类名前缀,避免样式冲突(如微前端场景)rootClassName:为根元素添加额外类名,方便样式定制
3. TypeScript 类型设计
3.1 第一步:创建 interface.ts
创建文件 packages/x/src/Prompts/interface.ts:
typescript
import type React from 'react';

/**
 * 基础提示词项
 */
export interface BasePromptItem {
  key: string;
  icon?: React.ReactNode;
  label?: React.ReactNode;
  description?: React.ReactNode;
  disabled?: boolean;
}

/**
 * 提示词项(支持嵌套)
 */
export interface PromptProps extends BasePromptItem {
  children?: BasePromptItem[];
}

/**
 * 语义化类型
 */
export type SemanticType =
  | 'list'        // 列表容器
  | 'item'        // 单个提示词
  | 'itemContent' // 提示词内容
  | 'title'       // 标题
  | 'subList'     // 子列表
  | 'subItem';    // 子提示词

/**
 * Prompts 组件的 Props
 */
export interface PromptsProps
  extends Omit<React.HTMLAttributes<HTMLDivElement>, 'onClick' | 'title'> {
  items?: PromptProps[];
  title?: React.ReactNode;
  onItemClick?: (info: { data: PromptProps }) => void;
  vertical?: boolean;
  wrap?: boolean;
  styles?: Partial<Record<SemanticType, React.CSSProperties>>;
  classNames?: Partial<Record<SemanticType, string>>;
  prefixCls?: string;
  rootClassName?: string;
}
3.2 类型设计要点详解
1. 为什么要分 BasePromptItem 和 PromptProps?
css
export interface BasePromptItem {
  key: string;
  icon?: React.ReactNode;
  label?: React.ReactNode;
  description?: React.ReactNode;
  disabled?: boolean;
}

export interface PromptProps extends BasePromptItem {
  children?: BasePromptItem[];  // 注意:children 的类型是 BasePromptItem[]
}
这样设计的原因:
BasePromptItem:定义提示词的基础字段PromptProps:在基础上添加children字段children使用BasePromptItem[]而不是PromptProps[],避免无限嵌套的类型定义
2. 为什么使用 Omit?
java
extends Omit<React.HTMLAttributes<HTMLDivElement>, 'onClick' | 'title'>详细说明:
- 继承 HTMLAttributes 的好处
- 组件自动支持所有原生 div 属性
- 用户可以传递
className、style、id、data-*、aria-*等 - 不需要手动定义每个属性
- 为什么要排除 onClick?
typescript
// ❌ 如果不排除,会有两个 onClick
interface PromptsProps extends React.HTMLAttributes<HTMLDivElement> {
  onClick?: (e: React.MouseEvent) => void;        // 来自 HTMLAttributes
  onItemClick?: (info: { data: PromptProps }) => void;  // 我们自己的
}

// ✅ 排除后,只有我们自己的 onItemClick
interface PromptsProps extends Omit<React.HTMLAttributes<HTMLDivElement>, 'onClick'> {
  onItemClick?: (info: { data: PromptProps }) => void;
}- 组件的点击逻辑是针对单个提示词的,不是整个容器
- 使用
onItemClick更语义化,提供更多上下文信息
- 为什么要排除 title?
c
// HTMLAttributes 中的 title
title?: string;  // 原生 HTML title 属性(鼠标悬停提示)

// 我们组件的 title
title?: React.ReactNode; // 提示词列表的标题(可以是任何 React 元素)- 类型不同:原生是
string,我们的是React.ReactNode - 用途不同:原生是悬停提示,我们的是列表标题
- 必须排除才能使用我们自己的定义
- 实际使用效果
ini
<Prompts
  items={items}
  title={<h3>选择一个提示词</h3>}  // ✅ 我们的 title(ReactNode)
  onItemClick={(info) => {}}        // ✅ 我们的点击回调
  className="my-prompts"            // ✅ 来自 HTMLAttributes
  style={{ padding: 20 }}           // ✅ 来自 HTMLAttributes
  id="prompts-1"                    // ✅ 来自 HTMLAttributes
  onClick={() => {}}                // ❌ 被排除,不支持
/>
3. 语义化类型的设计
typescript
export type SemanticType =
  | 'list'        // 列表容器
  | 'item'        // 单个提示词
  | 'itemContent' // 提示词内容
  | 'title'       // 标题
  | 'subList'     // 子列表
  | 'subItem';    // 子提示词
为什么需要这么多语义类型?
listvssubList:区分父级列表和子级列表itemvssubItem:区分父级提示词和子级提示词itemContent:提示词的内容部分(图标、标签、描述)
这样用户可以精确控制每个部分的样式。
4. 组件实现
4.1 第二步:创建组件骨架
创建文件 packages/x/src/Prompts/index.tsx,先写基本结构:
typescript
import React from 'react';
import type { PromptsProps, PromptProps } from './interface';
import './index.less';

const Prompts: React.FC<PromptsProps> = (props) => {
  // 组件逻辑将在这里实现
  return <div>Prompts Component</div>;
};

export default Prompts;
export type { PromptsProps, PromptProps } from './interface';
注意:
- Prompts 组件不需要
forwardRef(因为通常不需要访问其 DOM 节点) - 直接使用
React.FC<PromptsProps>即可
4.2 第三步:解构 Props 和设置默认值
javascript
const Prompts: React.FC<PromptsProps> = (props) => {
  const {
    // 基础属性
    prefixCls = 'arco-x-prompts',        // 默认类名前缀
    rootClassName,
    className,
    style,

    // 内容属性
    items,
    title,
    onItemClick,

    // 布局属性
    vertical,
    wrap,

    // 语义化样式
    styles = {},
    classNames: customClassNames = {},

    // 其他 HTML 属性
    ...htmlProps
  } = props;

  // ...
};
要点说明:
- Props 分组
- 基础属性:prefixCls、rootClassName、className、style
- 内容属性:items、title、onItemClick
- 布局属性:vertical、wrap
- 语义化样式:styles、classNames
- 默认值设置
prefixCls = 'arco-x-prompts':提供默认类名前缀styles = {}:避免后续访问 undefinedclassNames: customClassNames = {}:重命名为 customClassNames,避免与变量名冲突
- ...htmlProps 的作用
arduino
...htmlProps // 收集所有其他 HTML 属性(id、data-*、aria-* 等)- 因为 PromptsProps 继承了
HTMLAttributes<HTMLDivElement> - 用户可以传递任何原生 div 属性
- 这些属性会通过
...htmlProps传递给根元素
- 实际使用示例
ini
<Prompts
  items={items}
  id="my-prompts"           // → htmlProps.id
  data-testid="prompts"     // → htmlProps['data-testid']
  aria-label="提示词列表"    // → htmlProps['aria-label']
/>

// 在组件内部
<div {...htmlProps} className={mergedCls} style={style}>
  {/* id、data-testid、aria-label 都会被应用到这个 div 上 */}
</div>
4.3 第四步:获取上下文和构建类名
javascript
import classnames from 'classnames';
import { useXProviderContext } from '../XProvider';

const Prompts: React.FC<PromptsProps> = (props) => {
  const { /* ... */ } = props;

  // ============================ Context ===========================
  const { direction } = useXProviderContext();

  // ============================ ClassNames ===========================
  // 构建根元素的类名
  const mergedCls = classnames(
    prefixCls,
    className,
    rootClassName,
    {
      [`${prefixCls}-rtl`]: direction === 'rtl',
    },
  );

  // 构建列表的类名
  const mergedListCls = classnames(
    `${prefixCls}-list`,
    customClassNames.list,
    {
      [`${prefixCls}-list-wrap`]: wrap,
      [`${prefixCls}-list-vertical`]: vertical,
    },
  );

  // ...
};
要点说明:
- 使用 classnames 库
- 方便处理条件类名
- 自动过滤 undefined 和 false
- 支持对象语法:
{ 'class-name': condition }
- 支持 RTL 模式
ini
{
  [`${prefixCls}-rtl`]: direction === 'rtl',
}- 从 XProviderContext 获取全局方向配置
- 当 direction 为 'rtl' 时,添加
arco-x-prompts-rtl类名 - 支持阿拉伯语、希伯来语等从右到左的语言
- 为什么要分 mergedCls 和 mergedListCls?
mergedCls:根元素的类名(包含标题和列表)mergedListCls:列表容器的类名(只包含提示词列表)- 这样可以分别控制它们的样式
- 条件类名的应用
ini
{
  [`${prefixCls}-list-wrap`]: wrap,      // wrap=true 时添加
  [`${prefixCls}-list-vertical`]: vertical,  // vertical=true 时添加
}
4.4 第五步:获取上下文和构建类名
javascript
import { useXProviderContext } from '../XProvider';

const Prompts: React.FC<PromptsProps> = (props) => {
  const { /* ... */ } = props;

  // ============================ Context ===========================
  const { direction } = useXProviderContext();

  // ============================ ClassNames ===========================
  const mergedCls = classnames(
    prefixCls,
    className,
    rootClassName,
    {
      [`${prefixCls}-rtl`]: direction === 'rtl',
    },
  );

  const mergedListCls = classnames(
    `${prefixCls}-list`,
    customClassNames.list,
    {
      [`${prefixCls}-list-wrap`]: wrap,
      [`${prefixCls}-list-vertical`]: vertical,
    },
  );

  // ...
};
关键概念:
- useXProviderContext
- 获取全局上下文配置
- 主要用于获取
direction(文本方向:ltr 或 rtl) - 支持国际化(如阿拉伯语、希伯来语等从右到左的语言)
- mergedCls(根元素类名)
javascript
classnames(
  prefixCls,           // 基础类名:arco-x-prompts
  className,           // 用户传递的类名
  rootClassName,       // 根元素类名
  {
    [`${prefixCls}-rtl`]: direction === 'rtl',  // RTL 模式
  },
)- 使用
classnames库合并多个类名 - 支持条件类名(对象语法)
- 自动过滤
undefined和false
- mergedListCls(列表容器类名)
javascript
classnames(
  `${prefixCls}-list`,              // 基础类名:arco-x-prompts-list
  customClassNames.list,            // 用户自定义的列表类名
  {
    [`${prefixCls}-list-wrap`]: wrap,      // 换行模式
    [`${prefixCls}-list-vertical`]: vertical,  // 垂直模式
  },
)- 根据
wrap和vertical属性动态添加类名 - 支持用户自定义语义化类名
- 为什么使用 classnames 库?
javascript
// ❌ 手动拼接(容易出错)
const cls = [prefixCls, className, wrap && `${prefixCls}-list-wrap`]
  .filter(Boolean)
  .join(' ');

// ✅ 使用 classnames(简洁、安全)
const cls = classnames(
  prefixCls,
  className,
  { [`${prefixCls}-list-wrap`]: wrap },
);
4.5 第六步:渲染完整的 TSX
ini
const Prompts: React.FC<PromptsProps> = (props) => {
  // ... 前面的所有逻辑

  return (
    <div {...htmlProps} className={mergedCls} style={style}>
      {/* Title */}
      {title && (
        <Typography.Title
          heading={5}
          className={classnames(`${prefixCls}-title`, customClassNames.title)}
          style={styles.title}
        >
          {title}
        </Typography.Title>
      )}

      {/* Prompt List */}
      <div className={mergedListCls} style={styles.list}>
        {items?.map((info, index) => {
          const isNest = info.children && info.children.length > 0;

          return (
            <div
              key={info.key || `key_${index}`}
              style={styles.item}
              className={classnames(
                `${prefixCls}-item`,
                customClassNames.item,
                {
                  [`${prefixCls}-item-disabled`]: info.disabled,
                  [`${prefixCls}-item-has-nest`]: isNest,
                },
              )}
              onClick={() => {
                if (!isNest && !info.disabled && onItemClick) {
                  onItemClick({ data: info });
                }
              }}
            >
              {/* Icon */}
              {info.icon && <div className={`${prefixCls}-icon`}>{info.icon}</div>}

              {/* Content */}
              <div
                className={classnames(
                  `${prefixCls}-content`,
                  customClassNames.itemContent,
                )}
                style={styles.itemContent}
              >
                {/* Label */}
                {info.label && <h6 className={`${prefixCls}-label`}>{info.label}</h6>}

                {/* Description */}
                {info.description && <p className={`${prefixCls}-desc`}>{info.description}</p>}

                {/* Children (Nested Prompts) */}
                {isNest && (
                  <Prompts
                    className={`${prefixCls}-nested`}
                    items={info.children}
                    vertical
                    onItemClick={onItemClick}
                    classNames={{
                      list: customClassNames.subList,
                      item: customClassNames.subItem,
                    }}
                    styles={{
                      list: styles.subList,
                      item: styles.subItem,
                    }}
                  />
                )}
              </div>
            </div>
          );
        })}
      </div>
    </div>
  );
};
关键点详解:
1. 根<div> 的属性顺序
xml
<div {...htmlProps} className={mergedCls} style={style}>顺序说明:
-
{...htmlProps}在前:先展开所有 HTML 属性(id、data- 、aria- 等) -
className={mergedCls}在后:覆盖 htmlProps 中可能存在的 className -
style={style}在后:覆盖 htmlProps 中可能存在的 style
实际效果:
ini
<Prompts
  items={items}
  id="my-prompts"           // → htmlProps.id
  data-testid="prompts"     // → htmlProps['data-testid']
  className="custom-class"  // → 会被合并到 mergedCls 中
/>
2. 标题渲染
ini
{title && (
  <Typography.Title
    heading={5}
    className={classnames(`${prefixCls}-title`, customClassNames.title)}
    style={styles.title}
  >
    {title}
  </Typography.Title>
)}
要点:
- 使用 Arco 的
Typography.Title组件 heading={5}:对应<h5>标签- 支持用户自定义类名和样式
- 只有
title存在时才渲染
3. 遍历渲染提示词
ini
{items?.map((info, index) => {
  const isNest = info.children && info.children.length > 0;

  return (
    <div key={info.key || `key_${index}`}>
      {/* ... */}
    </div>
  );
})}
要点:
- 使用
items?.map():可选链操作符,避免 items 为 undefined 时报错 isNest:判断是否有子提示词key={info.key ||key_${index}}:优先使用 info.key,否则使用 index
4. 提示词的类名
javascript
className={classnames(
  `${prefixCls}-item`,           // 基础类名:arco-x-prompts-item
  customClassNames.item,         // 用户自定义的类名
  {
    [`${prefixCls}-item-disabled`]: info.disabled,  // 禁用状态
    [`${prefixCls}-item-has-nest`]: isNest,         // 有子提示词
  },
)}
条件类名:
arco-x-prompts-item-disabled:当info.disabled === true时添加arco-x-prompts-item-has-nest:当有子提示词时添加
5. 点击事件处理
scss
onClick={() => {
  if (!isNest && !info.disabled && onItemClick) {
    onItemClick({ data: info });
  }
}}
逻辑说明:
!isNest:只有非嵌套的提示词才能点击!info.disabled:禁用的提示词不能点击onItemClick:回调函数存在时才调用
为什么这样设计?
arduino
// 示例数据
{
  key: '1',
  label: '学习 Arco Design',  // ← 这个不能点击(因为有 children)
  children: [
    { key: '1-1', label: '快速开始' },  // ← 这个可以点击
    { key: '1-2', label: '组件文档' },  // ← 这个可以点击
  ]
}
6. 图标渲染
css
{info.icon && <div className={`${prefixCls}-icon`}>{info.icon}</div>}- 只有
info.icon存在时才渲染 icon可以是任何 React 元素(图标组件、文字、图片等)
7. 内容区域
javascript
<div
  className={classnames(
    `${prefixCls}-content`,
    customClassNames.itemContent,
  )}
  style={styles.itemContent}
>
  {/* Label */}
  {info.label && <h6 className={`${prefixCls}-label`}>{info.label}</h6>}

  {/* Description */}
  {info.description && <p className={`${prefixCls}-desc`}>{info.description}</p>}

  {/* Children */}
  {isNest && <Prompts ... />}
</div>
结构:
content:内容容器label:标签(使用<h6>标签)desc:描述(使用<p>标签)- 嵌套的
<Prompts>组件
8. 递归渲染嵌套提示词
ini
{isNest && (
  <Prompts
    className={`${prefixCls}-nested`}
    items={info.children}
    vertical
    onItemClick={onItemClick}
    classNames={{
      list: customClassNames.subList,
      item: customClassNames.subItem,
    }}
    styles={{
      list: styles.subList,
      item: styles.subItem,
    }}
  />
)}
关键点:
-
递归组件 :直接调用
<Prompts>组件本身 -
items={info.children} :传递子提示词数据
-
vertical:子提示词强制垂直排列
-
onItemClick={onItemClick} :保持点击回调一致
-
语义化样式 :使用
subList和subItem区分父子样式
为什么使用组件递归而不是函数递归?
javascript
// ❌ 函数递归(旧方式)
const renderItem = (item: PromptProps) => {
  return (
    <div>
      {item.children?.map((child) => renderItem(child))}
    </div>
  );
};

// ✅ 组件递归(新方式)
{isNest && <Prompts items={info.children} />}
优势:
- 更简洁:不需要额外的函数
- 更直观:JSX 结构清晰
- 更易维护:所有逻辑在一个地方
- 更符合 React 最佳实践
9. 为什么不使用 renderItem 函数?
❌ 旧方式(使用 renderItem):
javascript
const renderItem = (item: PromptProps, isSubItem = false) => {
  // ...
  return <div>...</div>;
};

return (
  <div>
    {items.map((item) => renderItem(item, false))}
  </div>
);
✅ 新方式(直接在 JSX 中渲染):
javascript
return (
  <div>
    {items?.map((info, index) => (
      <div>...</div>
    ))}
  </div>
);
优势:
-
更简洁:减少一层函数抽象
-
更直观:JSX 结构一目了然
-
更易维护:所有逻辑都在一个地方
-
递归更清晰:使用组件递归而不是函数递归
-
性能更好:减少函数调用开销
10. 完整的组件结构
xml
<div {...htmlProps}>                      ← 根容器(支持所有 HTML 属性)
  {title && <Typography.Title>}           ← 标题(可选)
  <div className="list">                  ← 列表容器
    {items?.map((info) => (               ← 遍历提示词
      <div className="item">              ← 单个提示词
        <div className="icon">            ← 图标
        <div className="content">         ← 内容
          <h6 className="label">          ← 标签
          <p className="desc">            ← 描述
          {isNest && <Prompts>}           ← 递归渲染子提示词
        </div>
      </div>
    ))}
  </div>
</div>
4.6 完整的组件代码
ini
import { Typography } from '@arco-design/web-react';
import classnames from 'classnames';
import React from 'react';

import type { PromptsProps, PromptProps } from './interface';
import { useXProviderContext } from '../XProvider';
import './index.less';

const Prompts: React.FC<PromptsProps> = (props) => {
  const {
    prefixCls = 'arco-x-prompts',
    title,
    className,
    items,
    onItemClick,
    vertical,
    wrap,
    rootClassName,
    styles = {},
    classNames: customClassNames = {},
    style,
    ...htmlProps
  } = props;

  // ============================ Context ===========================
  const { direction } = useXProviderContext();

  const mergedCls = classnames(
    prefixCls,
    className,
    rootClassName,
    {
      [`${prefixCls}-rtl`]: direction === 'rtl',
    },
  );

  const mergedListCls = classnames(
    `${prefixCls}-list`,
    customClassNames.list,
    {
      [`${prefixCls}-list-wrap`]: wrap,
      [`${prefixCls}-list-vertical`]: vertical,
    },
  );

  return (
    <div {...htmlProps} className={mergedCls} style={style}>
      {/* Title */}
      {title && (
        <Typography.Title
          heading={5}
          className={classnames(`${prefixCls}-title`, customClassNames.title)}
          style={styles.title}
        >
          {title}
        </Typography.Title>
      )}
      {/* Prompt List */}
      <div className={mergedListCls} style={styles.list}>
        {items?.map((info, index) => {
          const isNest = info.children && info.children.length > 0;

          return (
            <div
              key={info.key || `key_${index}`}
              style={styles.item}
              className={classnames(
                `${prefixCls}-item`,
                customClassNames.item,
                {
                  [`${prefixCls}-item-disabled`]: info.disabled,
                  [`${prefixCls}-item-has-nest`]: isNest,
                },
              )}
              onClick={() => {
                if (!isNest && !info.disabled && onItemClick) {
                  onItemClick({ data: info });
                }
              }}
            >
              {/* Icon */}
              {info.icon && <div className={`${prefixCls}-icon`}>{info.icon}</div>}
              {/* Content */}
              <div
                className={classnames(
                  `${prefixCls}-content`,
                  customClassNames.itemContent,
                )}
                style={styles.itemContent}
              >
                {/* Label */}
                {info.label && <h6 className={`${prefixCls}-label`}>{info.label}</h6>}

                {/* Description */}
                {info.description && <p className={`${prefixCls}-desc`}>{info.description}</p>}

                {/* Children */}
                {isNest && (
                  <Prompts
                    className={`${prefixCls}-nested`}
                    items={info.children}
                    vertical
                    onItemClick={onItemClick}
                    classNames={{
                      list: customClassNames.subList,
                      item: customClassNames.subItem,
                    }}
                    styles={{
                      list: styles.subList,
                      item: styles.subItem,
                    }}
                  />
                )}
              </div>
            </div>
          );
        })}
      </div>
    </div>
  );
};

Prompts.displayName = 'Prompts';

export default Prompts;
export type { PromptsProps, PromptProps };
代码说明:
- 导入 Arco Design 组件
javascript
import { Typography } from '@arco-design/web-react';- 使用 Arco 的
Typography.Title组件 heading={5}对应<h5>标签(Arco 的 API)
- 导入类型定义
python
import type { PromptsProps, PromptProps } from './interface';- 从
interface.ts导入类型 - 使用
type关键字(仅类型导入)
- 导入样式文件
arduino
import './index.less';- 使用传统的 Less 样式文件
- 不使用 CSS-in-JS(与 Ant Design 不同)
- 使用 useXProviderContext
scss
const { direction } = useXProviderContext();- 获取全局上下文配置
- 主要用于 RTL 模式支持
- 直接在 JSX 中渲染
- 不使用
renderItem函数 - 使用
items?.map()直接渲染 - 递归使用
<Prompts>组件本身
- 简洁的样式处理
- 不使用
wrapCSSVar(Arco 不需要) - 不使用
contextConfig(Arco 没有全局组件配置) - 直接使用
styles和customClassNames
- displayName 设置
ini
Prompts.displayName = 'Prompts';- 方便 React DevTools 调试
- 不需要
process.env.NODE_ENV判断
- 导出类型
bash
export type { PromptsProps, PromptProps };- 导出类型供外部使用
5. 样式实现
5.1 第八步:创建样式文件
创建文件 packages/x/src/Prompts/index.less:
css
@prefix: arco-x-prompts;

.@{prefix} {
  // 标题样式
  .arco-typography {
    margin-bottom: 12px;
  }

  // 列表容器
  &-list {
    display: flex;
    gap: 8px;
    overflow-x: auto;
    overflow-y: hidden;

    // 隐藏滚动条
    &::-webkit-scrollbar {
      display: none;
    }
    scrollbar-width: none;

    // 垂直布局
    &-vertical {
      flex-direction: column;
    }

    // 换行布局
    &-wrap {
      flex-wrap: wrap;
    }
  }

  // 单个提示词
  &-item,
  &-subitem {
    display: flex;
    flex-direction: column;
    gap: 8px;
    padding: 12px 16px;
    background-color: var(--color-bg-2);
    border: 1px solid var(--color-border-2);
    border-radius: 8px;
    cursor: pointer;
    transition: all 0.2s;
    flex-shrink: 0;

    // hover 状态
    &:hover {
      background-color: var(--color-fill-3);
      border-color: var(--color-border-3);
    }

    // active 状态
    &:active {
      transform: scale(0.98);
    }

    // 禁用状态
    &-disabled {
      cursor: not-allowed;
      opacity: 0.5;

      &:hover {
        background-color: var(--color-bg-2);
        border-color: var(--color-border-2);
      }

      &:active {
        transform: none;
      }
    }
  }

  // 提示词内容
  &-item-icon {
    display: inline-flex;
    align-items: center;
    margin-right: 8px;
  }

  &-item-text {
    flex: 1;
  }

  &-item-label {
    font-size: 14px;
    font-weight: 500;
    color: var(--color-text-1);
    margin-bottom: 4px;
  }

  &-item-description {
    font-size: 12px;
    color: var(--color-text-3);
    line-height: 1.5;
  }

  // 子提示词列表
  &-subitem {
    background-color: var(--color-bg-1);
    padding: 8px 12px;
  }
}
5.2 样式设计要点
1. 滚动条隐藏
css
&-list {
  overflow-x: auto;
  overflow-y: hidden;

  // 隐藏滚动条
  &::-webkit-scrollbar {
    display: none;
  }
  scrollbar-width: none;  // Firefox
}
为什么要隐藏滚动条?
- 提供更简洁的视觉效果
- 用户仍然可以通过鼠标拖拽或触摸滑动来滚动
- 适合移动端和桌面端
2. Flexbox 布局
css
&-list {
  display: flex;
  gap: 8px;

  &-vertical {
    flex-direction: column;
  }

  &-wrap {
    flex-wrap: wrap;
  }
}- 默认:
flex-direction: row(水平排列) vertical:flex-direction: column(垂直排列)wrap:flex-wrap: wrap(自动换行)
3. 交互状态
css
&-item {
  cursor: pointer;
  transition: all 0.2s;

  &:hover {
    background-color: var(--color-fill-3);
    border-color: var(--color-border-3);
  }

  &:active {
    transform: scale(0.98);  // 点击时轻微缩小
  }
}
为什么要添加这些状态?
hover:鼠标悬停时改变背景色,提供视觉反馈active:点击时缩小,提供触觉反馈transition:平滑过渡,提升用户体验
4. 禁用状态
css
&-item-disabled {
  cursor: not-allowed;
  opacity: 0.5;

  &:hover {
    background-color: var(--color-bg-2);  // 保持原样
    border-color: var(--color-border-2);
  }

  &:active {
    transform: none;  // 不缩放
  }
}
禁用状态的设计:
opacity: 0.5:视觉上变淡cursor: not-allowed:鼠标指针变为禁止图标- 覆盖 hover 和 active 状态,保持不变
5. 子提示词样式
css
&-subitem {
  background-color: var(--color-bg-1);  // 比父级更浅
  padding: 8px 12px;                     // 比父级更小
}
为什么要区分父级和子级?
- 视觉层次:子级更浅的背景色
- 尺寸差异:子级更小的内边距
- 帮助用户理解嵌套关系
5.3 响应式设计
如果需要在移动端优化,可以添加:
scss
@media (max-width: 768px) {
  .@{prefix} {
    &-list {
      flex-direction: column;  // 移动端强制垂直布局
    }

    &-item {
      width: 100%;  // 占满宽度
    }
  }
}
6. 总结
6.1 实现步骤回顾
我们按照以下步骤实现了 Prompts 组件:
-
设计思路:明确组件的作用和嵌套结构
-
Props 设计:定义支持嵌套的数据结构
-
类型定义 :创建
interface.ts,定义复杂的 TypeScript 类型 -
组件骨架:创建基础结构
-
Props 解构:解构 props 并设置默认值
-
类名构建:构建多个语义化的类名
-
递归渲染:实现嵌套提示词的递归渲染
-
样式实现:使用 LESS 编写样式,支持多种布局
6.2 关键技术点
- 递归渲染
javascript
const renderItem = (item: PromptProps, isSubItem = false) => {
  // ...
  {children && children.length > 0 && (
    <div className={classNames.subList}>
      {children.map((child) => renderItem(child, true))}  // 递归
    </div>
  )}
};- 条件类名
javascript
const itemCls = [
  isSubItem ? `${prefixCls}-subitem` : `${prefixCls}-item`,
  disabled && `${prefixCls}-item-disabled`,
  isSubItem ? classNames.subItem : classNames.item,
].filter(Boolean).join(' ');- 禁用状态处理
ini
const handleClick = () => {
  if (disabled) return;  // 关键:禁用时不触发
  onItemClick?.({ data: item });
};- 灵活的布局
- 通过
vertical和wrapprops 控制布局 - 使用 Flexbox 实现响应式布局
6.3 与 Welcome 组件的对比
| 特性 | Welcome 组件 | Prompts 组件 |
|---|---|---|
| 复杂度 | 简单 | 中等 |
| 数据结构 | 扁平 | 嵌套(树形) |
| 渲染方式 | 直接渲染 | 递归渲染 |
| 交互 | 无 | 点击、禁用 |
| 布局 | 固定 | 灵活(垂直/水平/换行) |
| 使用场景 | 欢迎页 | 提示词列表 |
6.4 使用示例
ini
import { Prompts } from '@curry-ai/x';
import { IconBulb, IconBook } from '@arco-design/web-react/icon';

function App() {
  return (
    <Prompts
      title="快速开始"
      items={[
        {
          key: '1',
          icon: <IconBulb />,
          label: '学习 Arco Design',
          description: '从基础开始学习',
          children: [
            { key: '1-1', label: '快速开始' },
            { key: '1-2', label: '组件文档' },
          ],
        },
        {
          key: '2',
          icon: <IconBook />,
          label: '查看示例',
          description: '浏览示例代码',
          disabled: true,
        },
      ]}
      onItemClick={(info) => {
        console.log('点击了:', info.data.label);
      }}
      wrap
    />
  );
}
6.5 扩展思考
如果要进一步优化这个组件,可以考虑:
-
虚拟滚动:当提示词数量很多时,使用虚拟滚动优化性能
-
拖拽排序:支持用户拖拽调整提示词顺序
-
搜索过滤:添加搜索框,过滤提示词
-
键盘导航:支持键盘上下键选择提示词
-
动画效果:添加展开/收起子提示词的动画
附录:完整文件清单
csharp
packages/x/src/Prompts/
├── interface.ts      # TypeScript 类型定义
├── index.tsx         # 组件实现
├── index.less        # 样式文件
├── index.md          # 组件文档
└── demo/             # 示例代码
    ├── basic.tsx
    ├── disabled.tsx
    ├── flex-vertical.tsx
    ├── flex-wrap.tsx
    ├── flex-wrap-fixed.tsx
    └── nest.tsx
对比总结:Welcome vs Prompts
通过实现这两个组件,我们学习了:
Welcome 组件(简单组件)
- ✅ 基础的 Props 设计
- ✅ TypeScript 类型定义
- ✅ forwardRef 的使用
- ✅ 条件渲染
- ✅ 语义化样式
Prompts 组件(复杂组件)
- ✅ 嵌套数据结构
- ✅ 递归渲染
- ✅ 复杂的类名逻辑
- ✅ 交互状态处理
- ✅ 灵活的布局系统
恭喜!你已经掌握了从简单到复杂的组件实现方法。 🎉
下一步,你可以尝试实现更复杂的组件,如:
-
Bubble:消息气泡,支持打字机效果
-
Sender:消息发送器,集成多个子组件
-
Attachments:文件上传,处理文件状态