文章目录
- 前言
- 目标
- [快速构建基于Spring AI的MCP SSE Server服务(webflux)](#快速构建基于Spring AI的MCP SSE Server服务(webflux))
-
- 官方文档
- 详细构建步骤
-
- 引入依赖pom
- [1、配置启动器 & 默认配置文件](#1、配置启动器 & 默认配置文件)
- 2、实现tools工具
- 3、实现配置类ToolCallbackProvider
- [测试:s单测验证是否可连接mcp服务 & 执行tool方法](#测试:s单测验证是否可连接mcp服务 & 执行tool方法)
- cherrystudio测试使用
- [快速构建基于Spring AI的MCP sse Client](#快速构建基于Spring AI的MCP sse Client)
-
- 官方文档
- 详细构建步骤
-
- 1、引入pom依赖
- [2、配置client参数 & sse参数(配置deepseek模型)](#2、配置client参数 & sse参数(配置deepseek模型))
- 3、启动器类McpClientApplication.java
- 测试验证
- 改造为web服务并提供chat聊天功能
-
- [1、pom依赖引入web stater依赖](#1、pom依赖引入web stater依赖)
- 2、配置文件普通配置
- 3、配置类实现ChatClient初始化
- 4、实现chat控制器(流式回答接口)
- 测试验证
- 扩展
- 资料获取
前言
博主介绍:✌目前全网粉丝4W+,csdn博客专家、Java领域优质创作者,博客之星、阿里云平台优质作者、专注于Java后端技术领域。
涵盖技术内容:Java后端、大数据、算法、分布式微服务、中间件、前端、运维等。
博主所有博客文件目录索引:博客目录索引(持续更新)
CSDN搜索:长路
视频平台:b站-Coder长路
目标
搭建基于java的在线sse的mcp服务能够结合智能体完成mcp tools工具调用
快速构建基于Spring AI的MCP SSE Server服务(webflux)
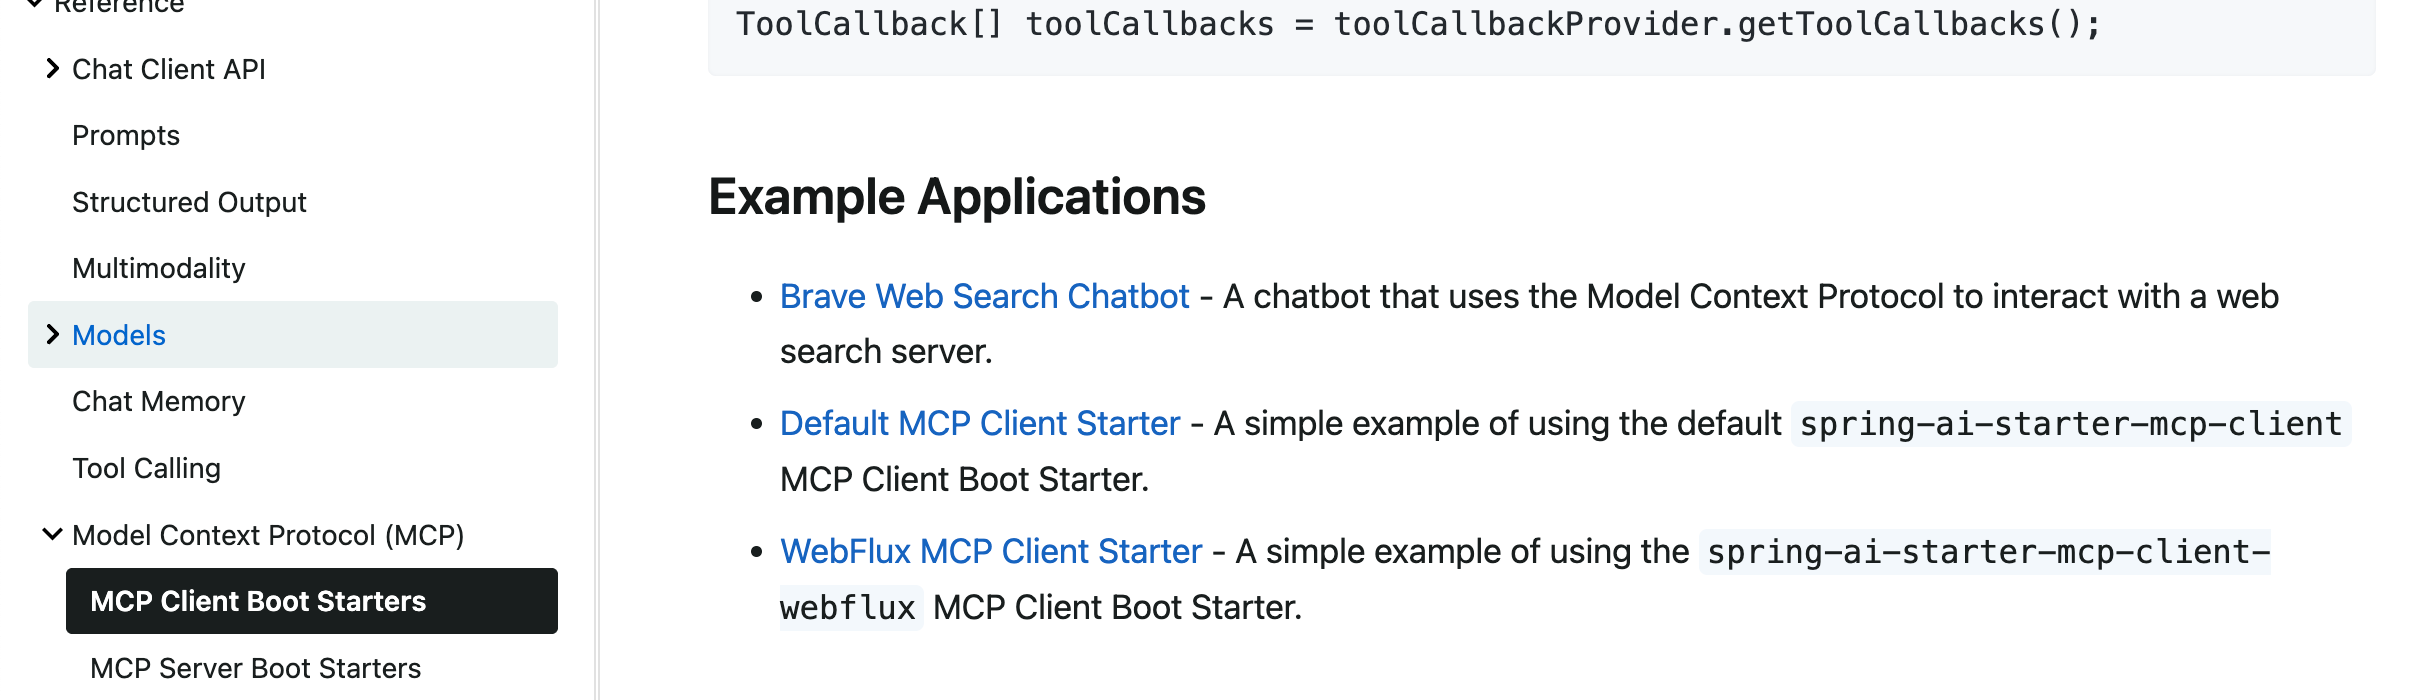
官方文档
spring ai官方文档:https://docs.spring.io/spring-ai/reference/api/mcp/mcp-server-boot-starter-docs.html
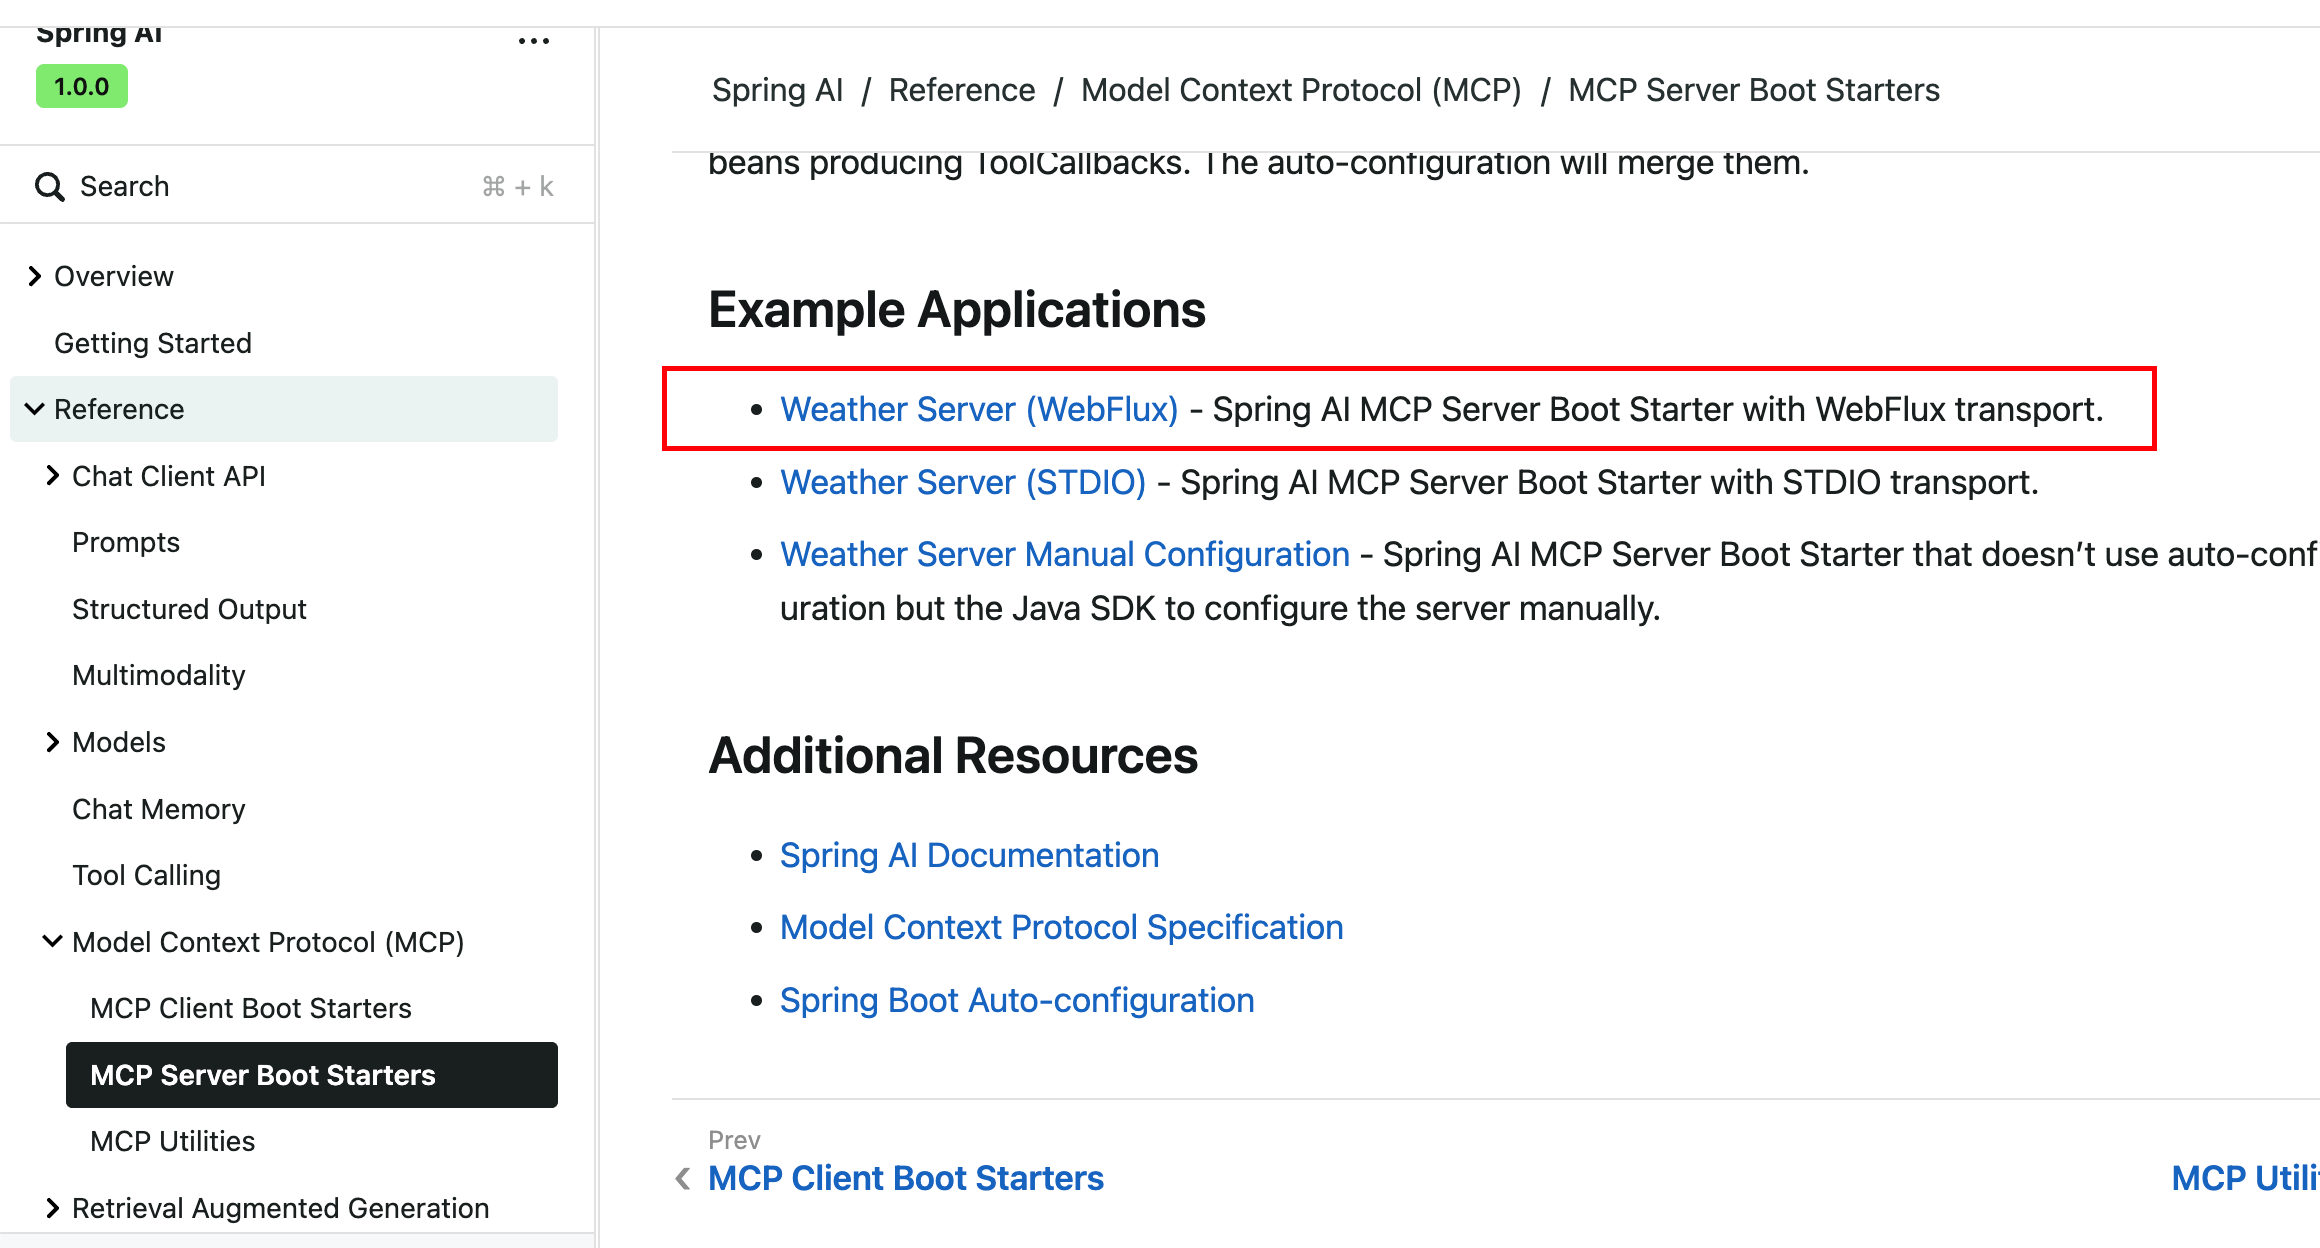
提示:一定要仔细阅读readme,非常的详细。
详细构建步骤
引入依赖pom
xml
<dependencyManagement>
    <dependencies>
        <dependency>
            <groupId>org.springframework.ai</groupId>
            <artifactId>spring-ai-bom</artifactId>
            <version>1.1.0-SNAPSHOT</version>
            <type>pom</type>
            <scope>import</scope>
        </dependency>
    </dependencies>
</dependencyManagement>

<dependencies>
    <dependency>
        <groupId>org.springframework.ai</groupId>
        <artifactId>spring-ai-starter-mcp-server-webflux</artifactId>
    </dependency>
</dependencies>

<build>
    <plugins>
        <plugin>
            <groupId>org.springframework.boot</groupId>
            <artifactId>spring-boot-maven-plugin</artifactId>
        </plugin>
    </plugins>
</build>

<repositories>
    <repository>
        <id>spring-milestones</id>
        <name>Spring Milestones</name>
        <url>https://repo.spring.io/milestone</url>
        <snapshots>
            <enabled>false</enabled>
        </snapshots>
    </repository>
    <repository>
        <id>spring-snapshots</id>
        <name>Spring Snapshots</name>
        <url>https://repo.spring.io/snapshot</url>
        <releases>
            <enabled>false</enabled>
        </releases>
    </repository>
    <repository>
        <id>central-portal-snapshots</id>
        <name>Central Portal Snapshots</name>
        <url>https://central.sonatype.com/repository/maven-snapshots/</url>
        <releases>
            <enabled>false</enabled>
        </releases>
        <snapshots>
            <enabled>true</enabled>
        </snapshots>
    </repository>
</repositories>
1、配置启动器 & 默认配置文件
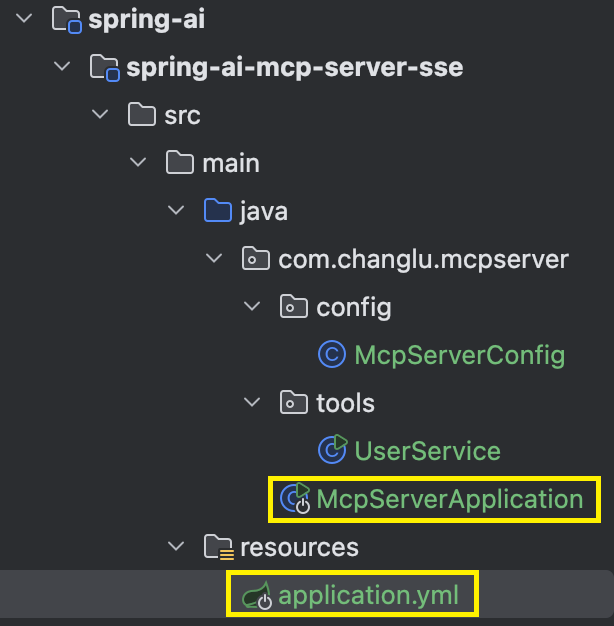
McpServerApplication.java:
java
@SpringBootApplication
public class McpServerApplication {

    public static void main(String[] args) {
        SpringApplication.run(McpServerApplication.class, args);
    }

}
application.yml:
yaml
# Using spring-ai-starter-mcp-server-webmvc
spring:
  application:
    name: mcp-server
  main:
    web-application-type: reactive
    banner-mode: off
  ai:
    mcp:
      server:
        name: mcp-server-sse
        version: 1.0.0
        type: ASYNC
        stdio: false
        sse: true
        sse-endpoint: /sse
        capabilities:
          tool: true
          resource: true
          prompt: true
          completion: true
server:
  port: 8080
2、实现tools工具
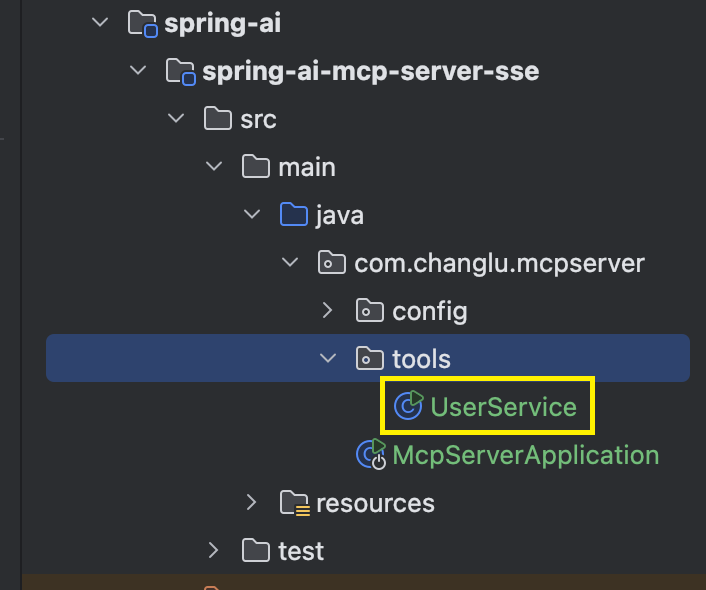
java
@Service
public class UserService {

    @Tool(description = "获取用户信息,根据指定用户名")
    public String getUserInfo(String username) {
        if ("changlu".equals(username)) {
            return "changlu 18岁";
        }else if ("manman".equals(username)) {
            String info = "基本信息\n" +
                    "姓名:[manman]\n" +
                    "花名:[花名]\n" +
                    "职位:[职位]\n" +
                    "所属企业:[企业名称]\n" +
                    "岗位职级:[职级]\n" +
                    "工号:[工号]\n" +
                    "入职时间:[入职时间]\n" +
                    "专业背景\n" +
                    "[花名]先生目前就职于国内知名云计算服务提供商[企业名称],担任[职位]一职,隶属于公司核心的产品技术部门。作为平台开发团队的一员,他专注于开发平台相关技术的研发工作,具备扎实的[职位]能力。\n" +
                    "技术岗位详情\n" +
                    "所属部门:[部门]\n" +
                    "直接上级:[上级姓名]\n" +
                    "工作地点:[工作地点]\n" +
                    "专业联系方式\n" +
                    "企业邮箱:[邮箱]\n" +
                    "联系电话:[电话号码]\n" +
                    "职业特点\n" +
                    "[花名]先生拥有"[职业感悟]"的职业感悟,体现了其从初级开发者逐步成长为专业技术人员的职业历程。作为[企业名称]的技术团队成员,他在云计算平台开发领域积累了丰富的实践经验,能够胜任企业级[职位]工作。\n" +
                    "备注:以上信息基于可公开的职场资料整理,专业沟通建议通过企业邮箱进行。";
            return info;
        }
        return "查无此人";
    }


    public static void main(String[] args) {
        UserService client = new UserService();
        System.out.println(client.getUserInfo("manman"));
    }

}
3、实现配置类ToolCallbackProvider
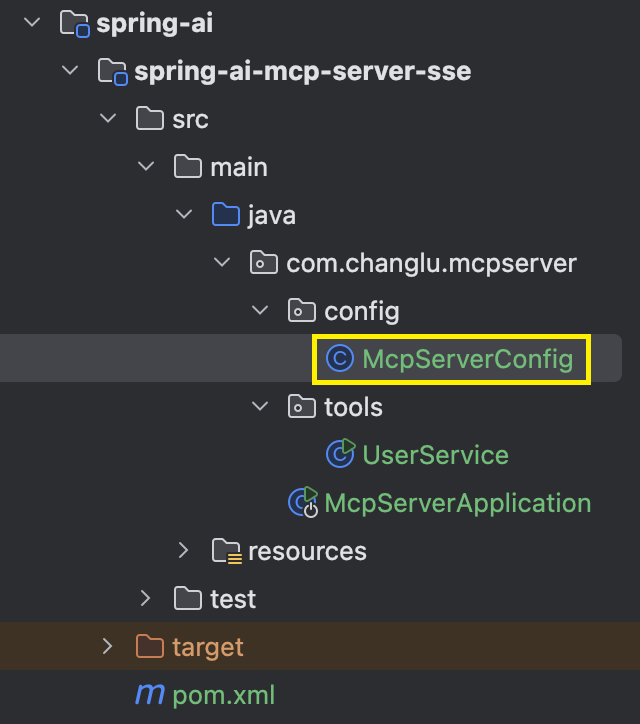
java
@Configuration
public class McpServerConfig {
@Bean
public ToolCallbackProvider weatherTools(UserService userService) {
return MethodToolCallbackProvider.builder().toolObjects(userService).build();
}
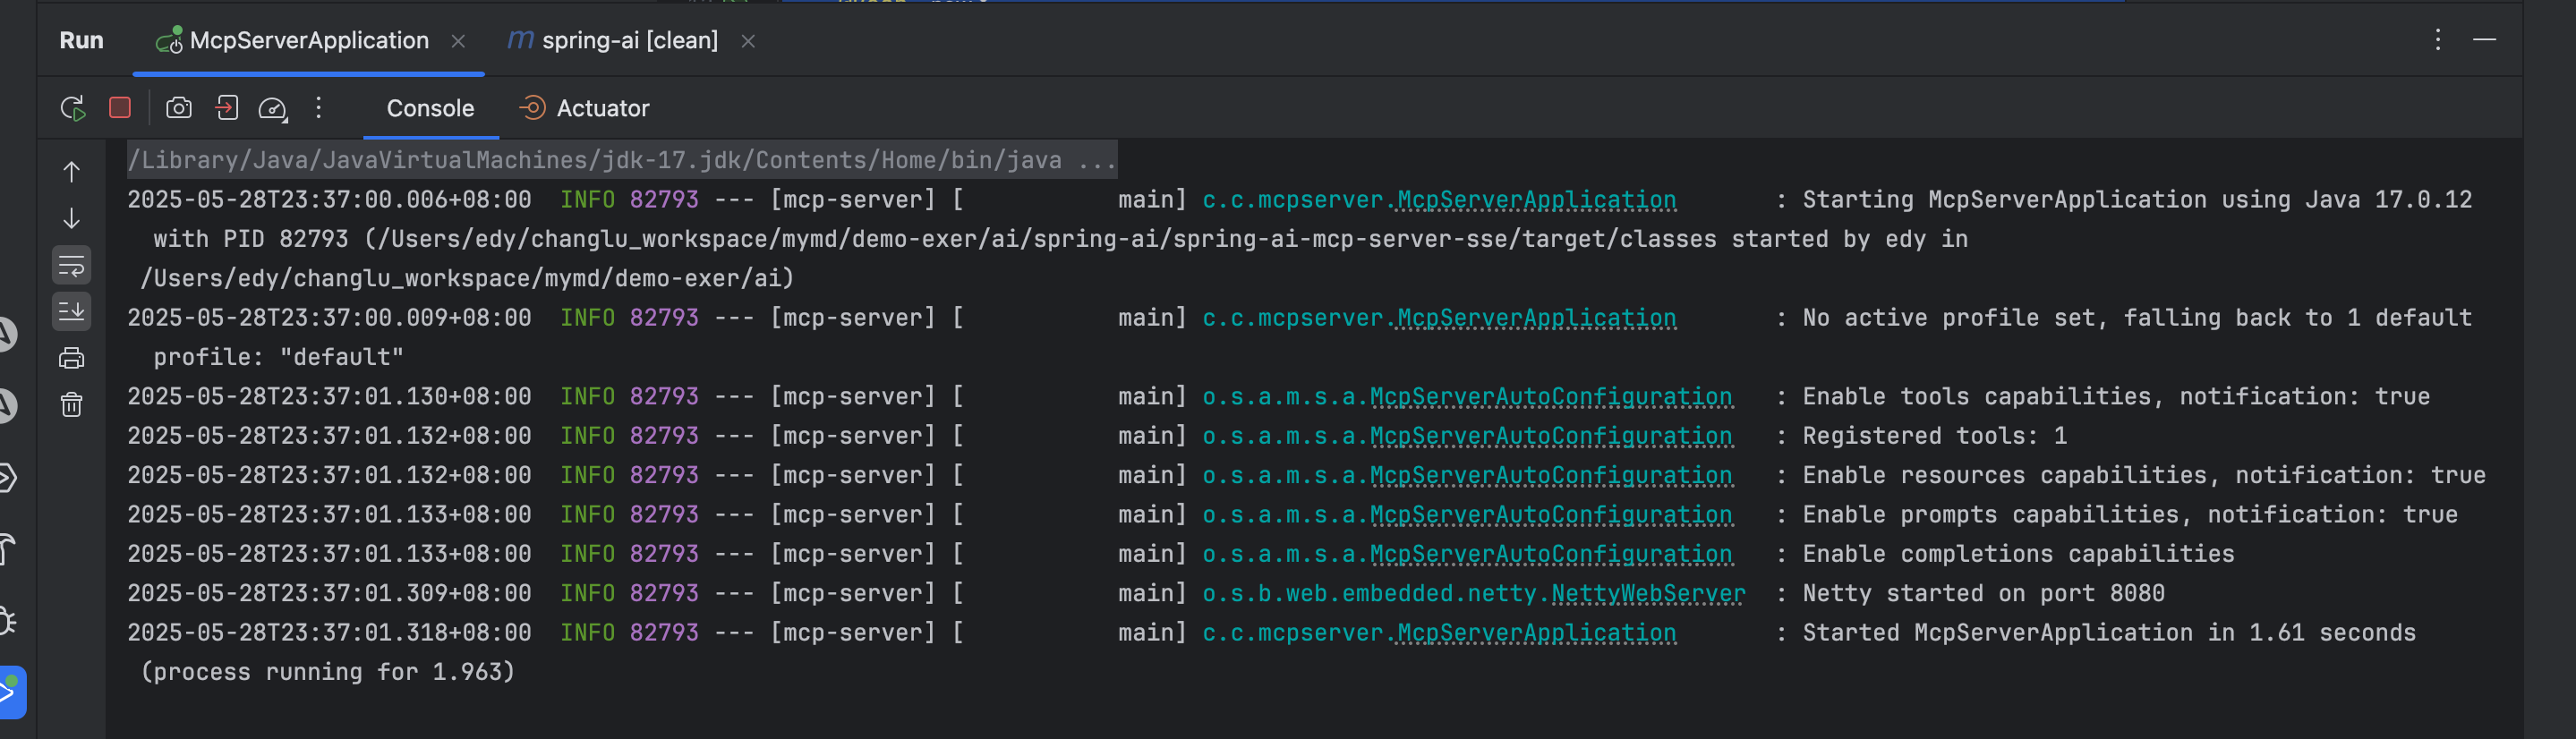
}测试:s单测验证是否可连接mcp服务 & 执行tool方法
首先我们把mcp服务启动:
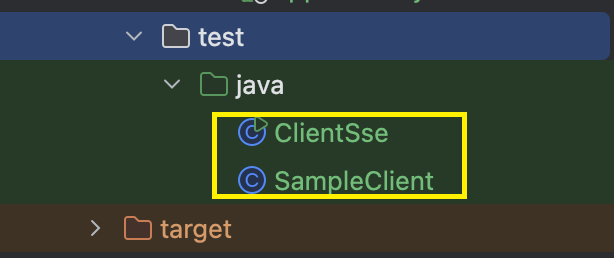
单测有一个clientsse测试,示范了如何使用Client来去连接mcp服务,同时去获取tools列表以及去远程调用tools工具:
SampleClient.java:
java
public class SampleClient {

	private final McpClientTransport transport;

	public SampleClient(McpClientTransport transport) {
		this.transport = transport;
	}

	public void run() {

		var client = McpClient.sync(this.transport).build();

		client.initialize();

		client.ping();

		// List and demonstrate tools
		ListToolsResult toolsList = client.listTools();
		System.out.println("Available Tools = " + toolsList);

		CallToolResult callToolResult = client.callTool(new CallToolRequest("getUserInfo",
				Map.of("username", "changlu")));
		System.out.println(callToolResult);

	}
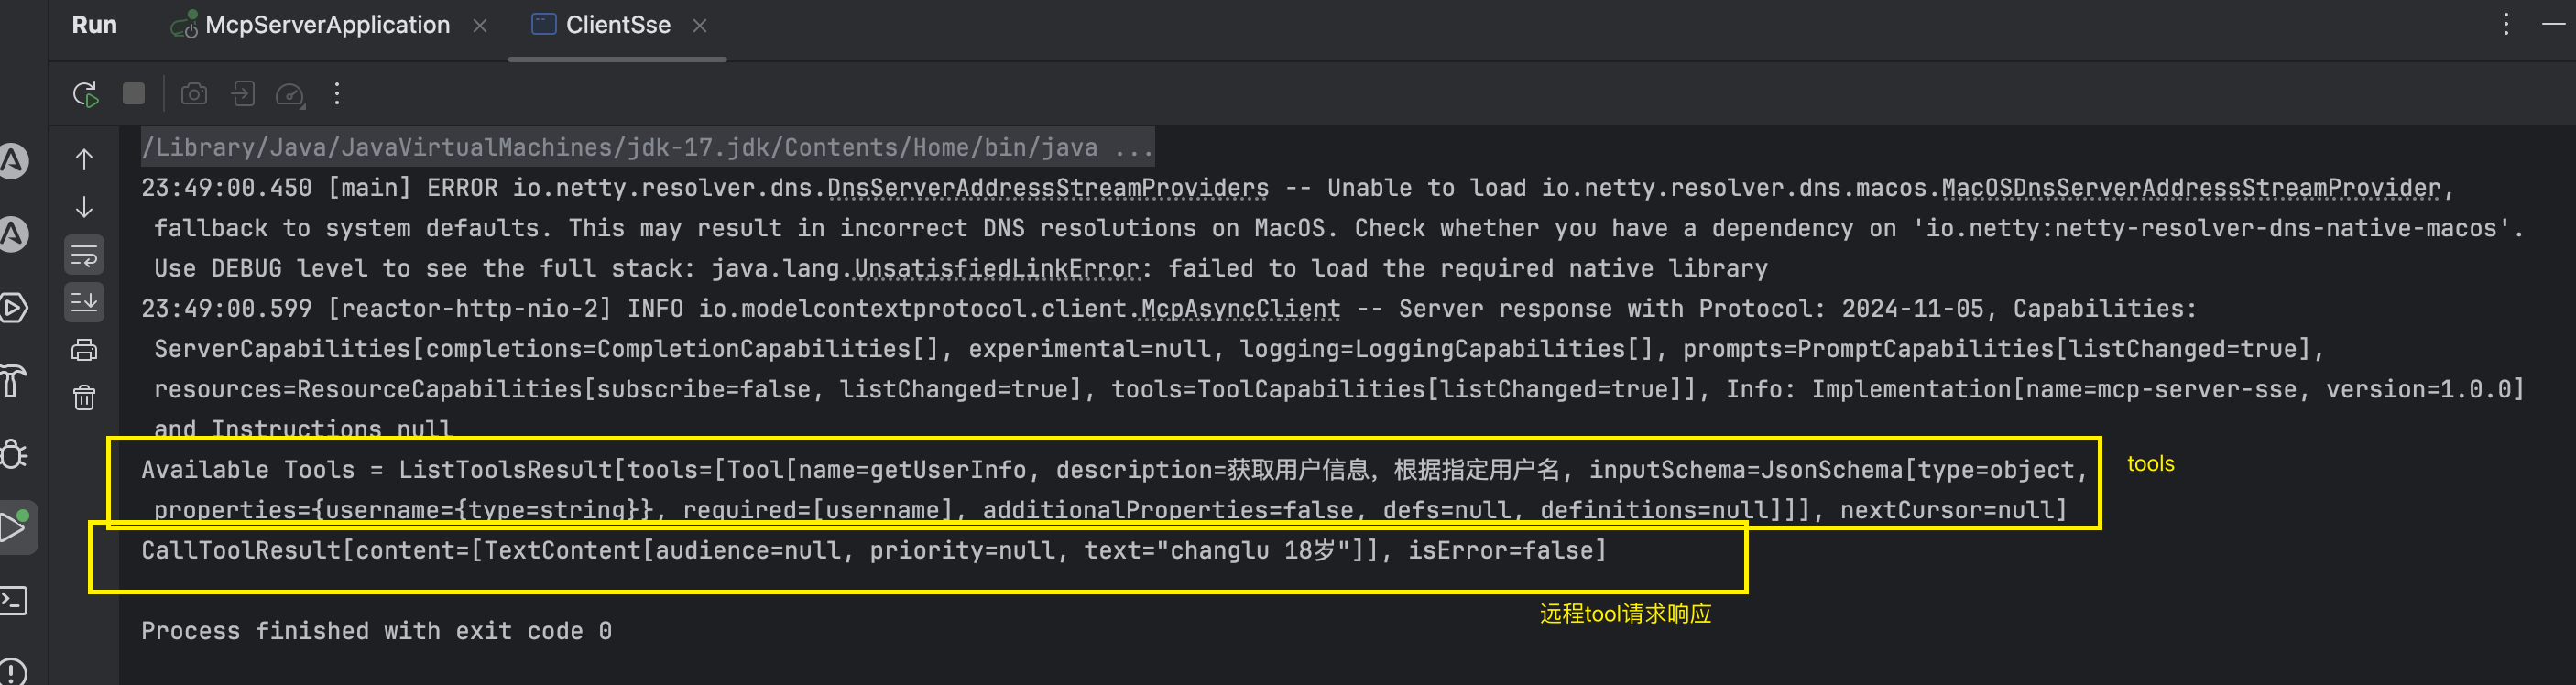
}ClientSse.java:这里直接指定连接的服务ip及端口号即可,默认sseEndPoint为/sse
java
public class ClientSse {

	public static void main(String[] args) {
		var transport = new WebFluxSseClientTransport(WebClient.builder().baseUrl("http://localhost:8080"));
		new SampleClient(transport).run();
	}

}
接着我们直接运行单测,拉取tools,和请求tool服务方法处理:
cherrystudio测试使用
准备工作
1)配置一个mcp-server在设置中
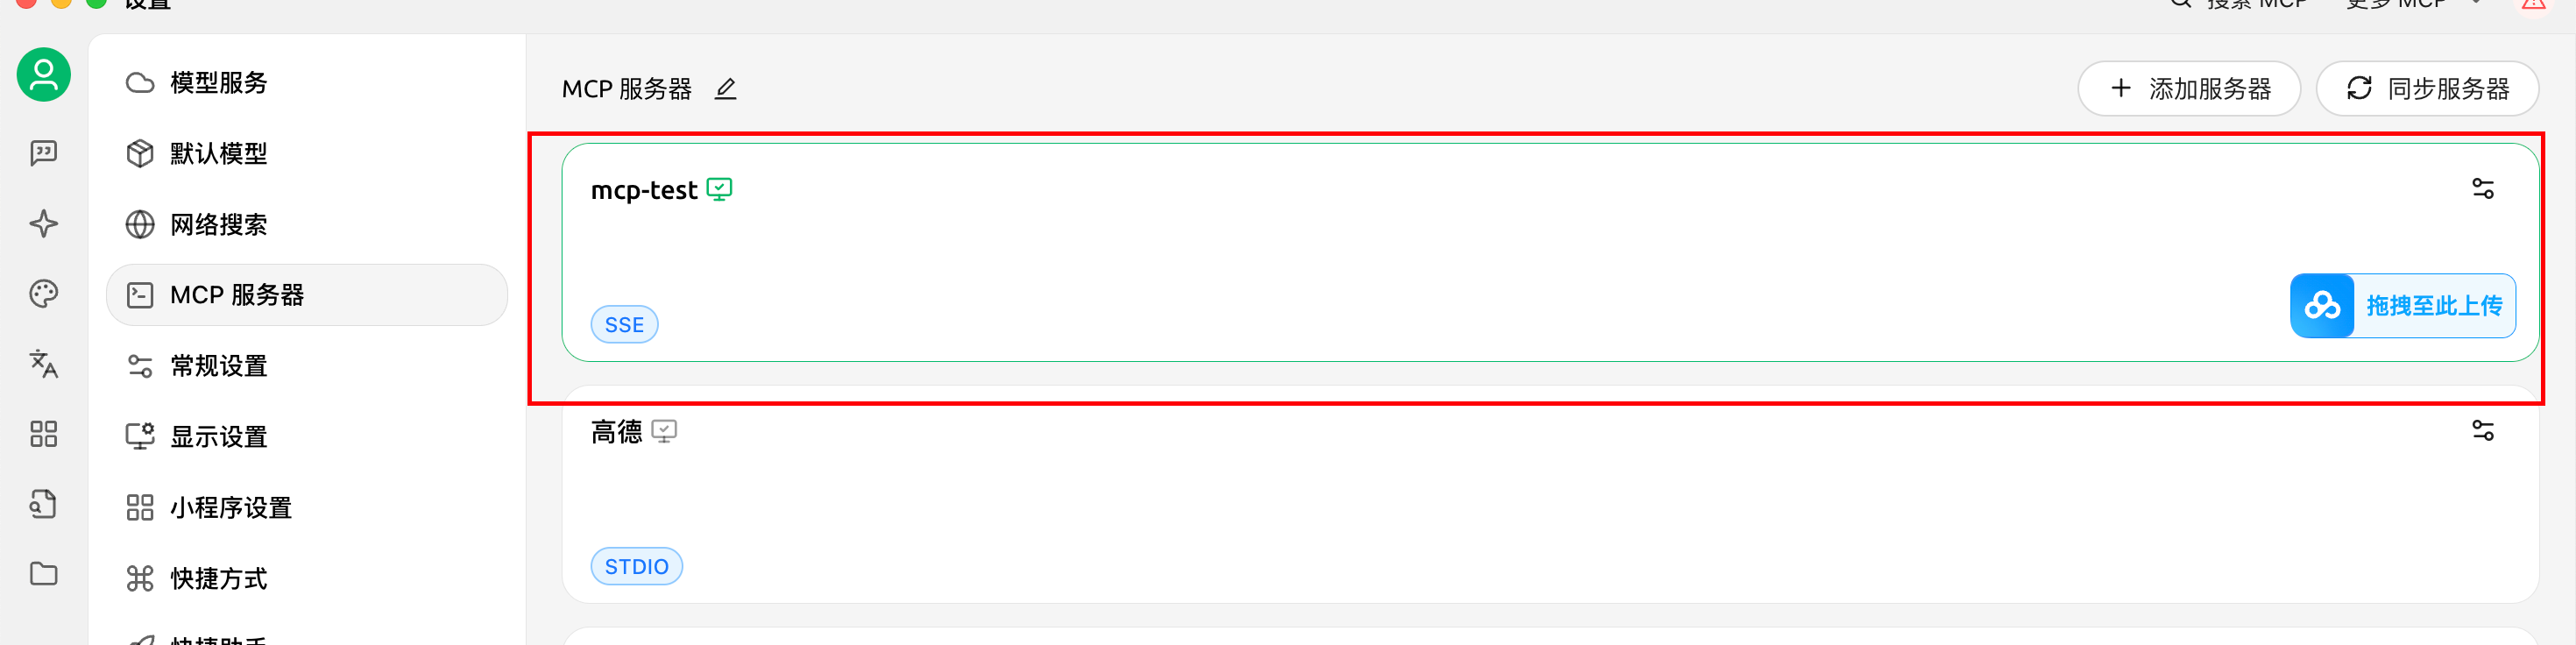
2)选择sse模式,并设置sse的url路径地址

测试验证:
进入聊天界面,选择mcp服务:
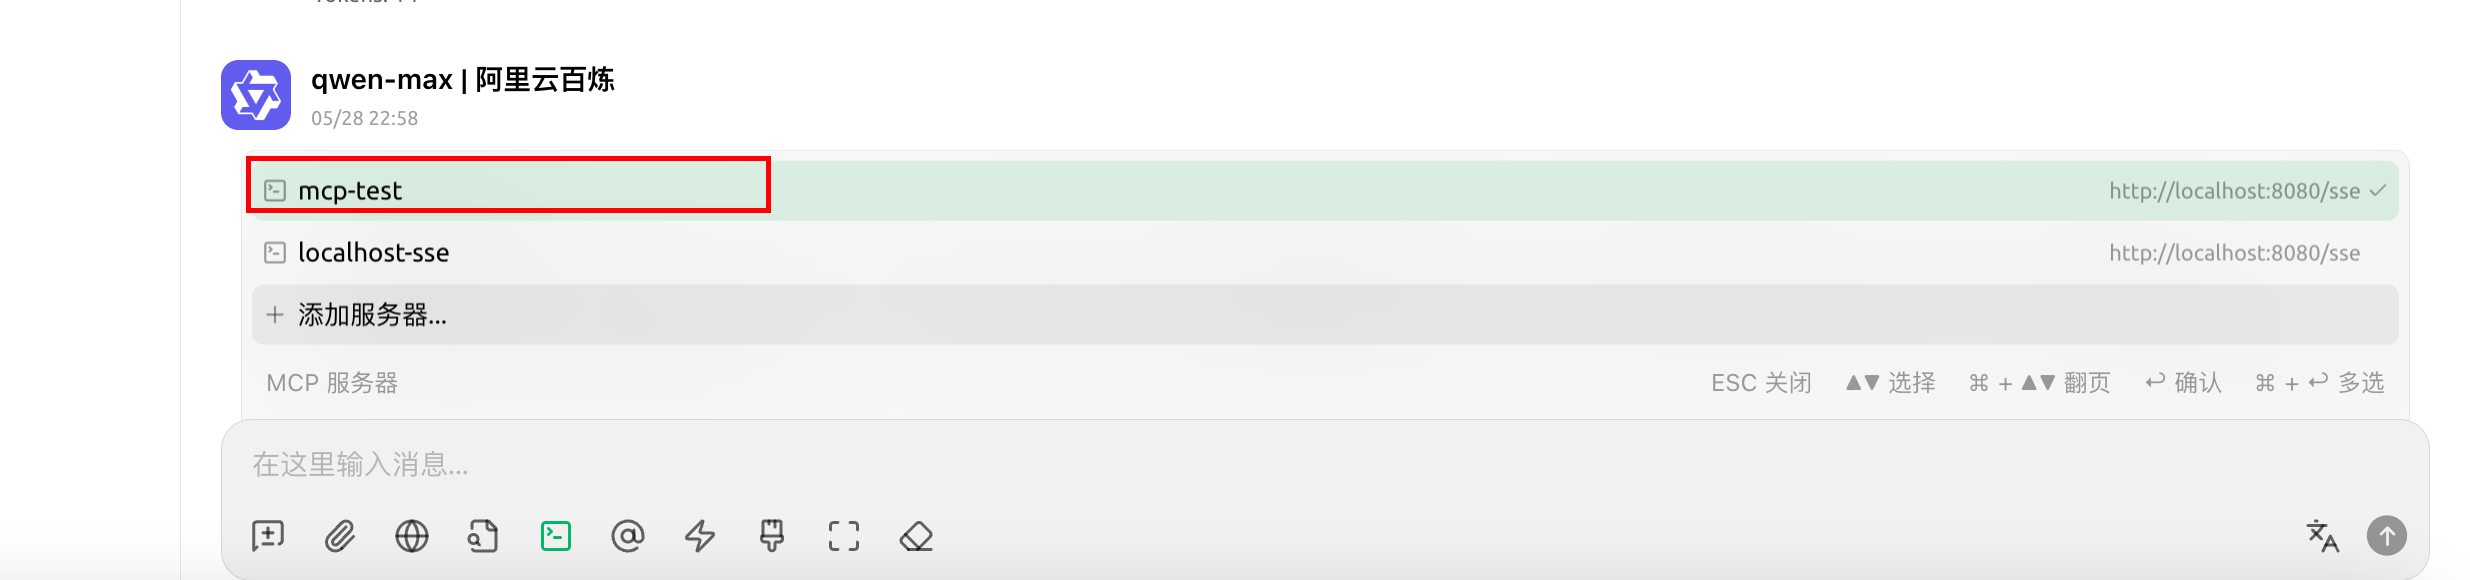
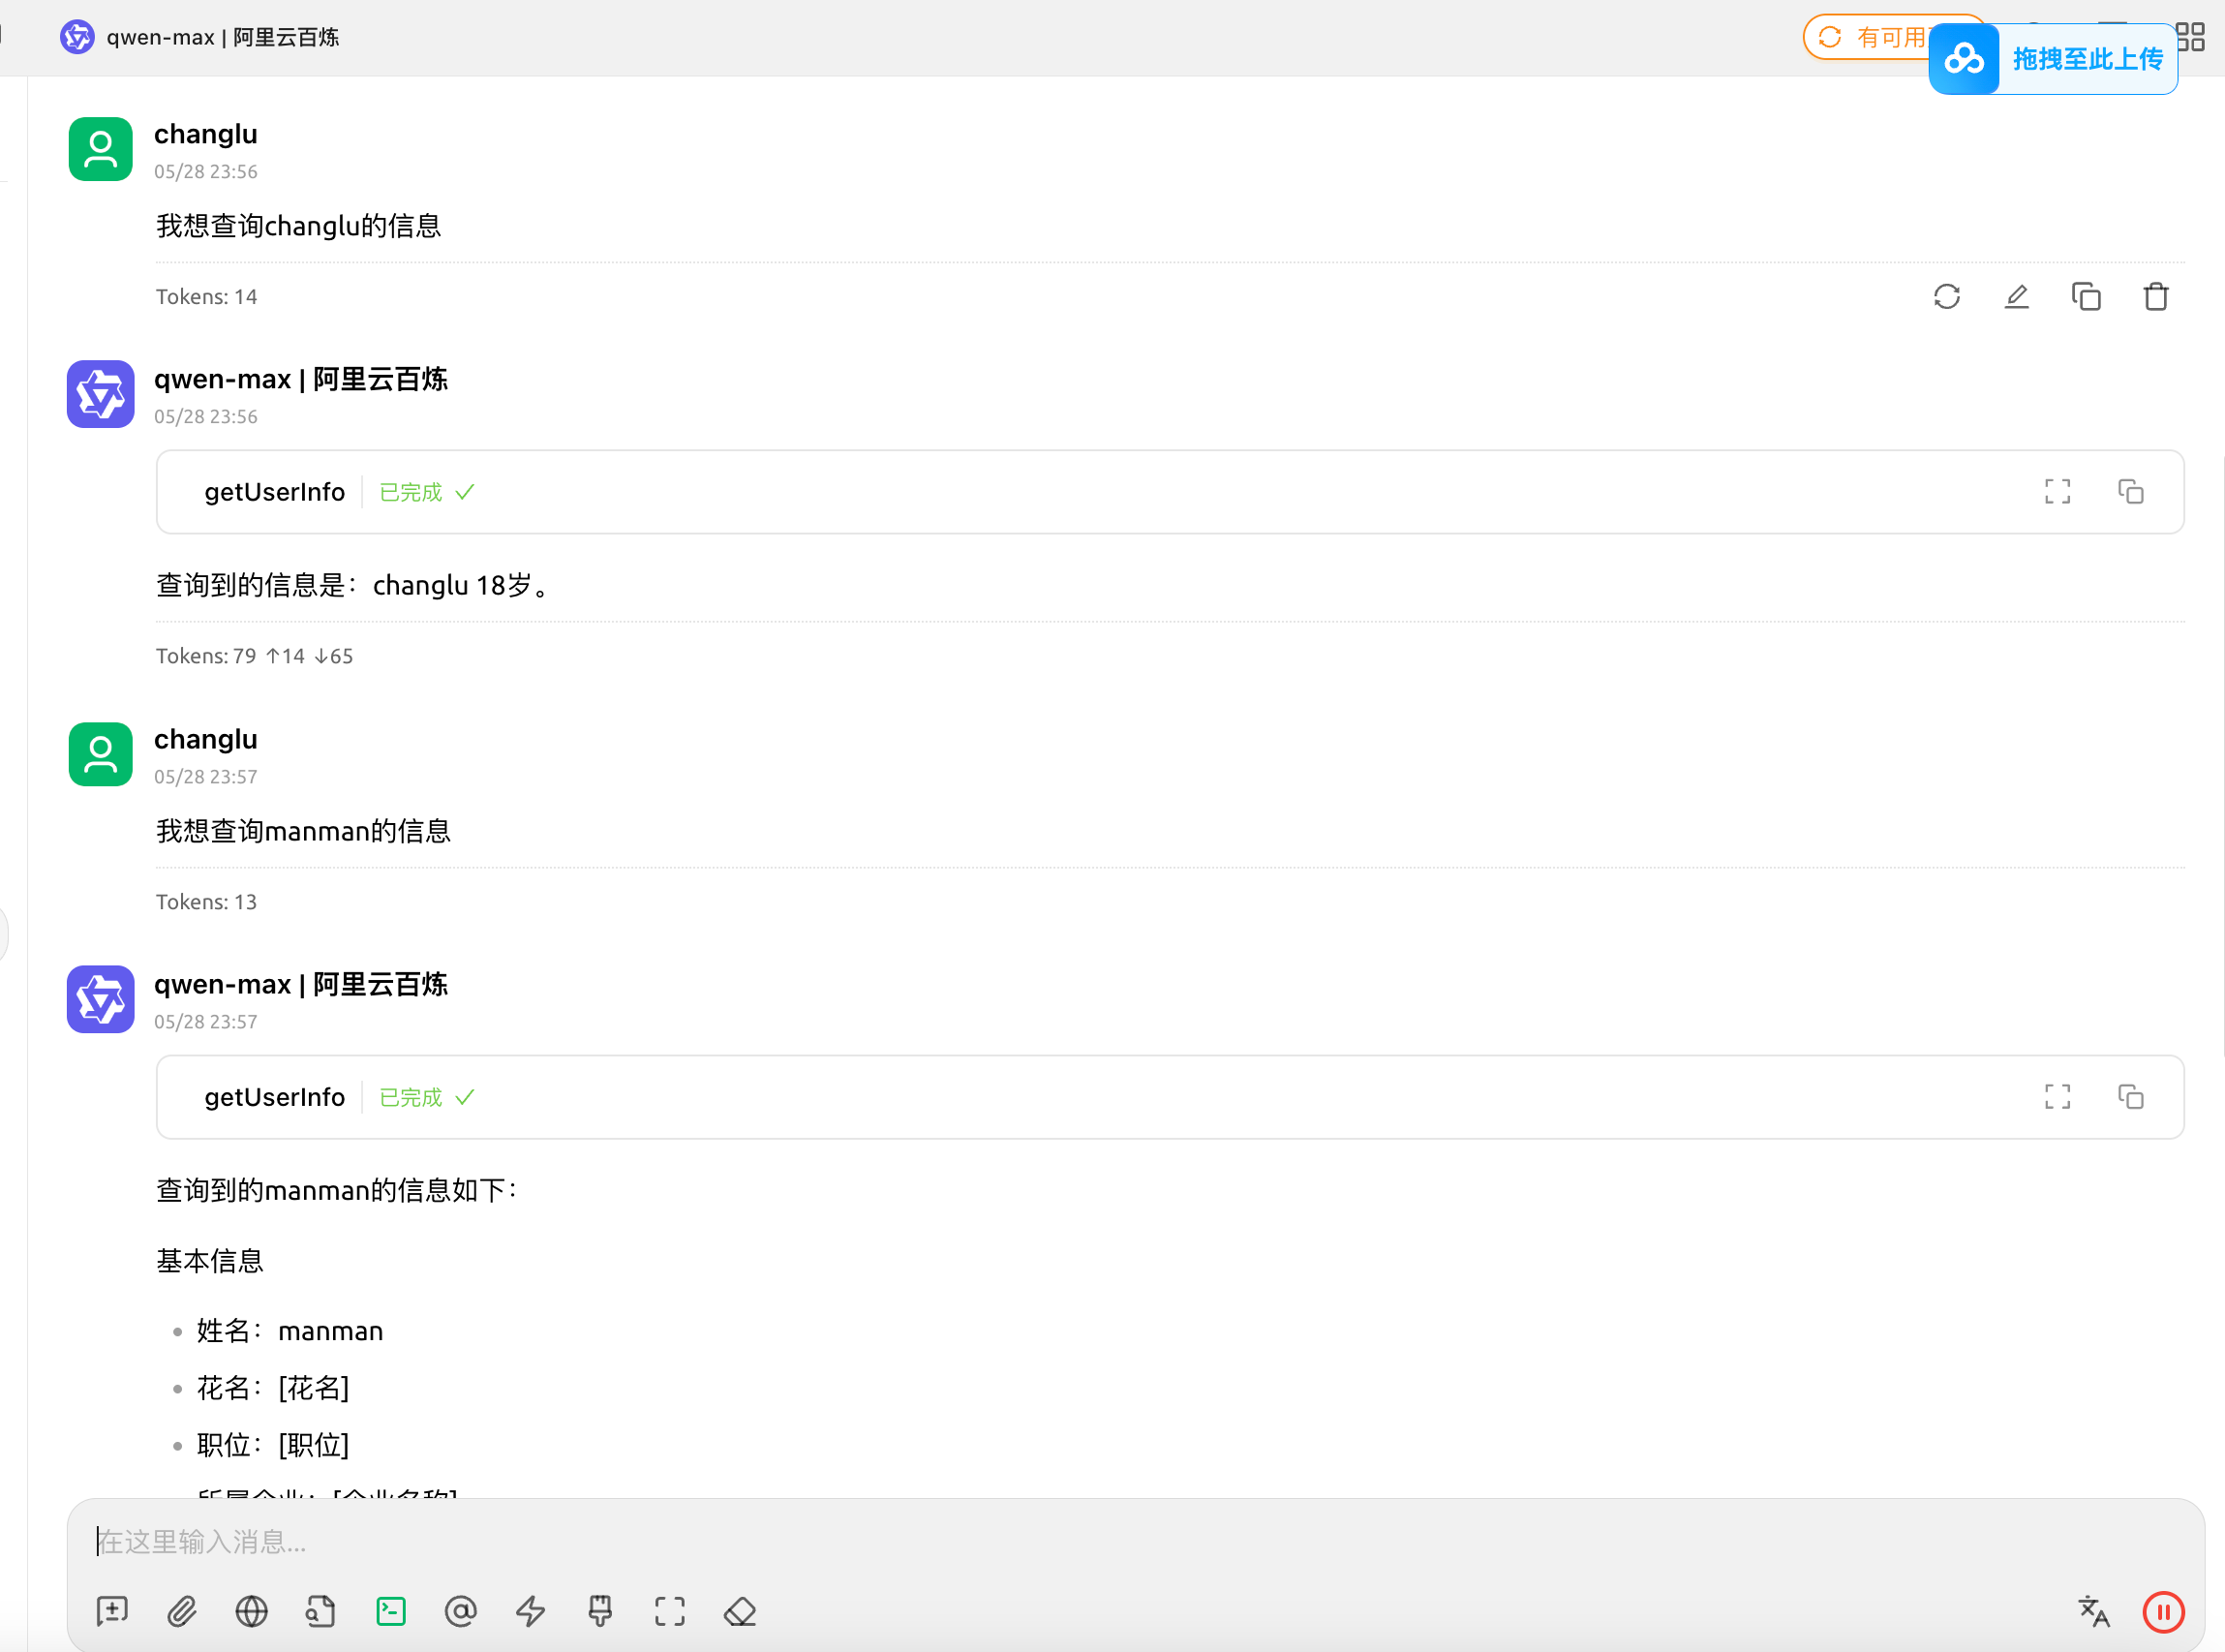
之后,选择一个大模型,正常聊天询问具有tools相关的问题即可,大模型就会自主去发起让client调用tools工具:
效果如下:
快速构建基于Spring AI的MCP sse Client
官方文档
官方文档:https://docs.spring.io/spring-ai/reference/api/mcp/mcp-client-boot-starter-docs.html
提示:一定要仔细阅读readme,非常的详细。
详细构建步骤
1、引入pom依赖
xml
<properties>
    <maven.compiler.source>17</maven.compiler.source>
    <maven.compiler.target>17</maven.compiler.target>
    <project.build.sourceEncoding>UTF-8</project.build.sourceEncoding>
    <spring-ai.version>1.1.0-SNAPSHOT</spring-ai.version>
</properties>

<dependencyManagement>
    <dependencies>
        <dependency>
            <groupId>org.springframework.ai</groupId>
            <artifactId>spring-ai-bom</artifactId>
            <version>${spring-ai.version}</version>
            <type>pom</type>
            <scope>import</scope>
        </dependency>
    </dependencies>
</dependencyManagement>

<dependencies>

    <dependency>
        <groupId>org.springframework.ai</groupId>
        <artifactId>spring-ai-starter-mcp-client-webflux</artifactId>
    </dependency>

    <dependency>
        <groupId>org.springframework.ai</groupId>
        <artifactId>spring-ai-starter-model-openai</artifactId>
    </dependency>

</dependencies>

<build>
    <plugins>
        <plugin>
            <groupId>org.springframework.boot</groupId>
            <artifactId>spring-boot-maven-plugin</artifactId>
        </plugin>
    </plugins>
</build>

<repositories>
    <repository>
        <name>Central Portal Snapshots</name>
        <id>central-portal-snapshots</id>
        <url>https://central.sonatype.com/repository/maven-snapshots/</url>
        <releases>
            <enabled>false</enabled>
        </releases>
        <snapshots>
            <enabled>true</enabled>
        </snapshots>
    </repository>
    <repository>
        <id>spring-milestones</id>
        <name>Spring Milestones</name>
        <url>https://repo.spring.io/milestone</url>
        <snapshots>
            <enabled>false</enabled>
        </snapshots>
    </repository>
    <repository>
        <id>spring-snapshots</id>
        <name>Spring Snapshots</name>
        <url>https://repo.spring.io/snapshot</url>
        <releases>
            <enabled>false</enabled>
        </releases>
    </repository>
</repositories>
2、配置client参数 & sse参数(配置deepseek模型)
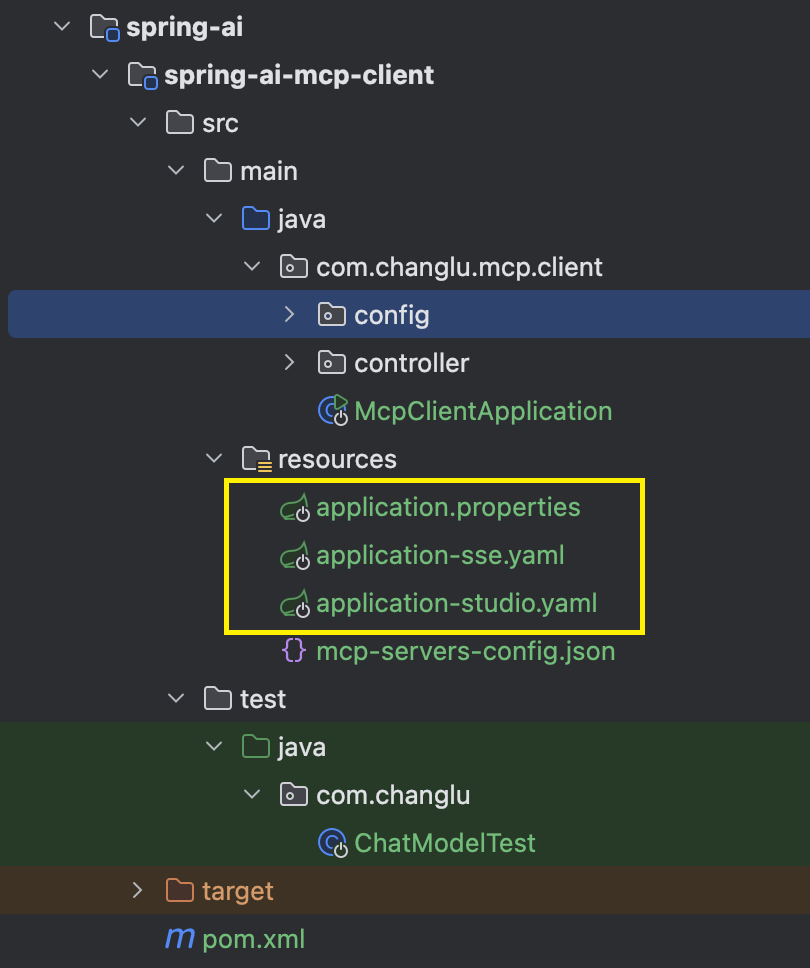
这里我们主配置文件为application.properties:这里我们选择使用了deepseek模型(与openai保持一致的协议实现)
properties
spring.application.name=mcp
# 如果这是一个 纯客户端应用(不需要 HTTP 服务),在 application.properties 中明确禁用 Web:
spring.main.web-application-type=none
spring.profiles.active=sse

ai.user.input=What tools are available?

# 大模型
spring.ai.openai.base-url=https://api.deepseek.com
spring.ai.openai.api-key=${DEEP_SEEK_API_KEY}
spring.ai.openai.chat.options.model=deepseek-chat
spring.ai.openai.chat.options.temperature=0.9

logging.level.io.modelcontextprotocol.client=WARN
logging.level.io.modelcontextprotocol.spec=WARN

# 开启mcp
# Enable the mcp client tool-callback auto-configuration
spring.ai.mcp.client.toolcallback.enabled=true
application-sse.yaml:这里指向了我们之前配置的sse server服务端口
yaml
spring:
  ai:
    mcp:
      client:
        sse:
          connections:
            server1:
              url: http://localhost:8080
#            server2:
#              url: http://otherserver:8081
#              sse-endpoint: /custom-sse
3、启动器类McpClientApplication.java
java
@SpringBootApplication
public class McpClientApplication {
public static void main(String[] args) {
SpringApplication.run(McpClientApplication.class, args);
}
@Value("${ai.user.input}")
private String userInput;
@Bean
public CommandLineRunner predefinedQuestions(ChatClient.Builder chatClientBuilder, ToolCallbackProvider tools,
ConfigurableApplicationContext context) {
return args -> {
var chatClient = chatClientBuilder
.defaultToolCallbacks(tools)
.build();
System.out.println("\n>>> QUESTION: " + userInput);
System.out.println("\n>>> ASSISTANT: " + chatClient.prompt(userInput).call().content());
System.out.println("=====");
System.out.println(chatClient.prompt("请获取manman的信息").call().content());
// context.close();
};
}
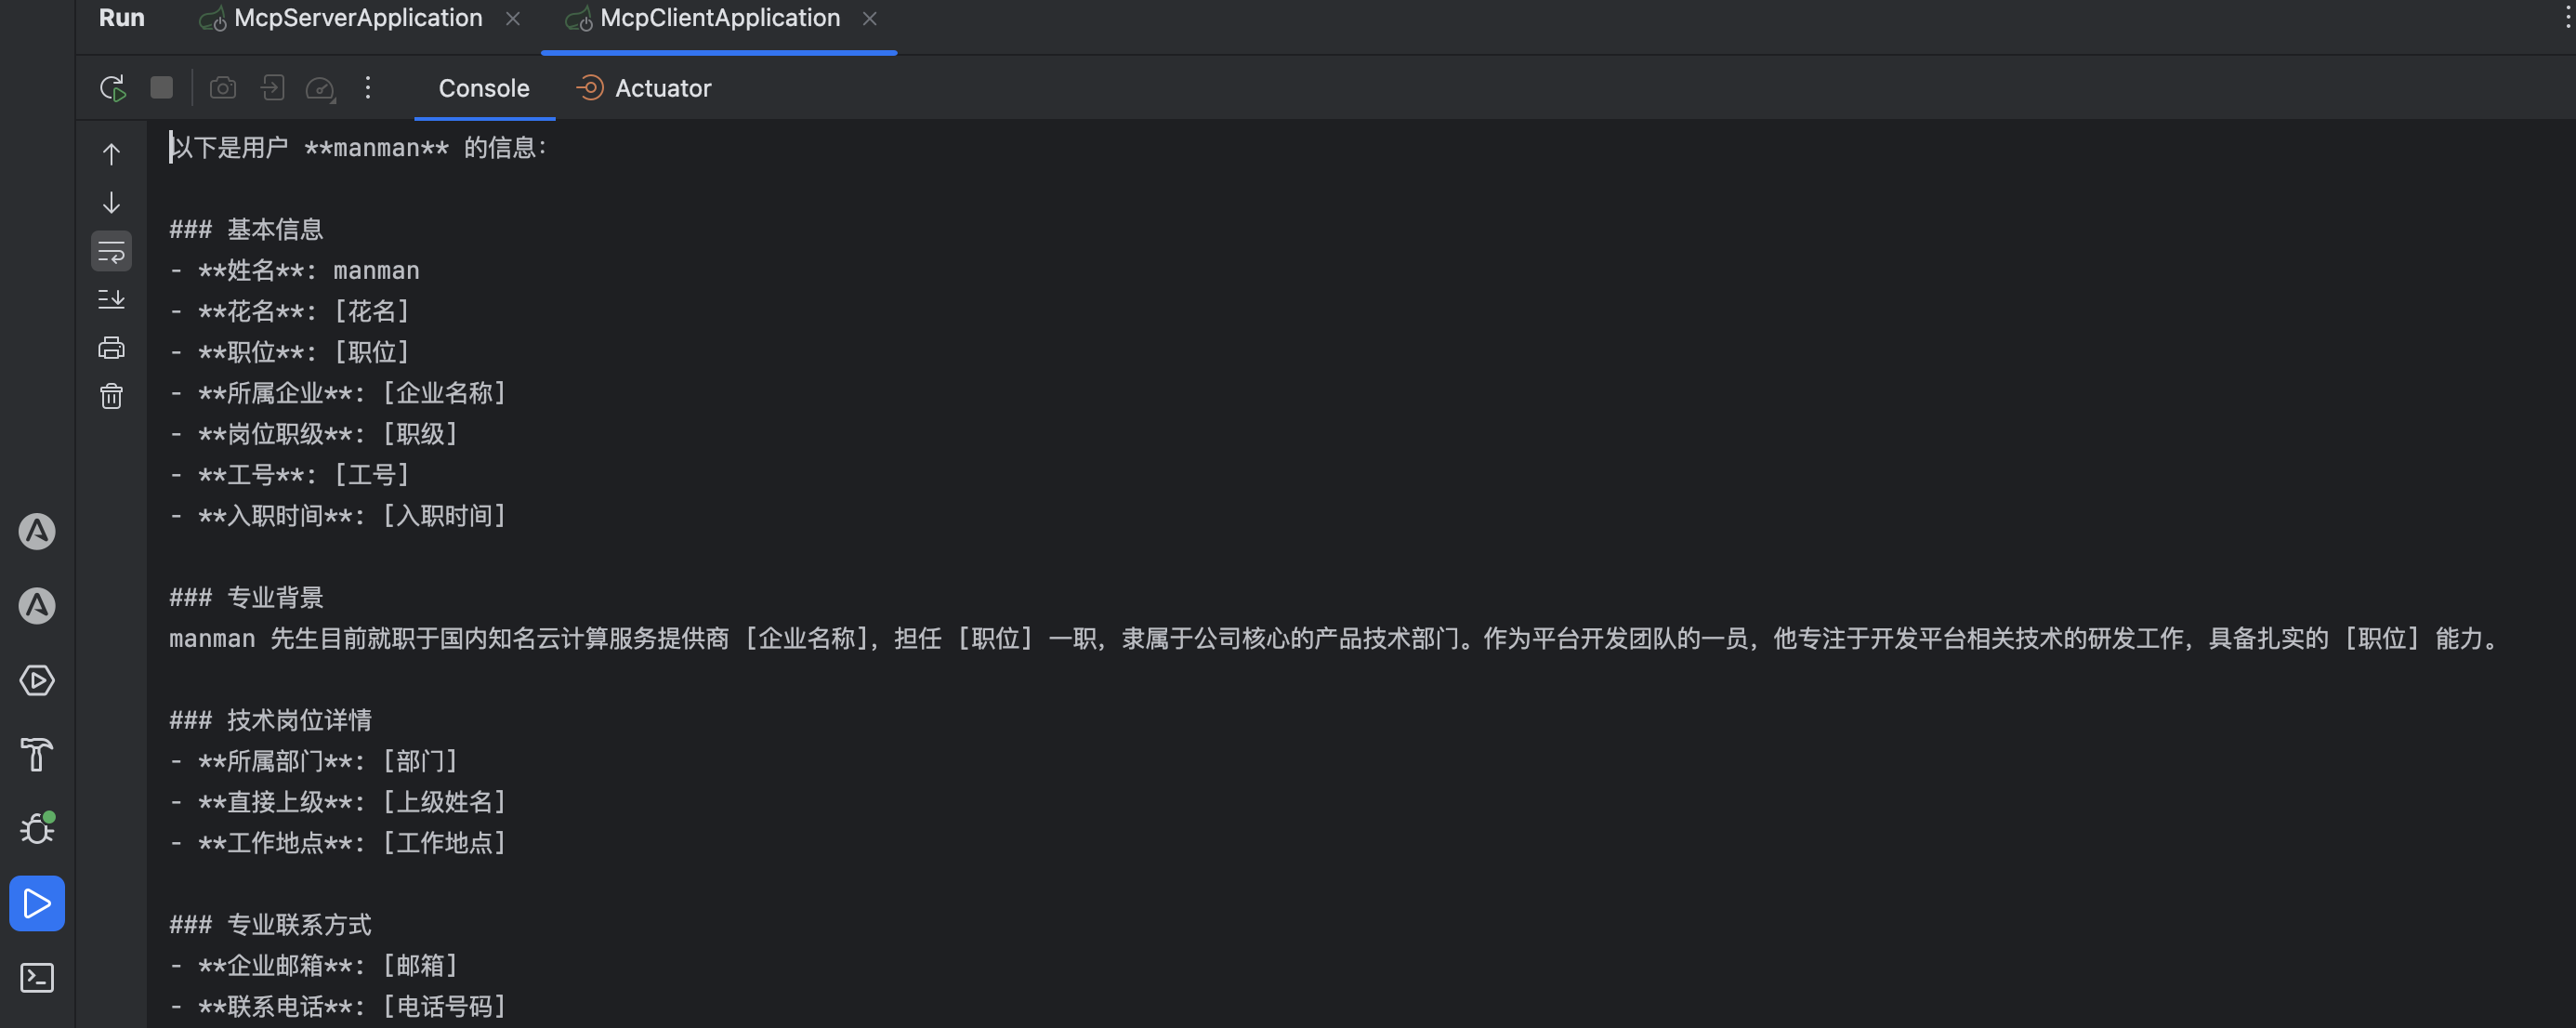
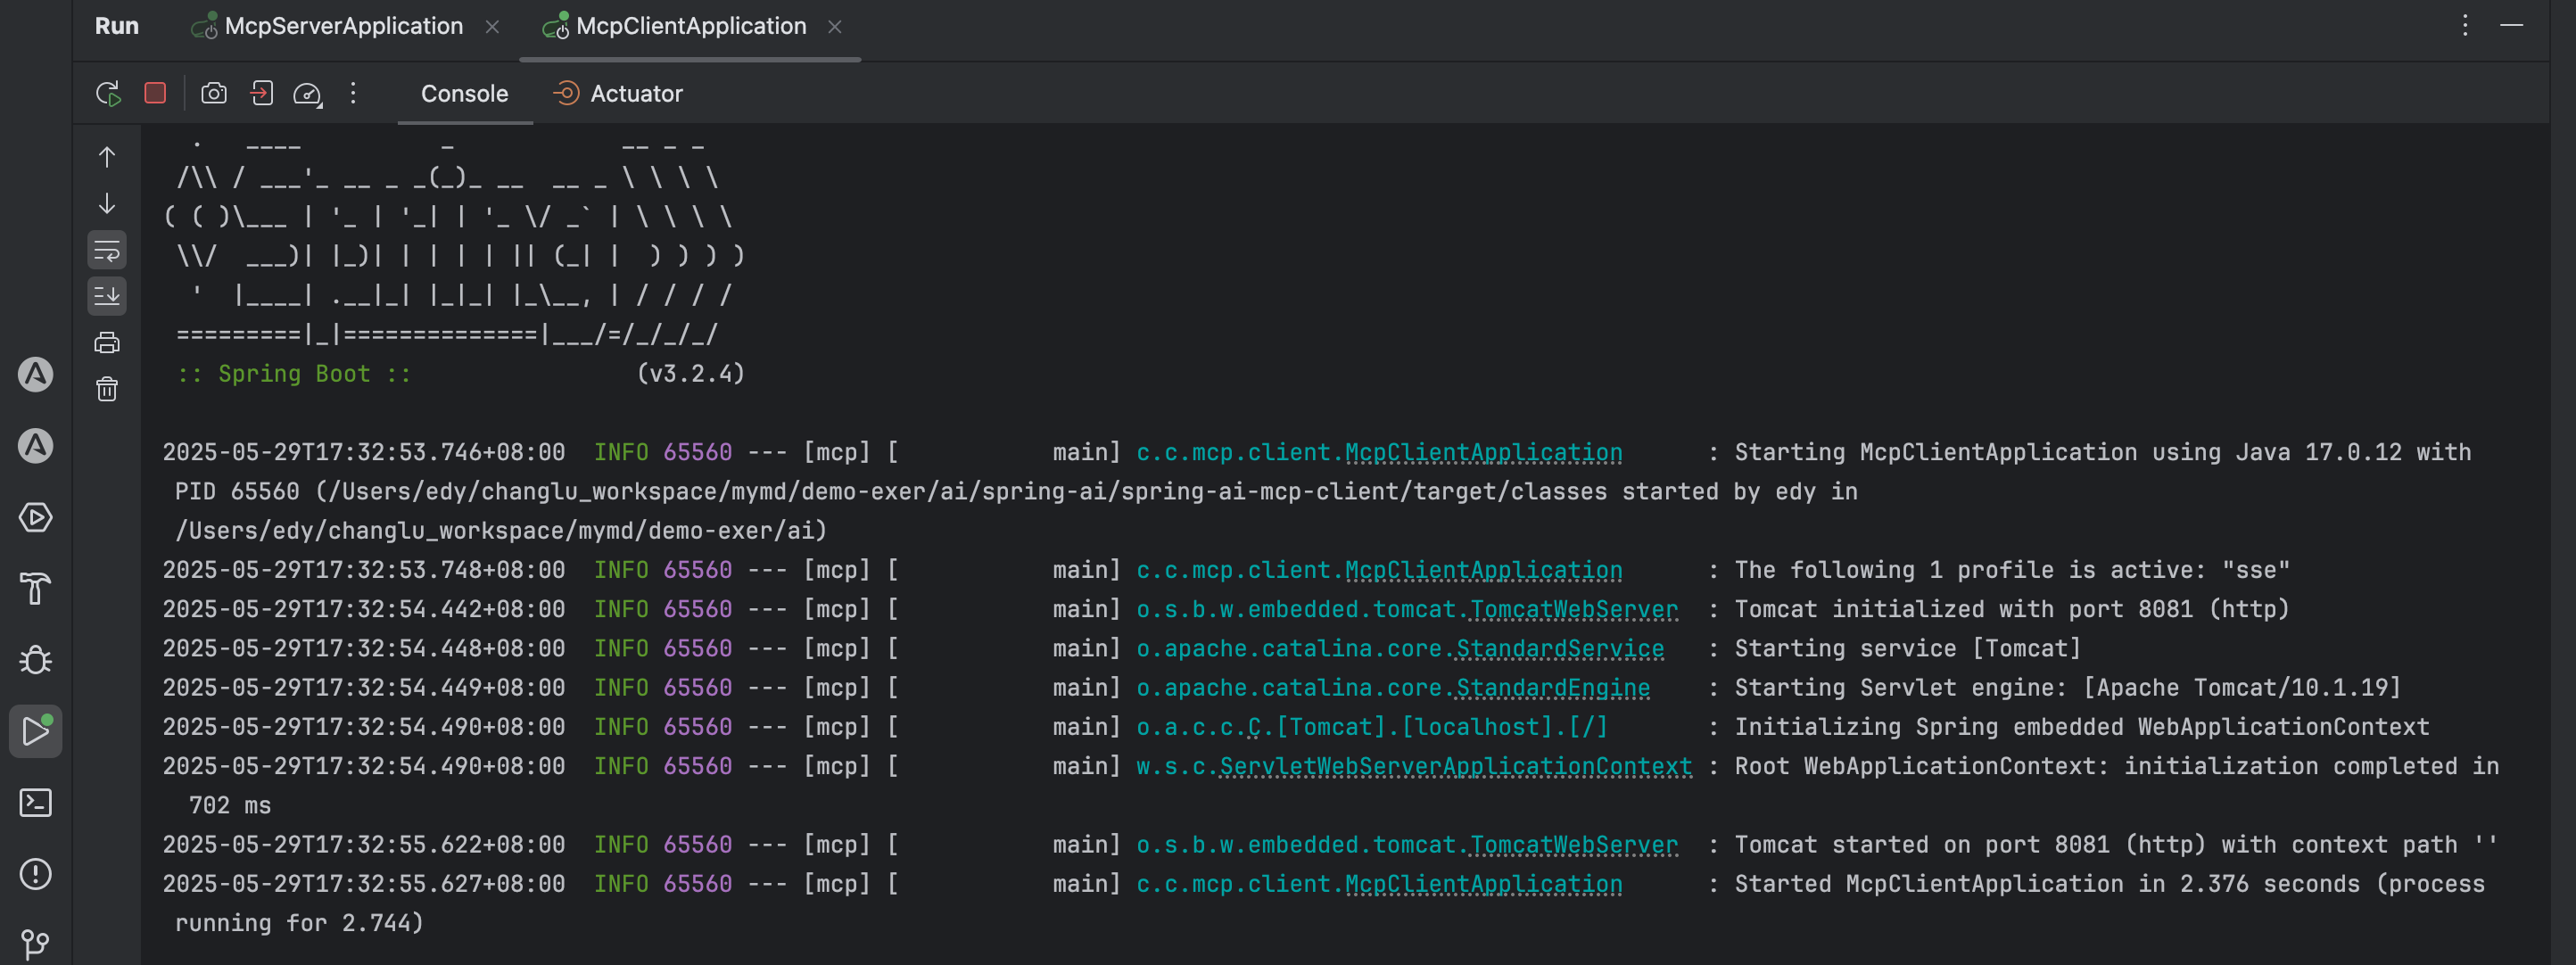
}测试验证
直接启动client服务:
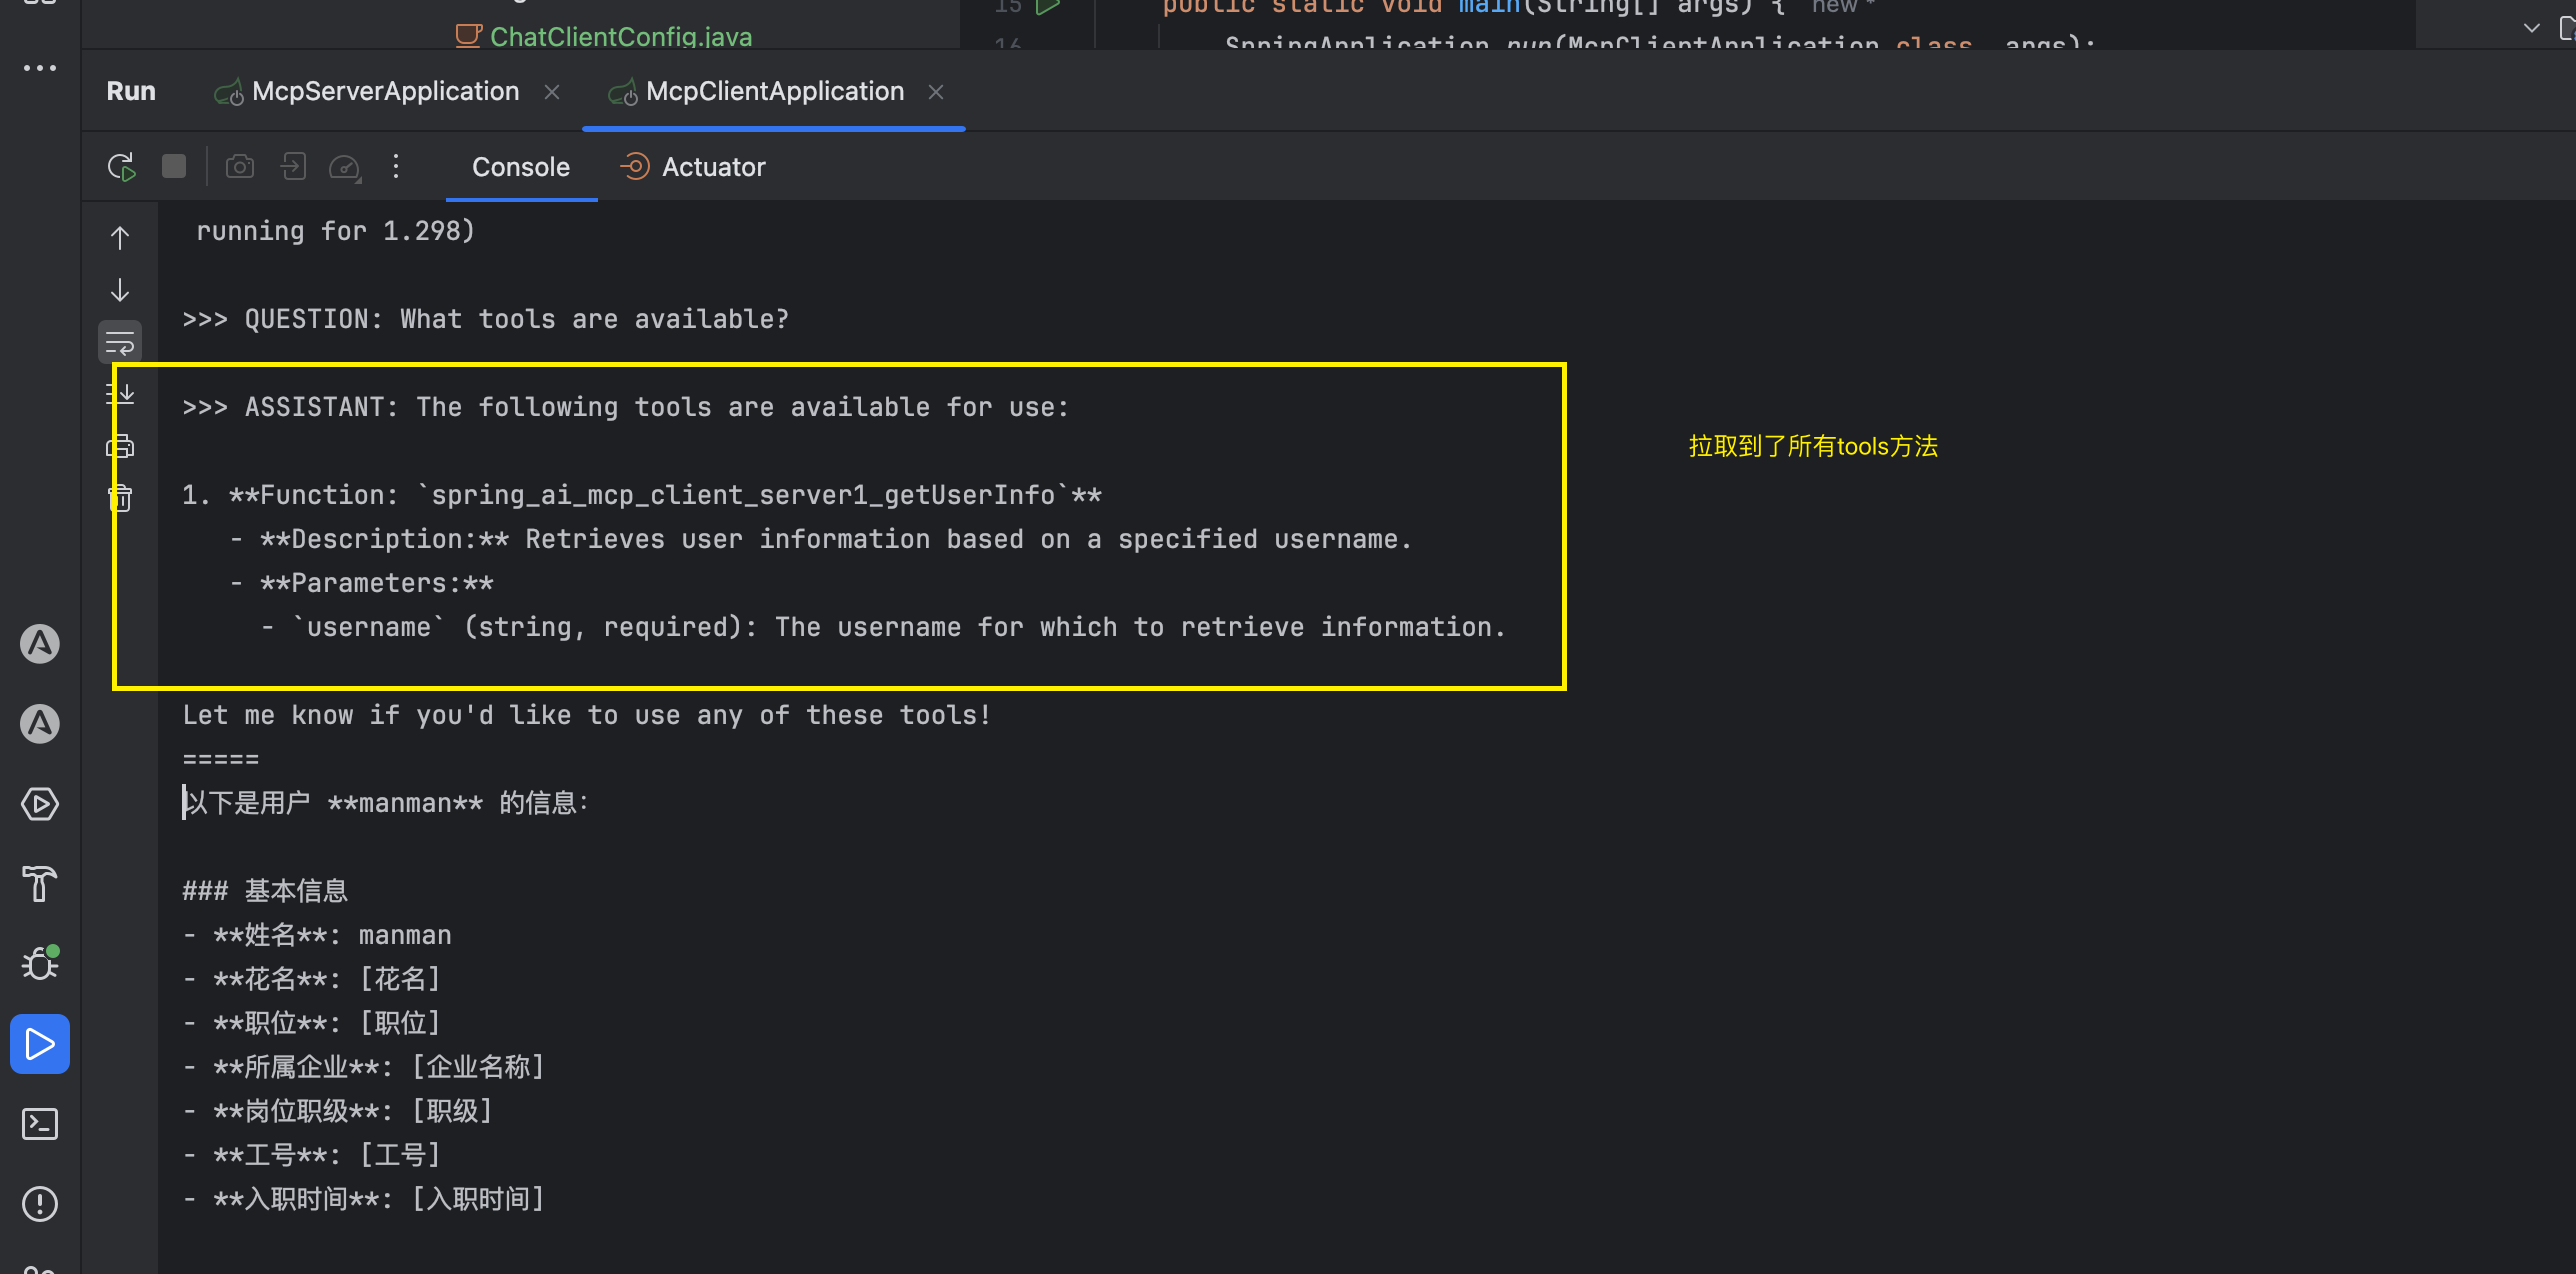
同时还测试了主动结合我的问题去询问ai大模型,并同时主动去调用tools工具完成问题回答。
改造为web服务并提供chat聊天功能
1、pom依赖引入web stater依赖
xml
<dependency>
    <groupId>org.springframework.boot</groupId>
    <artifactId>spring-boot-starter-web</artifactId>
</dependency>
2、配置文件普通配置
application.properties:
properties
#spring.main.web-application-type=none
server.port=8081
3、配置类实现ChatClient初始化
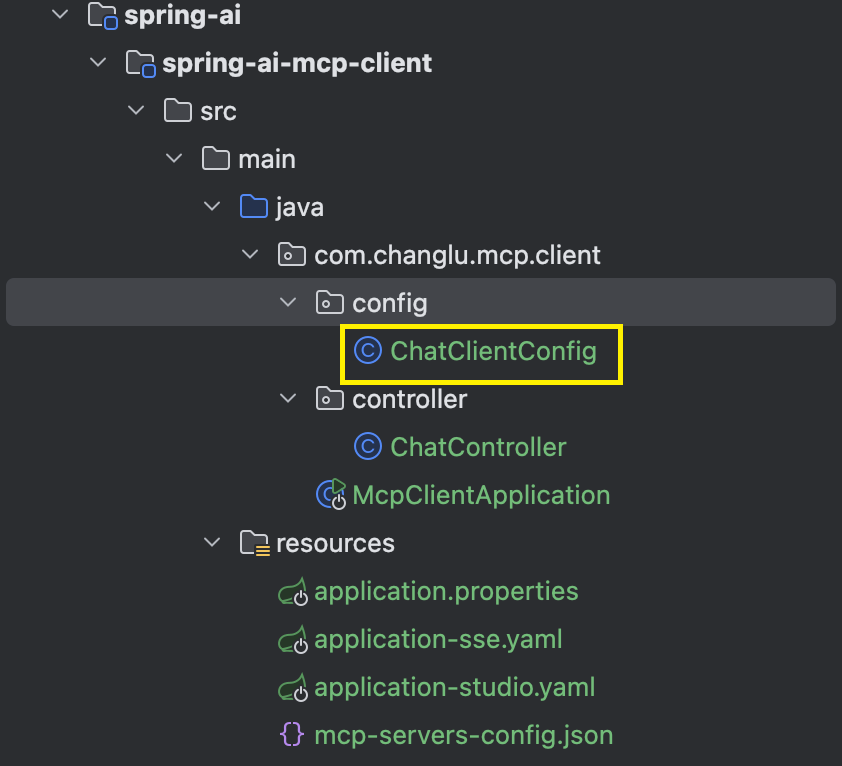
java
@Configuration
public class ChatClientConfig {

    @Bean
    public ChatClient chatClient(ChatClient.Builder chatClientBuilder, ToolCallbackProvider tools) {
        ChatClient chatClient = chatClientBuilder.defaultToolCallbacks(tools)
                .build();
        return chatClient;
    }

}
4、实现chat控制器(流式回答接口)
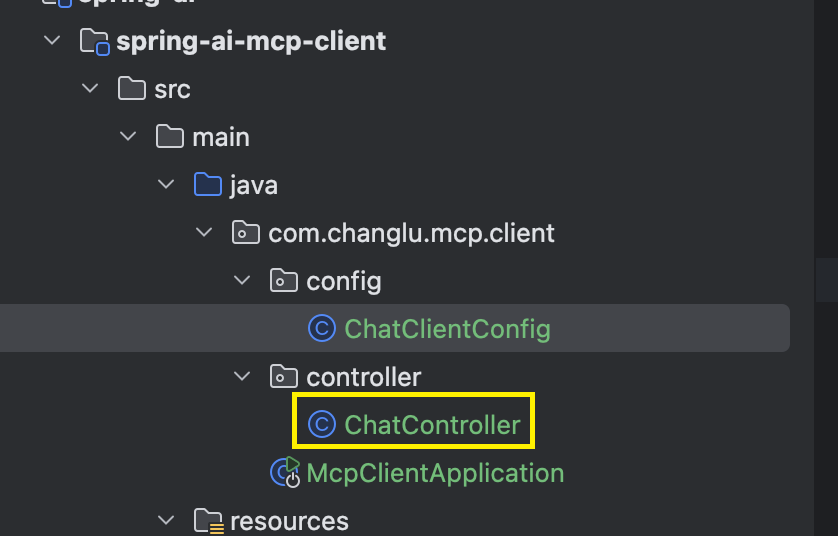
java
@RestController
public class ChatController {

    @Autowired
    private ChatClient chatClient;

    // 流式响应
    @GetMapping(value = "/chat/stream",produces="text/html;charset=UTF-8")
    public Flux<String> chatStream(@RequestParam(value = "msg") String message) {
        return chatClient.prompt().user(message).stream().content();
    }

}
测试验证
启动server服务,同时再启动client服务:
测试一下:http://localhost:8081/chat/stream?msg=我想知道manman的信息

这个回答就是结合我们之前sse的服务来实现的。
扩展
spring ai alibaba
资料获取
大家点赞、收藏、关注、评论啦~
精彩专栏推荐订阅:在下方专栏👇🏻
- 长路-文章目录汇总(算法、后端Java、前端、运维技术导航):博主所有博客导航索引汇总
- 开源项目Studio-Vue---校园工作室管理系统(含前后台,SpringBoot+Vue):博主个人独立项目,包含详细部署上线视频,已开源
- 学习与生活-专栏:可以了解博主的学习历程
- 算法专栏:算法收录
更多博客与资料可查看👇🏻获取联系方式👇🏻,🍅文末获取开发资源及更多资源博客获取🍅