在33号远征队中有一个效果是人物随风变成花瓣消失,最近在网上看到了用THREE.JS实现的类似效果,在这里也给大家分享一下。

1. 加载文本
我们还是按照我们以前的经验从易到难实现这个效果,首先肯定是加载一段文本!
JavaScript
const loader = new FontLoader();
loader.load('/font/Zhi_Mang_Xing_Regular_2.json', function (font) {


    const shapes = font.generateShapes('春风若有怜花意,可否许我再少年', 5);

    const geometry = new THREE.ShapeGeometry(shapes);

    geometry.center();

    const material = new THREE.MeshBasicMaterial({
        color: 0xECCFA3
    });
    const mesh = new THREE.Mesh(geometry, material);
    scene.add(mesh);
});
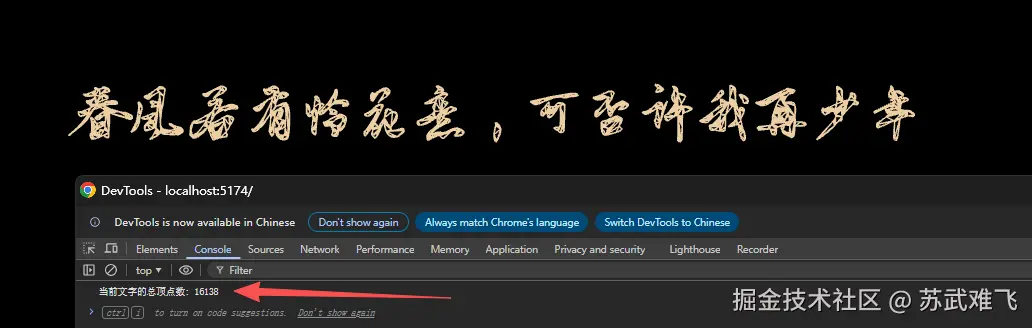
很简单,但是由于我们之后要对这个文本进行溶解效果,所以性能是很重要的,目前这样加载的文本顶点数量极大!对性能影响也非常大!
1.2 采用MSDF
"MSDF 是一种利用纹理通道存储矢量距离场信息的技术,它能让 3D 文字以极低的顶点成本(每个字仅需 2 个三角形),实现无论如何放大都始终如矢量般锐利、无锯齿的渲染效果。"
简单的说 MSDF 走了一条"数学曲线"道路:
它不在贴图里存储颜色,而是存储距离。它利用图片的 R、G、B 三个通道 分别存储不同的距离场信息。通过这三个通道的交集运算,GPU 可以在渲染时实时"计算"出极其锐利的边缘。
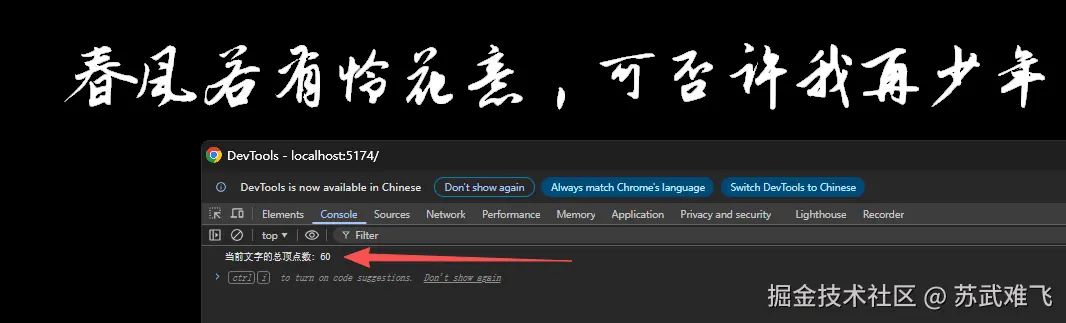
可以看到我们采用了MSDF之后顶点数量大幅下降!
1.3 应该如何使用MSDF
在1.2的例子中我们已经看到了MSDF的优势,我们来详细说说应该怎么使用~
首页我们先用msdf-bmfont-xml这个库生成我们需要的文字距离场
shell
msdf-bmfont ZhiMangXing-Regular.ttf \
-f json \
-o ZhiMangXing.png \
--font-size 64 \
--distance-range 16 \
--texture-padding 8 \
--border 2 \
--smart-size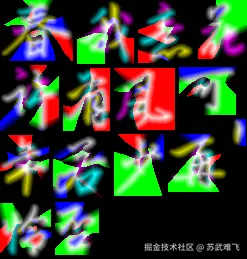
可以看到我们确实是生成了一个文字信息的图片距离场!
接下来由于THREE.JS中没有提供默认的MSDF实现所以我们还需要用到另一个库
JavaScript
npm i three-msdf-text-utils@^1.2.1
JavaScript
import {MSDFTextGeometry, MSDFTextNodeMaterial} from "three-msdf-text-utils";

const response = await fetch("/font/ZhiMangXing-Regular.json");
const fontData = await response.json();

// Create text geometry
const textGeometry = new MSDFTextGeometry({
    text: "春风若有怜花意,可否许我再少年",
    font: fontData,
    width: 1000,
    align: "center",
});

const textureLoader = new THREE.TextureLoader();
const fontAtlasTexture = await textureLoader.loadAsync('/font/font.png');
fontAtlasTexture.colorSpace = THREE.NoColorSpace;
fontAtlasTexture.minFilter = THREE.LinearFilter;
fontAtlasTexture.magFilter = THREE.LinearFilter;
fontAtlasTexture.wrapS = THREE.ClampToEdgeWrapping;
fontAtlasTexture.wrapT = THREE.ClampToEdgeWrapping;
fontAtlasTexture.generateMipmaps = false;

const textMaterial = new MSDFTextNodeMaterial({
    map: fontAtlasTexture,
    wireframe: true,
    transparent: true,
});

textMaterial.alphaTest = 0.1;
const mesh = new THREE.Mesh(textGeometry, textM aterial);
2. 文字溶解效果
我们已经成功用MSDF加载出来文本,之后就要考虑实现我们的溶解效果。
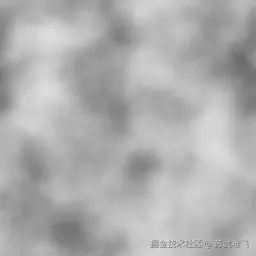
首先我们需要一个蒙版遮罩图片
在THREE.JS中加载这个遮罩纹理
JavaScript
const textureLoader = new THREE.TextureLoader();
const perlinTexture = await textureLoader.loadAsync("/textures/perlin.webp");
perlinTexture.colorSpace = THREE.NoColorSpace;
perlinTexture.minFilter = THREE.LinearFilter;
perlinTexture.magFilter = THREE.LinearFilter;
perlinTexture.wrapS = THREE.RepeatWrapping;
perlinTexture.wrapT = THREE.RepeatWrapping;
perlinTexture.generateMipmaps = false;使用TSL方式应用加载进来的纹理
JavaScript
createTextMaterial(fontAtlasTexture, perlinTexture) {
        const textMaterial = new MSDFTextNodeMaterial({map: fontAtlasTexture});
        const glyphUv = attribute("glyphUv", "vec2");
        const perlinTextureNode = texture(perlinTexture, glyphUv);
        const boostedPerlin = pow(perlinTextureNode, 4);
        textMaterial.colorNode = boostedPerlin;
        return textMaterial;
}
这个时候我们能发现字体的颜色已经混合了纹理图,而纹理图是一个黑白灰的图片,色值也就是0.0~1.0 ,所以如果我们设置小于0.5的不显示!
JavaScript
createTextMaterial(fontAtlasTexture, perlinTexture) {
        const textMaterial = new MSDFTextNodeMaterial({
            map: fontAtlasTexture,
            transparent: true,
        });

        const glyphUv = attribute("glyphUv", "vec2");

        const perlinTextureNode = texture(perlinTexture, glyphUv);
        const boostedPerlin = pow(perlinTextureNode, 2);
        const dissolve = step(boostedPerlin, 0.5);

        textMaterial.colorNode = boostedPerlin;
        const msdfOpacity = textMaterial.opacityNode;
        textMaterial.opacityNode = msdfOpacity.mul(dissolve);
        return textMaterial;
    }
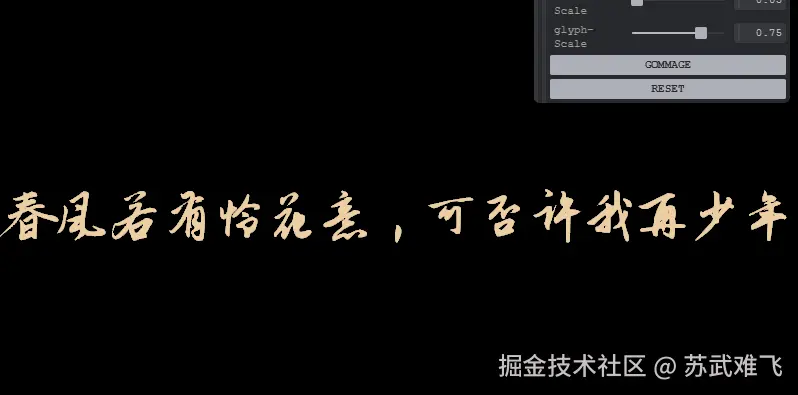
这样就有了一个静态的字体溶解效果!
css
npm i tweakpane接下来我们添加一个调试工具并且把我们的0.5改成动态调试看看效果
JavaScript
 const uProgress = uniform(0.0);


        const glyphUv = attribute("glyphUv", "vec2");

        const perlinTextureNode = texture(perlinTexture, glyphUv);
        const boostedPerlin = pow(perlinTextureNode, 2);
        const dissolve = step(uProgress, boostedPerlin);

        textMaterial.colorNode = boostedPerlin;
        const msdfOpacity = textMaterial.opacityNode;
        textMaterial.opacityNode = msdfOpacity.mul(dissolve);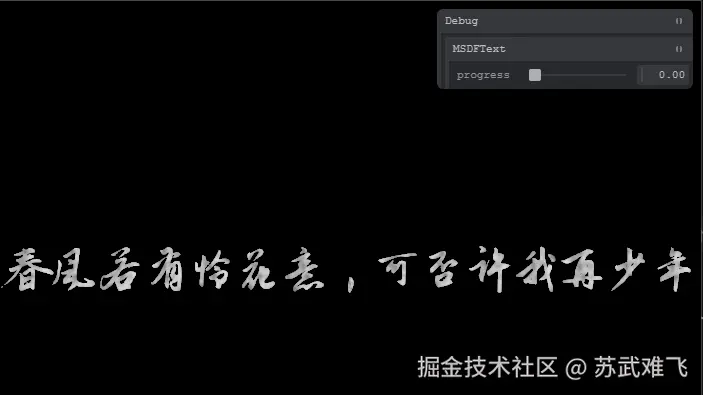
此时我们能发现目前的溶解有两个问题
- 每个文字的溶解都是一样的
- 目前的溶解效果是从0.3~0.7
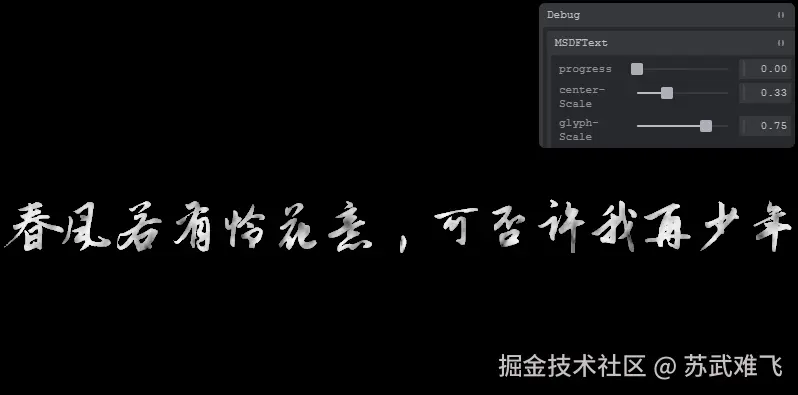
2.1 改变溶解中心
目前每个字体的溶解看起来同步的原因是因为我们用了glyphUv,glyphUv 通常是一个 0 到 1 之间的局部坐标。
- 对于每一个字符(无论是"春"还是"风"),它们左上角的 glyphUv 都是 (0,0),右下角都是 (1,1)。
- 当直接用 glyphUv 来计算溶解(比如通过噪声函数)时,每个字在相同相对位置的采样值是完全一样的。
- 结果:所有字会像排好队一样,整齐划一地同时开始、同时结束溶解
JavaScript
const center = attribute("center", "vec2");所以我们应该获取每个字符自己的坐标系,center 是每个字符在屏幕或场景中的 世界坐标/中心坐标。
- 唯一性:"春"字的 center 可能是 (10,5),"风"字的 center 可能是 (15,5)。
JavaScript
 const uProgress = uniform(0.0);
        const uCenterScale = uniform(0.05);
        const uGlyphScale = uniform(0.75);

        debugFolder.addBinding(uProgress, "value", {
            min: 0,
            max: 1,
            label: "progress",
        });

        debugFolder.addBinding(uCenterScale, "value", {
            min: 0,
            max: 1,
            label: "centerScale",
        });

        debugFolder.addBinding(uGlyphScale, "value", {
            min: 0,
            max: 1,
            label: "glyphScale",
        });

        const glyphUv = attribute("glyphUv", "vec2");
        const center = attribute("center", "vec2");

        const customUv = center.mul(uCenterScale).add(glyphUv.mul(uGlyphScale));

        const perlinTextureNode = texture(perlinTexture, customUv);
        // const boostedPerlin = pow(perlinTextureNode, 2);
        const dissolve = step(uProgress, perlinTextureNode);

        textMaterial.colorNode = perlinTextureNode;
        const msdfOpacity = textMaterial.opacityNode;
        textMaterial.opacityNode = msdfOpacity.mul(dissolve);
        return textMaterial;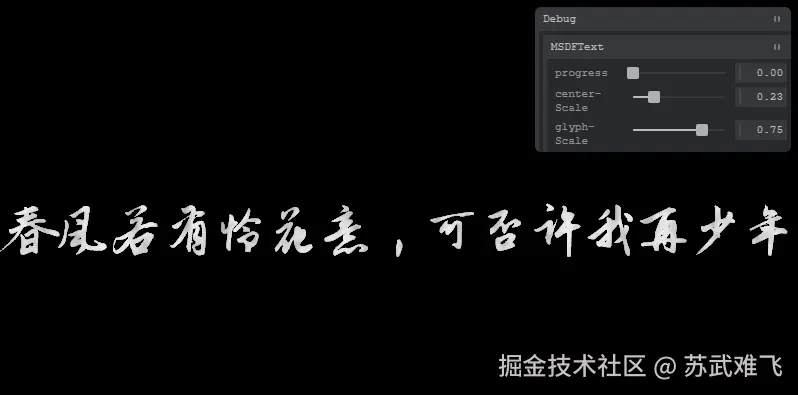
2.2 归一化溶解进度
为什么现在溶解感觉是从 0.3 ~ 0.7开始呢,是因为我们的蒙版图片用的是Perlin 噪声。
- 理论上:它的值域是 0,1。
- 实际上:极端的 0(纯黑)和 1(纯白)出现概率极低。大部分像素值都挤在 0.3 到 0.7 之间。
JavaScript
      const uProgress = uniform(0.0);
        const uNoiseRemapMin = uniform(0.4);
        const uNoiseRemapMax = uniform(0.87);
        const uCenterScale = uniform(0.05);
        const uGlyphScale  = uniform(0.75);

        const perlinTextureNode = texture(perlinTexture, customUv);
        const perlinRemap = clamp(
            perlinTextureNode.sub(uNoiseRemapMin).div(uNoiseRemapMax.sub(uNoiseRemapMin)),
            0,
            1
        );
        const dissolve = step(uProgress, perlinRemap);

        textMaterial.colorNode = perlinRemap;
        const msdfOpacity = textMaterial.opacityNode;
        textMaterial.opacityNode = msdfOpacity.mul(dissolve);
perlinRemap 做了什么?
这行代码本质上是一个线性插值函数的逆运算: Result=Max−MinNoise−Min
- 减法 sub(uNoiseRemapMin):将整体亮度向下压。原本 0.3 的地方变成了 0。
- 除法 div(...):将剩下的区间"拉伸"开。原本 0.7 的地方经过减法变成了 0.4,再除以区间长度( 0.7−0.3=0.4),结果变成了 1.0。
- clamp(..., 0, 1):确保拉伸后的值不会超出 0,1 范围,防止产生奇怪的过曝或负值。
结果:把原来缩在 0.3,0.7 的"窄窄的一团颜色",暴力拉伸到了 0.0,1.0 的整个空间。
2.3 加上字体颜色
JavaScript
    const uDissolvedColor = uniform(new THREE.Color("#5E5E5E"));
    const uBaseColor = uniform(new THREE.Color("#ECCFA3"));
    ...
    ...
    ...
    const colorMix = mix(uBaseColor, uDissolvedColor,desaturationProgress);
    textMaterial.colorNode = colorMix;
    const msdfOpacity = textMaterial.opacityNode;
    textMaterial.opacityNode = msdfOpacity.mul(dissolve);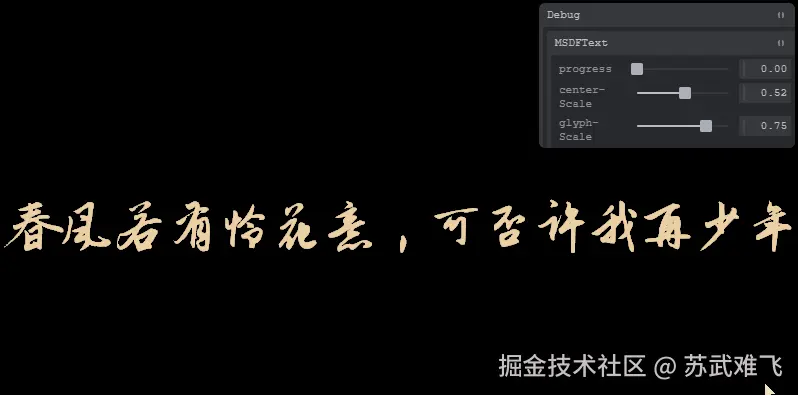
2.4 使用gsap触发动画
目前的效果我们都是拖拽来展示的,手累的不行!我们直接改成用gsap来触发这一系列的动画
JavaScript
triggerGommage() {
        gsap.to(this.uProgress, {
            value: 1,
            duration: 4,
            ease: "linear",
        });
    }

    resetGommage() {
        this.uProgress .value = 0;
    }
3. 粒子灰尘
在具体实现这个粒子灰尘前我们应该提前思考我们的粒子灰尘都需要什么属性
- 位置(用来做粒子的移动)
- 生成的时间(用来处理最后的消失状态)
- 存在的时间(用来判断何时消失)
- 尺寸(粒子的大小)
- 随机数(确保粒子不是都长一样)
JavaScript
    async initialize(perlinTexture, dustParticleTexture) {

        const dustGeometry = new THREE.PlaneGeometry(0.02, 0.02);
        this.spawnPos = new Float32Array(this.MAX_DUST * 3);

        this.birthLifeSeedScale = new Float32Array(this.MAX_DUST * 4);
        this.currentDustIndex = 0;

        dustGeometry.setAttribute(
            "aSpawnPos",
            new THREE.InstancedBufferAttribute(this.spawnPos, 3)
        );
        dustGeometry.setAttribute(
            "aBirthLifeSeedScale",
            new THREE.InstancedBufferAttribute(this.birthLifeSeedScale, 4)
        );

        const material = this.createDustMaterial(perlinTexture, dustParticleTexture);
        this.dustMesh = new THREE.InstancedMesh(dustGeometry, material, this.MAX_DUST);
        return this.dustMesh;
    }


     createDustMaterial(perlinTexture, dustTexture) {
        const material = new THREE.MeshBasicMaterial({
            map: dustTexture,
            transparent: true,
            depthWrite: false,
            depthTest: false,
        });

        return material;
}aSpawnPos用来保存位置信息aBirthLifeSeedScale用来保存剩余的所有信息,用一个属性保存是为了性能考虑

此时我们的粒子已经加载到屏幕上了,然后我们调整一下aSpawnPos
JavaScript
spawnDust(spawnPos) {
    this.spawnPos[id * 3 + 0] = spawnPos.x;
    this.spawnPos[id * 3 + 1] = spawnPos.y;
    this.spawnPos[id * 3 + 2] = spawnPos.z;
    this.dustMesh.geometry.attributes.aSpawnPos.needsUpdate = true;
}


createDustMaterial(perlinTexture, dustTexture) {
    const material = new THREE.MeshBasicMaterial({
        map: dustTexture,
        transparent: true,
        depthWrite: false,
        depthTest: false,
    });

    const aSpawnPos = attribute("aSpawnPos", "vec3");
    const dustSample = texture(dustTexture, uv());
    const uDustColor = uniform(new THREE.Color("#FFFFFF"));
    material.colorNode = vec4(uDustColor, dustSample.a);
    material.positionNode = aSpawnPos.add(positionLocal);

    return material;
}

for (let i = 0; i < 100; i++) {
    this.spawnDust(
        new THREE.Vector3(
            (Math.random() * 2 - 1) * 0.5,
            (Math.random() * 2 - 1) * 0.5,
            0,
        )
    );
}
3.1 让粒子动起来
刚才我们只是用了aSpawnPos让粒子的位置确定下来,如果需要让粒子动起来其实就是根据一个最简单的公式
位移(Displacement)=速度(Velocity)×时间(Time)
JavaScript
  spawnDust(spawnPos) {
        if (this.currentDustIndex === this.MAX_DUST) this.currentDustIndex = 0;
        const id = this.currentDustIndex;
        this.currentDustIndex = this.currentDustIndex + 1;
        this.spawnPos[id * 3 + 0] = spawnPos.x;
        this.spawnPos[id * 3 + 1] = spawnPos.y;
        this.spawnPos[id * 3 + 2] = spawnPos.z;
        this.birthLifeSeedScale[id * 4 + 0] = performance.now() * 0.001; // 👈诞生时间
        ...
        ...

        this.dustMesh.geometry.attributes.aSpawnPos.needsUpdate = true;
        this.dustMesh.geometry.attributes.aBirthLifeSeedScale.needsUpdate = true;
    }

    createDustMaterial(perlinTexture, dustTexture) {
        ...
        ...
        const aBirthLifeSeedScale = attribute("aBirthLifeSeedScale", "vec4");
        const aBirth = aBirthLifeSeedScale.x;


        const uDustColor = uniform(new THREE.Color("#8A8A8A"));
        const uWindDirection = uniform(new THREE.Vector3(-1, 0, 0).normalize());
        const uWindStrength = uniform(0.3);


        const dustAge = time.sub(aBirth);

        const windImpulse = uWindDirection.mul(uWindStrength).mul(dustAge);
        const driftMovement = windImpulse;

        const dustSample = texture(dustTexture, uv());
        material.colorNode = vec4(uDustColor, dustSample.a);
        material.positionNode = aSpawnPos
            .add(driftMovement)
            .add(positionLocal);

        return material;
}我们是模拟了一个风向左吹的方向const uWindDirection = uniform(new THREE.Vector3(-1, 0, 0).normalize());和一个风力强度const uWindStrength = uniform(0.3)然后通过const dustAge = time.sub(aBirth);获取时间最后通过material.positionNode = aSpawnPos .add(driftMovement) .add(positionLocal);把这个位移加到原始位置上

目前我们已经成功模拟了一个向左的移动,接下来继续添加一个向上方向的恒定力!
JavaScript
const uRiseSpeed = uniform(0.1);
const windImpulse = uWindDirection.mul(uWindStrength).mul(dustAge);
const rise = vec3(0.0, dustAge.mul(uRiseSpeed), 0.0);
const driftMovement = windImpulse.add(rise);
3.2 添加一些随机性
现在我们的粒子的方向没什么问题了但是每个粒子的运动都是一致的显得非常呆板,接下来我们应该再添加一个随机的漩涡力,还记得我们的aBirthLifeSeedScale保存的信息么
- 生成的时间(用来处理最后的消失状态)
- 存在的时间(用来判断何时消失)
- 尺寸(粒子的大小)
- 随机数(确保粒子不是都长一样)
我们接下来就用随机数来让每个粒子的运动产生差异
JavaScript
createDustMaterial(perlinTexture, dustTexture) {

  ...
  ...

  const aBirthLifeSeedScale = attribute("aBirthLifeSeedScale", "vec4");
  const aBirth = aBirthLifeSeedScale.x;
  const aLife = aBirthLifeSeedScale.y;
  const aSeed = aBirthLifeSeedScale.z;
  const aScale = aBirthLifeSeedScale.w;

  const uNoiseSpeed = uniform(0.015);

  const randomSeed = vec2(aSeed.mul(1230.4), aSeed.mul(5670.8));

  const noiseUv = aSpawnPos.xz
    .add(randomSeed)
    .add(uWindDirection.xz.mul(dustAge.mul(uNoiseSpeed)));
  const noiseSample = texture(perlinTexture, noiseUv).x;
}noiseSample的值是我们最开始的perlin图片也就是0.0~1.0,但是只有x的值还是不够的我们在y轴上的运动也应该受到湍流的影响所以我们还需要一个noise
JavaScript
 ...
 ...
 // x轴
 const noiseSample = texture(perlinTexture, noiseUv).x;
 // y轴
 const noiseSampleBis = texture(perlinTexture, noiseUv.add(vec2(13.37, 7.77))).x;

 // 把值从 0.0 ~ 1.0 变成 -1.0~1.0
 const turbulenceX = noiseSample.sub(0.5).mul(2);
const turbulenceY = noiseSampleBis.sub(0.5).mul(2);此时我们已经有了湍流的位移,接下来需要根据进度把这个力加到我们之前计算的位置上!那么进度就算我们的粒子的声明周期啦也就是aLife
JavaScript
createDustMaterial(perlinTexture, dustTexture) {
        const material = new THREE.MeshBasicMaterial({
            transparent: true,
            depthWrite: false,
            depthTest: false,
        });

        const aSpawnPos = attribute("aSpawnPos", "vec3");
        const aBirthLifeSeedScale = attribute("aBirthLifeSeedScale", "vec4");
        const aBirth = aBirthLifeSeedScale.x;
        const aLife = aBirthLifeSeedScale.y;
        const aSeed = aBirthLifeSeedScale.z;
        const aScale = aBirthLifeSeedScale.w;

        const uWobbleAmp = uniform(0.6);
        const uNoiseScale = uniform(30.0);
        const uNoiseSpeed = uniform(0.015);
        const uDustColor = uniform(new THREE.Color("#8A8A8A"));
        const uWindDirection = uniform(new THREE.Vector3(-1, 0, 0).normalize());
        const uWindStrength = uniform(0.3);

        const dustAge = time.sub(aBirth);
        const lifeInterpolation = clamp(dustAge.div(aLife), 0, 1);

        const randomSeed = vec2(aSeed.mul(1230.4), aSeed.mul(5670.8));

        const noiseUv = aSpawnPos.xz
            .add(randomSeed)
            .add(uWindDirection.xz.mul(dustAge.mul(uNoiseSpeed)));

        const noiseSample = texture(perlinTexture, noiseUv).x;

        const noiseSampleBis = texture(perlinTexture, noiseUv.add(vec2(13.37, 7.77))).x;

        const turbulenceX = noiseSample.sub(0.5).mul(2);
        const turbulenceY = noiseSampleBis.sub(0.5).mul(2);

        const swirl = vec3(clamp(turbulenceX.mul(lifeInterpolation), 0, 1.0), turbulenceY.mul(lifeInterpolation), 0.0).mul(uWobbleAmp);

        const uRiseSpeed = uniform(0.1);

        const windImpulse = uWindDirection.mul(uWindStrength).mul(dustAge);
        const riseFactor = clamp(noiseSample, 0.3, 1.0);
        const rise = vec3(0.0, dustAge.mul(uRiseSpeed).mul(riseFactor), 0.0);
        const driftMovement = windImpulse.add(rise).add(swirl);

        const dustSample = texture(dustTexture, uv());
        material.colorNode = vec4(uDustColor, dustSample.a);
        material.positionNode = aSpawnPos
            .add(driftMovement)
            .add(positionLocal);

        return material;
}
3.3 控制粒子的大小和显示
我们现在已经有了lifeInterpolation,所以可以很方便的控制粒子的缩放大小和渐隐渐显
JavaScript
createDustMaterial(perlinTexture, dustTexture) {
  ...
  const lifeInterpolation = clamp(dustAge.div(aLife), 0, 1);
  const scaleFactor = smoothstep(float(0), float(0.05), lifeInterpolation);
  const fadingOut = float(1.0).sub(
    smoothstep(float(0.8), float(1.0), lifeInterpolation)
  );
  ...
  material.positionNode = aSpawnPos
    .add(driftMovement)
    .add(positionLocal.mul(aScale.mul(scaleFactor)));
  material.opacityNode = fadingOut;
  ...
}
3.4 调整粒子初始位置
之前我们的粒子初始位置是我们为了测试用的
JavaScript
for (let i = 0; i < 40; i++) {
    this.spawnDust(
        new THREE.Vector3(
            (Math.random() * 2 - 1) * 0.5,
            (Math.random() * 2 - 1) * 0.5,
            0,
        )
    );
}
现在我们调整成文本的位置,然后配合之前完成的效果
JavaScript
getRandomPositionInMesh() {
    const min = this.worldPositionBounds.min;
    const max = this.worldPositionBounds.max;
    const x = Math.random() * (max.x - min.x) + min.x;
    const y = Math.random() * (max.y - min.y) + min.y;
    const z = Math.random() * 0.5;
    return new THREE.Vector3(x, y, z);
}


triggerGommage() {

        if (this.gommageTween || this.spawnDustTween) return;

        this.spawnDustTween = gsap.to({}, {
            duration: this.dustInterval,
            repeat: -1,
            onRepeat: () => {
                const p = this.msdfTextEntity.getRandomPositionInMesh();
                this.dustParticlesEntity.spawnDust(p);
            },
        });

        this.gommageTween = gsap.to(this.uProgress, {
            value: 1,
            duration: 5,
            ease: "linear",
            onComplete: () => {
                this.spawnDustTween?.kill();
                this.spawnDustTween = null;
                this.gommageTween = null;
            },
        });
}
4. 添加花瓣
花瓣和粒子的大体逻辑是一致的!花瓣有自己的模型文件可以参考我之前的博客用一个粒子效果告别蛇年迎来马年~
首先看看花瓣的模型是什么样子
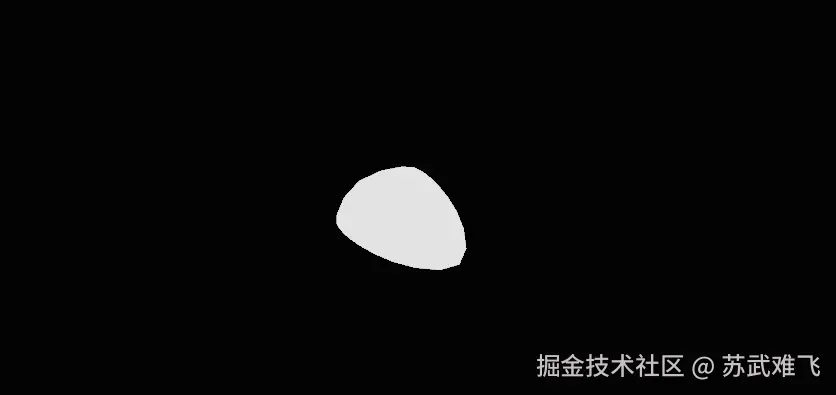
ok,牌没有问题!
那我们直接照搬之前的粒子效果只不过把模型换成我们的花瓣模型
JavaScript
    async initialize(perlinTexture, petalGeometry) {


        const petalGeo = petalGeometry.clone();
        const scale = 0.15;
        petalGeo.scale(scale, scale, scale);

        this.spawnPos = new Float32Array(this.MAX_PETAL * 3);
        this.birthLifeSeedScale = new Float32Array(this.MAX_PETAL * 4);
        this.currentPetalIndex = 0;

        petalGeo.setAttribute(
            "aSpawnPos",
            new THREE.InstancedBufferAttribute(this.spawnPos, 3)
        );
        petalGeo.setAttribute(
            "aBirthLifeSeedScale",
            new THREE.InstancedBufferAttribute(this.birthLifeSeedScale, 4)
        );
        const material = this.createPetalMaterial(perlinTexture);
        this.petalMesh = new THREE.InstancedMesh(petalGeo, material, this.MAX_PETAL);
        return this.petalMesh;
    }

    createPetalMaterial(perlinTexture) {
        const material = new THREE.MeshBasicMaterial({
            transparent: true,
            side: THREE.DoubleSide,
        });

        const aSpawnPos = attribute("aSpawnPos", "vec3");
        const aBirthLifeSeedScale = attribute("aBirthLifeSeedScale", "vec4");
        const aBirth = aBirthLifeSeedScale.x;
        const aLife = aBirthLifeSeedScale.y;
        const aSeed = aBirthLifeSeedScale.z;
        const aScale = aBirthLifeSeedScale.w;

        const uDustColor = uniform(new THREE.Color("#8A8A8A"));
        const uWindDirection = uniform(new THREE.Vector3(-1, 0, 0).normalize());
        const uWindStrength = uniform(0.3);
        const uRiseSpeed = uniform(0.1);
        const uNoiseScale = uniform(30.0);
        const uNoiseSpeed = uniform(0.015);
        const uWobbleAmp = uniform(0.6);

        const dustAge = time.sub(aBirth);
        const lifeInterpolation = clamp(dustAge.div(aLife), 0, 1);

        const randomSeed = vec2(aSeed.mul(123.4), aSeed.mul(567.8));
        const noiseUv = aSpawnPos.xz
            .mul(uNoiseScale)
            .add(randomSeed)
            .add(uWindDirection.xz.mul(dustAge.mul(uNoiseSpeed)));

        const noiseSample = texture(perlinTexture, noiseUv).x;
        const noiseSammpleBis = texture(perlinTexture, noiseUv.add(vec2(13.37, 7.77))).x;

        const turbulenceX = noiseSample.sub(0.5).mul(2);
        const turbulenceY = noiseSammpleBis.sub(0.5).mul(2);

        const swirl = vec3(clamp(turbulenceX.mul(lifeInterpolation), 0., 1.0), turbulenceY.mul(lifeInterpolation), 0.0).mul(uWobbleAmp);

        const windImpulse = uWindDirection.mul(uWindStrength).mul(dustAge);

        const riseFactor = clamp(noiseSample, 0.3, 1.0);
        const rise = vec3(0.0, dustAge.mul(uRiseSpeed).mul(riseFactor), 0.0);
        const driftMovement = windImpulse.add(rise).add(swirl);

        const scaleFactor = smoothstep(float(0), float(0.05), lifeInterpolation);
        const fadingOut = float(1.0).sub(
            smoothstep(float(0.8), float(1.0), lifeInterpolation)
        );

        material.colorNode = vec4(uDustColor, 1);
        material.positionNode = aSpawnPos
            .add(driftMovement)
            .add(positionLocal.mul(aScale.mul(scaleFactor)));
        material.opacityNode = fadingOut;

        return material;
    }
花瓣已经成功加载并且运动轨迹也和之前的粒子灰尘保持一致,现在的问题是花瓣不可能是一个直线型的,所以我们要先扭曲这个花瓣模型
JavaScript
  createPetalMaterial(perlinTexture) {
    const material = new THREE.MeshBasicNodeMaterial({
      transparent: true,
      side: THREE.DoubleSide,
    });

    function rotX(a) {
      const c = cos(a);
      const s = sin(a);
      const ns = s.mul(-1.0);
      return mat3(1.0, 0.0, 0.0, 0.0, c, ns, 0.0, s, c);
    }
    function rotY(a) {
      const c = cos(a);
      const s = sin(a);
      const ns = s.mul(-1.0);
      return mat3(c, 0.0, s, 0.0, 1.0, 0.0, ns, 0.0, c);
    }

    function rotZ(a) {
      const c = cos(a);
      const s = sin(a);
      const ns = s.mul(-1.0);
      return mat3(c, ns, 0.0, s, c, 0.0, 0.0, 0.0, 1.0);
    }

    const aSpawnPos = attribute("aSpawnPos", "vec3");
    ...
    ...

    // 获取花瓣的uv坐标尖端部分y=1根部y=0
    const y = uv().y;
    // 越靠近尖端部分弯曲的越大
    const bendWeight = pow(y, float(3.0));
    // 随时间流逝动态改变完全的程度
    const bend = bendWeight.mul(uBendAmount).mul(sin(dustAge.mul(uBendSpeed.mul(noiseSample))));
    // 沿着x轴弯曲
    const B = rotX(bend);

    const positionLocalUpdated = B.mul(positionLocal);

    material.colorNode = vec4(uDustColor, 1);
    material.positionNode = aSpawnPos
            .add(driftMovement)
            .add(positionLocalUpdated.mul(aScale.mul(scaleFactor)));
    material.opacityNode = fadingOut;

  }
可以看到原本平整的花瓣模型现在已经被扭曲的更像是一个真实的飞舞的花瓣,接下来我们需要旋转整个花瓣营造一种随风飘动的效果。
JavaScript
   // x轴的初始相位范围0 ~ 2PI
   const baseX = aSeed.mul(1.13).mod(1.0).mul(TWO_PI);
   // y轴的初始相位范围0 ~ 2PI
   const baseY = aSeed.mul(2.17).mod(1.0).mul(TWO_PI);
   // z轴的初始相位范围0 ~ 2PI
   const baseZ = aSeed.mul(3.31).mod(1.0).mul(TWO_PI)
   // 时间×速度×振幅
   const spin = dustAge.mul(uSpinSpeed).mul(uSpinAmp);
   // 受湍流影响的x轴旋转
   const rx = baseX.add(spin.mul(0.9).mul(turbulenceX.add(1.5)));
   // 受湍流影响的y轴旋转
   const ry = baseY.add(spin.mul(1.2).mul(turbulenceY.add(1.5)));
   // 受湍流影响的z轴旋转
   const rz = baseZ.add(spin.mul(0.7).mul(turbulenceZ.add(1.5)))
   // 应用旋转
   const R = rotY(ry).mul(rotX(rx)).mul(rotZ(rz))
   const positionLocalUpdated = R.mul(B.mul(positionLocal));
Ok,接下来我们给花瓣上颜色!
JavaScript
const uRedColor = uniform(new THREE.Color("#9B0000"));
const uWhiteColor = uniform(new THREE.Color("#EEEEEE"));

// instanceIndex当前处理的模型下标
const petalColor = mix(
            uRedColor,
            uWhiteColor,
            instanceIndex.mod(3).equal(0)
        );

material.colorNode = petalColor;
这样已经非常接近最终的效果了,最后的最后我们再添加一个光照!让整个花瓣显得更加立体
JavaScript
const uRedColor = uniform(new THREE.Color("#9B0000"));
const uWhiteColor = uniform(new THREE.Color("#EEEEEE"));
const uLightPosition = uniform(new THREE.Vector3(0, 0, 5));

const positionLocalUpdated = R.mul(B.mul(positionLocal))
// 计算经过旋转后的法线方向
const normalUpdate = normalize(R.mul(B.mul(normalLocal)))
const worldPosition = aSpawnPos
    .add(driftMovement)
    .add(positionLocalUpdated.mul(aScale.mul(scaleFactor)))

// 更新法线方向
material.normalNode = normalUpdate;
material.positionNode = worldPosition;
material.opacityNode = fadingOut;

// 计算花瓣到光源的向量
const lightDirection = normalize(uLightPosition.sub(worldPosition));
// 计算受光照影响之后的颜色
const facing = clamp(abs(dot(normalUpdate, lightDirection)), 0.4, 1);

material.colorNode = petalColor.mul(facing);
5. 整合所有效果
OKKKK,到这一步我们所有的分解动作都已经处理完了,最后就是节后字体溶解->粒子灰尘->花瓣实现我们最终的效果就可以了!
JavaScript
    triggerGommage() {
        // Don't start if already running
        if (this.#gommageTween || this.#spawnDustTween || this.#spawnPetalTween) return;
        this.#uProgress.value = 0;


        this.#spawnDustTween = gsap.to(
            {},
            {
                duration: this.#dustInterval,
                repeat: -1,
                onRepeat: () => {
                    const p = this.#MSDFTextEntity.getRandomPositionInMesh();
                    this.#DustParticlesEntity.spawnDust(p);
                },
            }
        );

        this.#spawnPetalTween = gsap.to(
            {},
            {
                duration: this.#petalInterval,
                repeat: -1,
                onRepeat: () => {
                    const p = this.#MSDFTextEntity.getRandomPositionInMesh();
                    this.#PetalParticlesEntity.spawnPetal(p);
                },
            }
        );

        this.#gommageTween = gsap.to(this.#uProgress, {
            value: 1,
            duration: 6,
            ease: 'linear',
            onComplete: () => {
                this.#spawnDustTween?.kill();
                this.#spawnPetalTween?.kill();
                this.#spawnDustTween = null;
                this.#gommageTween = null;
                this.#spawnPetalTween = null;
                gsap.delayedCall(1, () => {
                    this.gommageButton.disabled = false;
                    this.gommageButton.classList.remove('disabled');
                });
            },
        });
    }
参考链接
WebGPU Gommage Effect: Dissolving MSDF Text into Dust and Petals with Three.js & TSL