Vuex状态管理
在Vue.js的组件化开发中,经常会遇到需要将当前组件的状态传递给其他组件的情况。父子组件之间进行通信时,通常会采用Prop的方式实现数据传递。在一些比较大型的应用中,单页面中可能会包含大量的组件,数据结构也会比较复杂。当通信双方不是父子组件甚至不存在任何联系时,一个状态需要共享给多个组件就会变得非常麻烦。为了解决这种问题,就需要引入状态管理这种设计模式。而Vuex就是一个专门为Vue.js设计的状态管理模式。
1、什么是Vuex
在实际开发过程中,多个网页经常需要共享一些数据。例如,用户登录网站后,网站中的多个页面需要共享登录用户名。实现数据共享最好的方法就是使用Vuex保存数据的状态。Vuex是一个专门为Vue.js应用程序开发的状态管理模式。它采用集中式存储来管理应用程序中所有组件的状态。在通常情况下,每个组件拥有自己的状态。有时需要使某个组件的状态变化影响其他组件,使它们也进行相应的修改。这时可以使用Vuex保存需要管理的状态值,状态值一旦被修改,所有引用该值的组件就会自动进行更新。应用Vuex实现状态管理的流程如图所示。
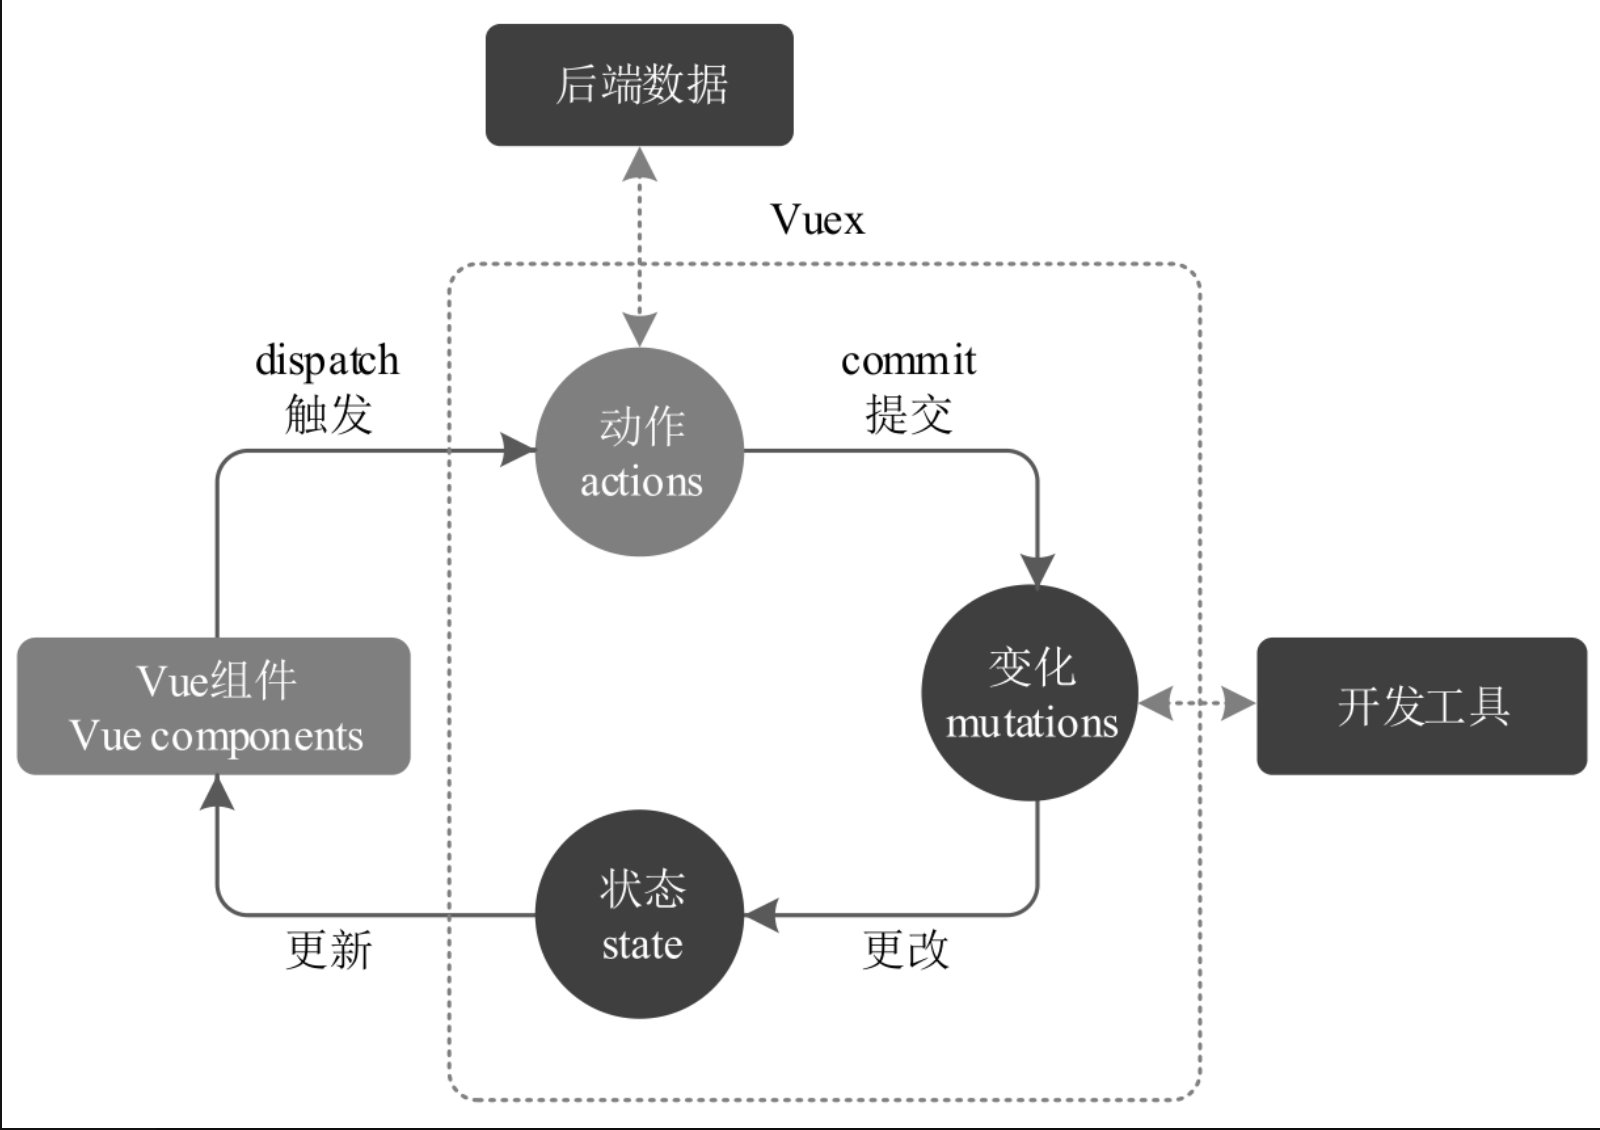
用户在Vue组件中通过dispatch方法触发一个action,在action中通过commit方法提交一个mutation,通过mutation对应的函数更改一个新的state值,Vuex就会将新的state值渲染到组件中,从而实现界面的更新。
2、Vuex的组成
Vuex主要由五部分组成,分别为state、getters、mutations、actions和modules。它们的含义如表所示。
| 核心构成 | 说明 |
|---|---|
state |
存储项目中需要多组件共享的数据或状态 |
getters |
从state中派生初状态,即对状态进行一些处理,类似于Vue实例中的computed选项 |
mutations |
存储更改state状态的方法,是Vuex中唯一修改state的方式i,但不支持异步操作,类似于Vue实例中的methods选项 |
actions |
可以通过提交mutations中的方法来改变状态,支持异步操作 |
modules |
store的子模块,内容相当于store的一个实例 |
3、Vuex的安装
在使用Vuex之前需要对其进行安装,可以使用CDN方式安装。代码如下:
js
<script src="https://unpkg.com/vuex@next"></script>如果使用模块化开发,则可以使用npm方式进行安装。在命令提示符窗口中输入如下命令:
shell
npm install vuex@next --save或者使用yarn安装,命令如下:
shell
yarn add vuex@next --save在安装Vuex时,安装支持Vue 3.0版本的Vuex需要使用vuex@next,安装支持Vue 2.x版本的Vuex需要使用vuex。
如果使用Vue CLI创建项目,可以选择手动对项目进行配置,在项目的配置选项中应用空格键选择Vuex。这样,在创建项目后会自动安装Vuex,无须再进行单独安装。
4、在项目中使用Vuex
在Vuex中增加了store(仓库)这个概念。Vuex应用的核心就是store,用于存储和处理整个应用需要共享的数据或状态信息。下面通过一个简单的例子来介绍如何在VueCLI脚手架工具中使用Vuex。
4.1、创建store
首先应用Vue CLI脚手架工具创建一个项目,在创建项目时需要选择配置选项列表中的Vuex选项,这样在项目创建完成后会自动安装Vuex,而且在项目的src文件夹下会 自动生成main.js文件,在store文件夹下会自动生成index.js文件,这两个文件实现了创建store的基本工作。
store文件夹下的index.js文件实现了创建store的基本代码。在该文件中,首先引入了createStore,然后调用该方法创建store实例并使用export default进行导出。代码如下:
js
import { createStore } from 'vuex'

export default createStore({
  state: {
  },
  getters: {
  },
  mutations: {
  },
  actions: {
  },
  modules: {
  }
})
在main.js文件中,首先引入Vue.js和根组件App.vue,然后通过import store from './store'引入创建的store,并在Vue根实例中通过调用use()方法使用store实例,将该实例作为插件安装。这样,在整个应用程序中就可以应用Vuex的状态管理功能。代码如下:
js
import { createApp } from 'vue'
import App from './App.vue'
import router from './router'
import store from './store'

createApp(App).use(store).use(router).mount('#app')因为在Vue根实例中使用了store实例,所以该store实例会应用到根组件下的所有子组件中,并且子组件可以通过this.$store来访问创建的store实例。
4.2、定义state
在store实例的state中可以定义需要共享的数据。修改index.js文件,在state中定义共享数据的初始状态。代码如下:
js
import { createStore } from 'vuex'

export default createStore({
  state: {
    name: '电热水器',
    price: 1999
  },
  getters: {
  },
  mutations: {
  },
  actions: {
  },
  modules: {
  }
})
在components文件夹下创建单文件组件MyDemo.vue,在组件中通过this.$store.state来获取定义的数据。代码如下:
html
<template>
    <div>
        <h3>商品名称:{{ name }}</h3>
        <h3>商品价格:{{ price }}</h3>
    </div>
</template>

<script>
    export default {
        name: 'MyDemo',
        data() {
            return {
                name: this.$store.state.name,
                price: this.$store.state.price
            }
        }
    }
</script>
由于Vuex的状态存储是响应式的,所以要从store实例中读取状态还可以使用计算属性。代码如下:
html
<template>
    <div>
        <h3>商品名称:{{ name }}</h3>
        <h3>商品价格:{{ price }}</h3>
    </div>
</template>

<script>
    export default {
        name: 'MyDemo',
        computed: {
            name() {
                return this.$store.state.name;
            },
            price() {
                return this.$store.state.price;
            }
        }
    }
</script>
修改根组件App.vue,在根组件中引入子组件MyDemo。代码如下:
html
<template>
<MyDemo></MyDemo>
</template>
<script>
import MyDemo from './components/MyDemo.vue';
export default {
name: 'App',
components: {
MyDemo
}
}
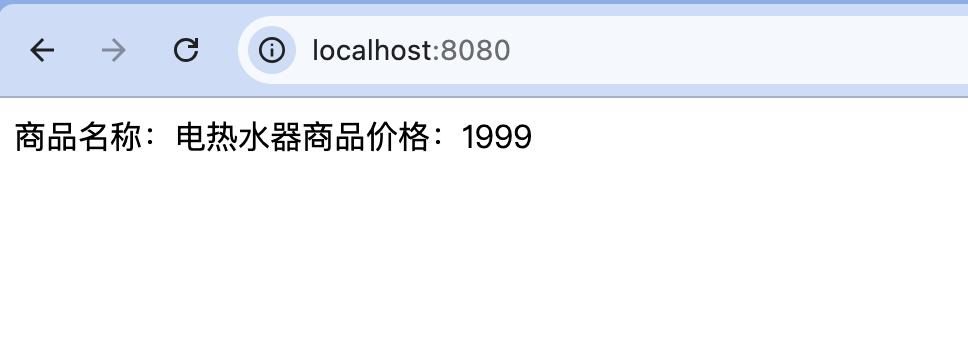
</script>运行项目,在浏览器中会显示定义的state的值,输出结果如图所示。
当一个组件需要获取多个状态时,如果将这些状态都声明为计算属性,就会变得非常烦琐。这时可以使用mapState辅助函数来生成计算属性。使用mapState辅助函数的代码如下:
html
<template>
    <div>
        <h3>商品名称:{{ name }}</h3>
        <h3>商品价格:{{ price }}</h3>
    </div>
</template>

<script>
    import {mapState} from 'vuex';

    export default {
        name: 'MyDemo',
        computed: mapState({
            name: state => state.name,
            price: state => state.price
        })
    }
</script>
如果需要将mapState函数中定义的计算属性与普通的计算属性混合使用,则需要使用对象展开运算符的方式。上述代码可以修改为:
html
<template>
    <div>
        <h3>商品名称:{{ name }}</h3>
        <h3>商品价格:{{ price }}</h3>
    </div>
</template>

<script>
    import {mapState} from 'vuex';

    export default {
        name: 'MyDemo',
        computed: {
            ...mapState([
                'name', //this.name映射为this.$store.state.name
                'price' //this.price映射为this.$store.state.price
            ])
        }
    }
</script>
在实际开发中,经常采用对象展开运算符的方式来简化代码。
4.2.1、mapState
mapState是 Vuex 提供的一个工具函数,用来批量生成 computed 计算属性,避免手动写大量:
js
this.$store.state.xxx基本用法:
引入 mapState:
js
import { mapState } from 'vuex'在 computed 中使用(对象写法)
js
export default {
  computed: {
    ...mapState({
      count: state => state.count,
      token: state => state.user.token
    })
  }
}
组件中就可以直接使用:
html
<p>{{ count }}</p>
<p>{{ token }}</p>
等价于:
js
computed: {
  count() {
    return this.$store.state.count
  },
  token() {
    return this.$store.state.user.token
  }
}
数组写法(推荐,最常用)
如果 组件中的属性名和 state 中的 key 一致,可以直接用数组:
js
computed: {
  ...mapState(['count', 'userName'])
}
等价于:
js
computed: {
  count() {
    return this.$store.state.count
  },
  userName() {
    return this.$store.state.userName
  }
}
带命名空间的模块(modules)
模块结构示例
js
// store/modules/user.js
export default {
  namespaced: true,
  state: {
    name: 'Tom',
    age: 18
  }
}
使用 mapState 访问模块 state:
- 方式一:对象写法
js
...mapState('user', {
  userName: state => state.name,
  userAge: state => state.age
})- 方式二:数组写法(推荐)
js
...mapState('user', ['name', 'age'])组件中可直接使用:
html
<p>{{ name }}</p>
<p>{{ age }}</p>
mapState 与普通 computed 混用:
mapState返回的是普通对象,因此可以和其他 computed 一起使用:
js
computed: {
  fullName() {
    return this.firstName + this.lastName
  },
  ...mapState(['count', 'token'])
}
4.3、定义getter
如果需要从state中派生出一些状态,就需要使用getter,如对某个数值进行计算、对字符串进行格式化、对数组进行过滤等操作。getter相当于Vue中的computed计算属性,getter的返回值会根据它的依赖被缓存起来,只有当它的依赖值发生改变时才会被重新计算。getter会接收state作为第一个参数。
修改index.js文件,定义getter,对state中的price的值进行处理。代码如下:
js
import { createStore } from 'vuex'

export default createStore({
  state: {
    name: '电热水器',
    price: 1999
  },
  getters: {
    memberPrice(state) {
      return state.price -= 200;
    }
  },
  mutations: {
  },
  actions: {
  },
  modules: {
  }
})在MyDemo.vue文件的计算属性中应用this.$store.getters.memberPrice获取定义的getter。代码如下:
html
<template>
<div>
<h3>商品名称:{{ name }}</h3>
<h3>商品会员价:{{ memberPrice }}</h3>
</div>
</template>
<script>
import {mapState} from 'vuex';
export default {
name: 'MyDemo',
computed: {
...mapState([
'name',
]),
memberPrice() {
return this.$store.getters.memberPrice;
}
}
}
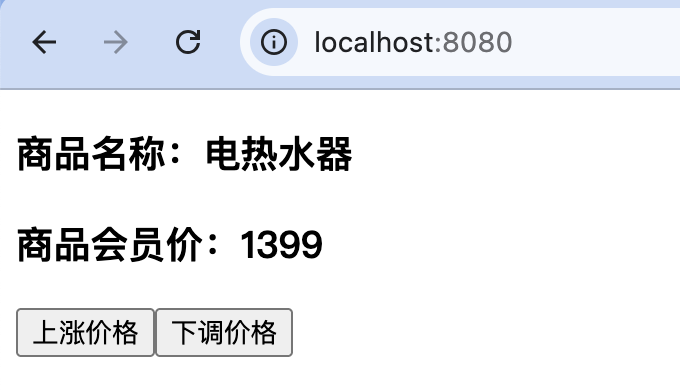
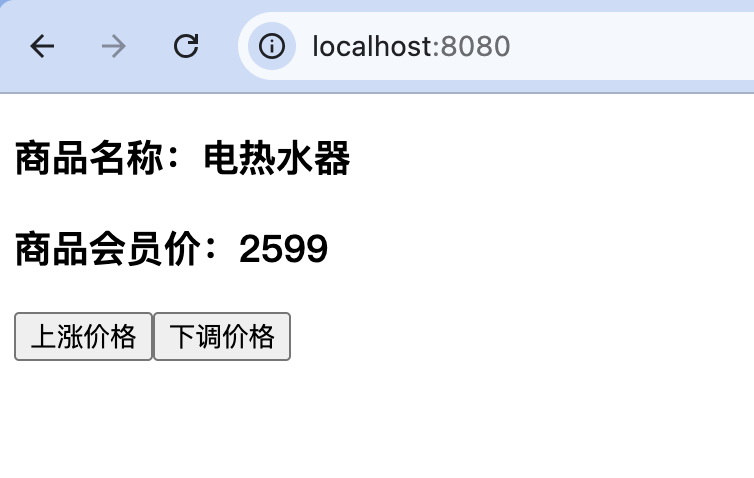
</script>重新运行项目,输出结果如图所示。

在组件中访问定义的getter也可以通过mapGetters辅助函数的形式,将store中的getter映射到局部计算属性。上述代码可以修改为:
html
<template>
    <div>
        <h3>商品名称:{{ name }}</h3>
        <h3>商品会员价:{{ memberPrice }}</h3>
    </div>
</template>

<script>
    import {mapState, mapGetters} from 'vuex';

    export default {
        name: 'MyDemo',
        computed: {
            ...mapState([
                'name',
            ]),
            ...mapGetters([
                'memberPrice'
            ])
        }
    }
</script>
4.3.1、mapGetters
mapGetters是 Vuex 提供的一个辅助函数,作用是把 Vuex store 中的 getters 映射为组件内部的 computed(计算属性)。
基本用法:
Vuex 中的 getter:
js
// store/index.js
const store = new Vuex.Store({
  state: {
    count: 10
  },
  getters: {
    doubleCount(state) {
      return state.count * 2
    },
    halfCount(state) {
      return state.count / 2
    }
  }
})
在组件中使用 mapGetters
js
import { mapGetters } from 'vuex'

export default {
  computed: {
    ...mapGetters([
      'doubleCount',
      'halfCount'
    ])
  }
}
等价于:
js
computed: {
  doubleCount() {
    return this.$store.getters.doubleCount
  },
  halfCount() {
    return this.$store.getters.halfCount
  }
}
在模板中使用:
html
<p>doubleCount: {{ doubleCount }}</p>
<p>halfCount: {{ halfCount }}</p>
重命名(对象写法)
当你想 改个名字,或避免命名冲突时使用对象形式。
js
computed: {
  ...mapGetters({
    myDouble: 'doubleCount',
    myHalf: 'halfCount'
  })
}
模板中:
html
{{ myDouble }}
{{ myHalf }}
带参数的getters:
mapGetters 不能直接传参
js
//错误示例
mapGetters(['getUserById'])
js
//正确做法:getter 返回一个函数
getters: {
  getUserById: (state) => (id) => {
    return state.users.find(user => user.id === id)
  }
}
组件中这样用
js
computed: {
  ...mapGetters(['getUserById'])
}
html
<p>{{ getUserById(1) }}</p>模块(modules)中的 mapGetters
命名空间模块
js
modules: {
  user: {
    namespaced: true,
    state: { name: 'Tom' },
    getters: {
      fullName(state) {
        return state.name + ' Smith'
      }
    }
  }
}- 使用方式一:直接指定命名空间
js
...mapGetters('user', [
  'fullName'
])- 使用方式二:对象形式
js
...mapGetters({
  userName: 'user/fullName'
})
mapGetters 与 computed 混用
js
computed: {
  localComputed() {
    return 'local'
  },
  ...mapGetters([
    'doubleCount'
  ])
}
4.4、定义mutation
如果需要更改state中的状态,最常用的方法就是提交mutation。每个mutation都有一个字符串的事件类型(type)和一个回调函数(handler)。这个回调函数可以更改状态,并且它会接收state作为第一个参数。
在store实例的mutations中定义更改state状态的函数,然后在组件中应用commit方法提交到对应的mutation,实现state状态的更改。修改index.js文件,在mutations中定义risePrice函数和reducePrice函数,实现更改state状态的操作。代码如下:
js
import { createStore } from 'vuex'

export default createStore({
  state: {
    name: '电热水器',
    price: 1999
  },
  getters: {
  },
  mutations: {
    risePrice(state) {
      state.price += 200;
    },
    reducePrice(state) {
      state.price -= 200;
    }
  },
  actions: {
  },
  modules: {
  }
})
修改MyDemo.vue文件,添加"上涨价格"按钮和"下调价格"按钮,在methods选项中定义单击按钮执行的方法,在方法中通过commit方法提交到对应的mutation函数,实现更改状态的操作。代码如下:
html
<template>
    <div>
        <h3>商品名称:{{ name }}</h3>
        <h3>商品会员价:{{ price }}</h3>
        <button @click="rise">上涨价格</button>
        <button @click="reduce">下调价格</button>
    </div>
</template>

<script>
    import {mapState} from 'vuex';

    export default {
        name: 'MyDemo',
        computed: {
            ...mapState([
                'name',
                'price'
            ])
        },
        methods: {
            rise() {
                this.$store.commit('risePrice');
            },
            reduce() {
                this.$store.commit('reducePrice');
            }
        }
    }
</script>
重新运行项目,每次单击浏览器中的"上涨价格"按钮,都会对定义的商品价格进行上涨,输出结果如图18.4所示。每次单击浏览器中的"下调价格"按钮,都会对定义的商品价格进行下调,输出结果如图所示。
在组件中可以使用commit方法提交mutation,还可以使用mapMutations辅助函数将组件中的methods映射为store.commit调用。在实际开发中通常使用这种简化的写法。MyDemo.vue文件的代码可以修改为:
html
<template>
    <div>
        <h3>商品名称:{{ name }}</h3>
        <h3>商品会员价:{{ price }}</h3>
        <button @click="rise">上涨价格</button>
        <button @click="reduce">下调价格</button>
    </div>
</template>

<script>
    import {mapMutations, mapState} from 'vuex';

    export default {
        name: 'MyDemo',
        computed: {
            ...mapState([
                'name',
                'price'
            ])
        },
        methods: {
            ...mapMutations({
                rise: 'risePrice',
                reduce: 'reducePrice'
            })
        }
    }
</script>
如果要在修改状态时传递值,只需要在mutation中加上一个参数,这个参数又称为mutation的载荷(payload),在使用commit的时候传递值就可以。
修改index.js文件,在mutations的risePrice和reducePrice函数中添加第二个参数。定义mutation的代码修改如下:
js
 mutations: {
   risePrice(state, n) {
     state.price += n;
   },
   reducePrice(state, n) {
     state.price -= n;
   }
 }
修改MyDemo.vue文件,在单击"上涨价格"按钮和"下调价格"按钮调用方法时分别传递一个参数300。代码如下:
html
<template>
    <div>
        <h3>商品名称:{{ name }}</h3>
        <h3>商品会员价:{{ price }}</h3>
        <button @click="rise(300)">上涨价格</button>
        <button @click="reduce(300)">下调价格</button>
    </div>
</template>
重新运行项目,每次单击浏览器中的"上涨价格"按钮,商品价格都会上涨300,每次单击浏览器中的"下调价格"按钮,商品价格都会下调300。
在大多数情况下,为了使定义的mutation更具有可读性,可以将载荷(payload)设置为一个对象。将定义mutation的代码修改如下:
js
mutations: {
  risePrice(state, obj) {
    state.price += obj.num;
  },
  reducePrice(state, obj) {
    state.price -= obj.num;
  }
}
在组件中调用方法时将传递的参数修改为对象,代码如下:
html
<template>
    <div>
        <h3>商品名称:{{ name }}</h3>
        <h3>商品会员价:{{ price }}</h3>
        <button @click="rise({num: 300})">上涨价格</button>
        <button @click="reduce({num: 300})">下调价格</button>
    </div>
</template>
4.4.1、mapMutations
mapMutations是 Vuex 提供的一个辅助函数,作用是:把 Vuex store 中的 mutations 映射为组件中的 methods。
基本用法(最常见):
定义 mutation:
js
// store/index.js
const store = new Vuex.Store({
  state: {
    count: 0
  },
  mutations: {
    increment(state) {
      state.count++
    },
    decrement(state) {
      state.count--
    }
  }
})
在组件中使用 mapMutations:
js
import { mapMutations } from 'vuex'

export default {
  methods: {
    ...mapMutations([
      'increment',
      'decrement'
    ])
  }
}
等价于:
js
methods: {
  increment() {
    this.$store.commit('increment')
  },
  decrement() {
    this.$store.commit('decrement')
  }
}
模板中使用:
html
<button @click="increment">+</button>
<button @click="decrement">-</button>
带参数的 mutation(payload)
mutation 接收参数:
js
mutations: {
  incrementBy(state, payload) {
    state.count += payload
  }
}
组件中调用
js
methods: {
 ...mapMutations([
   'incrementBy'
 ])
}
html
<button @click="incrementBy(5)">+5</button>重命名(对象写法)
当你需要避免命名冲突时:
js
methods: {
  ...mapMutations({
    add: 'increment',
    minus: 'decrement'
  })
}
模板中:
html
<button @click="add">+</button>
<button @click="minus">-</button>
多个参数 / 对象参数
mutation
js
mutations: {
  updateUser(state, payload) {
    state.user.name = payload.name
    state.user.age = payload.age
  }
}
组件调用
js
this.updateUser({
  name: 'Tom',
  age: 18
})
模块化(modules)中的 mapMutations
命名空间模块
js
modules: {
  cart: {
    namespaced: true,
    state: { total: 0 },
    mutations: {
      addToCart(state, price) {
        state.total += price
      }
    }
  }
}- 使用方式一(推荐)
js
methods: {
  ...mapMutations('cart', [
    'addToCart'
  ])
}- 使用方式二(对象)
js
methods: {
  ...mapMutations({
    addCart: 'cart/addToCart'
  })
}
4.5、定义action
action和mutation的功能类似。不同之处在于以下两点:
- action提交的是mutation,而不是直接更改状态。
- action可以异步更改state中的状态。
修改index.js文件,在actions中定义两个方法,在方法中应用commit方法来提交mutation。代码如下:
js
import { createStore } from 'vuex'

export default createStore({
  state: {
    name: '电热水器',
    price: 1999
  },
  getters: {
  },
  mutations: {
    risePrice(state, obj) {
      state.price += obj.num;
    },
    reducePrice(state, obj) {
      state.price -= obj.num;
    }
  },
  actions: {
    risePriceAsync(context,obj) {
      setTimeout(()=> {
        context.commit('risePrice', obj);
      }, 1000);
    },
    reducePriceAsync(context, obj) {
      setTimeout(()=> {
        context.commit('reducePrice', obj);
      }, 1000);
    }
  },
  modules: {
  }
})
上述代码中,action函数将上下文对象context作为第一个参数,context与store实例具有相同的方法和属性,因此可以调用context.commit提交一个mutation。而在MyDemo.vue组件中,action需要应用dispatch方法进行触发,并且同样支持载荷方式和对象方式。代码如下:
js
<template>
    <div>
        <h3>商品名称:{{ name }}</h3>
        <h3>商品会员价:{{ price }}</h3>
        <button @click="rise">上涨价格</button>
        <button @click="reduce">下调价格</button>
    </div>
</template>

<script>
    import {mapState} from 'vuex';

    export default {
        name: 'MyDemo',
        computed: {
            ...mapState([
                'name',
                'price'
            ])
        },
        methods: {
            rise() {
                this.$store.dispatch('risePriceAsync', {num: 300});
            },
            reduce() {
                this.$store.dispatch('reducePriceAsync', {num: 300});
            }
        }
    }
</script>
重新运行项目,单击浏览器中的"上涨价格"和"下调价格"按钮同样可以实现调整商品价格的操作。不同的是,单击按钮后,需要经过1秒才能更改商品的价格。
在组件中可以使用dispatch方法触发action;还可以通过mapActions辅助函数将组件中的methods映射为store.dispatch调用,在实际开发中通常使用这种简化的写法。MyDemo.vue文件的代码可以修改为:
html
<template>
    <div>
        <h3>商品名称:{{ name }}</h3>
        <h3>商品会员价:{{ price }}</h3>
        <button @click="rise({num: 400})">上涨价格</button>
        <button @click="reduce({num: 400})">下调价格</button>
    </div>
</template>

<script>
    import {mapActions, mapState} from 'vuex';

    export default {
        name: 'MyDemo',
        computed: {
            ...mapState([
                'name',
                'price'
            ])
        },
        methods: {
            ...mapActions({
                rise: 'risePriceAsync',
                reduce: 'reducePriceAsync'
            })
        }
    }
</script>
4.5.1、mapActions
mapActions是 Vuex 提供的辅助函数,作用是:把 Vuex store 中的 actions 映射为组件内的 methods。
基本用法:
定义 action
js
// store/index.js
const store = new Vuex.Store({
  state: {
    count: 0
  },
  mutations: {
    increment(state) {
      state.count++
    }
  },
  actions: {
    incrementAsync(context) {
      setTimeout(() => {
        context.commit('increment')
      }, 1000)
    }
  }
})
组件中使用 mapActions
js
import { mapActions } from 'vuex'

export default {
  methods: {
    ...mapActions([
      'incrementAsync'
    ])
  }
}
等价于:
js
methods: {
  incrementAsync() {
    this.$store.dispatch('incrementAsync')
  }
}
模板中使用
html
<button @click="incrementAsync">+1(异步)</button>带参数的 action(payload)
action 接收参数
js
actions: {
  incrementBy({ commit }, payload) {
    setTimeout(() => {
      commit('incrementBy', payload)
    }, 1000)
  }
}
mutation
js
mutations: {
  incrementBy(state, payload) {
    state.count += payload
  }
}
组件中调用
js
methods: {
  ...mapActions(['incrementBy'])
}
html
<button @click="incrementBy(5)">+5(异步)</button>重命名(对象写法)
js
methods: {
  ...mapActions({
    asyncAdd: 'incrementAsync',
    asyncAddBy: 'incrementBy'
  })
}
模板:
html
<button @click="asyncAdd">异步+1</button>
<button @click="asyncAddBy(10)">异步+10</button>
解构写法(推荐)
js
methods: {
  ...mapActions([
    'incrementAsync',
    'incrementBy'
  ]),
  otherMethod() {
    // 组件自己的方法
  }
}
模块化(modules)中的 mapActions
命名空间模块
js
modules: {
  user: {
    namespaced: true,
    actions: {
      login({ commit }, payload) {
        commit('SET_USER', payload)
      }
    }
  }
}- 使用方式一(推荐)
js
methods: {
  ...mapActions('user', [
    'login'
  ])
}- 使用方式二(对象)
js
methods: {
  ...mapActions({
    userLogin: 'user/login'
  })
}
5、Vuex应用
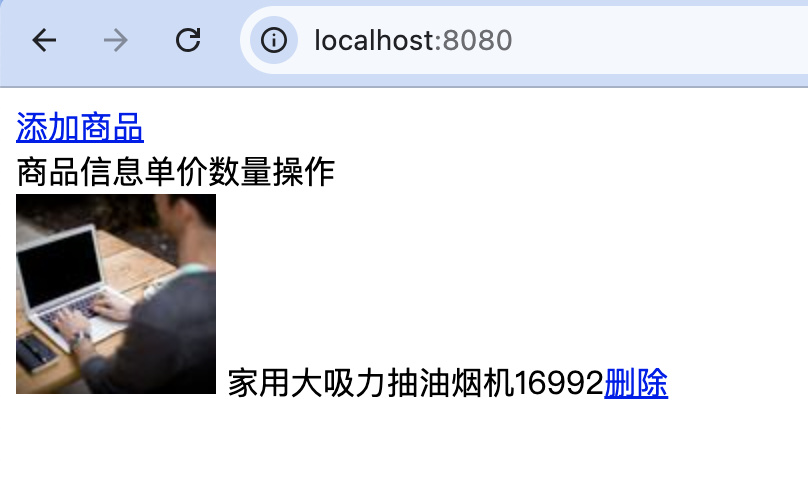
在实际开发中,多个组件之间的数据共享得到广泛应用。例如,在电子商务网站的管理系统中,经常会执行添加商品或删除商品的操作。用户在添加或删除商品之后,系统会对操作的结果进行保存。但是在刷新页面的情况下,Vuex中的状态信息会进行初始化,这样可能会导致系统中的商品信息丢失,因此会选择一种浏览器端的存储方式解决这个问题。比较常用的解决方案就是使用localStorage来保存操作后的结果,保存在store中的状态信息也要同步使用localStorage。下面通过一个实例来实现添加商品和删除商品的功能。
示例:添加商品和删除商品。
实现向商品列表中添加商品以及从商品列表中删除商品的操作。关键步骤如下。
-
创建项目,然后在assets目录中创建css文件夹和images文件夹,分别用来存储CSS文件和图片文件。
-
在views目录中创建商品列表文件ShopList.vue。在<template>标签中应用v-for指令循环输出商品列表中的商品信息,在<script>标签中引入mapState和mapMutations辅助函数,实现组件中的计算属性、方法以及store中的state、mutation之间的映射。代码如下:
js
<template>
  <div class="main">
    <a href="javascript:void(0)" @click="show">添加商品</a>
    <div class="title">
      <span class="name">商品信息</span>
      <span class="price">单价</span>
      <span class="num">数量</span>
      <span class="action">操作</span>
    </div>
    <div class="goods" v-for="(item, index) in list" :key="index">
      <span class="name">
        <img :src="item.img">
        {{ item.name }}
      </span>
      <span class="price">{{ item.price }}</span>
      <span class="num">
        {{ item.num }}
      </span>
      <span class="action">
        <a href="javascript:void(0)" @click="del(index)">删除</a>
      </span>
    </div>
  </div>
</template>

<script>
  import { mapState, mapMutations } from 'vuex';

  export default {
    computed: {
      ...mapState([
        'list'
      ])
    },
    methods: {
      ...mapMutations([
        'del'
      ]),
      show: function() {
        this.$router.push({name: 'add'});//跳转到添加商品页面
      }
    }
  }
</script>

<style  scoped>

</style>- 在views目录中创建添加商品文件AddGoods.vue。在<template>标签中创建添加商品信息的表单元素,应用v-model指令对表单元素进行数据绑定。在<script>标签中引入mapMutations辅助函数,实现组件中的方法和store中的mutation之间的映射。代码如下:
html
<template>
    <div class="container">
        <div class="title">添加商品信息</div>
        <div class="one">
            <label>商品名称:</label>
            <input type="text" v-model="name">
        </div>
        <div class="one">
            <label>商品图片:</label>
            <select v-model="url">
                <option value="">请选择图片</option>
                <option v-for="item in imgArr" :key="item">{{ item }}</option>
            </select>
        </div>
        <div class="one">
            <label>商品价格:</label>
            <input type="text" v-model="price" size="10">
        </div>
        <div class="one">
            <label>商品数量:</label>
            <input type="text" v-model="num" size="10">
        </div>
        <div class="tow">
            <input type="button" value="添加" @click="add">
            <input type="reset" value="重置">
        </div>
    </div>
</template>

<script>
    import {mapMutations} from 'vuex';

    export default {
        data() {
            return {
                name:'',
                url: '',
                price: '',
                num: '',
                imgArr: ['1.jpg', '2.jpg', '3.jpg']
            }
        },
        methods: {
            ...mapMutations({
                addMutation: 'add'
            }),
            add: function() {
                let newShop = {
                    img: require('@/assets/images/' + this.url),
                    name: this.name,
                    price: this.price,
                    num: this.num
                };
                this.addMutation(newShop);
                this.$router.push({name: 'shop'});
            }
        }
    }
</script>

<style scoped lang="scss">

</style>- 修改根组件App.vue,使用router-view渲染路由组件的模板,代码如下:
html
 <template>
    <div>
      <router-view/>
    </div>
</template>- 修改store文件夹下的index.js文件,在store实例中分别定义state和mutation。当添加商品或删除商品后,应用localStorage.setItem存储商品列表信息,代码如下:
js
import { createStore } from 'vuex'

export default createStore({
  state: {
    list: localStorage.getItem('list') ?
      JSON.parse(localStorage.getItem('list')) :
      [
        {
          img: require('@/assets/images/1.jpg'),
          name: '家用大吸力抽油烟机',
          num: 2,
          price: 1699
        },
        {
          img: require('@/assets/images/2.jpg'),
          name: '爆裂飞车',
          num: 3,
          price: 56
        }
      ]
  },
  getters: {
  },
  mutations: {
    add: function(state, newShop) {
      state.list.push(newShop);
      localStorage.setItem('list', JSON.stringify(state.list));
    },
    del: function(state, index) {
      state.list.splice(index, 1);
      localStorage.setItem('list', JSON.stringify(state.list));
    }
  },
  actions: {
  },
  modules: {
  }
})- 修改router文件夹下的index.js文件,应用import引入路由组件,并创建router实例,再使用export default进行导出。代码如下:
js
import { createRouter, createWebHistory } from 'vue-router'
import ShopList from '@/components/ShopList.vue'
import AddGoods from '@/components/AddGoods.vue'
const routes = [
{
path: '/',
name: 'shop',
component: ShopList
},
{
path: '/add',
name: 'add',
component: AddGoods
}
]
const router = createRouter({
history: createWebHistory(process.env.BASE_URL),
routes
})
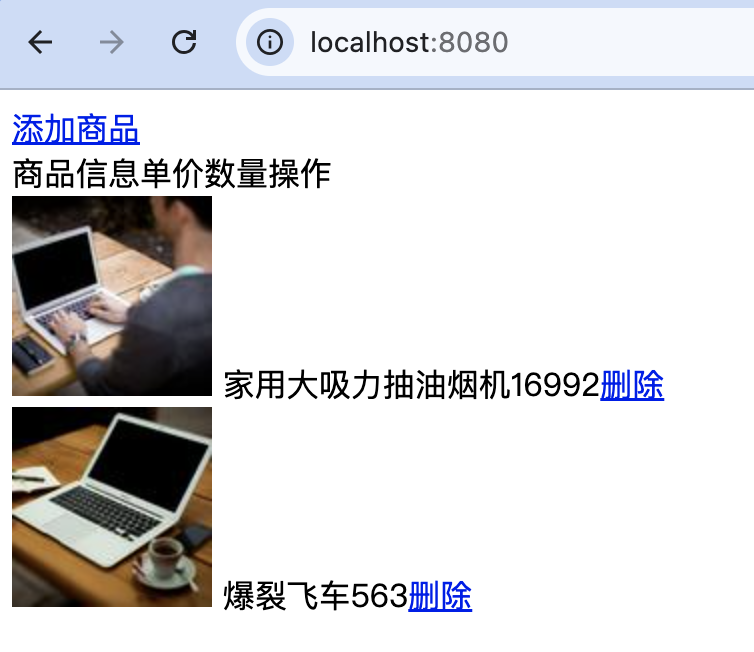
export default router页面初始效果:
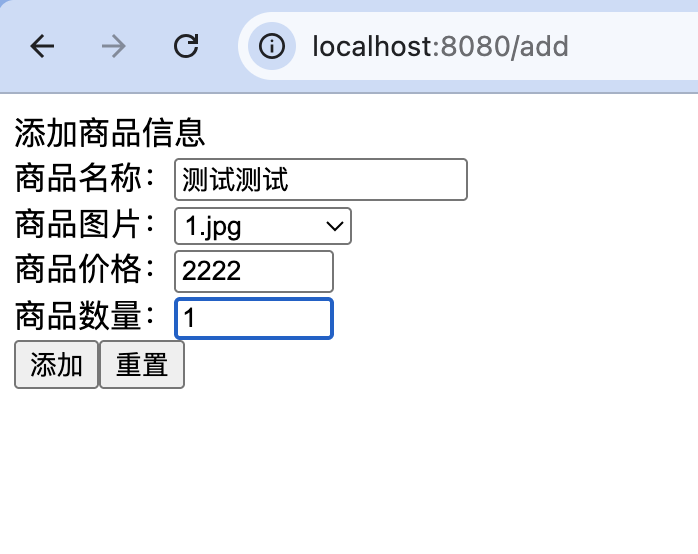
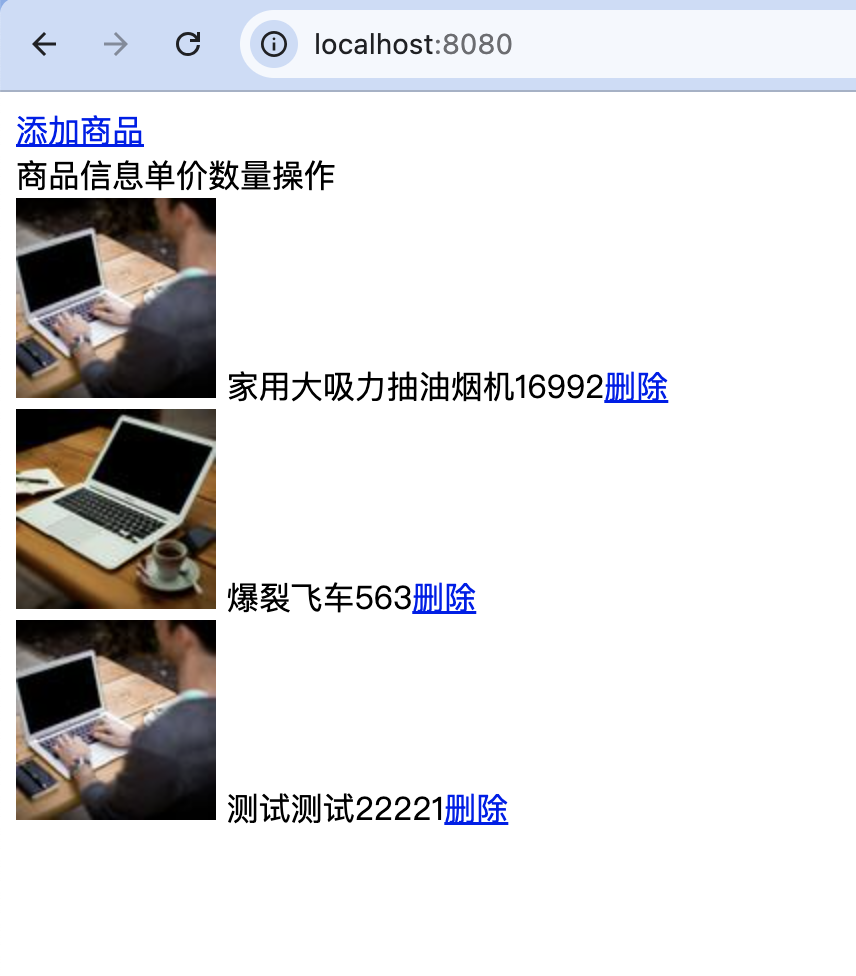
新增:
删除: