本文将介绍在RHEL8.0 操作系统上安装 mysql8.4. 4数据库的教程。
一、安装前提
系统兼容性
MySQL 8.4仅支持64位RHEL8.0 操作系统。安装前需要确认操作系统类型。
依赖组件
必须提前安装数据库依赖的组件,否则MySQL服务无法运行。
二、环境准备:
操作系统: Red Hat Enterprise Linux release 8.0 (Ootpa)
MySQL : MySQL-8.4.4 LTS版本
关闭防火墙:
systemctl stop firewalld && systemctl disable firewalld
关闭Selinux:
sed -i 's/SELINUX=enforcing/SELINUX=disabled/g' /etc/selinux/config && setenforce 0
三、安装步骤:
操作系统: RHEL8.0 安装(略)
1.安装包下载:
打开mysql官方网站的连接:https://www.mysql.com/downloads/
在网页的底部点击:MySQL Community (GPL) Downloads >> 下载社区版本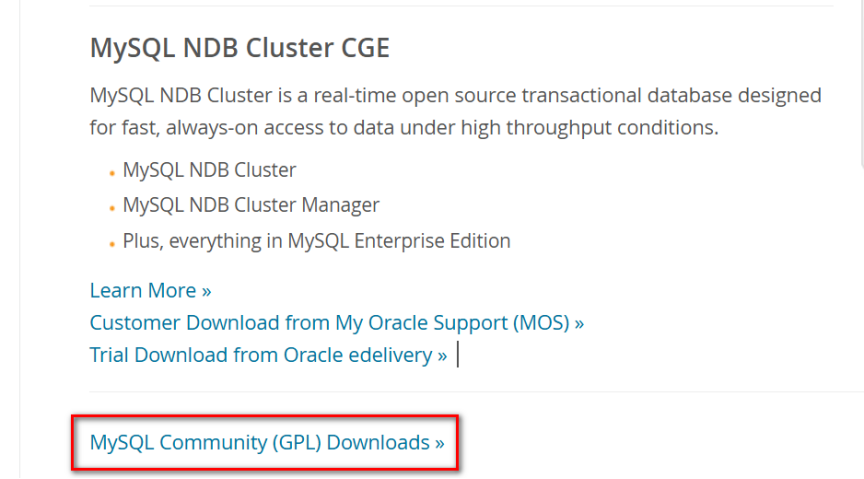
进行后,打开下面的页面,再点击MySQL Community Server链接,如下图: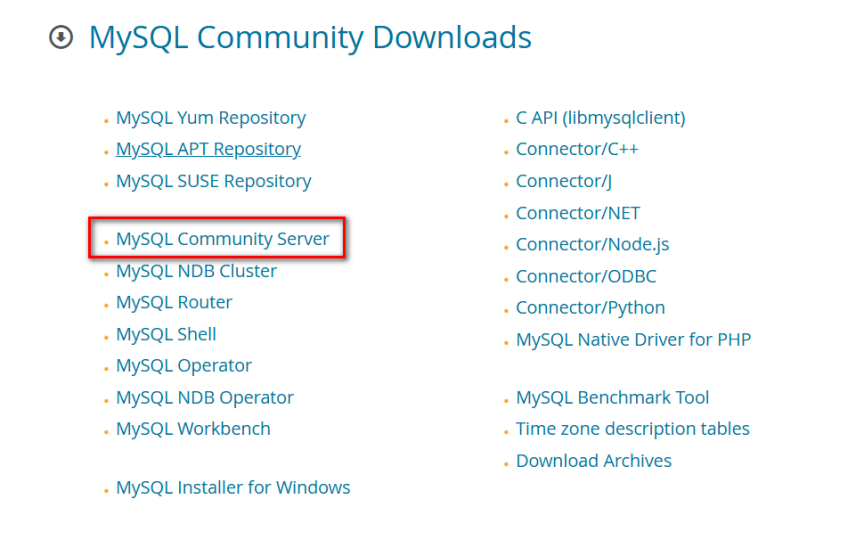
进行后,下图就是MySQL官方网站各平台软件的下载页面,里面可以下载最新的GA版本的软件,也可以下载历史的GA版本软件: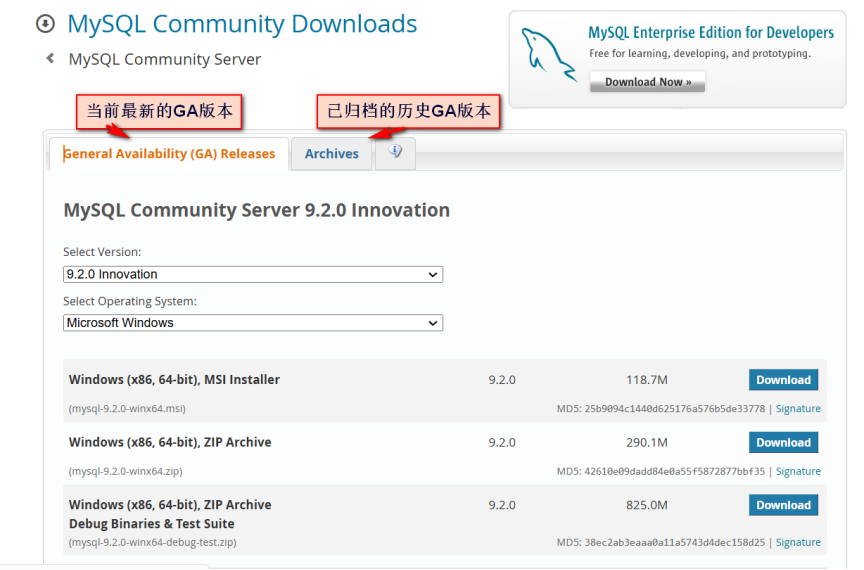
下载Red Hat Enterprise Linux 8 操作系统的tar安装类型的包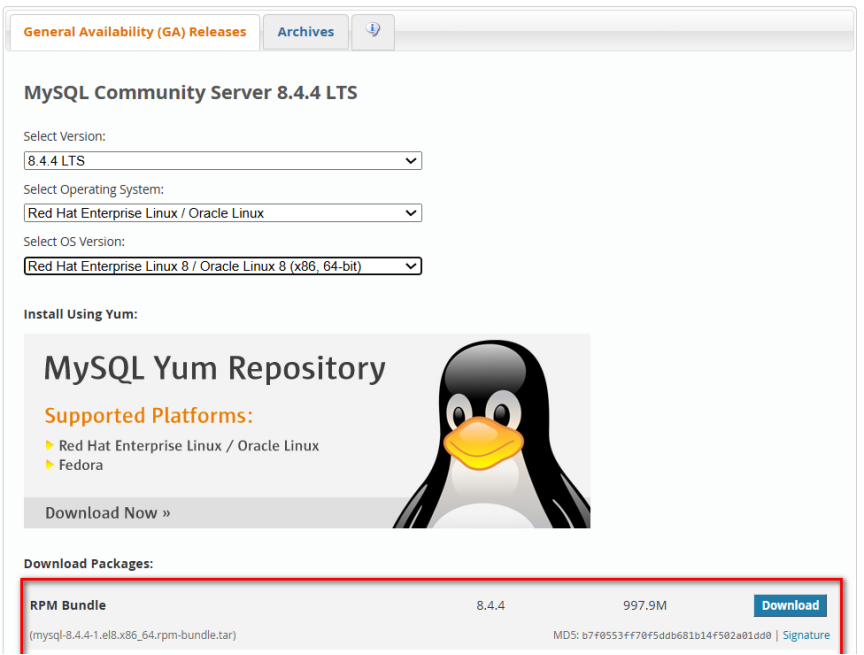
点击右边的Download按钮后,会有下面的提示页面,提示你进行登录,但页面最后有个No thanks, just start my download.链接,点击这个链接,就可以不注册,下载MySQL的软件包了。点击下图中红色框框的链接,直接下载软件包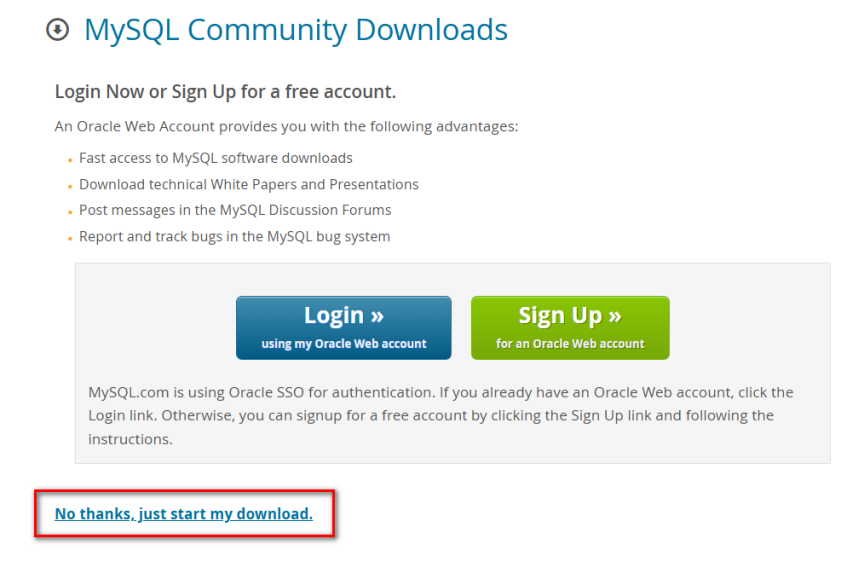
当然也可以直接下载软件包,不需要上面的页面操作,软件包下载地址:
https://dev.mysql.com/get/Downloads/MySQL-8.4/mysql-8.4.4-1.el8.x86_64.rpm-bundle.tar
2.安装 RHEL8.0依赖包:
注意:如果通过xshell客户端登录服务器,需要使用Xshell 6或以上的版本才能正常登录操作系统
3.安装mysql服务端:
从官方下载软件包:
https://dev.mysql.com/get/Downloads/MySQL-8.4/mysql-8.4.4-1.el8.x86_64.rpm-bundle.tar
将软件包解压到mysql8.4.4目录中
mkdir mysql8.4.4
tar xf mysql-8.4.4-1.el8.x86_64.rpm-bundle.tar -C ./mysql8.4.4/
4.文件解压后的清单如下:
root@RHEL8 mysql8.4.4# pwd
/root/mysql8.4.4
root@RHEL8 mysql8.4.4# ls
mysql-community-client-8.4.4-1.el8.x86_64.rpm
mysql-community-client-debuginfo-8.4.4-1.el8.x86_64.rpm
mysql-community-client-plugins-8.4.4-1.el8.x86_64.rpm
mysql-community-client-plugins-debuginfo-8.4.4-1.el8.x86_64.rpm
mysql-community-common-8.4.4-1.el8.x86_64.rpm
mysql-community-debuginfo-8.4.4-1.el8.x86_64.rpm
mysql-community-debugsource-8.4.4-1.el8.x86_64.rpm
mysql-community-devel-8.4.4-1.el8.x86_64.rpm
mysql-community-icu-data-files-8.4.4-1.el8.x86_64.rpm
mysql-community-libs-8.4.4-1.el8.x86_64.rpm
mysql-community-libs-compat-8.4.4-1.el8.x86_64.rpm
mysql-community-libs-compat-debuginfo-8.4.4-1.el8.x86_64.rpm
mysql-community-libs-debuginfo-8.4.4-1.el8.x86_64.rpm
mysql-community-server-8.4.4-1.el8.x86_64.rpm
mysql-community-server-debug-8.4.4-1.el8.x86_64.rpm
mysql-community-server-debug-debuginfo-8.4.4-1.el8.x86_64.rpm
mysql-community-server-debuginfo-8.4.4-1.el8.x86_64.rpm
mysql-community-test-8.4.4-1.el8.x86_64.rpm
mysql-community-test-debuginfo-8.4.4-1.el8.x86_64.rpm
5.按照如下顺序(一定要按顺序从上到下执行 ),将软件包安装到RHEL8.0操作系统中:
安装依赖包:
yum install -y epel-release openssl.x86_64 openssl-libs pcre-devel openssl-devel zlib.x86_64 zlib-devel krb5-devel pkgconfig keyutils-libs-devel krb5-libs libcom_err-devel libkadm5.x86_64 libselinux-devel libsepol-devel pkgconfig libverto-devel lsof screen lrzsz wget
删除旧的安装包(注意:如果是最小化安装,没有这个软件包)
root@RHEL8 mysql8.4.4# rpm -qa | grep mariadb
mariadb-libs-5.5.68-1.el7.x86_64
root@RHEL8 mysql8.4.4# rpm -e --nodeps mariadb-libs-5.5.68-1.el7.x86_64
依赖包安装完成后,按以下顺序一步一步执行下面的命令:
rpm -ivh mysql-community-client-plugins-8.4.4-1.el8.x86_64.rpm
rpm -ivh mysql-community-common-8.4.4-1.el8.x86_64.rpm
rpm -ivh mysql-community-libs-8.4.4-1.el8.x86_64.rpm
rpm -ivh mysql-community-client-8.4.4-1.el8.x86_64.rpm
rpm -ivh mysql-community-devel-8.4.4-1.el8.x86_64.rpm
rpm -ivh mysql-community-libs-compat-8.4.4-1.el8.x86_64.rpm
rpm -ivh mysql-community-icu-data-files-8.4.4-1.el8.x86_64.rpm
rpm -ivh mysql-community-server-8.4.4-1.el8.x86_64.rpm
还可以另一种方式来安装MySQL RPM安装包,这种安装方式不需要考虑软件包之间的依赖关系,因为yum安装程序会自动解决并搜索需要安装的软件包:
root@RHEL8 mysql8.4.4# pwd
/root/mysql8.4.4
root@RHEL8 mysql8.4.4#yum localinstall -y mysql-community-client-plugins-8.4.4-1.el8.x86_64.rpm mysql-community-common-8.4.4-1.el8.x86_64.rpm mysql-community-libs-8.4.4-1.el8.x86_64.rpm mysql-community-client-8.4.4-1.el8.x86_64.rpm mysql-community-devel-8.4.4-1.el8.x86_64.rpm mysql-community-libs-compat-8.4.4-1.el8.x86_64.rpm mysql-community-icu-data-files-8.4.4-1.el8.x86_64.rpm mysql-community-server-8.4.4-1.el8.x86_64.rpm
6.启动MYSQL数据库
root@RHEL8 mysql8.4.4# systemctl start mysqld
查看临时生成的密码:
root@RHEL8 mysql8.4.4# grep 'temporary password' /var/log/mysqld.log
MY-010454 Server A temporary password is generated for root@localhost: 4qiiuuFq%7l+
第一次登录数据库时,输入临时生成的密码
root@RHEL8 mysql8.4.4# mysql -uroot -p'4qiiuuFq%7l+'
mysql: Warning Using a password on the command line interface can be insecure.
Welcome to the MySQL monitor. Commands end with ; or \g.
Your MySQL connection id is 8
Server version: 8.4.4
Copyright (c) 2000, 2025, Oracle and/or its affiliates.
Oracle is a registered trademark of Oracle Corporation and/or its
affiliates. Other names may be trademarks of their respective
owners.
Type 'help;' or '\h' for help. Type '\c' to clear the current input statement.
mysql>
通过临时密码登录数据库,登录成功后,一定要修改当前root的密码
mysql> alter user root@localhost identified by 'Shukuinfo123.';
Query OK, 0 rows affected (0.03 sec)
mysql> flush privileges;
Query OK, 0 rows affected (0.02 sec)
查看数据库运行情况:
mysql> \s
mysql Ver 8.4.4 for Linux on x86_64 (MySQL Community Server - GPL)
Connection id: 8
Current database:
Current user: root@localhost
SSL: Not in use
Current pager: stdout
Using outfile: ''
Using delimiter: ;
Server version: 8.4.4
Protocol version: 10
Connection: Localhost via UNIX socket
Server characterset: utf8mb4
Db characterset: utf8mb4
Client characterset: utf8mb4
Conn. characterset: utf8mb4
UNIX socket: /var/lib/mysql/mysql.sock
Binary data as: Hexadecimal
Uptime: 11 min 4 sec
Threads: 2 Questions: 8 Slow queries: 0 Opens: 131 Flush tables: 3 Open tables: 47 Queries per second avg: 0.012
7.通过以上的配置过程,MySQL8.4.4就成功安装在RHEL8.0操作系统中
8.安装目录与文件结构
默认安装路径:/usr/bin/。
关键目录说明:
bin目录:包含MySQL服务端(mysqld)和客户端工具(如mysql)。
数据目录文件:
/var/lib/mysql/ : 存放日志文件及数据库文件。
mysql> show variables like '%data%';
+---------------------------------------+------------------------+
| Variable_name | Value |
+---------------------------------------+------------------------+
| binlog_row_metadata | MINIMAL |
| character_set_database | utf8mb4 |
| collation_database | utf8mb4_0900_ai_ci |
| datadir | /var/lib/mysql/ |
my sqld.cnf文件 :
配置文件目录:/etc/my.cnf
MySQL配置文件,可在此调整内存、端口等参数。
注意:如果要与旧版本的MySQL客户端兼容,需要在配置文件中的mysqld中添加以下参数
mysqld
mysql_native_password=ON
9查看MySQL的服务状态:
root@RHEL8 \~# systemctl status mysqld
mysqld.service - MySQL Server
Loaded: loaded (/usr/lib/systemd/system/mysqld.service; enabled; vendor preset: disabled)
Active: active (running) since Tue 2025-03-04 05:50:08 CST; 15h ago
Docs: man:mysqld(8)
http://dev.mysql.com/doc/refman/en/using-systemd.html
Process: 19082 ExecStart=/usr/sbin/mysqld --daemonize --pid-file=/var/run/mysqld/mysqld.pid $MYSQLD_OPTS (code=exited, status=0/SUCCESS)
Process: 19064 ExecStartPre=/usr/bin/mysqld_pre_systemd (code=exited, status=0/SUCCESS)
Main PID: 19086 (mysqld)
CGroup: /system.slice/mysqld.service
└─19086 /usr/sbin/mysqld --daemonize --pid-file=/var/run/mysqld/mysqld.pid
Mar 04 05:50:02 localhost.localdomain systemd1: Starting MySQL Server...
Mar 04 05:50:08 localhost.localdomain systemd1: Started MySQL Server.
10.查看MySQL服务监听的端口:
root@RHEL8 mysql8.4.4# lsof -i:3306
COMMAND PID USER FD TYPE DEVICE SIZE/OFF NODE NAME
mysqld 1487 mysql 31u IPv6 20224 0t0 TCP *:mysql (LISTEN)
11.查看MySQL服务器的进程:
root@RHEL8 mysql8.4.4# ps -ef | grep mysql
mysql 1487 1 1 09:36 ? 00:00:37 /usr/sbin/mysqld
root 1557 1249 0 10:09 pts/0 00:00:00 grep --color=auto mysql
如果有上面的输出,表示MySQL数据库已安装成功并且已正常运行。在RHEL8.0 上安装MySQL 8.4.4 LTS版本数据库就完成了!
12.登录数据库:
root@RHEL8 mysql8.4.4# mysql -uroot -p'Shukuinfo123.'
mysql: Warning Using a password on the command line interface can be insecure.
Welcome to the MySQL monitor. Commands end with ; or \g.
Your MySQL connection id is 9
Server version: 8.4.4 MySQL Community Server - GPL
Copyright (c) 2000, 2025, Oracle and/or its affiliates.
Oracle is a registered trademark of Oracle Corporation and/or its
affiliates. Other names may be trademarks of their respective
owners.
Type 'help;' or '\h' for help. Type '\c' to clear the current input statement.
mysql> \s
mysql Ver 8.4.4 for Linux on x86_64 (MySQL Community Server - GPL)
Connection id: 9
Current database:
Current user: root@localhost
SSL: Not in use
Current pager: stdout
Using outfile: ''
Using delimiter: ;
Server version: 8.4.4 MySQL Community Server - GPL
Protocol version: 10
Connection: Localhost via UNIX socket
Server characterset: utf8mb4
Db characterset: utf8mb4
Client characterset: utf8mb4
Conn. characterset: utf8mb4
UNIX socket: /var/lib/mysql/mysql.sock
Binary data as: Hexadecimal
Uptime: 35 min 52 sec
Threads: 2 Questions: 14 Slow queries: 0 Opens: 131 Flush tables: 3 Open tables: 47 Queries per second avg: 0.006
13.修改数据库的配置文件,以支持旧版本MySQL客户端可以登录:
vim /etc/my.cnf
在文件的最后加入以下配置:
mysql_native_password=ON
如下:
mysqld
pid-file = /var/run/mysqld/mysqld.pid
socket = /var/run/mysqld/mysqld.sock
datadir = /var/lib/mysql
log-error = /var/log/mysql/error.log
mysql_native_password=ON
14修改完成后,重启一下数据库服务:
root@localhost \~# systemctl restart mysqld
四、通过图形界面登录MySQL数据库:
1.配置远程登录数据库(用MySQL客户端连接)
查看当前数据库的用户清单:
mysql> use mysql
Reading table information for completion of table and column names
You can turn off this feature to get a quicker startup with -A
Database changed
mysql> select user,host from mysql.user;
+------------------+-----------+
| user | host |
+------------------+-----------+
| mysql.infoschema | localhost |
| mysql.session | localhost |
| mysql.sys | localhost |
| root | localhost |
+------------------+-----------+
4 rows in set (0.00 sec)
创建一个远程可以登录的用户:
mysql> flush privileges;
mysql> create user shukuinfo@'%' IDENTIFIED WITH mysql_native_password BY 'Shukuinfo123.';
mysql> grant all privileges on *.* to shukuinfo@'%';
mysql> flush privileges;
2.使用MySQL客户端(Navicat/heidisql)登录数据库:
在客户端中输入连接信息:
这里使用的是HeidiSQL这个客户端,其它支持MySQL的客户端也可以使用。
在配置中输入数据库的IP,用户名和密码 ,如下图: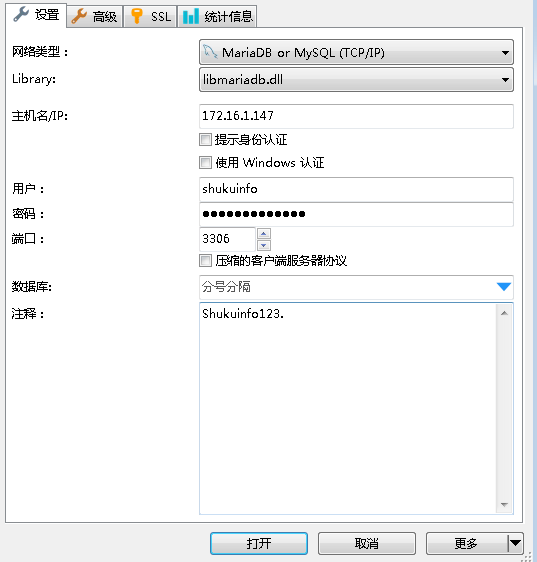
就可以正常使用MySQL数据库了,如下图: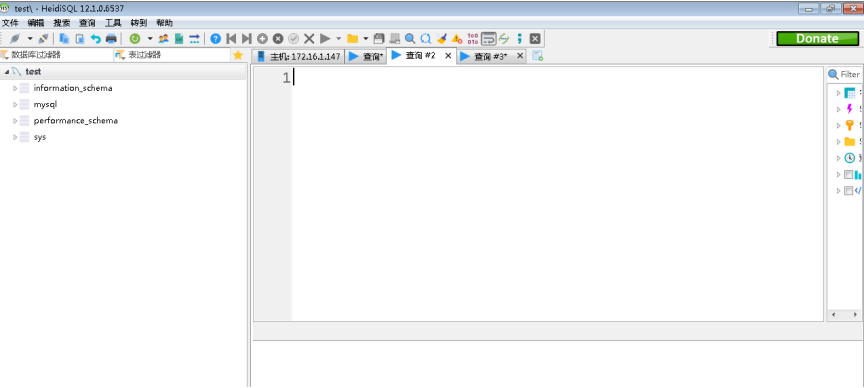
五、注意事项
加密方式兼容性
使用Navicat等工具连接时,需选择"mysql_native_password"加密方式,否则可能因协议不兼容导致连接失败。