12、列表框Listbox与滚动条Scrollbar
列表框(Listbox)是一个显示一系列选项的Widget控件,用户可以进行单项或多项的选择。
12-1 建立列表框
它的使用格式如下。
Listbox(父对象, options, ...)参数一:同上
options参数:
(1) bg或background:背景色彩。
(2) borderwidth或bd:边界宽度,默认是2像素。
(3) cursor:当鼠标光标在列表框上时的光标形状、
(4) fg或foreground:字形色彩。
(5) font:字形
(6) height:高,单位是字符,默认是10.
(7) highlightcolor:当尺度条取得焦点时的颜色。
(8) highlightthickness:当列表框获得焦点时的厚度。
(9) listvariable:以变量方式处理选项内容。
(10) relief:默认是relief=FLAT,可由此控制列表框外框,默认是SUNKEN。
(11) selectbackground:被选取字符串的背景色彩。
(12) selectmode:可以决定有多少选项可以被选,以及鼠标拖拽如何影响选项。
① BROWSE:这是默认值,我们可以选择一个选项,如果选取一个选项同时拖拽鼠标,将
造成选项最后的位置是被选取的项目位置。
② SINGLE:只能选择一个选项,可以用单击方式选取,不可用拖拽方式更改所选的项目。
③ MULTIPLE:可以选择多个选项,单击项目可以切换是否选择该项目。
④ EXTENDED:单击第一个项目然后拖拽到最后一个项目,即可选择这个区间的一系列
选项。单击可以选择第一个项目,此时若是按住Shift键并单击另一个项目,可以选取区间
项目。
(13) width:宽,单位是字符。
(14) xscrollcommand:在x轴使用此滚动条。
(15) yscrollcommand:在y轴使用此滚动条。
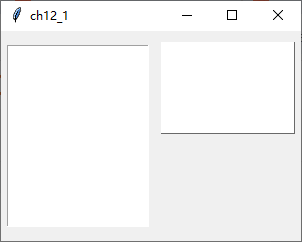
下面程序实例:建立列表框1,然后使用字符高度5建立列表框2。
python
from tkinter import *

root = Tk()
root.title("ch12_1")
root.geometry("300x210")

lb1 = Listbox(root)
lb1.pack(side=LEFT, padx=5, pady=10)
lb2 = Listbox(root, height=5, relief="raised")
lb2.pack(anchor=N, side=LEFT, padx=5, pady=10)

root.mainloop()
执行结果
12-2 建立列表框项目insert()
可以使用insert()方法为列表框建立项目,这个方法的使用格式如下。
python
insert(index, elements)上述index是项目插入位置,如果是插在最后面可以使用END。
下面程序实例:建立列表框,同时为这个列表框建立Banana、Watermelon、Pineapple三个项目。
python
from tkinter import *

root = Tk()
root.title("ch12_2")
root.geometry("300x210")

lb = Listbox(root)
lb.insert(END, "Banana")
lb.insert(END, "Watermelon")
lb.insert(END, "Pineapple")
lb.pack(pady=10)

root.mainloop()
执行结果
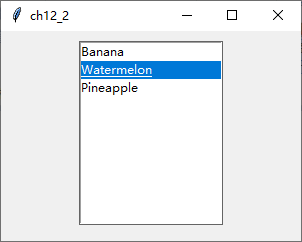
上述程序中第8 ~ 10行是建立列表项目,因为只有三个项目所以使用上述方式一次建立一个还不会太复杂,但是如果所要建立的项目很多时,建议使用list方式先存储项目,然后使用for...in循环方式将list内的列表项目插入到列表框。
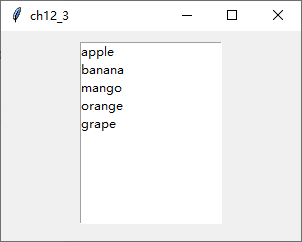
下面程序实例:建立含6个项目的列表框,程序第3、4行是建立fruits列表,第11、12行是分别将列表元素插入列表框内。
python
from tkinter import *
fruits = ["apple", "banana", "mango", "orange", "grape"]

root = Tk()
root.title("ch12_3")
root.geometry("300x210")

lb = Listbox(root)
for fruit in fruits:
    lb.insert(END, fruit)
lb.pack(pady=10)

root.mainloop()
执行结果
下面程序实例:重新设计ch12_3,主要是在第10行使用Listbox()构造方法时增加selectmode=MULTIPLE参数设置,这个设置可以让用户选取多个项目。
python
from tkinter import *
fruits = ["apple", "banana", "mango", "orange", "grape"]

root = Tk()
root.title("ch12_4")
root.geometry("300x210")

lb = Listbox(root, selectmode=MULTIPLE)
for fruit in fruits:
    lb.insert(END, fruit)
lb.pack(pady=10)

root.mainloop()
执行结果
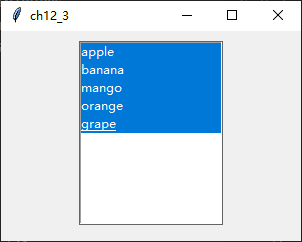
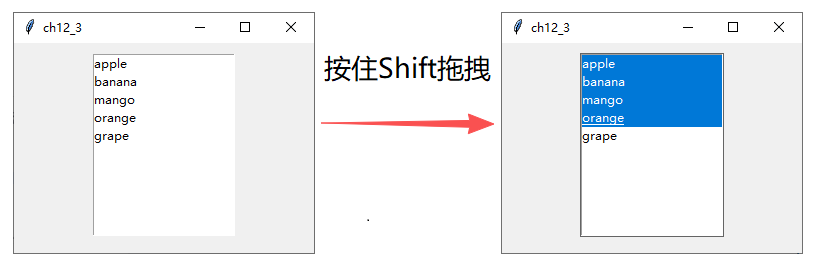
下面程序实例:使用selectmode=EXTENDED参数,重新设计ch12_4,此时可以用拖拽的方式选取区间项目。如果先单击一个项目,然后按住Shift键并单击另一个项目可以选取这个区间内的项目。
python
from tkinter import *
fruits = ["apple", "banana", "mango", "orange", "grape"]

root = Tk()
root.title("ch12_5")
root.geometry("300x210")

lb = Listbox(root, selectmode=EXTENDED)
for fruit in fruits:
    lb.insert(END, fruit)
lb.pack(pady=10)

root.mainloop()
执行结果
目前插入选项皆是插在最后面,所以语法是insert(END, elements),其实第一个参数是索引值,如果将END改为ACTIVE,表示是在目前选项前面加入一个项目,如果尚未选择选项则此ACTIVE是0.下面程序实例:先建立三个选项,然后使用insert(ACTIVE, elements...)在目前选项前方建立另外三个选项。
python
from tkinter import *
fruits = ["apple", "banana", "mango"]

root = Tk()
root.title("ch12_6")
root.geometry("300x210")

lb = Listbox(root, selectmode=EXTENDED)
for fruit in fruits:
    lb.insert(END, fruit)
lb.insert(ACTIVE, "orange", "grape")        # 在前面补充建立两个项目
lb.pack(pady=10)

root.mainloop()
执行结果
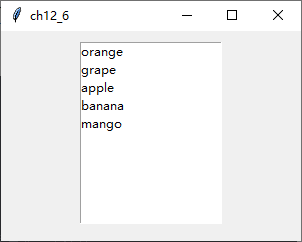
请注意第11行一次插入了两个项目的方式。
12-3 Listbox的基本操作
本节将介绍下列常用的Listbox控件操作的方法。
(1) size():传回列表项目的数量,可参考12-3-1节。
(2) selection_set():选取特定索引值,可参考12-3-2节。
(3) delete():删除特定索引项,可参考12-3-3节。
(4) get():传回指定索引项,可参考12-3-4节。
(5) curselection():传回选取项目的索引,可参考12-3-5节。
(6) selection_include():检查指定索引是否被选取,可参考12-3-6节。
12-3-1 列出列表框的选项数量size()
下面程序实例:参考ch12_5建立列表框,然后列出列表框中的项目数量。
python
from tkinter import *
fruits = ["apple", "banana", "mango", "orange", "grape"]

root = Tk()
root.title("ch12_7")
root.geometry("300x210")

lb = Listbox(root, selectmode=EXTENDED)
for fruit in fruits:
    lb.insert(END, fruit)
lb.pack(pady=10)
print("items数字: ", lb.size())

root.mainloop()
执行结果 下面是Python Shell窗口中的执行结果。
bash
PS E:\code\python\GuiTkinter\ch12> python .\ch12.py
items数字:  5
12-3-2选取特定索引项selection_set()
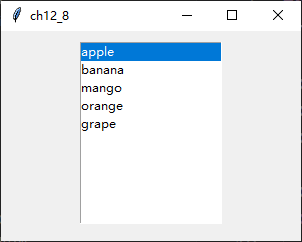
如果selection_set()方法内含一个参数,表示选取这个索引项,这个功能常被用于在建立好Listbox后,设定初次选择的项目。
下面程序实例:建立一个Listbox,然后设定初次的选择项目是索引为0的项目,需留意第12行。
python
from tkinter import *
fruits = ["apple", "banana", "mango", "orange", "grape"]

root = Tk()
root.title("ch12_8")
root.geometry("300x210")

lb = Listbox(root)
for fruit in fruits:
    lb.insert(END, fruit)
lb.pack(pady=10)
lb.select_set(0)            # 默认选择第0个项目

root.mainloop()
执行结果
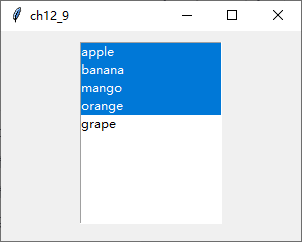
如果在select_set()方法内有两个参数时,则表示选取区间选项,第一个参数是区间的起始索引项,第二个参数是区间的结束索引项。
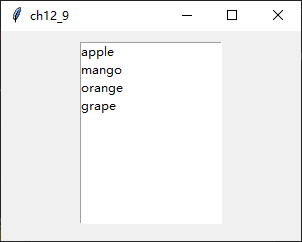
下面程序实例:建立一个Listbox,然后设定初次的选择项目是索引为0 ~ 3的项目,读者需留意第12行。
python
from tkinter import *
fruits = ["apple", "banana", "mango", "orange", "grape"]

root = Tk()
root.title("ch12_9")
root.geometry("300x210")

lb = Listbox(root, selectmode=EXTENDED)
for fruit in fruits:
    lb.insert(END, fruit)
lb.pack(pady=10)
lb.select_set(0, 3)            # 默认选择第0 ~ 3个项目

root.mainloop()
执行结果
12-3-3 删除特定索引项delete()
如果delete()方法内含一个参数,表示删除这个索引项。
下面程序实例:建立Listbox后删除索引为1的项目,原先索引为1的项目是banana,经执行后将没有显示,因为已经被删除了,读者需留意第12行。
python
from tkinter import *
fruits = ["apple", "banana", "mango", "orange", "grape"]

root = Tk()
root.title("ch12_10")
root.geometry("300x210")

lb = Listbox(root)
for fruit in fruits:
    lb.insert(END, fruit)
lb.pack(pady=10)
lb.delete(1)                # 删除索引为1的项目

root.mainloop()
执行结果
如果在delete()方法内有两个参数时,则表示删除区间选项,第一个参数是区间的起始索引项,第二个参数是区间的结束索引项。
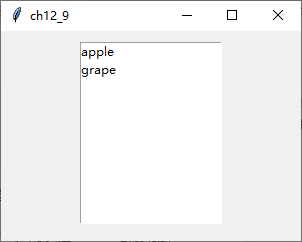
下面程序实例:建立一个Listbox,然后删除索引为1 ~ 3的项目,需留意第12行。
python
from tkinter import *
fruits = ["apple", "banana", "mango", "orange", "grape"]

root = Tk()
root.title("ch12_11")
root.geometry("300x210")

lb = Listbox(root)
for fruit in fruits:
    lb.insert(END, fruit)
lb.pack(pady=10)
lb.delete(1, 3)                # 删除索引为1~3的项目

root.mainloop()
执行结果
12-3-4 传回指定的索引项get()
如果get()方法内含一个参数,表示传回这个索引项的元素内容。
下面程序实例,建立Listbox后,传回索引为1的项目。
python
from tkinter import *
fruits = ["apple", "banana", "mango", "orange", "grape"]

root = Tk()
root.title("ch12_12")
root.geometry("300x210")

lb = Listbox(root)
for fruit in fruits:
    lb.insert(END, fruit)
lb.pack(pady=10)
print(lb.get(1))              # 打印索引为1的项目

root.mainloop()
执行结果
bash
PS E:\code\python\GuiTkinter\ch12> python .\ch12.py
banana
如果在get()方法内有两个参数时,则表示传回区间选项,第一个参数时区间的起始索引项,第二个参数时区间的结束索引项,所传回的值用元组方式传回。
下面程序实例:建立Listbox后,传回索引为1 ~ 3的项目。
python
from tkinter import *
fruits = ["apple", "banana", "mango", "orange", "grape"]

root = Tk()
root.title("ch12_13")
root.geometry("300x210")

lb = Listbox(root)
for fruit in fruits:
    lb.insert(END, fruit)
lb.pack(pady=10)
print(lb.get(1, 3))              # 打印索引为1 ~ 3的项目

root.mainloop()
执行结果
bash
PS E:\code\python\GuiTkinter\ch12> python .\ch12.py
('banana', 'mango', 'orange')
12-3-5 传回所选取项目的索引curselection()
这个方法会传回所选取项目的索引。
下面
监听字符串
self.emp_internation.trace_add('write', self.count_salary)
self.emp_internation为创建的字符串变量,ttk.String()
trace_add('write', 函数名),监听字符串变量写入之后需要干什么。
表头组件
创建表格组件
ttk.Treeview(columns='', '', '', show=")
参数
表头标识 columns, 参数后面可以接列表,列表中有几个元素,就增加几个表头
去除默认表头 show="headings"
ttk样式组件
一、基础使用示例
python
style = ttk.Style()
# 查看ttk的组件样式
print(style.theme_names())
# ttk组件主题设置
style.theme_use('')
# 设置默认标签样式
style.configure('TLabel', foreground='red', font=('宋体', 16))
# ttk Label组件参数绑定style='login-TLabel',就可以设置下面样式了
style.configure('login-TLabel', foreground='red', font=('宋体', 16))
# 默认按钮样式
style.configure('TButton', font=('宋体', 12))
# 默认单选框样式
style.configure('TRadiobutton', font=('宋体', 12))
# 默认表头标题
style.configure('Treeview.Heading', font=('宋体', 16))
# 默认表内容样式
style.configure('Treeview', font=('宋体', 14))
ttk.Treeview表格组件
一、基础使用示例
先看一个完整的代码示例,可以直接复制运行:
python
import tkinter as tk
from tkinter import ttk

root = tk.Tk()
root.title("简易表格示例")

# 创建表格
table = ttk.Treeview(root)

# 定义列(注意:第一列#0是隐藏的树形列,通常留空)
table["columns"] = ("姓名", "年龄", "城市")

# 设置列属性
table.column("#0", width=0, stretch=tk.NO)  # 隐藏第一列
table.column("姓名", width=100, anchor=tk.W)  # 列宽度和对齐方式
table.column("年龄", width=60, anchor=tk.CENTER)
table.column("城市", width=120, anchor=tk.E)

# 设置表头
table.heading("姓名", text="姓名")  # 列标题
table.heading("年龄", text="年龄")
table.heading("城市", text="城市")

# 添加数据
table.insert("", "end", values=("张三", 25, "北京"))  # 插入一行数据
table.insert("", "end", values=("李四", 30, "上海"))
table.insert("", "end", values=("王五", 28, "广州"))

# 显示表格
table.pack(pady=20)

root.mainloop()
二、核心参数详解
1. 列配置(column方法)
-
width:列宽度(单位:像素)
-
anchor :对齐方式(
tk.W左对齐,tk.CENTER居中,tk.E右对齐) -
minwidth:最小宽度(可拖动调整列宽时有效)
-
stretch :是否允许拉伸(
tk.YES/tk.NO)
python
table.column('姓名', anchor='center', width=90)2. 表头设置(heading方法)
-
text:显示的表头文字
-
command:点击表头时触发的回调函数(用于排序功能)
python
table.heading("年龄", text="年龄", command=lambda: sort_by_age())3. 插入数据(insert方法)
-
parent:父节点(通常用空字符串表示根节点)
-
index:插入位置("end"表示末尾),tk.END也可以,从最后一行开始追加
-
values:数据内容(元组形式,长度需与列数匹配)
-
iid:可选参数,为行指定唯一标识符
python
table.insert("", "end", iid="row1", values=("张三", 25, "北京"))4. 其他常用方法
-
删除行 :
table.delete(iid) -
获取选中行 :
table.selection() -
获取行数据 :
table.item(iid, "values") -
修改数据 :
table.item(iid, values=新数据) -
获取选中行的id:table.identify_row(event.y)
-
获取所有行的id:table.get_children()
-
查询id的下标:table.get_children().index(id)
三、样式美化
1. 修改字体颜色
python
style = ttk.Style()
style.configure("Treeview",
               rowheight=25,  # 行高
               font=("微软雅黑", 11),
               foreground="#333",
               background="#fff")

# 设置斑马线效果(隔行变色)
style.map("Treeview", background=[("selected", "#0078D7"), ("!selected", "#f0f0f0")])
2. 添加滚动条
python
# 纵向滚动条
y_scroll = ttk.Scrollbar(root, orient="vertical", command=table.yview)
table.configure(yscrollcommand=y_scroll.set)
y_scroll.pack(side=tk.RIGHT, fill=tk.Y)

# 横向滚动条同理(orient="horizontal")
四、常见问题
-
为什么表格不显示数据?
-
检查是否执行了
insert插入数据 -
确认列名与
columns定义一致
-
-
如何实现点击排序?
需要自定义排序函数:
pythondef sort_by_col(col, reverse): data = [(table.set(child, col), child) for child in table.get_children("")] data.sort(reverse=reverse) for index, (val, child) in enumerate(data): table.move(child, "", index) table.heading(col, command=lambda: sort_by_col(col, not reverse)) -
如何获取选中行数据?
pythonselected = table.selection() if selected: print(table.item(selected[0], "values"))
五、完整功能示例(带编辑功能)
python
# 点击单元格编辑功能
def edit_cell(event):
    region = table.identify_region(event.x, event.y)
    if region == "cell":
        column = table.identify_column(event.x)
        iid = table.focus()
        current_value = table.item(iid, "values")[int(column[1])-1]

        # 创建编辑框
        entry = tk.Entry(root)
        entry.place(x=event.x, y=event.y)
        entry.insert(0, current_value)

        def save_edit():
            new_value = entry.get()
            values = list(table.item(iid, "values"))
            values[int(column[1])-1] = new_value
            table.item(iid, values=values)
            entry.destroy()

        entry.bind("<Return>", lambda e: save_edit())

table.bind("<Double-1>", edit_cell)
滚动条ttk.Scrollbar
用于滚动一些组件的可见范围,根据方向可分为垂直滚动条和水平滚动条。组件常常被用于实现文本、画布和列表框的滚动。
在名为parent的顶级窗口或框架中创建一个新的滚动条组件:
python
# 创建滚动条  command=需要绑定的应用组件,yview
scroll_bar = ttk.Scrollbar(main_window, command=table.yview)
# 表格绑定滚动条
table.config(yscrollcommand=scroll_bar.set)
# 滚动条布局
scroll_bar.place(x=1313, y=80, height=645)