前言
由于一些必要的因素,我需要使用网络代理来请求页面,以完成相应的访问量增加。
使用requests这些纯后台的访问确实简单。但在不清楚页面逻辑的情况下,会有一定危险性,并且需要耗费大量时间去验证那些的必要接口。
没有办法的情况下,这里推荐使用selenium+代理服务,来模拟有效的浏览器访问。
前期准备
我之前的博客有相关介绍,但可能需要注意你的代理服务是否跟浏览器版本兼容,否则你可能需要下载老版本的浏览器应用和它对应版本的driver,这里以chrome为例:
python爬虫:selenium+browsermobproxy实现浏览器请求抓取(模块安装详解)_browsermobproxy安装-CSDN博客
我这里用到了Chrome 129.0.6614.3版本,进行测试。
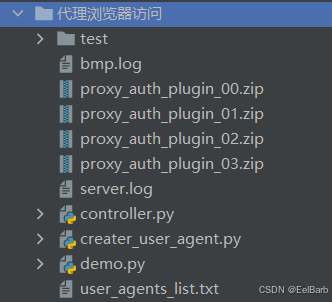
项目结构
代码
creater_user_agent.py
# 真实的浏览器User-Agent模板池(2024-2026年常见版本)
import random

USER_AGENT_TEMPLATES = {
    'chrome_windows': [
        "Mozilla/5.0 (Windows NT 10.0; Win64; x64) AppleWebKit/537.36 (KHTML, like Gecko) Chrome/{version}.0.0.0 Safari/537.36",
    ],
    'edge_windows': [
        "Mozilla/5.0 (Windows NT 10.0; Win64; x64) AppleWebKit/537.36 (KHTML, like Gecko) Chrome/{version}.0.0.0 Safari/537.36 Edg/{edge_version}.0.0.0",
        "Mozilla/5.0 (Windows NT 10.0; Win64; x64) AppleWebKit/537.36 (KHTML, like Gecko) Chrome/{version}.0.0.0 Safari/537.36 Edge/{edge_version}.0.0.0",
    ],
    'chrome_macos': [
        "Mozilla/5.0 (Macintosh; Intel Mac OS X 10_15_7) AppleWebKit/537.36 (KHTML, like Gecko) Chrome/{version}.0.0.0 Safari/537.36",
        "Mozilla/5.0 (Macintosh; Intel Mac OS X 13_0) AppleWebKit/537.36 (KHTML, like Gecko) Chrome/{version}.0.0.0 Safari/537.36",
        "Mozilla/5.0 (Macintosh; Intel Mac OS X 14_0) AppleWebKit/537.36 (KHTML, like Gecko) Chrome/{version}.0.0.0 Safari/537.36",
    ],
    'edge_macos': [
        "Mozilla/5.0 (Macintosh; Intel Mac OS X 10_15_7) AppleWebKit/537.36 (KHTML, like Gecko) Chrome/{version}.0.0.0 Safari/537.36 Edg/{edge_version}.0.0.0",
        "Mozilla/5.0 (Macintosh; Intel Mac OS X 13_0) AppleWebKit/537.36 (KHTML, like Gecko) Chrome/{version}.0.0.0 Safari/537.36 Edg/{edge_version}.0.0.0",
    ],
    'chrome_linux': [
        "Mozilla/5.0 (X11; Linux x86_64) AppleWebKit/537.36 (KHTML, like Gecko) Chrome/{version}.0.0.0 Safari/537.36",
        "Mozilla/5.0 (X11; Ubuntu; Linux x86_64) AppleWebKit/537.36 (KHTML, like Gecko) Chrome/{version}.0.0.0 Safari/537.36",
    ],
    'edge_linux': [
        "Mozilla/5.0 (X11; Linux x86_64) AppleWebKit/537.36 (KHTML, like Gecko) Chrome/{version}.0.0.0 Safari/537.36 Edg/{edge_version}.0.0.0",
    ],
    'firefox_windows': [
        "Mozilla/5.0 (Windows NT 10.0; Win64; x64; rv:{version}.0) Gecko/20100101 Firefox/{version}.0",
    ],
    'firefox_macos': [
        "Mozilla/5.0 (Macintosh; Intel Mac OS X 10.15; rv:{version}.0) Gecko/20100101 Firefox/{version}.0",
    ],
}


def generate_chrome_version():
    """生成Chrome版本号(120-131范围,可根据时间调整)"""
    return random.randint(120, 131)


def generate_edge_version(chrome_version):
    """基于Chrome版本生成对应的Edge版本"""
    return chrome_version + random.randint(0, 5)


def generate_firefox_version():
    """生成Firefox版本号(120-125范围)"""
    return random.randint(120, 125)


def generate_realistic_user_agent(platform=None, browser=None):
    """
    生成真实可信的User-Agent字符串

    Args:
        platform: 指定平台 ('windows', 'macos', 'linux', None随机)
        browser: 指定浏览器 ('chrome', 'edge', 'firefox', None随机)

    Returns:
        str: 生成的User-Agent字符串
    """
    # 随机选择平台和浏览器
    if platform is None:
        platform = random.choice(['windows', 'macos', 'linux'])

    if browser is None:
        browser = random.choice(['chrome', 'edge', 'firefox'])

    # 构建key
    key = f"{browser}_{platform}"

    # 如果该组合不存在,回退到chrome_windows
    if key not in USER_AGENT_TEMPLATES:
        key = 'chrome_windows'

    template = random.choice(USER_AGENT_TEMPLATES[key])

    # 生成版本号
    if browser in ['chrome', 'edge']:
        chrome_version = generate_chrome_version()
        if 'Edg' in template or 'Edge' in template:
            edge_version = generate_edge_version(chrome_version)
            return template.format(version=chrome_version, edge_version=edge_version)
        else:
            return template.format(version=chrome_version)
    elif browser == 'firefox':
        firefox_version = generate_firefox_version()
        return template.format(version=firefox_version)


def generate_user_agents(count=10, unique=True):
    """
    批量生成User-Agent

    Args:
        count: 生成数量
        unique: 是否保证唯一性

    Returns:
        list: User-Agent列表
    """
    user_agents = []
    attempts = 0
    max_attempts = count * 10

    while len(user_agents) < count and attempts < max_attempts:
        ua = generate_realistic_user_agent()
        if unique:
            if ua not in user_agents:
                user_agents.append(ua)
        else:
            user_agents.append(ua)
        attempts += 1

    return user_agents


def save_to_file(user_agents, filename='user_agents.txt'):
    """将User-Agent保存到文件"""
    with open(filename, 'w', encoding='utf-8') as f:
        for i, ua in enumerate(user_agents, 1):
            f.write(f"{i}. {ua}\n")
    print(f"已保存 {len(user_agents)} 个User-Agent到 {filename}")


if __name__ == '__main__':
    print("=" * 80)
    print("User-Agent生成器 - 适用于B站等网站的正常访问识别")
    print("=" * 80)
    print()

    # 生成示例
    print("[示例1] 生成10个随机User-Agent(包含Chrome/Edge/Firefox):")
    for i in range(10):
        ua = generate_realistic_user_agent()
        print(f"  {i+1}. {ua}")
    print()

    # 按平台生成
    print("[示例2] Windows平台Edge浏览器User-Agent:")
    for i in range(3):
        ua = generate_realistic_user_agent(platform='windows', browser='edge')
        print(f"  {i+1}. {ua}")
    print()

    print("[示例3] macOS平台Edge浏览器User-Agent:")
    for i in range(3):
        ua = generate_realistic_user_agent(platform='macos', browser='edge')
        print(f"  {i+1}. {ua}")
    print()

    # 按浏览器生成
    print("[示例4] 各浏览器User-Agent示例:")
    for browser in ['chrome', 'edge', 'firefox']:
        ua = generate_realistic_user_agent(browser=browser)
        print(f"  {browser.upper()}: {ua}")
    print()

    # 批量生成并保存
    print("[示例5] 批量生成30个唯一User-Agent并保存:")
    user_agents = generate_user_agents(count=30, unique=True)
    save_to_file(user_agents, 'user_agents_list.txt')
    print()

    # 显示统计信息
    print("=" * 80)
    print("生成完成!这些User-Agent包含:")
    print("  ✓ 真实的Chrome版本号(120-131)")
    print("  ✓ 真实的Edge版本号(基于Chrome版本+偏移)")
    print("  ✓ 真实的Firefox版本号(120-125)")
    print("  ✓ 主流操作系统(Windows 10/11, macOS 10.15/13/14, Linux)")
    print("  ✓ 标准的AppleWebKit和Safari标识")
    print("  ✓ 符合W3C规范的格式")
    print("  ✓ 支持Chrome、Edge、Firefox三大浏览器")
    print("=" * 80)
demo.py
import time
import string
import zipfile
import os
import requests
from selenium import webdriver
from selenium.webdriver.chrome.service import Service
from selenium.webdriver.chrome.options import Options
from creater_user_agent import generate_realistic_user_agent

def create_proxy_auth_extension(proxy_host, proxy_port, proxy_username, proxy_password, scheme='http',
                                plugin_index=None):
    """
    创建代理认证Chrome扩展插件
    作用:让Chrome自动输入代理的用户名和密码
    """
    if plugin_index is None:
        plugin_path = r'./proxy_auth_plugin.zip'
    else:
        plugin_path = r'./proxy_auth_plugin_%s.zip' % str(plugin_index).zfill(2)

    # Chrome扩展的配置文件
    manifest_json = """{
    "version": "1.0.0",
    "manifest_version": 2,
    "name": "Proxy Auth",
    "permissions": [
        "proxy",
        "tabs",
        "unlimitedStorage",
        "storage",
        "<all_urls>",
        "webRequest",
        "webRequestBlocking"
    ],
    "background": {
        "scripts": ["background.js"]
    }
}"""

    # JavaScript脚本:自动填写代理账号密码
    background_js = string.Template(
        """var config = {
            mode: "fixed_servers",
            rules: {
                singleProxy: {
                    scheme: "${scheme}",
                    host: "${host}",
                    port: parseInt(${port})
                },
                bypassList: ["localhost"]
            }
        };

        chrome.proxy.settings.set({value: config, scope: "regular"}, function() {});

        function callbackFn(details) {
            return {
                authCredentials: {
                    username: "${username}",
                    password: "${password}"
                }
            };
        }

        chrome.webRequest.onAuthRequired.addListener(
            callbackFn,
            {urls: ["<all_urls>"]},
            ['blocking']
        );"""
    ).substitute(
        host=proxy_host,
        port=proxy_port,
        username=proxy_username,
        password=proxy_password,
        scheme=scheme,
    )

    # 删除旧的插件文件
    if os.path.exists(plugin_path):
        try:
            os.remove(plugin_path)
        except:
            pass

    # 创建ZIP插件文件
    with zipfile.ZipFile(plugin_path, 'w') as zp:
        zp.writestr("manifest.json", manifest_json)
        zp.writestr("background.js", background_js)

    print(f"[INFO] 代理认证插件已创建: {plugin_path}")
    return plugin_path


def selenium_go(proxy_auth_plugin_path, target_urls, id):
    """
    使用代理访问目标URL
    :param proxy_url: 代理地址,格式如 "ip:port"
    :param target_urls: 要访问的URL列表
    :param wait_time: 等待时间(秒)
    """
    # 启动BrowserMob Proxy(如果不需要拦截请求,可以注释掉)
    # server = Server(r"E:\其他源码\browsermob-proxy-2.1.4-bin\browsermob-proxy-2.1.4\bin\browsermob-proxy.bat")
    # server.start()

    # 设置Chrome WebDriver
    chrome_service = Service(r"E:\其他源码\chrome-129.0.6614.3\chromedriver-win64\chromedriver.exe")
    # 【新增】指定 Chrome 浏览器的安装路径
    chrome_binary_path = r"E:\其他源码\chrome-129.0.6614.3\chrome-win64\chrome.exe"  # 默认Chrome路径

    chrome_options = Options()
    chrome_options.binary_location = chrome_binary_path  # 【关键】设置Chrome浏览器路径

    # 添加随机User-Agent(模拟真实浏览器)
    user_agent = generate_realistic_user_agent()
    chrome_options.add_argument(f'user-agent={user_agent}')
    print(f"[INFO] {id} 使用User-Agent: {user_agent}")

    # 方式1: 通过Chrome命令行参数设置代理
    # chrome_options.add_argument(f'--proxy-server=http://{proxy_url}')

    # 方式2: 通过扩展插件处理认证
    chrome_options.add_extension(proxy_auth_plugin_path)

    # 忽略证书错误
    chrome_options.add_argument('--ignore-certificate-errors')

    # 禁用自动化检测(防止被识别为机器人)
    chrome_options.add_experimental_option('excludeSwitches', ['enable-automation'])
    chrome_options.add_experimental_option('useAutomationExtension', False)
    chrome_options.add_argument('--disable-blink-features=AutomationControlled')

    # 【修复】正确禁用图片和CSS的方法
    prefs = {
        'profile.managed_default_content_settings.images': 2,  # 禁用图片
        'permissions.default.stylesheet': 2,  # 禁用CSS
        'profile.default_content_setting_values.stylesheets': 2,  # 禁用CSS(备用)
    }
    chrome_options.add_experimental_option('prefs', prefs)

    # 【可选】进一步加速的配置
    # chrome_options.add_argument('--disable-gpu')  # 禁用GPU加速
    chrome_options.add_argument('--no-sandbox')  # 禁用沙盒(Windows可选)
    chrome_options.add_argument('--disable-dev-shm-usage')

    # 【新增】启用无头模式,不显示浏览器窗口
    chrome_options.add_argument('--headless')

    # 【新增】禁用音频输出
    chrome_options.add_argument('--mute-audio')

    driver = webdriver.Chrome(service=chrome_service, options=chrome_options)

    try:
        # 访问其他URL(每个URL打开新标签页)
        for target_url in target_urls:
            driver.execute_script("window.open('');")
            driver.switch_to.window(driver.window_handles[-1])
            print(f"[INFO] {id} 正在访问: {target_url}")

            driver.set_page_load_timeout(30)
            try:
                driver.get(target_url)
            except Exception as e:
                pass

            # 【优化】减少等待时间或使用更短的随机延迟
            time.sleep(5)

        # 从最后一个标签页往前依次切换
        for i in range(len(target_urls) - 1, -1, -1):
            if i == 0:
                continue
            driver.switch_to.window(driver.window_handles[i])
            print(f"[INFO] {id} 切换至第{i}个页面: {driver.current_url} 停留5秒")
            time.sleep(5)

        driver.switch_to.window(driver.window_handles[len(target_urls)])
        print(f"[INFO] {id} 切换至页面{len(target_urls)}: {driver.current_url} 停留4秒")
        time.sleep(4)

    except Exception as e:
        print(f"[ERROR] {id} 访问出错: {e}")
    finally:
        # 关闭浏览器
        driver.quit()
        print(f"[INFO] {id} 浏览器已关闭")
        # server.stop()


# 提取代理服务
def get_proxy(proxy_num, authKey, password):
    targetURL = "XXXXXXXXXXXXXXXXXXXXXXXXXXXXX"
    distinct = 'true'

    for i in range(3):
        proxyUrl = f"{targetURL}?key={authKey}&num={proxy_num}&distinct={distinct}&pwd={password}"
        r = requests.get(proxyUrl)
        result = r.json()
        print(result)

        if result['code'] != "SUCCESS":
            print(f"[ERROR] 代理获取失败: {result['message']}")
            time.sleep(10)
        else:
            proxies = [res['server'] for res in result['data']]
            return proxies
controller.py
import threading
import demo

authKey = "XXXXXXX"
password = "xxxxxxxxxxx"

def start_task(urls, proxy_num, times=1):
    proxies = demo.get_proxy(proxy_num, authKey, password)
    print(proxies)

    thrs = []
    for index, proxy in enumerate(proxies):
        # 创建代理认证插件
        proxy_auth_plugin_path = demo.create_proxy_auth_extension(
            proxy_host=proxy.split(':')[0],
            proxy_port=proxy.split(':')[1],
            proxy_username=authKey,
            proxy_password=password,
            plugin_index=index,
        )

        for i in range(times):
            id = f"P{str(index).zfill(2)}_{i}"
            a = threading.Thread(target=demo.selenium_go, args=(proxy_auth_plugin_path, urls, id))
            a.start()
            thrs.append(a)

    for a in thrs:
        a.join()
        print('thread done!')


if __name__ == '__main__':
    urls = ['https://xxxxxxxxxx/','https://xxxxxxxxxx1/', 'https://xxxxxxxxxx2/']
    for i in range(30):
        start_task(urls, 3, times=1)
提示
本博客所述仅为学习参考,禁止用于任何商业目的,请仔细甄别。