🚀 pip / conda / uv 换源大全:2026 国内镜像最新地址,一张表搞定所有 Python 安装卡顿
文章目录
- [🚀 pip / conda / uv 换源大全:2026 国内镜像最新地址,一张表搞定所有 Python 安装卡顿](#🚀 pip / conda / uv 换源大全:2026 国内镜像最新地址,一张表搞定所有 Python 安装卡顿)
-
- [📋 2026 年国内可用镜像速查表](#📋 2026 年国内可用镜像速查表)
- [🐍 第一章:pip 换源](#🐍 第一章:pip 换源)
-
- 方法一:临时换源(单次命令,不影响全局)
- 方法二:永久换源(推荐,一劳永逸)
- [方法三:pip install torch 专项------PyTorch 官方 + 清华镜像](#方法三:pip install torch 专项——PyTorch 官方 + 清华镜像)
- [pip 换源效果验证](#pip 换源效果验证)
- [🐼 第二章:conda 换源](#🐼 第二章:conda 换源)
-
- 方法一:命令行添加镜像源
- [方法二:直接编辑 .condarc(推荐,更直观)](#方法二:直接编辑 .condarc(推荐,更直观))
- [conda 换源效果验证](#conda 换源效果验证)
- [conda-forge 单独换源](#conda-forge 单独换源)
- [⚡ 第三章:uv 换源](#⚡ 第三章:uv 换源)
-
- 方法一:环境变量(推荐,最灵活)
- [方法二:uv 配置文件](#方法二:uv 配置文件)
- 方法三:项目级配置(pyproject.toml)
- [uv 安装 PyTorch 的完整命令](#uv 安装 PyTorch 的完整命令)
- [🤗 第四章:HuggingFace 换源](#🤗 第四章:HuggingFace 换源)
-
- 方法一:环境变量(推荐)
- 方法二:代码里设置
- [huggingface-cli 下载(配合镜像)](#huggingface-cli 下载(配合镜像))
- [hf_transfer 加速(10x 下载速度)](#hf_transfer 加速(10x 下载速度))
- [🐳 第五章:Docker / pip 镜像双重加速](#🐳 第五章:Docker / pip 镜像双重加速)
- [🔧 第六章:常见问题速解](#🔧 第六章:常见问题速解)
-
- [问题 1:SSL 证书验证失败](#问题 1:SSL 证书验证失败)
- [问题 2:换源后还是很慢 / 超时](#问题 2:换源后还是很慢 / 超时)
- [问题 3:找不到包(某个镜像源没有这个包)](#问题 3:找不到包(某个镜像源没有这个包))
- [问题 4:虚拟环境里换源](#问题 4:虚拟环境里换源)
- [问题 5:conda 源配置后包版本冲突](#问题 5:conda 源配置后包版本冲突)
- [问题 6:公司/学校内网,不能访问任何外网](#问题 6:公司/学校内网,不能访问任何外网)
- [📱 第七章:一键配置脚本(新机器必跑)](#📱 第七章:一键配置脚本(新机器必跑))
- [🎁 速查总结(建议截图收藏)](#🎁 速查总结(建议截图收藏))
- [📣 最后](#📣 最后)
写在前面 :
pip install torch卡住不动,conda create半小时没反应,uv sync超时报错------这些问题的根本原因只有一个:默认源在境外,国内访问慢 。换源是 AI 开发者第一天就要做的事,但每次换新机器、新环境都要重新找地址。这篇把 pip、conda、uv、HuggingFace、Docker 镜像的所有换源方法集中整理,一次收藏,永久用。
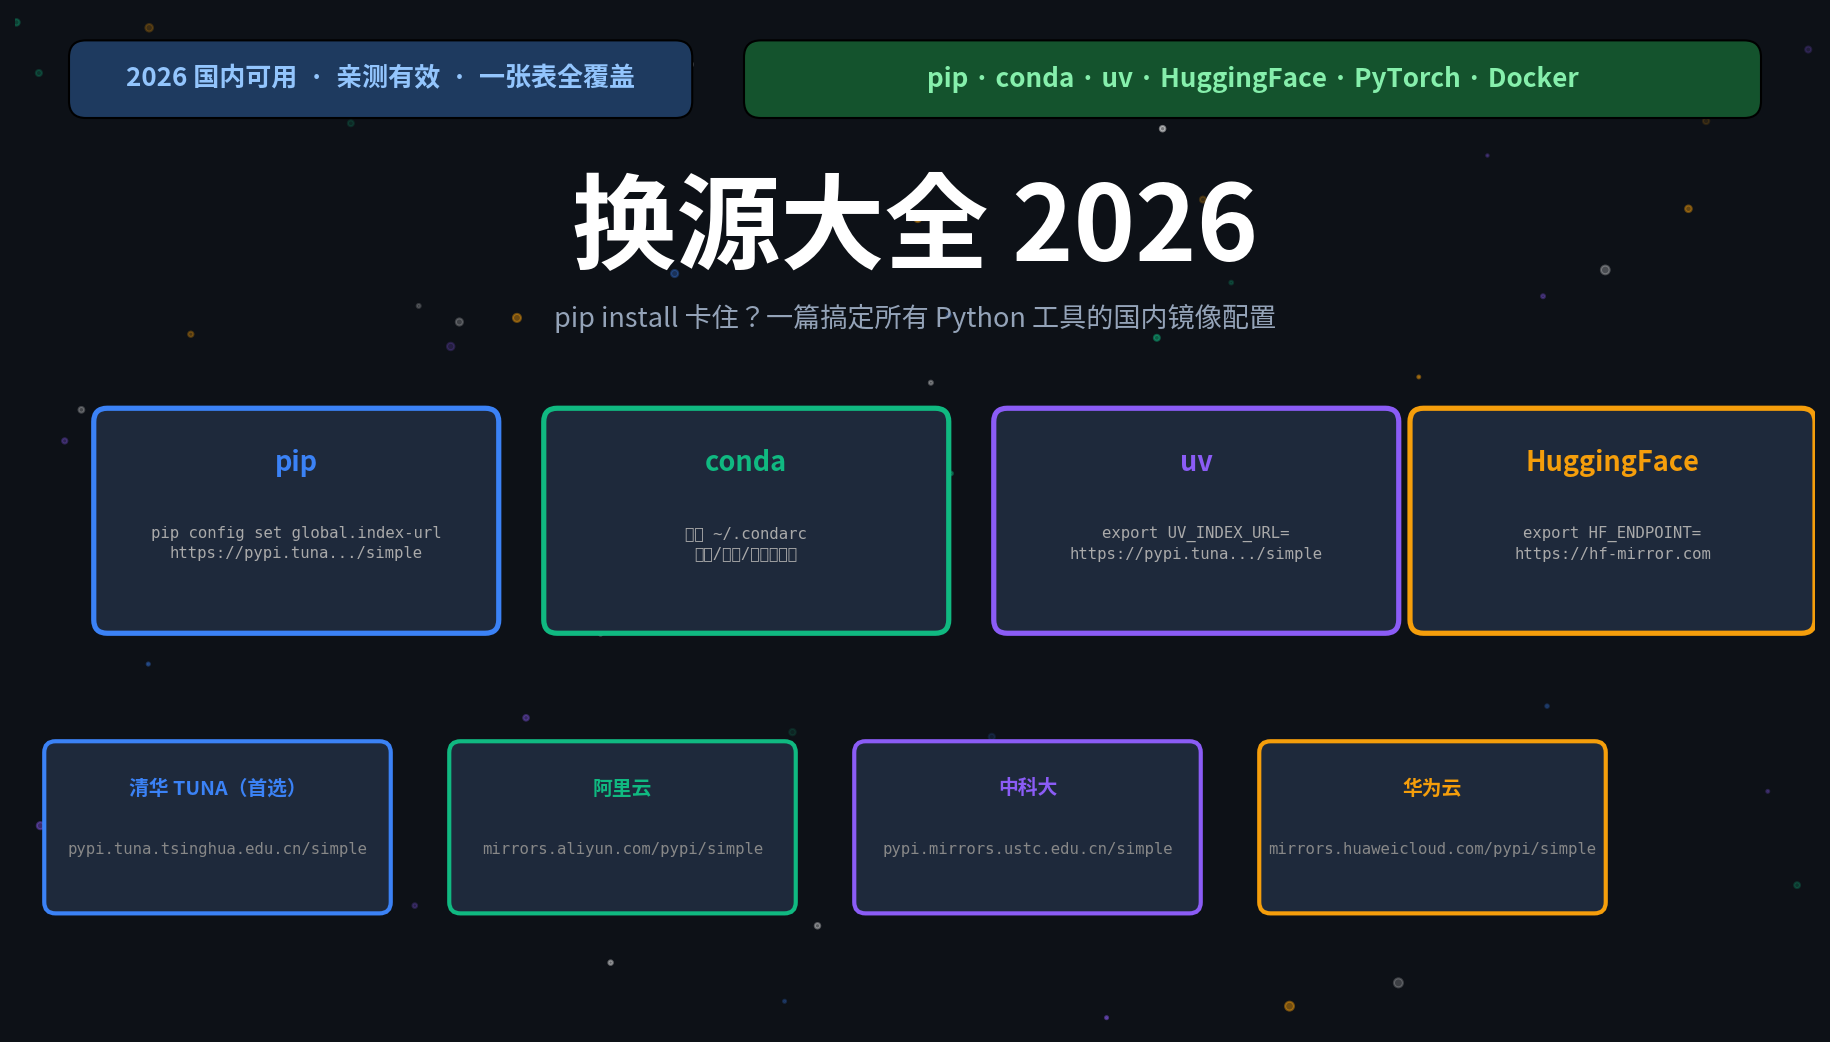
📋 2026 年国内可用镜像速查表
| 镜像站 | 机构 | pip | conda | 备注 |
|---|---|---|---|---|
| 清华 TUNA | 清华大学 | ✅ | ✅ | 最稳定,首选 |
| 阿里云 | 阿里巴巴 | ✅ | ✅ | 速度快,企业推荐 |
| 中科大 USTC | 中国科学技术大学 | ✅ | ✅ | 学术网络稳定 |
| 华为云 | 华为 | ✅ | ❌ | pip 备选 |
| 腾讯云 | 腾讯 | ✅ | ❌ | pip 备选 |
| 豆瓣 | 豆瓣 | ✅ | ❌ | 老牌,仍可用 |
| 上海交大 SJTUG | 上海交通大学 | ✅ | ✅ | 学术网络 |
镜像地址速查(直接复制):
# pip 镜像
清华:  https://pypi.tuna.tsinghua.edu.cn/simple
阿里:  https://mirrors.aliyun.com/pypi/simple
中科大:https://pypi.mirrors.ustc.edu.cn/simple
华为:  https://mirrors.huaweicloud.com/pypi/simple
腾讯:  https://mirrors.cloud.tencent.com/pypi/simple
豆瓣:  https://pypi.doubanio.com/simple

# conda 镜像(https_url)
清华:  https://mirrors.tuna.tsinghua.edu.cn/anaconda
阿里:  https://mirrors.aliyun.com/anaconda
中科大:https://mirrors.ustc.edu.cn/anaconda
上交大:https://mirror.sjtu.edu.cn/anaconda

# HuggingFace 镜像
HF-Mirror:https://hf-mirror.com

# PyTorch 镜像(清华)
https://mirrors.tuna.tsinghua.edu.cn/pytorch-wheels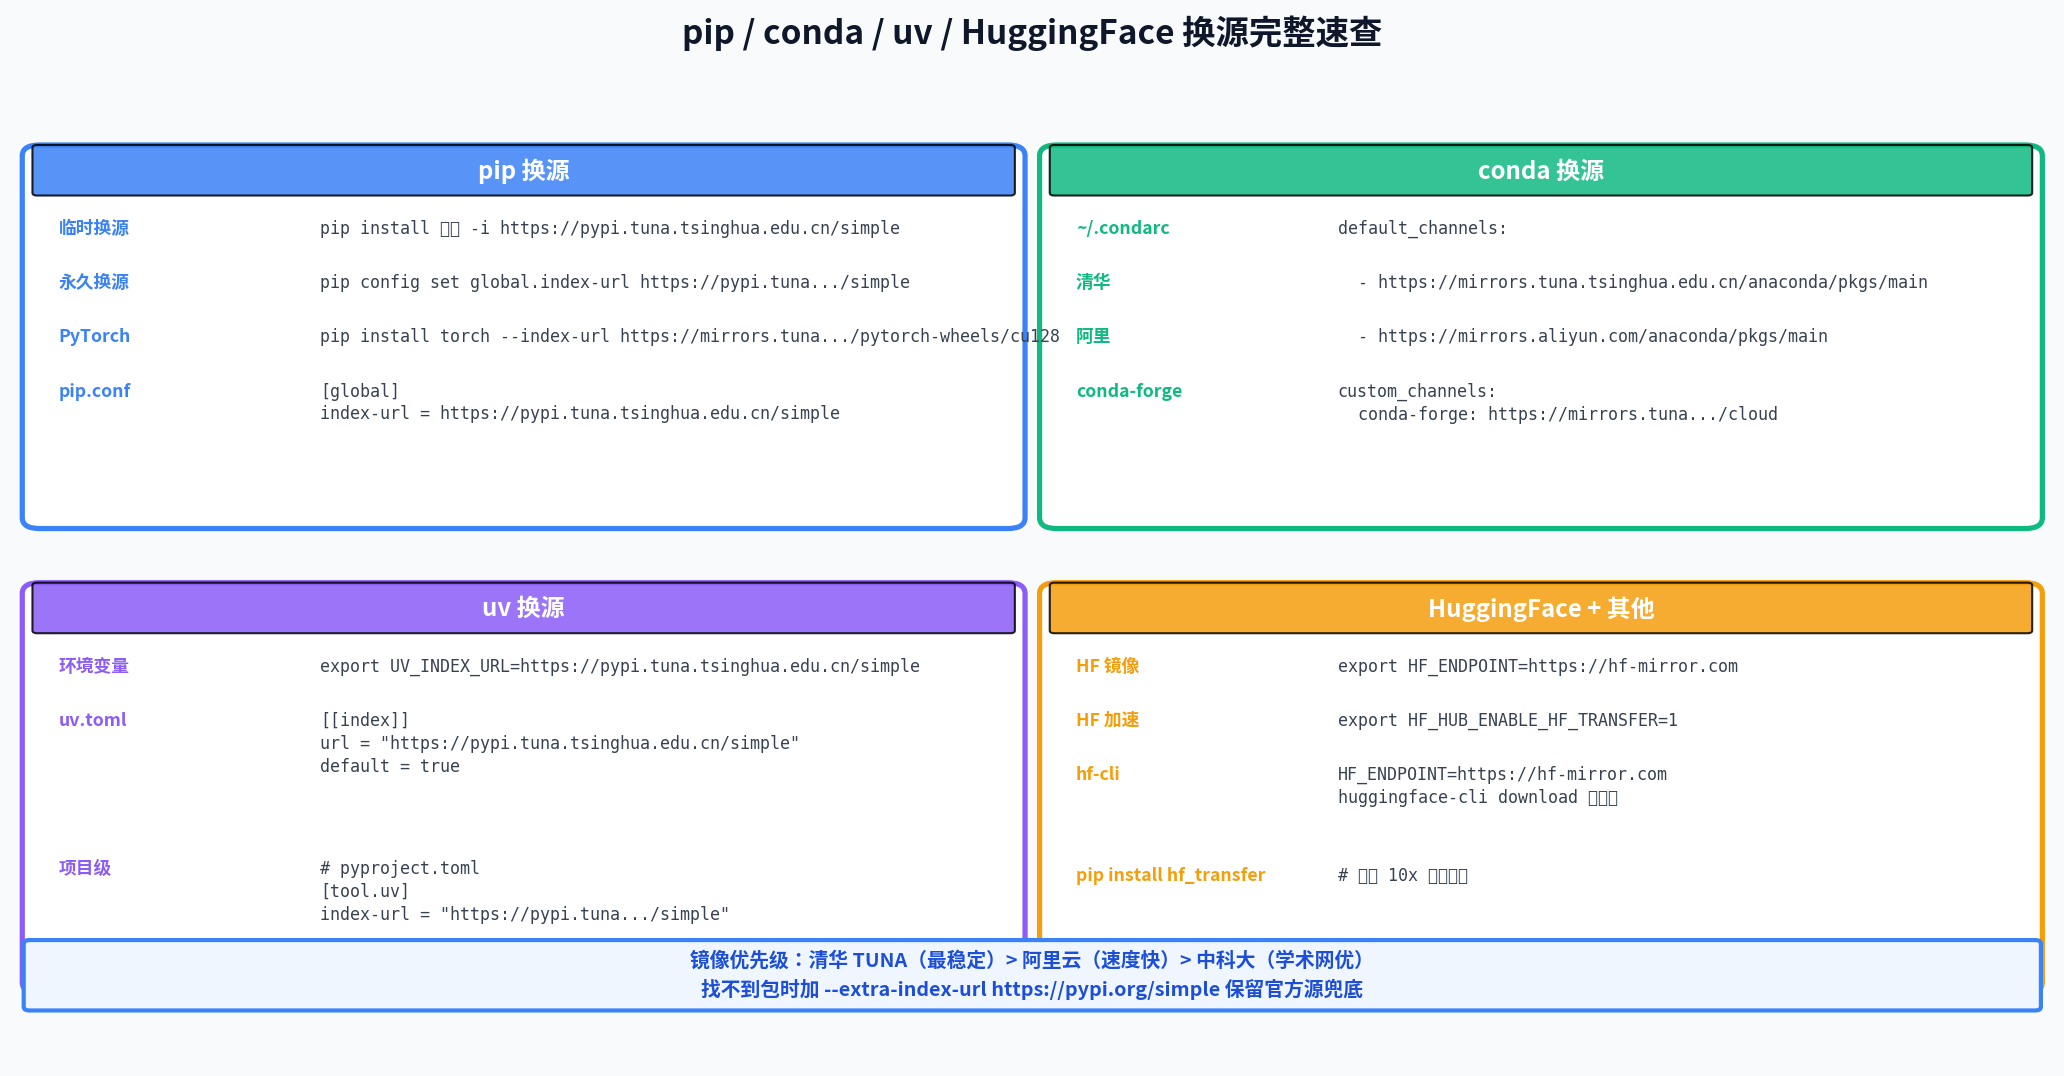
🐍 第一章:pip 换源
方法一:临时换源(单次命令,不影响全局)
bash
# 基础格式
pip install 包名 -i 镜像地址

# 常用写法(清华源,推荐)
pip install numpy -i https://pypi.tuna.tsinghua.edu.cn/simple

# 加上信任(避免 SSL 警告)
pip install numpy \
  -i https://pypi.tuna.tsinghua.edu.cn/simple \
  --trusted-host pypi.tuna.tsinghua.edu.cn

# 安装 requirements.txt 也一样
pip install -r requirements.txt \
  -i https://pypi.tuna.tsinghua.edu.cn/simple

# 各镜像的临时使用(直接替换 URL 即可)
pip install torch -i https://mirrors.aliyun.com/pypi/simple
pip install torch -i https://pypi.mirrors.ustc.edu.cn/simple
pip install torch -i https://mirrors.huaweicloud.com/pypi/simple
方法二:永久换源(推荐,一劳永逸)
Linux / macOS
bash
# 一行命令搞定(清华源)
pip config set global.index-url https://pypi.tuna.tsinghua.edu.cn/simple

# 验证配置
pip config list
# global.index-url='https://pypi.tuna.tsinghua.edu.cn/simple'
Windows
powershell
# PowerShell 里运行(同样的命令)
pip config set global.index-url https://pypi.tuna.tsinghua.edu.cn/simple
手动编辑配置文件
配置文件位置:
Linux/macOS:  ~/.pip/pip.conf(或 ~/.config/pip/pip.conf)
Windows:      C:\Users\用户名\pip\pip.ini
              或 %APPDATA%\pip\pip.ini
内容:
ini
[global]
index-url = https://pypi.tuna.tsinghua.edu.cn/simple
trusted-host = pypi.tuna.tsinghua.edu.cn
timeout = 120

# 如果需要安装私有包,保留官方源作为 extra-index
# extra-index-url = https://pypi.org/simple
一键配置脚本 (保存为 setup_pip.sh,新机器直接跑):
bash
#!/bin/bash
# 自动配置 pip 换源

mkdir -p ~/.pip
cat > ~/.pip/pip.conf << 'EOF'
[global]
index-url = https://pypi.tuna.tsinghua.edu.cn/simple
trusted-host = pypi.tuna.tsinghua.edu.cn
timeout = 120
EOF

echo "✅ pip 换源完成!当前配置:"
pip config list
方法三:pip install torch 专项------PyTorch 官方 + 清华镜像
PyTorch 的包比较特殊,在 PyPI 上没有全量的 CUDA 版本,需要指定额外的 index-url:
bash
# 官方地址(境外,慢)
pip install torch torchvision torchaudio \
  --index-url https://download.pytorch.org/whl/cu128

# 清华镜像(国内,推荐)
pip install torch torchvision torchaudio \
  --index-url https://mirrors.tuna.tsinghua.edu.cn/pytorch-wheels/cu128

# CUDA 版本对应:
# cu128  → CUDA 12.8(RTX 40/50 系列推荐)
# cu124  → CUDA 12.4
# cu121  → CUDA 12.1
# cpu    → 纯 CPU 版本

# 只需 CPU 版本(最小安装)
pip install torch torchvision torchaudio \
  --index-url https://mirrors.tuna.tsinghua.edu.cn/pytorch-wheels/cpu
pip 换源效果验证
bash
# 安装一个包,看速度
pip install requests -v 2>&1 | grep "Looking in indexes"
# 输出类似:
# Looking in indexes: https://pypi.tuna.tsinghua.edu.cn/simple

# 测试网速
time pip download numpy --no-deps -d /tmp/test_pip
🐼 第二章:conda 换源
方法一:命令行添加镜像源
bash
# 添加清华镜像(包含 defaults、conda-forge、pytorch 等常用频道)
conda config --add channels https://mirrors.tuna.tsinghua.edu.cn/anaconda/pkgs/main
conda config --add channels https://mirrors.tuna.tsinghua.edu.cn/anaconda/pkgs/r
conda config --add channels https://mirrors.tuna.tsinghua.edu.cn/anaconda/pkgs/free
conda config --add channels https://mirrors.tuna.tsinghua.edu.cn/anaconda/cloud/conda-forge

# 设置显示频道 URL(安装时能看到从哪里下)
conda config --set show_channel_urls yes

# 验证配置
conda config --show channels
方法二:直接编辑 .condarc(推荐,更直观)
配置文件位置:~/.condarc(不存在则新建)
清华源(最稳定,推荐):
yaml
# ~/.condarc
channels:
  - defaults

default_channels:
  - https://mirrors.tuna.tsinghua.edu.cn/anaconda/pkgs/main
  - https://mirrors.tuna.tsinghua.edu.cn/anaconda/pkgs/r
  - https://mirrors.tuna.tsinghua.edu.cn/anaconda/pkgs/free

custom_channels:
  conda-forge: https://mirrors.tuna.tsinghua.edu.cn/anaconda/cloud
  pytorch: https://mirrors.tuna.tsinghua.edu.cn/anaconda/cloud

show_channel_urls: true
channel_priority: flexible阿里云源:
yaml
# ~/.condarc
channels:
  - defaults

default_channels:
  - https://mirrors.aliyun.com/anaconda/pkgs/main
  - https://mirrors.aliyun.com/anaconda/pkgs/r
  - https://mirrors.aliyun.com/anaconda/pkgs/free

custom_channels:
  conda-forge: https://mirrors.aliyun.com/anaconda/cloud

show_channel_urls: true一键配置脚本:
bash
#!/bin/bash
# 自动配置 conda 换源(清华)

cat > ~/.condarc << 'EOF'
channels:
  - defaults

default_channels:
  - https://mirrors.tuna.tsinghua.edu.cn/anaconda/pkgs/main
  - https://mirrors.tuna.tsinghua.edu.cn/anaconda/pkgs/r
  - https://mirrors.tuna.tsinghua.edu.cn/anaconda/pkgs/free

custom_channels:
  conda-forge: https://mirrors.tuna.tsinghua.edu.cn/anaconda/cloud
  pytorch: https://mirrors.tuna.tsinghua.edu.cn/anaconda/cloud

show_channel_urls: true
channel_priority: flexible
EOF

echo "✅ conda 换源完成!"
conda config --show channels
conda 换源效果验证
bash
# 创建测试环境,看下载速度
conda create -n test_env python=3.12 --dry-run

# 搜索包,确认来源
conda search numpy | head -20
# 应该看到类似:mirrors.tuna.tsinghua.edu.cn 的来源

# 如果换源后还慢,清理缓存重试
conda clean --all -y
conda-forge 单独换源
bash
# 如果主要用 conda-forge 安装包
conda config --add channels https://mirrors.tuna.tsinghua.edu.cn/anaconda/cloud/conda-forge
conda config --set channel_priority strict

# 验证
conda config --show
⚡ 第三章:uv 换源
uv 是 2025-2026 年最受欢迎的 Python 包管理器,速度极快,换源方式和 pip 略有不同。
方法一:环境变量(推荐,最灵活)
bash
# 临时(当前 shell 会话有效)
export UV_INDEX_URL=https://pypi.tuna.tsinghua.edu.cn/simple

# 永久(加入 ~/.zshrc 或 ~/.bashrc)
echo 'export UV_INDEX_URL=https://pypi.tuna.tsinghua.edu.cn/simple' >> ~/.zshrc
source ~/.zshrc

# 验证
uv pip install numpy --verbose 2>&1 | grep "index"
方法二:uv 配置文件
toml
# ~/.config/uv/uv.toml(Linux/macOS)
# Windows: %APPDATA%\uv\uv.toml

[[index]]
url = "https://pypi.tuna.tsinghua.edu.cn/simple"
default = true

# 如果需要 PyTorch CUDA 版本,额外添加
[[index]]
url = "https://mirrors.tuna.tsinghua.edu.cn/pytorch-wheels/cu128"
explicit = true  # 只有明确指定时才使用这个源
方法三:项目级配置(pyproject.toml)
适合团队项目,把源配置放在项目里,所有人克隆后自动生效:
toml
# pyproject.toml(项目根目录)

[tool.uv]
index-url = "https://pypi.tuna.tsinghua.edu.cn/simple"

# PyTorch 项目专项配置(额外源)
[[tool.uv.index]]
url = "https://mirrors.tuna.tsinghua.edu.cn/pytorch-wheels/cu128"
explicit = true

[tool.uv.sources]
torch = { index = "https://mirrors.tuna.tsinghua.edu.cn/pytorch-wheels/cu128" }
torchvision = { index = "https://mirrors.tuna.tsinghua.edu.cn/pytorch-wheels/cu128" }
uv 安装 PyTorch 的完整命令
bash
# 配置了镜像后,安装 PyTorch
uv pip install torch torchvision \
  --index-url https://mirrors.tuna.tsinghua.edu.cn/pytorch-wheels/cu128

# 或者用 uv add(项目依赖管理)
uv add torch --index-url https://mirrors.tuna.tsinghua.edu.cn/pytorch-wheels/cu128

# 在 pyproject.toml 里配置好源后,直接 sync
uv sync
🤗 第四章:HuggingFace 换源
HuggingFace 模型下载慢是另一个常见痛点,官方推荐的国内镜像是 hf-mirror.com。
方法一:环境变量(推荐)
bash
# 临时(当前会话)
export HF_ENDPOINT=https://hf-mirror.com

# 永久(加入 ~/.zshrc)
echo 'export HF_ENDPOINT=https://hf-mirror.com' >> ~/.zshrc
source ~/.zshrc

# 设置好后,所有 HF 相关下载自动走镜像
# 包括:huggingface-cli / transformers / datasets / diffusers 等
方法二:代码里设置
python
import os
os.environ["HF_ENDPOINT"] = "https://hf-mirror.com"

# 必须在 import huggingface_hub 之前设置!
from transformers import AutoModelForCausalLM
model = AutoModelForCausalLM.from_pretrained("Qwen/Qwen3-7B")
huggingface-cli 下载(配合镜像)
bash
# 设置好 HF_ENDPOINT 后
HF_ENDPOINT=https://hf-mirror.com \
  huggingface-cli download Qwen/Qwen3-7B-Instruct \
  --local-dir ./models/qwen3-7b

# 开启断点续传(大模型必用)
HF_ENDPOINT=https://hf-mirror.com \
  huggingface-cli download Qwen/Qwen3-7B-Instruct \
  --local-dir ./models/qwen3-7b \
  --resume-download

# 只下载特定文件(排除不需要的)
HF_ENDPOINT=https://hf-mirror.com \
  huggingface-cli download Qwen/Qwen3-7B-Instruct \
  --local-dir ./models/qwen3-7b \
  --exclude "*.msgpack" "*.h5" "flax_model*"
hf_transfer 加速(10x 下载速度)
bash
# 安装
pip install hf_transfer

# 开启加速(配合镜像使用)
export HF_ENDPOINT=https://hf-mirror.com
export HF_HUB_ENABLE_HF_TRANSFER=1

huggingface-cli download Qwen/Qwen3-7B-Instruct --local-dir ./models
🐳 第五章:Docker / pip 镜像双重加速
如果在 Docker 里装 Python 包,需要同时换 apt 源和 pip 源:
dockerfile
FROM python:3.12-slim

# 换 apt 源(清华)
RUN sed -i 's/deb.debian.org/mirrors.tuna.tsinghua.edu.cn/g' /etc/apt/sources.list.d/debian.sources

# 配置 pip 源
RUN pip config set global.index-url https://pypi.tuna.tsinghua.edu.cn/simple \
    && pip config set global.trusted-host pypi.tuna.tsinghua.edu.cn

# 安装依赖
COPY requirements.txt .
RUN pip install -r requirements.txt --no-cache-dir

COPY . .
CMD ["python", "main.py"]
🔧 第六章:常见问题速解
问题 1:SSL 证书验证失败
bash
# 报错:SSL: CERTIFICATE_VERIFY_FAILED

# 方案1:临时跳过验证(不推荐用于生产)
pip install numpy --trusted-host pypi.tuna.tsinghua.edu.cn \
  -i https://pypi.tuna.tsinghua.edu.cn/simple

# 方案2:在 pip.conf 里永久配置 trusted-host
[global]
index-url = https://pypi.tuna.tsinghua.edu.cn/simple
trusted-host = pypi.tuna.tsinghua.edu.cn

# 方案3:更新证书(根本解决)
pip install certifi --upgrade
问题 2:换源后还是很慢 / 超时
bash
# 原因:缓存里还有旧的连接信息,或者这个源本身有问题

# 清理 pip 缓存
pip cache purge

# 换备用源试试
pip install numpy -i https://mirrors.aliyun.com/pypi/simple

# 调大超时时间
pip install numpy --timeout=300 -i https://pypi.tuna.tsinghua.edu.cn/simple

# conda 清理缓存
conda clean --all -y
问题 3:找不到包(某个镜像源没有这个包)
bash
# 部分小众包只在官方 PyPI 上有,镜像站同步有延迟

# 方案1:用 extra-index-url 同时保留官方源
pip install 罕见包 \
  -i https://pypi.tuna.tsinghua.edu.cn/simple \
  --extra-index-url https://pypi.org/simple

# 方案2:pip.conf 里同时配置两个源
[global]
index-url = https://pypi.tuna.tsinghua.edu.cn/simple
extra-index-url = https://pypi.org/simple
trusted-host = pypi.tuna.tsinghua.edu.cn
问题 4:虚拟环境里换源
bash
# 虚拟环境里的 pip 默认读取全局配置,通常不需要额外设置
# 但如果需要单独配置,在虚拟环境目录里建 pip.ini

# Linux/macOS
mkdir -p .venv/pip
cat > .venv/pip/pip.conf << 'EOF'
[global]
index-url = https://pypi.tuna.tsinghua.edu.cn/simple
EOF

# uv 管理的虚拟环境,用 pyproject.toml 里的配置
问题 5:conda 源配置后包版本冲突
bash
# 原因:channel_priority 设置问题

# 改为 flexible(更宽松的版本匹配)
conda config --set channel_priority flexible

# 或者在 .condarc 里设置
channel_priority: flexible

# 如果还是冲突,尝试单独用 conda-forge
conda install -c conda-forge 包名
问题 6:公司/学校内网,不能访问任何外网
bash
# 方案:搭建内部 PyPI 镜像(devpi / bandersnatch)

# 或者:用已有的企业内部镜像
# 向 IT 部门询问内部 PyPI/conda 地址,格式类似:
# http://nexus.company.com/repository/pypi/simple/

pip install numpy \
  -i http://nexus.company.com/repository/pypi/simple/ \
  --trusted-host nexus.company.com
📱 第七章:一键配置脚本(新机器必跑)
把这个脚本保存在 GitHub / 云端,新机器克隆下来直接跑:
bash
#!/bin/bash
# setup_mirrors.sh - 新机器一键换源脚本
# 用法:bash setup_mirrors.sh

set -e

echo "🚀 开始配置国内镜像源..."

# ── pip 换源 ──
echo "📦 配置 pip..."
pip config set global.index-url https://pypi.tuna.tsinghua.edu.cn/simple
pip config set global.trusted-host pypi.tuna.tsinghua.edu.cn
echo "✅ pip 配置完成"

# ── conda 换源(如果安装了 conda)──
if command -v conda &> /dev/null; then
    echo "🐼 配置 conda..."
    cat > ~/.condarc << 'EOF'
channels:
  - defaults

default_channels:
  - https://mirrors.tuna.tsinghua.edu.cn/anaconda/pkgs/main
  - https://mirrors.tuna.tsinghua.edu.cn/anaconda/pkgs/r
  - https://mirrors.tuna.tsinghua.edu.cn/anaconda/pkgs/free

custom_channels:
  conda-forge: https://mirrors.tuna.tsinghua.edu.cn/anaconda/cloud
  pytorch: https://mirrors.tuna.tsinghua.edu.cn/anaconda/cloud

show_channel_urls: true
channel_priority: flexible
EOF
    echo "✅ conda 配置完成"
fi

# ── uv 换源(如果安装了 uv)──
if command -v uv &> /dev/null; then
    echo "⚡ 配置 uv..."
    mkdir -p ~/.config/uv
    cat > ~/.config/uv/uv.toml << 'EOF'
[[index]]
url = "https://pypi.tuna.tsinghua.edu.cn/simple"
default = true
EOF
    echo "✅ uv 配置完成"
fi

# ── HuggingFace 镜像 ──
echo "🤗 配置 HuggingFace 镜像..."
SHELL_RC="${HOME}/.zshrc"
[ -f "${HOME}/.bashrc" ] && SHELL_RC="${HOME}/.bashrc"

# 检查是否已经配置
if ! grep -q "HF_ENDPOINT" "$SHELL_RC" 2>/dev/null; then
    echo '' >> "$SHELL_RC"
    echo '# HuggingFace 镜像' >> "$SHELL_RC"
    echo 'export HF_ENDPOINT=https://hf-mirror.com' >> "$SHELL_RC"
    echo 'export HF_HUB_ENABLE_HF_TRANSFER=1' >> "$SHELL_RC"
fi
echo "✅ HuggingFace 配置完成(重新打开终端生效)"

echo ""
echo "🎉 所有镜像源配置完成!"
echo ""
echo "当前 pip 配置:"
pip config list
🎁 速查总结(建议截图收藏)
bash
# ── pip ──
# 临时
pip install 包名 -i https://pypi.tuna.tsinghua.edu.cn/simple
# 永久
pip config set global.index-url https://pypi.tuna.tsinghua.edu.cn/simple
# PyTorch
pip install torch --index-url https://mirrors.tuna.tsinghua.edu.cn/pytorch-wheels/cu128

# ── conda ──
# 一键(直接编辑 ~/.condarc)
# 参考第二章完整配置

# ── uv ──
# 环境变量
export UV_INDEX_URL=https://pypi.tuna.tsinghua.edu.cn/simple
# 配置文件:~/.config/uv/uv.toml

# ── HuggingFace ──
export HF_ENDPOINT=https://hf-mirror.com
export HF_HUB_ENABLE_HF_TRANSFER=1

# ── 镜像地址备忘 ──
# 清华:https://pypi.tuna.tsinghua.edu.cn/simple        ← 首选
# 阿里:https://mirrors.aliyun.com/pypi/simple
# 中科大:https://pypi.mirrors.ustc.edu.cn/simple
# 华为:https://mirrors.huaweicloud.com/pypi/simple
📣 最后
如果这篇帮你解决了 pip install 卡住的问题:
- 👍 点赞 让更多被下载速度折磨的同学看到
- ⭐ 收藏 下次换新机器直接来翻脚本
- 🔔 关注 持续更新 AI 开发工具技巧,一个正在学 AI 的大学生 👨🎓
📚 相关阅读:
- 《Python 环境管理终极指南:conda vs venv vs uv,2026 年该怎么选》
- 《uv 实操:10 分钟跑通 Python 项目环境》
- 《CUDA 版本对齐踩坑全记录:torch + CUDA + cuDNN 四者版本怎么配》
- 《HuggingFace 模型下载太慢?2026 最全 4 种加速方案》