arcgis图层 · arcgis图层 · ▶ 在线运行案例
- 案例合集: 三维可视化功能案例(threehub.cn)
- 开源仓库github地址: https://github.com/z2586300277/three-cesium-examples
- 400个案例代码: 网盘链接
你将学到什么
- Scene / Camera / Renderer 标准渲染管线搭建
- 案例完整源码结构与可复用初始化模板
效果说明
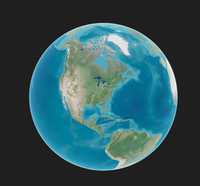
本案例演示 arcgis图层 效果:基于 WebGL 实现「arcgis图层」可视化效果,附完整可运行源码。建议先打开文首在线案例查看动态画面,再对照下方源码逐步理解。
核心概念
- Viewer 封装地球、相机、图层与 clock;可关闭 animation/timeline 精简 UI。
实现步骤
- 创建 Viewer,配置地形/影像(若案例需要)并设置初始相机
- 在
requestAnimationFrame循环中更新状态并 render(Cesium 为viewer.render或自动渲染)
代码要点
  import * as Cesium from 'cesium'


  const box = document.getElementById('box')


  const viewer = new Cesium.Viewer(box, {


  animation: false,//是否创建动画小器件,左下角仪表


  baseLayerPicker: false,//是否显示图层选择器,右上角图层选择按钮


  baseLayer: false, // 不显示默认图层


  fullscreenButton: false,//是否显示全屏按钮,右下角全屏选择按钮


  timeline: false,//是否显示时间轴


  infoBox: false,//是否显示信息框


  })


  const url = 'https://server.arcgisonline.com/arcgis/rest/services/World_Imagery/MapServer'

  const layer = Cesium.ImageryLayer.fromProviderAsync(


  Cesium.ArcGisMapServerImageryProvider.fromUrl(url)


  )


  `viewer.imageryLayers.add(layer)
`完整源码:GitHub
小结
- 本文提供 arcgis图层 完整 Cesium.js 源码与在线 Demo,建议先运行案例再改 uniform/参数做二次实验
- 更多 Cesium.js 实战案例见 three-cesium-examples 合集 与 GitHub 开源仓库