PyTorch 学习笔记与代码实操
一、PyTorch 简介
-
定位:基于 Python 的科学计算包,服务于两类人群:
-
NumPy 替代品:利用 GPU 加速数值计算。
-
深度学习平台:兼顾灵活性与速度,支持动态计算图。
-
-
核心概念 :张量 (Tensor) ,类似于 NumPy 的
ndarray,但可运行在 GPU 上。
二、张量 (Tensor) 基础
张量就是 PyTorch 中的基本数据容器,相当于支持 GPU 和自动微分的多维数组。
1. 导入 PyTorch
import torch2. 创建张量的常用方法
| 方法 | 说明 |
|---|---|
torch.empty(shape) |
未初始化的张量 |
torch.rand(shape) |
均匀分布 [0,1) 随机初始化 |
torch.zeros(shape, dtype) |
全零张量 |
torch.tensor(data) |
从已有数据创建 |
x.new_ones(shape) |
基于 x 的 dtype/device 创建全1张量 |
torch.randn_like(x) |
形状同 x,标准正态分布随机初始化 |
torch.zeros_like(x) |
形状同 x,全零 |
代码示例:
python
# 未初始化 5x3 矩阵
x = torch.empty(5, 3)
print("empty:\n", x)

# 随机初始化
x = torch.rand(5, 3)
print("rand:\n", x)

# 全零,指定数据类型为 long
x = torch.zeros(5, 3, dtype=torch.long)
print("zeros:\n", x)

# 从列表创建
x = torch.tensor([5.5, 3])
print("from list:\n", x)

# 基于已有张量创建
x = x.new_ones(5, 3, dtype=torch.double)   # 全1,double类型
print("new_ones:\n", x)

x = torch.randn_like(x, dtype=torch.float) # 形状同 x,float类型,随机值
print("randn_like:\n", x)
3. 张量的属性
-
形状 :
x.size()返回torch.Size对象,本质是元组。 -
维度 :
x.dim() -
数据类型 :
x.dtype -
设备 :
x.device
python
print("Shape:", x.size())      # torch.Size([5, 3])
print("Dimension:", x.dim())   # 2
print("Dtype:", x.dtype)       # torch.float32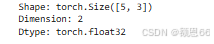
三、张量的基本操作
1. 加法运算
python
y = torch.rand(5, 3)

# 方法1: 运算符 +
result1 = x + y
print("x + y:\n", result1)

# 方法2: torch.add()
result2 = torch.add(x, y)
print("torch.add(x, y):\n", result2)

# 方法3: 指定输出张量
result3 = torch.empty(5, 3)
torch.add(x, y, out=result3)
print("out result:\n", result3)

# 方法4: in-place 加法 (会改变 y)
y.add_(x)
print("y after add_:\n", y)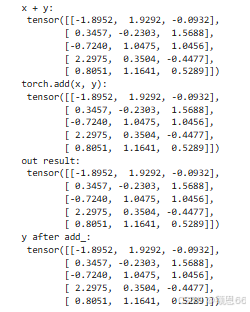
注意 :任何会改变张量的操作都有
_后缀,如add_、copy_、t_。
2. 索引与切片
与 NumPy 类似,支持冒号索引。
python
# 取第 1 列(所有行)
print(x[:, 1])
3. 改变形状 -- view()
python
x = torch.randn(4, 4)
y = x.view(16)          # 展平为一维
z = x.view(-1, 8)       # -1 自动推导,变成 2x8
print(x.size(), y.size(), z.size())   # torch.Size([4,4]) torch.Size([16]) torch.Size([2,8])
4. 取出张量中的数值(标量)
若张量只有一个元素,用 .item() 取出 Python 数值。
python
x = torch.tensor([3.14])
print(x.item())   # 3.14
四、完整实操代码(可复制运行)
python
# -*- coding: utf-8 -*-
import torch

print("="*40)
print("1. 创建张量")
print("="*40)

# 未初始化
a = torch.empty(2, 3)
print("empty(2,3):\n", a)

# 随机初始化
b = torch.rand(2, 3)
print("rand(2,3):\n", b)

# 全零
c = torch.zeros(2, 3, dtype=torch.long)
print("zeros(2,3,long):\n", c)

# 从数据创建
d = torch.tensor([[1,2],[3,4]])
print("tensor([[1,2],[3,4]]):\n", d)

# 基于已有张量创建
e = d.new_ones(2, 3, dtype=torch.double)
print("new_ones:\n", e)

f = torch.randn_like(e, dtype=torch.float)
print("randn_like:\n", f)

print("\n" + "="*40)
print("2. 张量属性")
print("="*40)
print("f.size():", f.size())
print("f.dim():", f.dim())
print("f.dtype:", f.dtype)

print("\n" + "="*40)
print("3. 加法操作")
print("="*40)
x = torch.rand(2, 3)
y = torch.rand(2, 3)
print("x:\n", x)
print("y:\n", y)

# 加法方式1
z1 = x + y
print("x + y:\n", z1)

# 加法方式2
z2 = torch.add(x, y)
print("torch.add(x,y):\n", z2)

# 加法方式3 (指定输出)
out = torch.empty(2, 3)
torch.add(x, y, out=out)
print("out result:\n", out)

# in-place 加法
y.add_(x)
print("y.add_(x) -> y:\n", y)

print("\n" + "="*40)
print("4. 索引与切片")
print("="*40)
print("x 的第 1 列:", x[:, 1])

print("\n" + "="*40)
print("5. 改变形状 (view)")
print("="*40)
mat = torch.randn(4, 4)
flat = mat.view(16)
reshaped = mat.view(-1, 8)
print("原始形状:", mat.size())
print("view(16):", flat.size())
print("view(-1,8):", reshaped.size())

print("\n" + "="*40)
print("6. 标量取值 item()")
print("="*40)
scalar = torch.tensor(9.99)
print("scalar =", scalar)
print("scalar.item() =", scalar.item())
五、要点速记
| 概念 | 说明 |
|---|---|
torch.Tensor |
默认张量类型(float32) |
dtype |
可选 torch.long, torch.double, torch.float 等 |
view() |
重塑张量,共享内存(高效) |
item() |
取出标量张量的 Python 值 |
_ 后缀 |
in-place 操作,如 y.add_(x) |
| GPU 支持 | 用 .cuda() 将张量移到 GPU |
运行以上代码,即可掌握 PyTorch 张量的核心操作。