导读:以一个简易新闻系统的开发实例,分别用4种框架实现。实现零基础入门Node.js、微信小程序、Vue.js、React等前端框架技术。
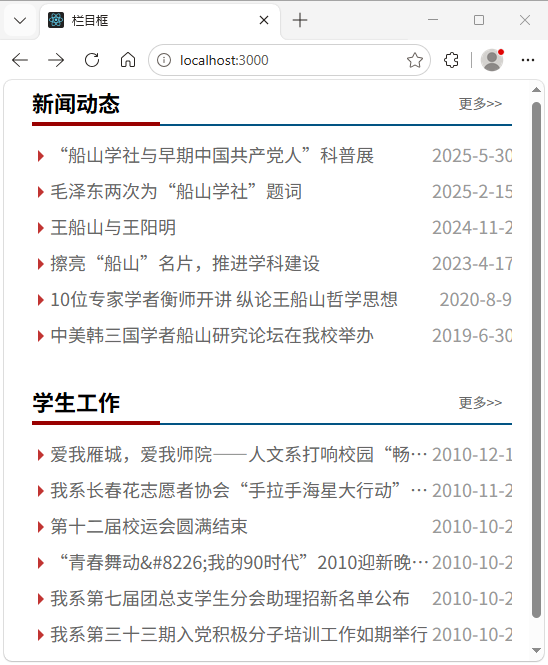
图1 网页版新闻系统列表页
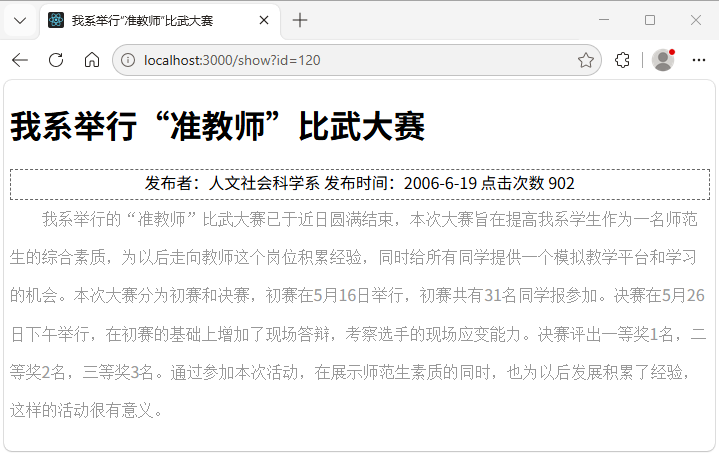
图2 网页版新闻系统详情页
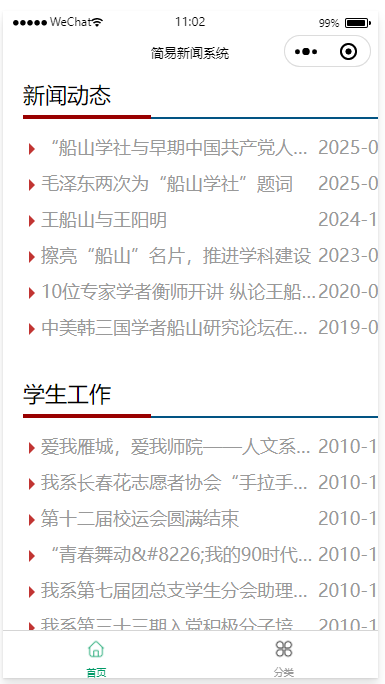
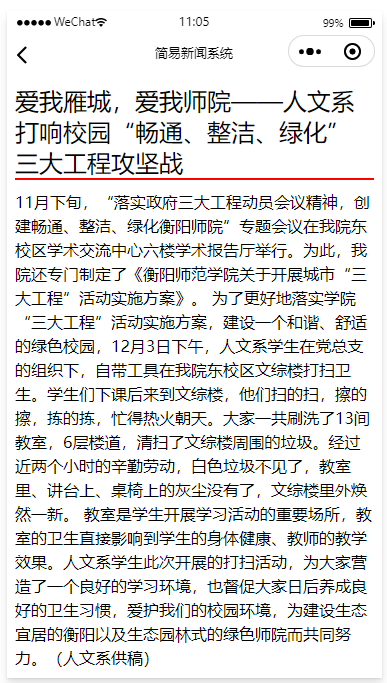
图3 微信小程序端新闻列表页 图4 微信小程序新闻详情页
1. Node.js+Express
思路:在 Node.js 的路由处理函数中渲染模板,并将数据发送给模板。在模板文件中绑定数据。
· routes/index.js文件的代码
var express = require('express');
var router = express.Router();
const conn = require('../db');
router.get('/', function(req, res, next) { //处理首页的路由,发送两个栏目框的数据给模板
var query = 'select * from news order by id desc limit 6';
conn.query(query, function(err, rows, fields){
var title = rows;
var query2 = "select * from news where BigClassName='学生工作' order by id desc limit 6";
conn.query(query2, function(err, rows, fields){
var title2 = rows;
res.render('lm', { title: title,title2:title2, formatD:formatD });
});
});
});
router.get('/show', function(req, res, next) { //处理内容页的路由,发送一条记录的数据给模板
var articleID = req.query.id; //获取首页传来的文章ID
var qry = 'SELECT * FROM news WHERE ID=' + conn.escape(articleID);
conn.query(qry, function(err, rows, fields) {
var qry2 = 'UPDATE news SET hits=hits+1 WHERE ID=' + conn.escape(articleID);
var article = rows0;
console.log(article);
conn.query(qry2, function(err, rows, fields) {
article.infotime = formatD(article.infotime);
res.render('show', { article: article });
});
});
});
module.exports = router;
·views/lm.ejs文件的代码
<div class="news">
<div class="title">
<h2>新闻动态</h2>
<span class="more"><a href="more.htm">更多>></a></span>
</div>
<ul class="list_one">
<% for(let i=0; i<title.length;i++) { %>
<li><a href="show?id=<%= titlei.ID %>"><%= titlei.title %></a>
<b><%= formatD(titlei.infotime) %></b></li>
<% } %>
</ul>
</div>
<div class="news">
<div class="title">
<h2><%= title20.BigClassName %></h2>
<span class="more"><a href="more.htm">更多>></a></span>
</div>
<ul class="list_one">
<% for(let i=0; i<title2.length;i++) { %>
<li><a href="show?id=<%= title2i.ID %>"><%= ellipsee(title2i.title,18) %></a>
<b><%= formatD(title2i.infotime) %></b></li>
<% } %>
</ul>
</div>
·views/show.ejs文件的代码
<body style="width:700px; margin:20px auto;">
<h1><%= article.title %></h1>
<div style="border: 1px dashed #666; height:1.8em; text-align:center">
发布者:<%= article.user %> 发布时间:<%= article.infotime %> 点击次数 <%= article.hits %>
</div>
<div style="font-size: 16px; color:#999"><%- article.content %> </div>
</body>
2. 微信小程序实现简易新闻系统
微信小程序、Vue.js和React访问Node.js后端输出的数据,都可以实现前后端分离的架构。在前后端分离架构下,后端的Node.js程序完全一样,其思路是输出json数据给前端。
1. 后端程序
将routes/index.js文件的代码修改如下:
router.get('/', function(req, res, next) {
var query = 'select * from news order by id desc limit 6';
conn.query(query, function(err, rows, fields) {
var title = rows;
var query2 = "select * from news where BigClassName='学生工作' order by id desc limit 6";
conn.query(query2, function(err, rows, fields) {
var title2 = rows;
var titall = ...title, ...title2;
res.send(titall);
});
});
});
router.get('/show', function(req, res, next) {
let id = req.query.id;
var query = 'select * from news where id=' + id;
conn.query(query, function(err, rows, fields) {
var title = rows0;
console.log(rows);
res.send(title);
});
});
2. 微信小程序端的代码
index/index.js文件
Page({
onLoad: function (options) {
this.getList()
},
getList: function () {
var _self = this
wx.request({
url: 'http://localhost:3000', //请求的Node.js端网址
methods: 'GET',
success: function (res) {
console.log(res.data); //用于测试
_self.setData({
title: res.data.splice(0,6), //将返回的数组前半赋值给title
title2: res.data.splice(0,6) //将返回的数组后半赋值给title2
});
}
})
},
seeDetail:function(e){ //跳转到新闻详情页
var Id = e.currentTarget.id;
wx.navigateTo({
url: '../show/show?Id=' + Id,
//url: '../show/show/' + Id,
})
}
})
index/index.wxml文件
<view class="news">
<view class="title">
<view>新闻动态</view>
<text class="more"><a href="more.htm">更多>></a></text>
</view>
<view class="list_one">
<view id="{{ titlei.ID }}" wx:for="{{title}}" wx:for-index="i" wx:key="id" bindtap='seeDetail'>
<a href="show?id={{ titlei.ID }}">{{ titlei.title }}</a> <b>{{ titlei.infotime }}</b></view>
</view>
</view>
<view class="news">
<view class="title">
<view>{{ title20.BigClassName }}</view>
<text class="more"><a href="list?type={{ title20.BigClassName }}">
更多>></a></text>
</view>
<view class="list_one">
<view id="{{ title2i.ID }}" wx:for="{{title2}}" wx:for-index="i" wx:key="id" bindtap='seeDetail'>
<a href="show?id={{ title2i.ID }}">{{ title2i.title }}</a><b>{{ title2i.infotime }}</b></view>
</view>
</view>
show/show.js文件
var Id
const { stripHtml } = require('../func/func.js');
Page({
data: { },
onLoad: function(options) {
Id = options.Id
console.log(options)
this.loadDetail()
},
loadDetail: function() {
if (Id != "") {
var _self = this;
wx.request({
url: 'http://localhost:3000/show?id=' + Id, //发送Id给后端程序
method: 'GET',
success: function(res) {
var title = res.data;
title.content=stripHtml(title.content);
_self.setData({title: title });
}
})
}
},
})
show/show.wxml文件
<view class="header">{{title.title}}</view>
<view class="content">{{title.content}}</view>
3. Vue前端实现新闻系统
本例采用Vue构建模式,将HTML代码写在<template>中,CSS代码写在<style>中,JavaScript代码写在export default {}中。
1. 新闻列表页的实现:App.vue
<script>
import axios from 'axios';
export default {
created() { //页面载入时执行
this.getbooks();
},
data() {
return {
title: \[\],
title2: \[\]
}
},
methods: {
getbooks() {
var self = this;
axios.get('http://localhost:3000', {
params: { }
}).then(function(response) {
self.title = response.data.splice(0, 6);
self.title2 = response.data.splice(0, 6);
//console.log(response.status);
//console.log(self.title);
}).catch(function(error) {
console.log('请求失败:' + error.status + ',' + error.statusText);
});
},
}
}
</script>
<template>
<div class="news">
<div class="title">
<h2>新闻动态</h2>
<span class="more"><a href="more.htm">更多>></a></span>
</div>
<ul class="list_one">
<li v-for="(item,index) in title" :key="index">
<a :href="'show?id='+item.ID">{{ item.title }}</a><b>{{ item.infotime }}</b>
</li>
</ul>
</div>
<div class="news">
<div class="title">
<h2>新闻动态</h2>
<span class="more"><a href="more.htm">更多>></a></span>
</div>
<ul class="list_one">
<li v-for="(item,index) in title2" :key="index">
<a :href="'show?id='+item.ID">{{ item.title }}</a><b>{{ item.infotime }}</b>
</li>
</ul>
</div>
</template>
<style>
.news {
width: 480px;
margin-left: 20px;
}
.title {
height: 40px;
line-height: 40px;
/*设置标题栏高度并使内容垂直居中*/
border-bottom: 2px solid #025483;
padding-bottom: 2px;
display: flex;
justify-content: space-between;
}
.title h2 {
height: 40px;
/*标题左浮动*/
font-size: 22px;
color: #000;
border-bottom: 4px solid #900;
padding-right: 40px;
margin: 0;
/*去掉h2标记的默认上下边界*/
}
.title .more {
display: block;
height: 22px;
padding-right: 10px;
}
/*"更多"右边保留一点间距*/
.more a {
font-size: 14px;
text-decoration: none;
color: #666;
}
.list_one {
min-height: 245px;
/*设置内容区域的最小高度*/
margin-top: 10px;
/*设置第一条新闻上面的间隙*/
}
.list_one li {
line-height: 36px;
height: 36px;
/*垂直居中*/
color: #999;
font-size: 18px;
padding-left: 6px;
text-overflow: ellipsis;
/*文本溢出则裁切*/
white-space: nowrap;
/*强制不换行*/
overflow: hidden;
/*溢出内容隐藏*/
display: flex;
justify-content: space-between;
}
.list_one li::before {
display: inline-block;
content: "";
width: 0;
height: 0;
border: 6px solid transparent;
border-left-color: #c13432;
margin-top: 14px;
}
.list_one li a {
flex-grow: 1;
text-overflow: ellipsis;
/*文本溢出则裁切*/
white-space: nowrap;
/*强制不换行*/
overflow: hidden;
/*溢出内容隐藏*/
}
.list_one li b {
font-weight: normal;
width: 80px;
text-align: right;
}
</style>
提示:要修改Vue项目的端口号,修改项目目录下以下2处即可:在package.json中,把"dev": "vite --port 5173",
在vite.config.js中,添加:
export default defineConfig({
plugins: vue(),
server: {
port: 5173 // 将端口改为5173
}
})
2. 添加路由实现新闻列表页和新闻详情页。
(1 )src/App.vue
<template>
<div id="app">
<router-view></router-view>
</div>
</template>
(2 )router/index.js
import { createRouter, createWebHistory } from 'vue-router'
const routes = [
{
path: '/',
name: 'NewsList',
component: () => import('../views/NewsList.vue')
},
{
path: '/news/:id',
name: 'NewsDetail',
component: () => import('../views/NewsDetail.vue')
}
]
const router = createRouter({
history: createWebHistory(),
routes
})
export default router
(3) views/NewsList.vue
<template>
<div class="news">
<div class="title">
<h2>新闻动态</h2>
<span class="more"><a href="more.htm">更多>></a></span>
</div>
<ul class="list_one">
<li v-for="(item,index) in title" :key="index">
<router-link :to="'/news/' + item.ID">{{ item.title }}</router-link><b>{{ item.infotime }}</b>
</li>
</ul>
</div>
<div class="news">
<div class="title">
<h2>{{title20.title}}</h2>
<span class="more"><a href="more.htm">更多>></a></span>
</div>
<ul class="list_one">
<li v-for="(item,index) in title2" :key="index">
<router-link :to="'/news/' + item.ID">{{ item.title }}</router-link> <b>{{ item.infotime }}</b>
</li>
</ul>
</div>
</template>
其他代码与上一节中App.vue的代码完全相同。特别注意:虽然**<router-link>**标签中传递ID是采用的路由参数形式,但Vue会截获该路由,委托给axios传递参数给后端程序,而axios传递id参数时会采用url参数的形式,因此后端程序必须使用req.query.id方式获取参数。
特别注意:
(4)views/NewsList.vue
<script>
import axios from 'axios';
export default {
created() {
this.getNewsDetail();
},
data() {
return {
news: null,
isLoading: true
}
},
methods: {
getNewsDetail() {
this.isLoading = true;
var self = this;
axios.get('http://localhost:3000/news', {
params: { id: this.$route.params.id }
}).then(function(response) {
self.news = response.data;
self.isLoading = false;
}).catch(function(error) {
console.log('请求失败:' + error.status + ',' + error.statusText);
self.isLoading = false;
});
}
}
}
</script>
<template>
<div class="detail-page">
<router-link to="/" class="back-link">← 返回新闻列表</router-link>
<div v-if="isLoading" class="loading">
加载中...
</div>
<div v-else-if="news" class="detail-content">
<h1 class="detail-title">{{ news.title }}</h1>
<div class="detail-meta">
<span class="detail-time">{{ news.infotime }}</span>
</div>
<div class="detail-body" v-html="news.content"></div>
</div>
<div v-else class="not-found">
新闻不存在
</div>
</div>
</template>
<style scoped>
.detail-page {
width: 80%;
margin: 20px auto;
padding: 20px;
background: #fff;
box-shadow: 0 2px 10px rgba(0,0,0,0.1);
}
.back-link {
display: inline-block;
padding: 8px 16px;
background: #025483;
color: #fff;
border-radius: 4px;
font-size: 14px;
margin-bottom: 20px;
text-decoration: none;
}
.back-link:hover {
background: #013a5c;
}
.loading {
text-align: center;
padding: 50px;
color: #999;
}
.detail-content {
line-height: 1.8;
}
.detail-title {
font-size: 28px;
color: #000;
margin-bottom: 20px;
padding-bottom: 10px;
border-bottom: 1px solid #eee;
}
.detail-meta {
color: #999;
font-size: 14px;
margin-bottom: 20px;
}
.detail-body {
font-size: 16px;
color: #333;
}
.detail-body img {
max-width: 100%;
height: auto;
margin: 10px 0;
}
.detail-body p {
margin-bottom: 1em;
}
.not-found {
text-align: center;
padding: 50px;
color: #999;
font-size: 18px;
}
</style>
4. React实现新闻系统前端
本例中列表页对应NewsList()组件,新闻详情页对应NewsDetail组件。在根组件App中定义到这两个组件的路由。
src/App.js代码
import './style.css';
import React, { useState, useEffect } from 'react';
import { Routes, Route, Link } from 'react-router-dom';
import axios from 'axios';
import NewsDetail from './components/NewsDetail';
function NewsList() {
const data, setData = useState(\[\]);
const data2, setData2 = useState(\[\]);
useEffect(() => {
const fetchData = async () => {
const result = await axios('http://localhost:3000');
console.log(result.data);
setData(result.data.splice(0,6));
setData2(result.data.splice(0,6));
};
fetchData();
}, \[\]);
return (
<>
<div className="news">
<div className="title">
<h2>新闻动态</h2>
<span className="more"><a href="more.htm">更多>></a></span>
</div>
<ul className="list_one">
{data.map(item => (
<li key={item.ID}>
<Link to={`/show/${item.ID}`}>{item.title}</Link>
<b>{item.infotime}</b>
</li>
))}
</ul>
</div>
<div className="news">
<div className="title">
<h2>新闻动态</h2>
<span className="more"><a href="more.htm">更多>></a></span>
</div>
<ul className="list_one">
{data2.map(item => (
<li key={item.ID}>
<Link to={`/show/${item.ID}`}>{item.title}</Link>
<b>{item.infotime}</b>
</li>
))}
</ul>
</div>
</>
);
}
function App() {
return (
<div className="app">
<Routes>
<Route path="/" element={<NewsList />} />
<Route path="/show/:id" element={<NewsDetail />} />
</Routes>
</div>
);
}
export default App;
src\components\NewsDetail.js
import { useState, useEffect } from 'react';
import { useParams, Link } from 'react-router-dom';
import axios from 'axios';
function NewsDetail() {
const { id } = useParams();
const news, setNews = useState(null);
const loading, setLoading = useState(true);
const error, setError = useState(null);
useEffect(() => {
const fetchNews = async () => {
try {
const result = await axios(`http://localhost:3008/show?id=${id}\`);
setNews(result.data);
setLoading(false);
} catch (err) {
setError(err.message);
setLoading(false);
}
};
fetchNews();
}, id);
if (!news) {
return <div className="news-detail">未找到该新闻</div>;
}
return (
<div className="news-detail">
<Link to="/" className="back-link">← 返回列表</Link>
<h1 className="news-title">{news.title}</h1>
<div className="news-meta">
<span className="news-time">{news.infotime}</span>
</div>
<div className="news-content" dangerouslySetInnerHTML={{ __html: news.content }}></div>
</div>
);
}
export default NewsDetail;