文章目录
GraphAPI之Node(节点)
定义
在LangGraph中,节点Node就是是Python函数(可以是同步的,也可以是异步的),它们接受以下参数;
- state:图的状态
- confg:一个RunnableConfig对象,包含诸如thread_id之类的配置信息以及诸如tags之类的跟踪信息
- runtime:一个Runtime对象,包含运行时context以及其他信息,如store和stream_witer
定义好node函数后,使用add_node方法将这些节点添加到图中。如果在向图中添加节点时来指定名称,系统会为其分配一个与函数名相同的默认名称。
Node是LangGraph中的一个基本处理单元,代表工作流中的一个操作步骤 ,可以是一个agent、调用大模型、工具或一个函数(说白了就是绑定一个python函数,具体逻辑可以干任何事情)
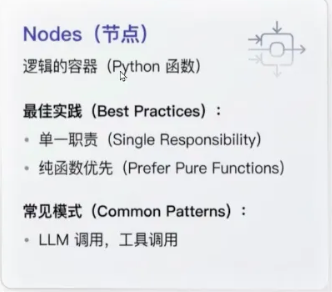
设计原则:
- 单一职责原则:每个节点应该只负责一项职责,避免功能过于复杂
- 无状态设计:节点本身不应该保存状态,所有数据都通过输入状态传递
- 幂等性:相同的输入应该产生相同的输出,确保可重试性
- 可测试性:节点逻辑应该易于单元测试
特殊节点:
__START__节点:开始节点,确定应该首先先调用哪些节点
__END__节点:终止节点,表示后续没有其他节点可以继续执行了
graph.set_entry_point("node_start") == graph.add_edge(START, "node_start")
graph.set_finish_point("node_end") == graph.add_edge("node_end", END)
节点缓存
是什么
LangGraph支持基于节点输入对任务/节点进行缓存。使用缓存的方法如下:
- 编译图(或指定入口点)时指定缓存。
- 为节点指定缓存策略,每个缓存策略支持
- key_func:用于根据节点的输入生成缓存键。
- tt:即缓存的生存时间(以秒为单位)。如果未指定,缓存将永不过期。
特性
- 缓存键与命中
当一个节点开始执行时,系统会使用其配置的key_func根据当前节点的输入数据生成一个唯一的键,LangGraph会检查缓存中是否存在这个键。
如果存在(缓存命中),则直接返回之前存储的结果,跳过该节点的实际执行。
如果不存在(缓存未命中),则正常执行节点函数,并将结果与缓存键关联后存入缓存。
- 缓存有效期
ttl参数能控制缓存的有效期。例如,对于依赖实时数据的天气查询节点,可以设置较短的ttl如60秒)。而对于处理静态信息或变化不频繁数据的节点,则可以设置较长的tt甚至不设置(None),让缓存永久有效,直到手动清除
案例:
java
import time

from langgraph.cache.memory import InMemoryCache
from langgraph.graph import StateGraph
from langgraph.types import CachePolicy
from typing_extensions import TypedDict


# 1.定义状态类,业务实体
class State(TypedDict):
    x: int
    result: int


# 2.定义节点(略)
def node_1(state: State) -> dict[str, int]:
    time.sleep(3)
    return {"result": state["x"] * 2}


# 3.构建图
graph = StateGraph(State)
graph.add_node(node="node1", action=node_1, cache_policy=CachePolicy(ttl=8))
graph.set_entry_point("node1")
graph.set_finish_point("node1")

# 4.编译,指定内存缓存
app = graph.compile(cache=InMemoryCache())

# 5.第一次运行,无缓存:3s返回结果
print("第一次开始运行:无缓存")
result = app.invoke({"x": 2})
print(f'第一次运行结果: {result}')

# 6.第二次运行,有缓存: 0.1s返回结果
print("第二次开始运行:有缓存")
result = app.invoke({"x": 2})
print(f'第二次运行结果: {result}')

# 7.第三次运行,等待缓存过期
time.sleep(5)
print("第三次开始运行:缓存过期")
result = app.invoke({"x": 2})
print(f'第三次运行结果: {result}')
错误处理与重试机制
定义:
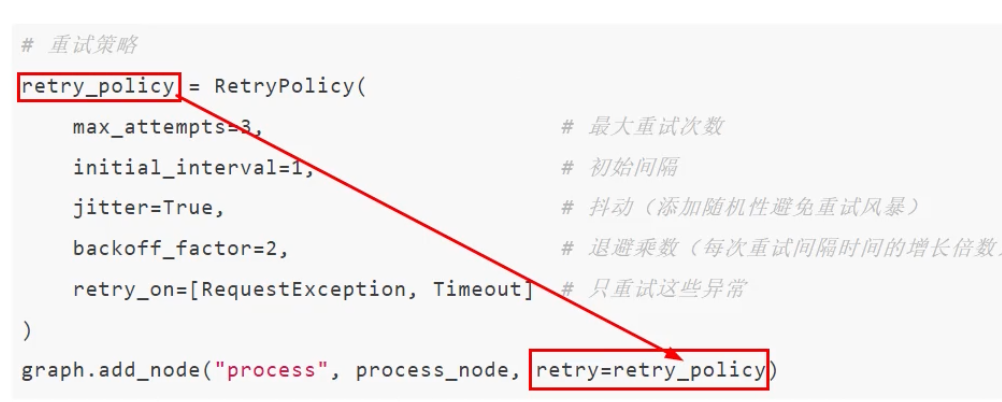
LangGraph还提供了错误处理和重试机制来指定重试次数、重试间隔、重试异常等,用于保证系统的可靠性。
为节点添加重试策略,需要在add_node中设置retry_policy参数。retry_policy参数接受一个RetryPolicy命名元组对象。默认情况下,retry_on参数使用default_retry_on函数,该函数会在遇到任何异常时重试。
案例:
java
from langgraph.constants import END
from langgraph.constants import START
from langgraph.graph import StateGraph
from langgraph.types import RetryPolicy
from typing_extensions import TypedDict, Any


# 节点重试策略:默认重试策略、自定义重试策略、不可重试策略
# 1.定义状态类
class State(TypedDict):
    result: int


global_counter = 0  # 全局计数器:记录API重试次数


# 工具函数:生成图的编译
def build_retry_graph(node_name: str, node_func, retry_policy: RetryPolicy):
    graph = StateGraph(State)
    graph.add_node(node_name, node_func, retry_policy=retry_policy)
    graph.add_edge(START, node_name)
    graph.add_edge(node_name, END)
    return graph.compile()


# 2.定义节点:模拟不稳定的API调用
def unstable_api_call(state: State) -> dict[str, Any]:
    """模拟不稳定的API调用:前2次调用失败,第三次调用成功"""
    global global_counter
    global_counter += 1
    print(f'第 {global_counter} 次调用unstable_api_call')
    if global_counter < 3:
        raise Exception("模拟API调用失败")
    return {"result": f'API调用成功,经过了 {global_counter} 次尝试'}


# 3.定义节点:模拟抛出ValueError异常
def value_error_call(state: State) -> dict[str, int]:
    raise ValueError("模拟抛出ValueError异常")


# 测试1:默认重试策略
def test_default_retry_strategy():
    global global_counter
    print("1.默认重试策略:对除了特定异常的所有异常进行重试")
    print("不会重试的异常:ValueError、TypeError、ImportError")
    global_counter = 0
    app = build_retry_graph(
        node_name="unstable_api_call",
        node_func=unstable_api_call,
        retry_policy=RetryPolicy(max_attempts=5)
    )
    try:
        result = app.invoke({"result": ""})
        print(f'result: {result}')
    except Exception as e:
        print(e)


# 测试2:自定义重试策略(输出完全匹配异常)
# 自定义重试条件判断
def custom_retry_on(exception: Exception) -> bool:
    """自定义重试条件判断:只对包含【模拟API调用失败】的异常重试"""
    err_msg = str(exception)
    if "模拟API调用失败" in err_msg:
        return True
    return False

def test_custom_retry_strategy():
    global global_counter
    print("2.自定义重试策略:只对包含【模拟API调用失败】的异常进行重试")
    global_counter = 0
    app = build_retry_graph(
        node_name="unstable_api_call",
        node_func=unstable_api_call,
        retry_policy=RetryPolicy(max_attempts=5, retry_on=custom_retry_on)
    )
    try:
        result = app.invoke({"result": ""})
        print(f'result: {result}')
    except Exception as e:
        print(e)


# 测试3:不可重试策略
def test_no_retry_strategy():
    print("3.不可重试策略:对ValueError异常不进行重试")
    app = build_retry_graph(
        node_name="value_error_call",
        node_func=value_error_call,
        retry_policy=RetryPolicy(max_attempts=5)
    )
    try:
        result = app.invoke({"result": ""})
        print(f'result: {result}')
    except Exception as e:
        print(e)


if __name__ == '__main__':
    # test_default_retry_strategy()
    # test_custom_retry_strategy()
    test_no_retry_strategy()
GraphAPI之Edge(边)
定义
Edge定义了节点之间的连接和执行顺序,以及不同节点之间是如何通讯的,一个节点可以有多个出边(指向多个节点),多个节点也可以指向同一个节点(Map-Reduce)

关键类型
- 普通边(Normal Edges)
如果你想总是从节点A到节点B,你可以直接使用add_edge方法.
graph.add_edge("node_A", "node_B")
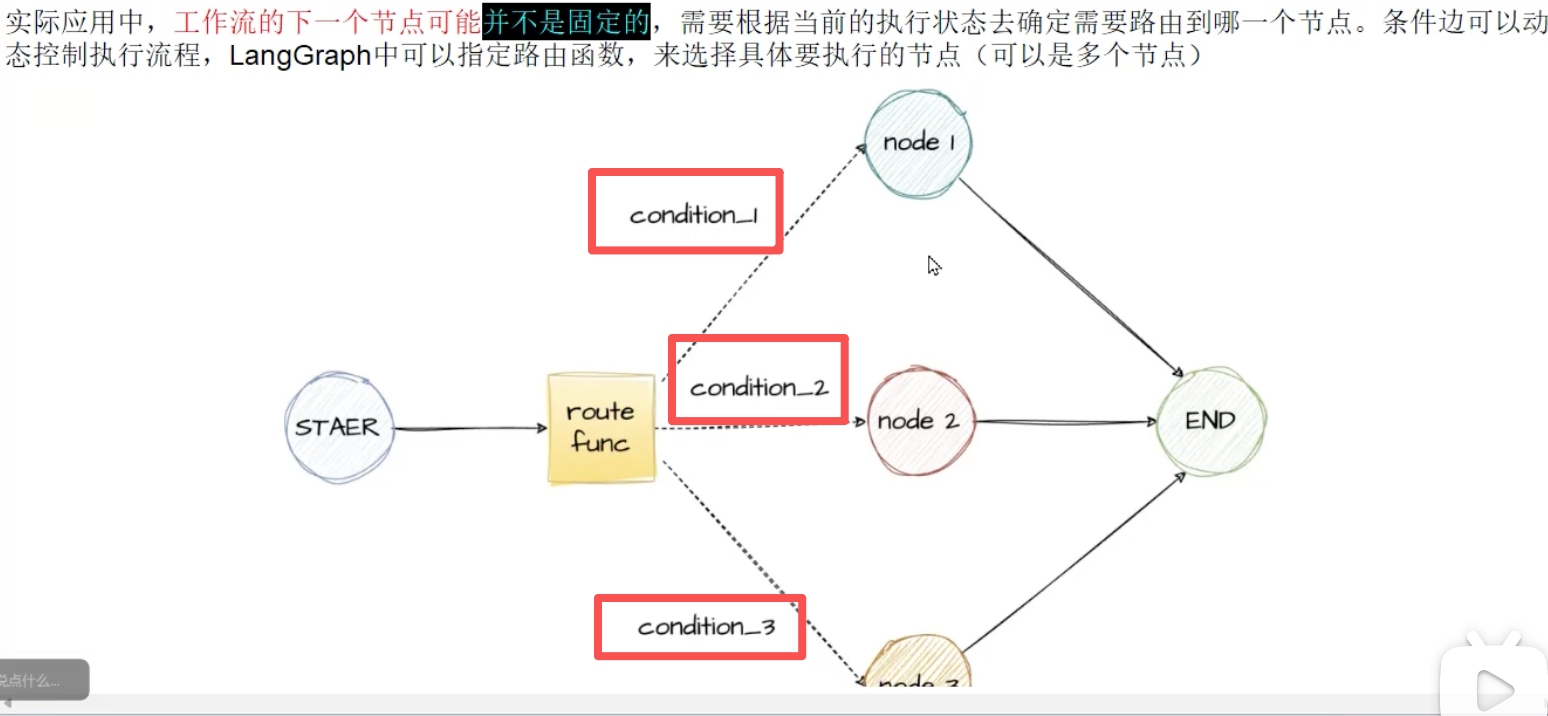
- 条件边(Conditional Edges)
如果你想选择性地 路由到一个或多个边(或选择性地终止),你可以使用 add_conditional edges 方法。此方法接受一个节点名称和一个在该节点执行后调用的"路由函数"。
graph.add_conditional_edges("node_a", routing_function)
默认情况下,routing_function的返回值用作下一个要发送状态的节点(或节点列表)的名称。所有这些节点都将在下一个超级步骤中并行运行。
graph.add_conditional_edges("node_a", routing_function, {True: "node_b", False: "node_c"})
- 入口点(Entry Point)
入口点是图启动时运行的第一个节点。可以使用 add_edge方法从虚拟** START **节点到要执行的第一个节点,以指定图的入口。
graph.add_edge(START, "node_a")
graph.set_entry_point("node_a")
- 条件入口点(Conditional Entry Point)
条件入口点允许你根据自定义逻辑从不同的节点开始。你可以使用虚拟节点的START节点的add_conditional_edges来实现此功能。
graph.add_conditional_edges(START,routing_function)
graph.add_conditional_edges(START, routing_function, {True: "node_b", False: "node_c"})
案例
- 条件边(Conditional Edges)
java
from typing import TypedDict, Optional

from langgraph.constants import START, END
from langgraph.graph import StateGraph


# 1. 定义State
class MyState(TypedDict):
    x: int
    result: Optional[str]


# 2.1定义节点1
def add_1(state: MyState) -> MyState:
    print(f'Adding 1: {state["x"]}')
    return MyState(x=state["x"] + 1)


# 2.2定义节点2
def add_2(state: MyState) -> MyState:
    print(f'Adding 2: {state["x"]}')
    return MyState(x=state["x"] + 2)


# 2.3定义节点3
def add_3(state: MyState) -> MyState:
    print(f'Adding 3: {state["x"]}')
    return MyState(x=state["x"] + 3)


# 3.定义路由函数
def route_by_sentiment(state: MyState) -> str:
    flag = state["x"]
    if flag == 1:
        return "add_1"
    elif flag == 2:
        return "add_2"
    else:
        return "add_3"


# 4.构建图Graph
graph = StateGraph(MyState)
graph.add_node("add_1", add_1)
graph.add_node("add_2", add_2)
graph.add_node("add_3", add_3)
# 4.1 添加条件边
graph.add_conditional_edges(START, route_by_sentiment, {
    "add_1": "add_1",
    "add_2": "add_2",
    "add_3": "add_3"
})
graph.add_edge("add_1", END)
graph.add_edge("add_2", END)
graph.add_edge("add_3", END)

# 5.编译
app = graph.compile()

# 6.运行
result_1 = app.invoke({"x": 1})
print(f"Result 1: {result_1}")
result_2 = app.invoke({"x": 2})
print(f"Result 2: {result_2}")
result_3 = app.invoke({"x": 3})
print(f"Result 3: {result_3}")- 条件入口点(Conditional Entry Point)
java
from typing import TypedDict

from langgraph.constants import START, END
from langgraph.graph import StateGraph


# 条件入口点:根据输入内容决定从START节点去往下一个处理节点
# 1. 定义State
class MyState(TypedDict):
    user_input: str
    content: str
    node: str


# 2.定义路由函数-决定从START节点去哪
def route_input(state: MyState) -> str:
    """根据输入内容决定从START节点去往下一个处理节点"""
    text = state["user_input"].lower()
    if "hello" in text:
        return "hello_node"
    elif "bye" in text:
        return "bye_node"
    else:
        return "default_node"


# 3.1 定义hello_node节点
def hello_node(state: MyState) -> dict:
    return {"content": "Hello!你好", "node": "hello_node"}


# 3.2 定义bye_node节点
def bye_node(state: MyState) -> dict:
    return {"content": "Bye!再见", "node": "bye_node"}


# 3.3 定义default_node节点
def default_node(state: MyState) -> dict:
    return {"content": "默认响应。", "node": "default_node"}


# 4.构建图Graph
graph = StateGraph(MyState)
graph.add_node("hello_node", hello_node)
graph.add_node("bye_node", bye_node)
graph.add_node("default_node", default_node)
graph.add_conditional_edges(
    START, # 起始节点
    route_input, # 路由函数
    { # 节点映射
        "hello_node": "hello_node",
        "bye_node": "bye_node",
        "default_node": "default_node"
    })
graph.add_edge("hello_node", END)
graph.add_edge("bye_node", END)
graph.add_edge("default_node", END)

# 5.编译
app = graph.compile()

# 6.运行
result_1 = app.invoke({"user_input": "hello"})
print(f"Result 1: {result_1}")
result_2 = app.invoke({"user_input": "bye"})
print(f"Result 2: {result_2}")
result_3 = app.invoke({"user_input": "hi"})
print(f"Result 3: {result_3}")