引言
本篇博客计划讲述一下如何下载安装CVAT,并且使用自己本地训练的YOLO模型在这个平台上对数据进行自动化标注,其中会有一些这个过程中我遇到的麻烦的记录。官网教程地址,官网是英文的,感觉网上资源不多,所以只能看官网比较可靠。
安装CVAT
这里就不介绍这个平台了(我也是想做自动化标注,所以让ai推荐的,没必要把ai输出复制过来啦~),本质上还是个标注数据的平台,似乎比较适合团队合作,有网页体验版本,用它提供的模型也可以做自动化标注,不过要收费,本地自己的模型就是免费。
下载
网址是github网址,下载之后看readme的内容,我下面写的也就是readme的内容。
clone代码
bash
git clone https://github.com/cvat-ai/cvat
cd cvat
下载配置docker
后面需要docker,这里介绍用中科大的镜像源下载docker
bash
curl -fsSL https://mirrors.ustc.edu.cn/docker-ce/linux/ubuntu/gpg | sudo gpg --dearmor -o /usr/share/keyrings/docker-archive-keyring.gpg

echo "deb [arch=$(dpkg --print-architecture) signed-by=/usr/share/keyrings/docker-archive-keyring.gpg] https://mirrors.ustc.edu.cn/docker-ce/linux/ubuntu $(lsb_release -cs) stable" | sudo tee /etc/apt/sources.list.d/docker.list > /dev/null

sudo apt update
sudo apt install -y docker-ce docker-ce-cli containerd.io docker-buildx-plugin docker-compose-plugin
下载完成之后,设置docker开机自启,以及将当前用户加入docker用户组。
bash
sudo systemctl start docker
sudo systemctl enable docker
bash
sudo usermod -aG docker $USER
newgrp docker
再配置国内镜像加速器
bash
sudo mkdir -p /etc/docker
sudo tee /etc/docker/daemon.json <<-'EOF'
{
  "registry-mirrors": [
    "https://docker.mirrors.ustc.edu.cn",
    "https://hub-mirror.c.163.com",
    "https://mirror.baidubce.com"
  ],
  "dns": ["114.114.114.114", "223.5.5.5"],
  "ipv6": false
}
EOF
重启docker使得配置失效
bash
sudo systemctl restart docker最后验证是否成功
bash
docker version
docker run hello-world
配置docker环境
在cvat文件路径下,运行下面这个命令,就可以配置这个项目的docker环境。
bash
docker compose up -d创建一个管理员帐号
bash
docker exec -it cvat_server bash -ic 'python3 ~/manage.py createsuperuser'输入这个命令之后会让你输入用户名,密码,邮箱等信息,正常填写就可以。
打开cvat
打开一个浏览器输入http://localhost:8080,然后用刚刚注册的帐号进行登陆就可以,进去之后如下图。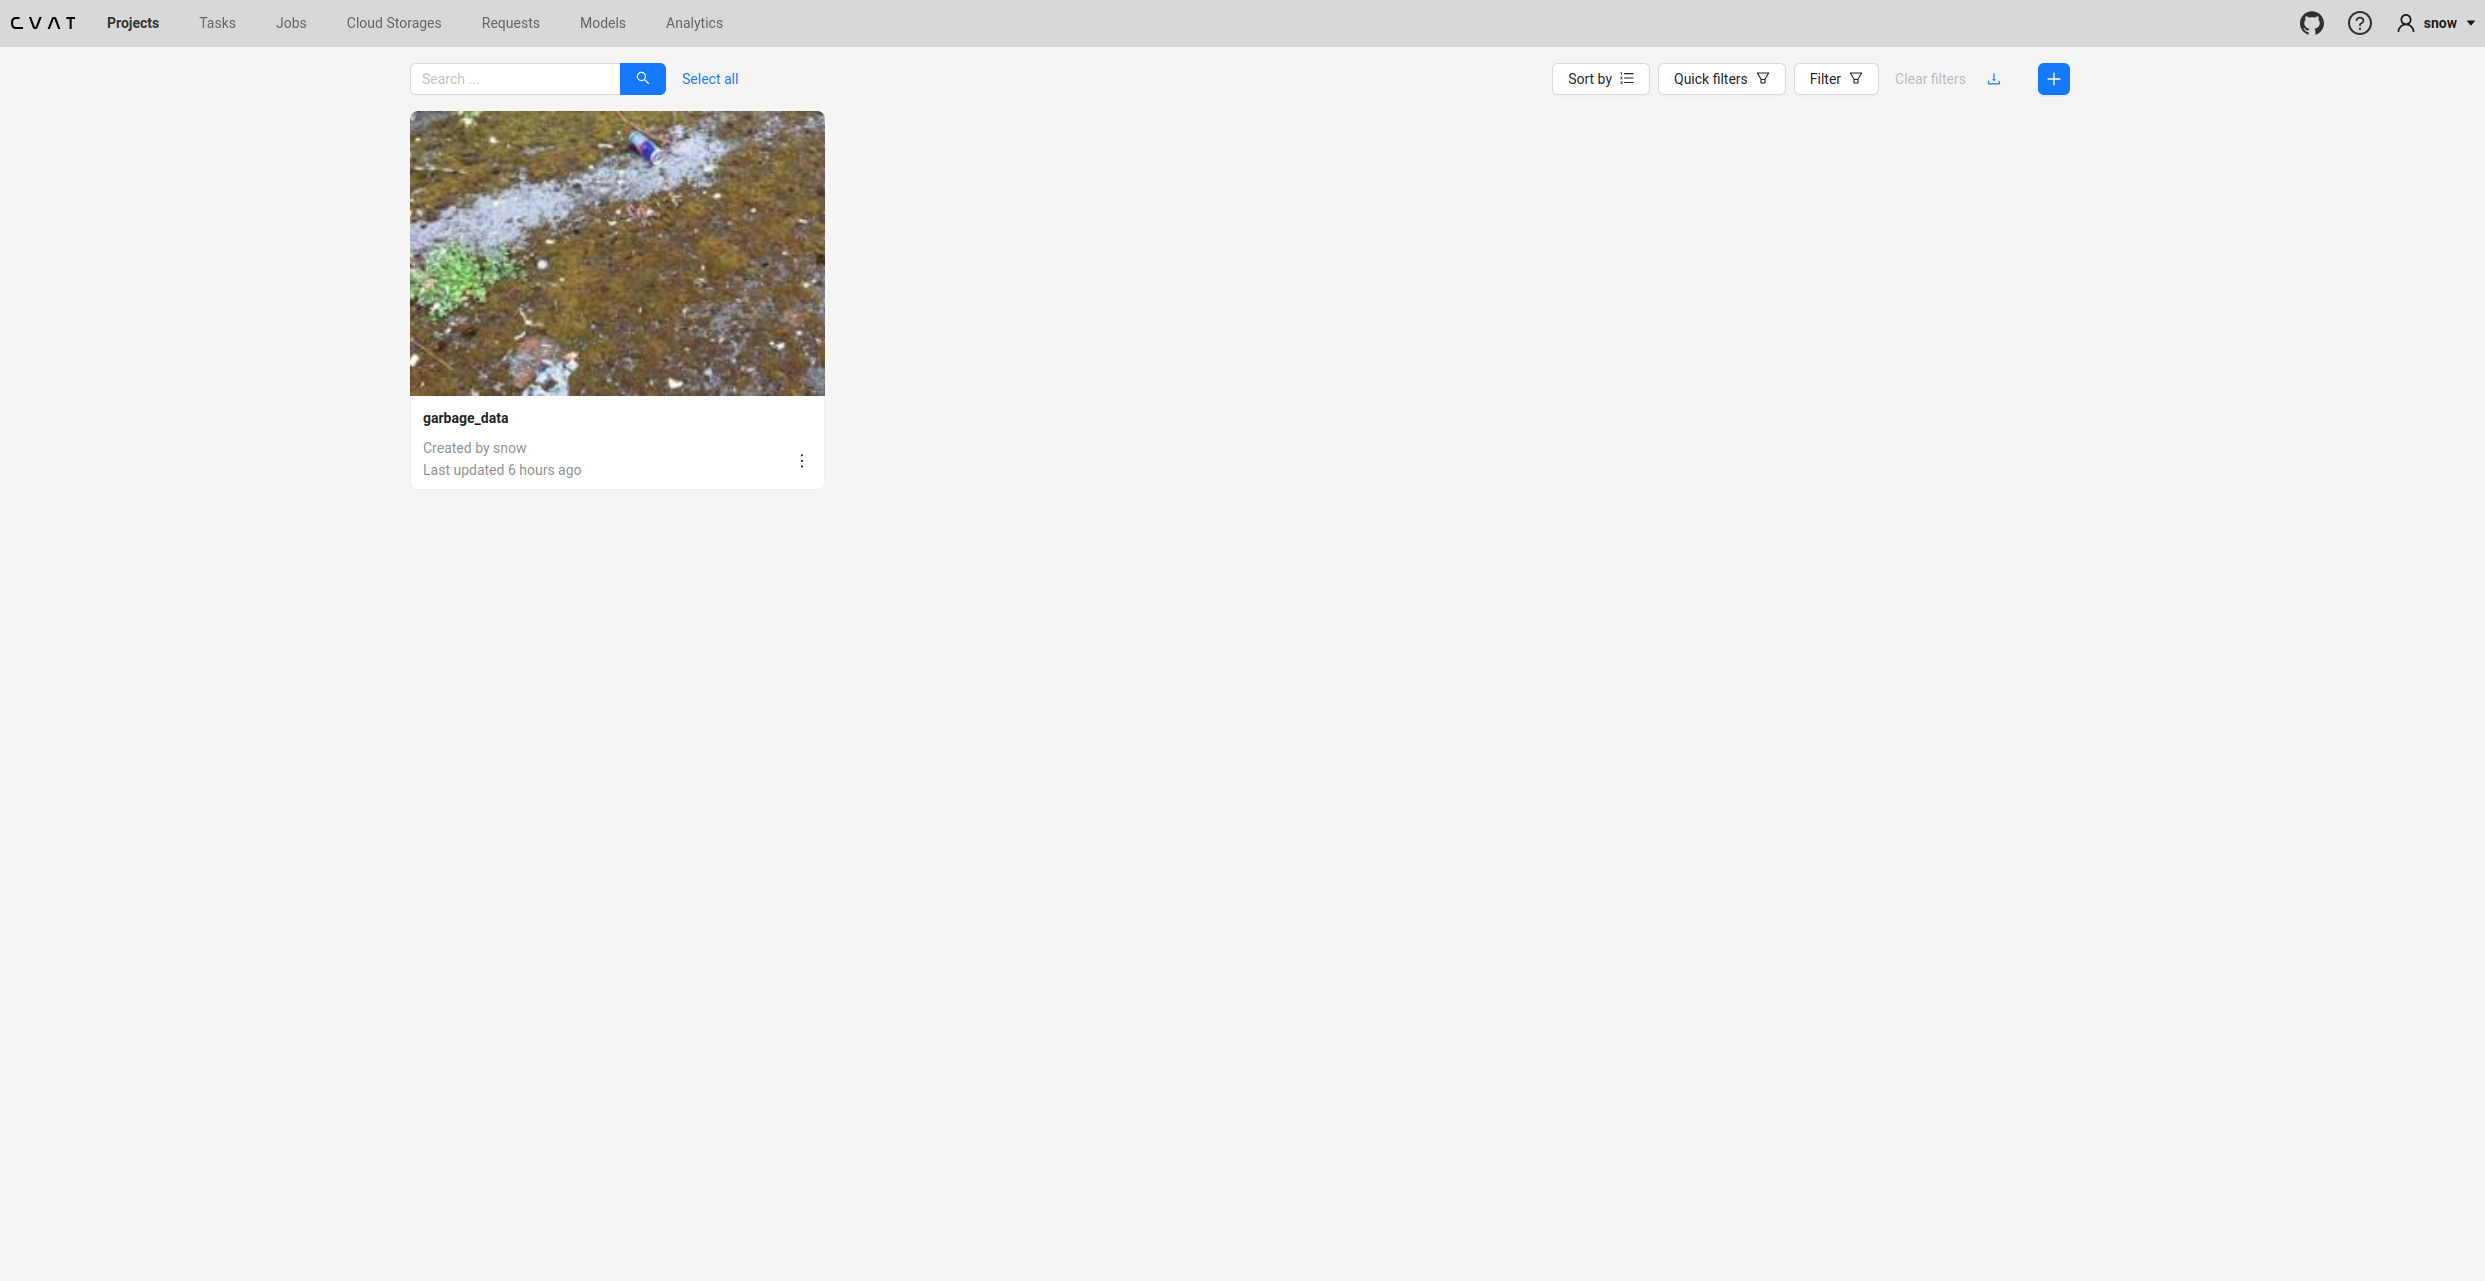
创建项目
最开始肯定是没有一个项目的,现在开始说怎么创建项目,点击这里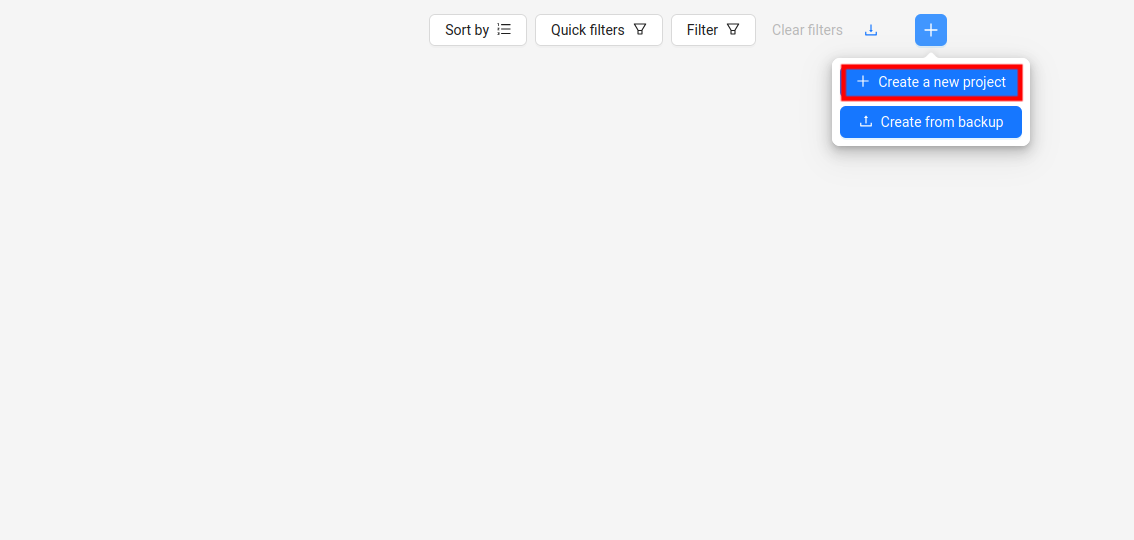
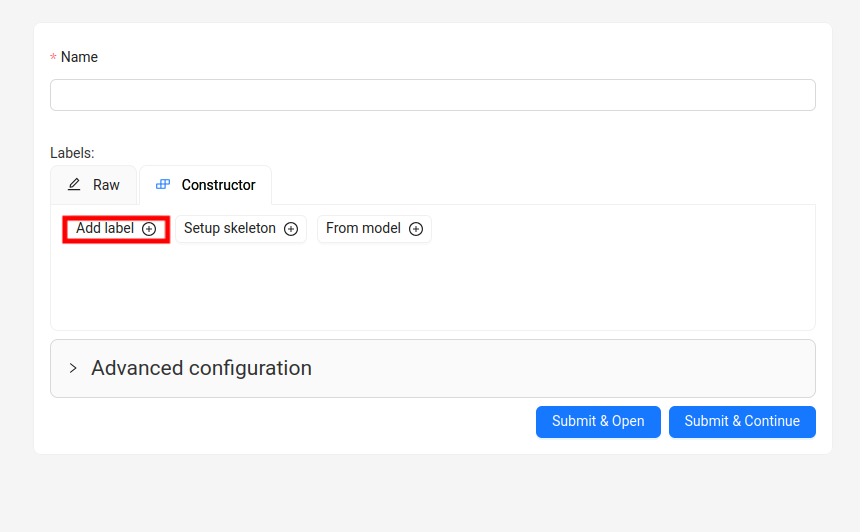
先填写项目名,后面填写标签,点下图那个地方添加标签
标签顺序要跟yolo的data.yaml里面的顺序是一样的,只要写名字就可以,然后点继续,添加下一个标签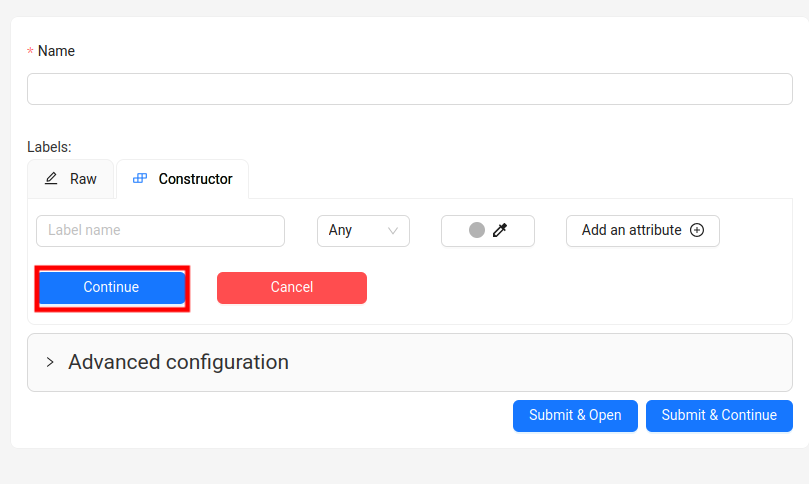
最后点submit&Continue,返回项目页面
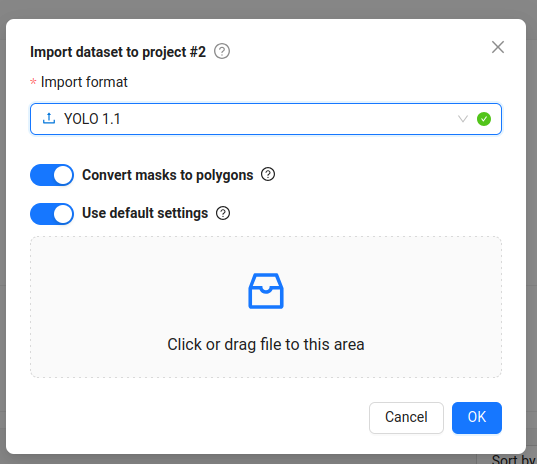
上传数据
再看项目页面就出现了这个项目,点击进去,点加载数据按钮,如下图
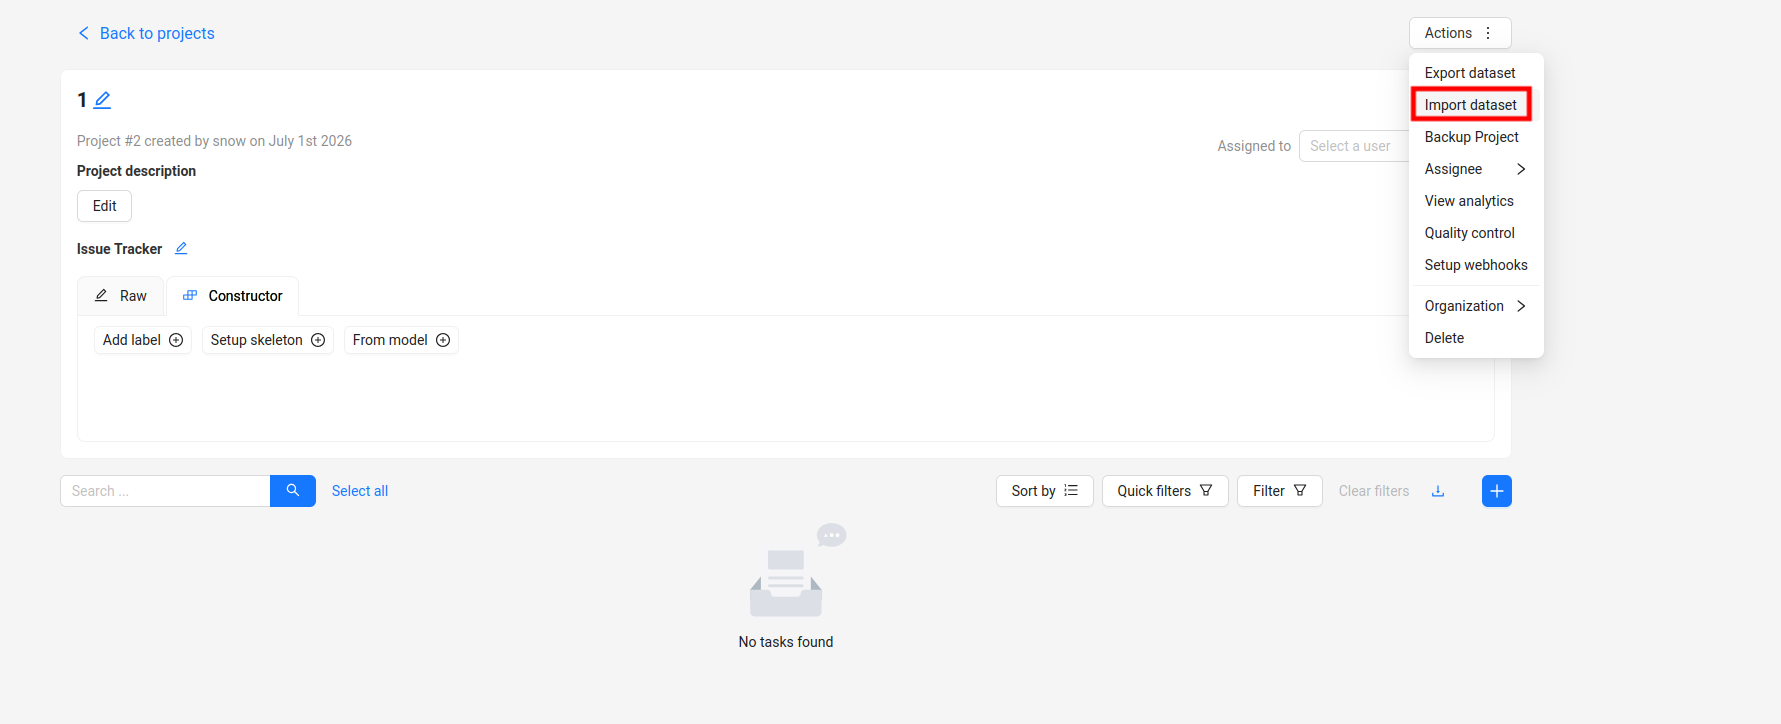
数据格式建议选择YOLO1.1,虽然有ultralytics的选项,但是我试过了疯狂报错,最后都没搞出来,这个好像是后面版本官方新加的,支持没有YOLO1.1好。
格式转换
这是我数据转换成YOLO1.1的代码,可以让AI根据自己的数据格式修改一下输入,只要输出格式是这样的就可以。
python
import os
import yaml
import shutil
from pathlib import Path

# --- 配置区 ---
src_root = Path("/home/snow/database/All_data/merged_v1_dataset")  # 你当前数据集的路径
output_dir = "cvat_yolo11_export"  # 新格式输出目录

# --- 脚本开始 ---
obj_data_dir = os.path.join(output_dir, "obj_train_data")

# 清理并创建输出目录
if os.path.exists(output_dir):
    shutil.rmtree(output_dir)
os.makedirs(obj_data_dir)

# 1. 读取你原有的 data.yaml 获取类别信息
with open(os.path.join(src_root, "data.yaml"), 'r') as f:
    data_config = yaml.safe_load(f)
# 注意:YOLO 1.1 要求 names 是一个按顺序排列的列表
names = data_config['names']

# 2. 生成 obj.names 文件 (每行一个类别)
with open(os.path.join(output_dir, "obj.names"), "w") as f:
    for name in names:
        f.write(f"{name}\n")

# 3. 收集所有图片和标签到 obj_train_data,并记录图片路径
image_paths = []
subsets = ['train', 'val', 'test']

for subset in subsets:
    img_dir = src_root / subset / 'images'
    lbl_dir = src_root / subset / 'labels'

    if not img_dir.exists():
        continue

    for img_file in img_dir.glob('*'):
        if img_file.suffix.lower() in ['.jpg', '.jpeg', '.png']:
            # 拷贝图片
            shutil.copy(img_file, os.path.join(obj_data_dir, img_file.name))
            # 拷贝对应的 .txt 标签
            label_file = lbl_dir / f"{img_file.stem}.txt"
            if label_file.exists():
                shutil.copy(label_file, os.path.join(obj_data_dir, label_file.name))
            # 记录图片的相对路径 (YOLO 1.1 的要求)
            image_paths.append(f"obj_train_data/{img_file.name}")

# 4. 生成 train.txt (列出所有图片文件)
with open(os.path.join(output_dir, "train.txt"), "w") as f:
    for path in image_paths:
        f.write(f"{path}\n")

# 5. 生成 obj.data (配置文件)
with open(os.path.join(output_dir, "obj.data"), "w") as f:
    f.write(f"classes = {len(names)}\n")
    f.write("train = train.txt\n")
    f.write("names = obj.names\n")

print(f"✅ 转换完成!结果保存在: {output_dir}")
print(f"共处理 {len(image_paths)} 个文件。")
一个小坑提示,这个数据上传对于标签的准确性要求是非常严格的,如果标签有问题就会上传不上去,这个地方我卡了很久(ps:当然如果还没开始打标就不会有标签这个问题),下面是我检查是否有问题,以及删除的代码。
python
# 检查
import os
from pathlib import Path

data_dir = Path("/home/snow/database/All_data/cvat_yolo11_export")

# 1. 检查文件名匹配
img_files = list((data_dir / "obj_train_data").glob("*.[jJ][pP][gG]")) + \
            list((data_dir / "obj_train_data").glob("*.[pP][nN][gG]")) + \
            list((data_dir / "obj_train_data").glob("*.[jJ][pP][eE][gG]"))

print(f"📷 找到 {len(img_files)} 张图片")
print("=" * 50)

for img in img_files:
    stem = img.stem
    txt_file = data_dir / "obj_train_data" / f"{stem}.txt"
    if not txt_file.exists():
        print(f"❌ 缺少标注文件: {img.name} -> {txt_file.name}")
    else:
        # 检查标注文件内容
        with open(txt_file, 'r') as f:
            lines = f.readlines()
        for line in lines:
            parts = line.strip().split()
            if len(parts) != 5:
                print(f"⚠️ 格式错误 {txt_file.name}: 期望5个值,实际 {len(parts)} 个")
                break
            try:
                class_id, cx, cy, w, h = map(float, parts)
                if not (0 <= cx <= 1 and 0 <= cy <= 1 and 0 <= w <= 1 and 0 <= h <= 1):
                    print(f"⚠️ 坐标超出范围 {txt_file.name}: {line.strip()}")
                    break
            except ValueError:
                print(f"⚠️ 数值解析失败 {txt_file.name}: {line.strip()}")
                break

print("=" * 50)
print("✅ 检查完成")
python
# 删除
import os
import shutil
from pathlib import Path
# ==================== 配置 ====================
# 你的转换后数据集目录(cvat_yolo11_export)
export_dir = Path("/home/snow/database/All_data/cvat_yolo11_export")
obj_data_dir = export_dir / "obj_train_data"
# 你的原始数据集目录(merged_v1_dataset)
src_dataset_dir = Path("/home/snow/database/All_data/merged_v1_dataset")
# 要删除的文件名列表(从检查脚本中收集的)
bad_files = [
"recycle_004365.txt", "recycle_000976.txt", "recycle_001934.txt",
"recycle_004313.txt", "recycle_000008.txt", "recycle_001271.txt",
"recycle_001761.txt", "recycle_002719.txt", "recycle_001068.txt",
"recycle_004214.txt", "recycle_000506.txt", "recycle_004708.txt",
"recycle_004551.txt", "recycle_002350.txt", "recycle_004035.txt",
"recycle_002314.txt", "recycle_000814.txt", "recycle_000373.txt",
"recycle_001244.txt", "recycle_000291.txt", "recycle_000301.txt",
"recycle_002428.txt", "recycle_000058.txt", "recycle_001435.txt",
"recycle_001446.txt", "recycle_000152.txt", "recycle_004096.txt",
"recycle_000036.txt", "recycle_000168.txt", "recycle_000065.txt",
"recycle_004166.txt", "recycle_000217.txt", "recycle_000320.txt",
"recycle_000210.txt", "recycle_001156.txt", "recycle_001060.txt",
"recycle_004595.txt", "recycle_000502.txt", "recycle_001884.txt",
"recycle_003282.txt", "recycle_001444.txt", "recycle_003743.txt",
"recycle_002571.txt", "recycle_000693.txt", "recycle_003441.txt",
"recycle_000897.txt", "recycle_000577.txt", "recycle_004536.txt",
"recycle_004707.txt", "recycle_003831.txt", "recycle_003902.txt",
"recycle_000203.txt", "recycle_004357.txt", "recycle_001055.txt",
"recycle_001253.txt", "recycle_000309.txt", "recycle_000155.txt",
"recycle_003595.txt", "recycle_000951.txt", "recycle_001208.txt",
"recycle_003184.txt", "recycle_000207.txt", "recycle_000033.txt",
"recycle_004121.txt", "recycle_002512.txt", "recycle_002902.txt",
"recycle_003652.txt", "recycle_000109.txt", "recycle_004298.txt",
"recycle_004276.txt", "recycle_000268.txt", "recycle_001980.txt",
"recycle_000472.txt", "recycle_004044.txt", "recycle_000169.txt",
"recycle_003171.txt", "recycle_000587.txt", "recycle_000019.txt",
"recycle_000737.txt", "recycle_004488.txt", "recycle_004308.txt",
"recycle_003741.txt", "recycle_004356.txt", "recycle_004465.txt",
"recycle_001240.txt", "recycle_003127.txt", "recycle_004583.txt",
"recycle_004192.txt"
]
# 提取文件名(不含扩展名)用于匹配图片
bad_stems = [f.replace('.txt', '') for f in bad_files]
# ==================== 执行删除 ====================
print("=" * 60)
print("🗑️ 开始删除有问题的文件")
print("=" * 60)
# 1. 从 cvat_yolo11_export/obj_train_data/ 删除
deleted_count = 0
for stem in bad_stems:
# 删除标注文件
txt_file = obj_data_dir / f"{stem}.txt"
if txt_file.exists():
txt_file.unlink()
deleted_count += 1
print(f"✅ 删除标注: {txt_file.name}")
# 删除对应的图片(尝试各种扩展名)
for ext in ['.jpg', '.jpeg', '.png', '.JPG', '.JPEG', '.PNG']:
img_file = obj_data_dir / f"{stem}{ext}"
if img_file.exists():
img_file.unlink()
print(f"✅ 删除图片: {img_file.name}")
break
print(f"\n📊 从 export 目录删除了 {deleted_count} 个标注文件")
# 2. 从原始数据集 merged_v1_dataset 中删除
print("\n" + "=" * 60)
print("🗑️ 从原始数据集中删除对应文件")
print("=" * 60)
src_deleted_count = 0
for split in ['train', 'val', 'test']:
img_dir = src_dataset_dir / split / 'images'
lbl_dir = src_dataset_dir / split / 'labels'
if not img_dir.exists() or not lbl_dir.exists():
continue
for stem in bad_stems:
# 删除标注文件
txt_file = lbl_dir / f"{stem}.txt"
if txt_file.exists():
txt_file.unlink()
src_deleted_count += 1
print(f"✅ 从 {split}/labels/ 删除: {txt_file.name}")
# 删除对应的图片(尝试各种扩展名)
for ext in ['.jpg', '.jpeg', '.png', '.JPG', '.JPEG', '.PNG']:
img_file = img_dir / f"{stem}{ext}"
if img_file.exists():
img_file.unlink()
print(f"✅ 从 {split}/images/ 删除: {img_file.name}")
break
print(f"\n📊 从原始数据集删除了 {src_deleted_count} 个标注文件")
# 3. 更新 train.txt(重新生成)
print("\n" + "=" * 60)
print("📄 重新生成 train.txt")
print("=" * 60)
# 重新扫描 obj_train_data 中剩余的图片
remaining_images = []
for img_file in obj_data_dir.glob('*'):
if img_file.suffix.lower() in ['.jpg', '.jpeg', '.png']:
remaining_images.append(f"obj_train_data/{img_file.name}")
# 写入新的 train.txt
train_txt_path = export_dir / "train.txt"
with open(train_txt_path, 'w') as f:
for path in remaining_images:
f.write(f"{path}\n")
print(f"✅ train.txt 已更新,剩余 {len(remaining_images)} 张图片")
print("\n" + "=" * 60)
print("🎉 清理完成!")
print(f"📊 原始数据总计: {len(remaining_images)} 张图片")
print("=" * 60)
# 4. 可选:验证是否还有问题文件
print("\n🔍 验证剩余文件是否都合法...")
problem_found = False
for txt_file in obj_data_dir.glob('*.txt'):
with open(txt_file, 'r') as f:
lines = f.readlines()
for line in lines:
parts = line.strip().split()
if len(parts) != 5:
print(f"❌ 仍有问题文件: {txt_file.name} (期望5个值,实际 {len(parts)} 个)")
problem_found = True
break
if problem_found:
break
if not problem_found:
print("✅ 所有剩余文件格式正确!")
print("\n📝 下一步操作:")
print("1. 重新打包数据集:")
print(f" cd {export_dir}")
print(" zip -r ../cvat_clean_upload.zip .")
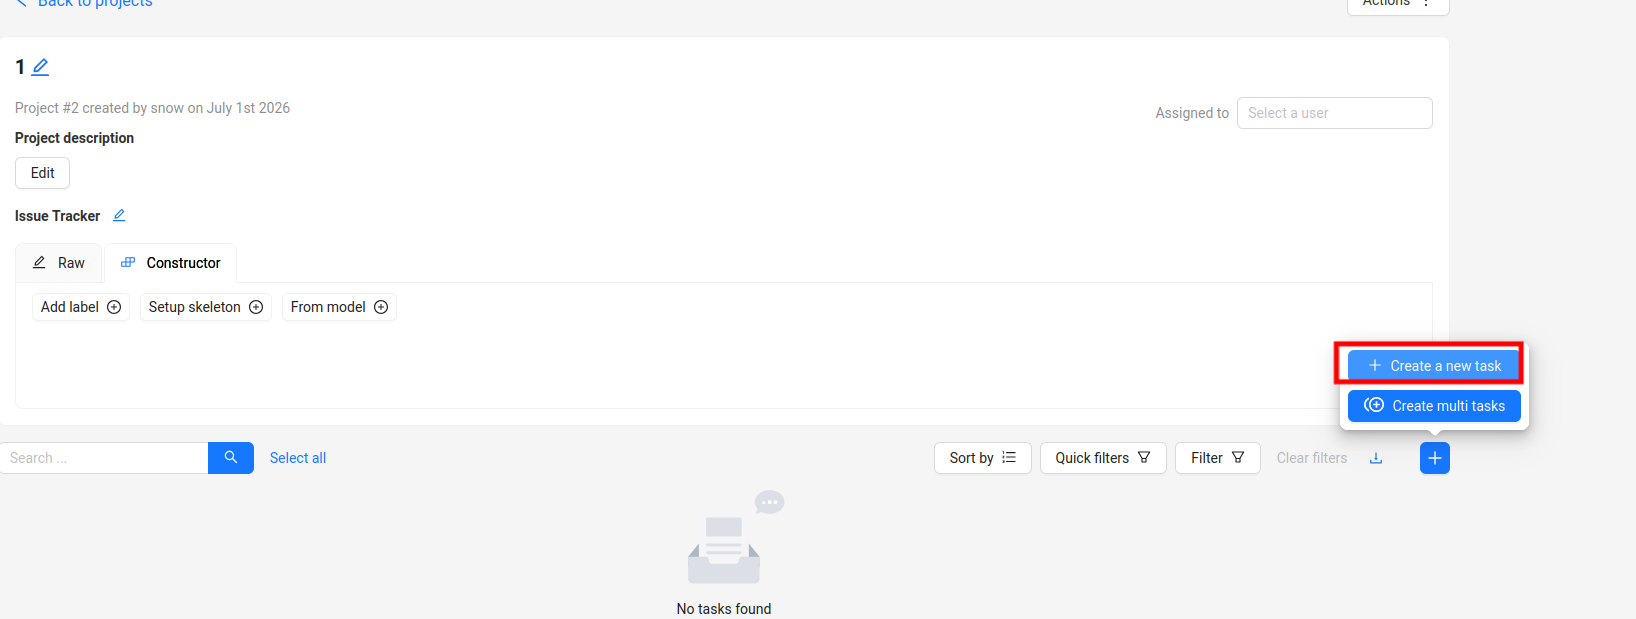
print("2. 上传到CVAT重新导入")创建任务
前面项目创建好之后,点击创建任务在任务列表和job列表里面就会出现这个任务了。
打开任务
在job列表中可以看见,点击进去就可以直接开始打标了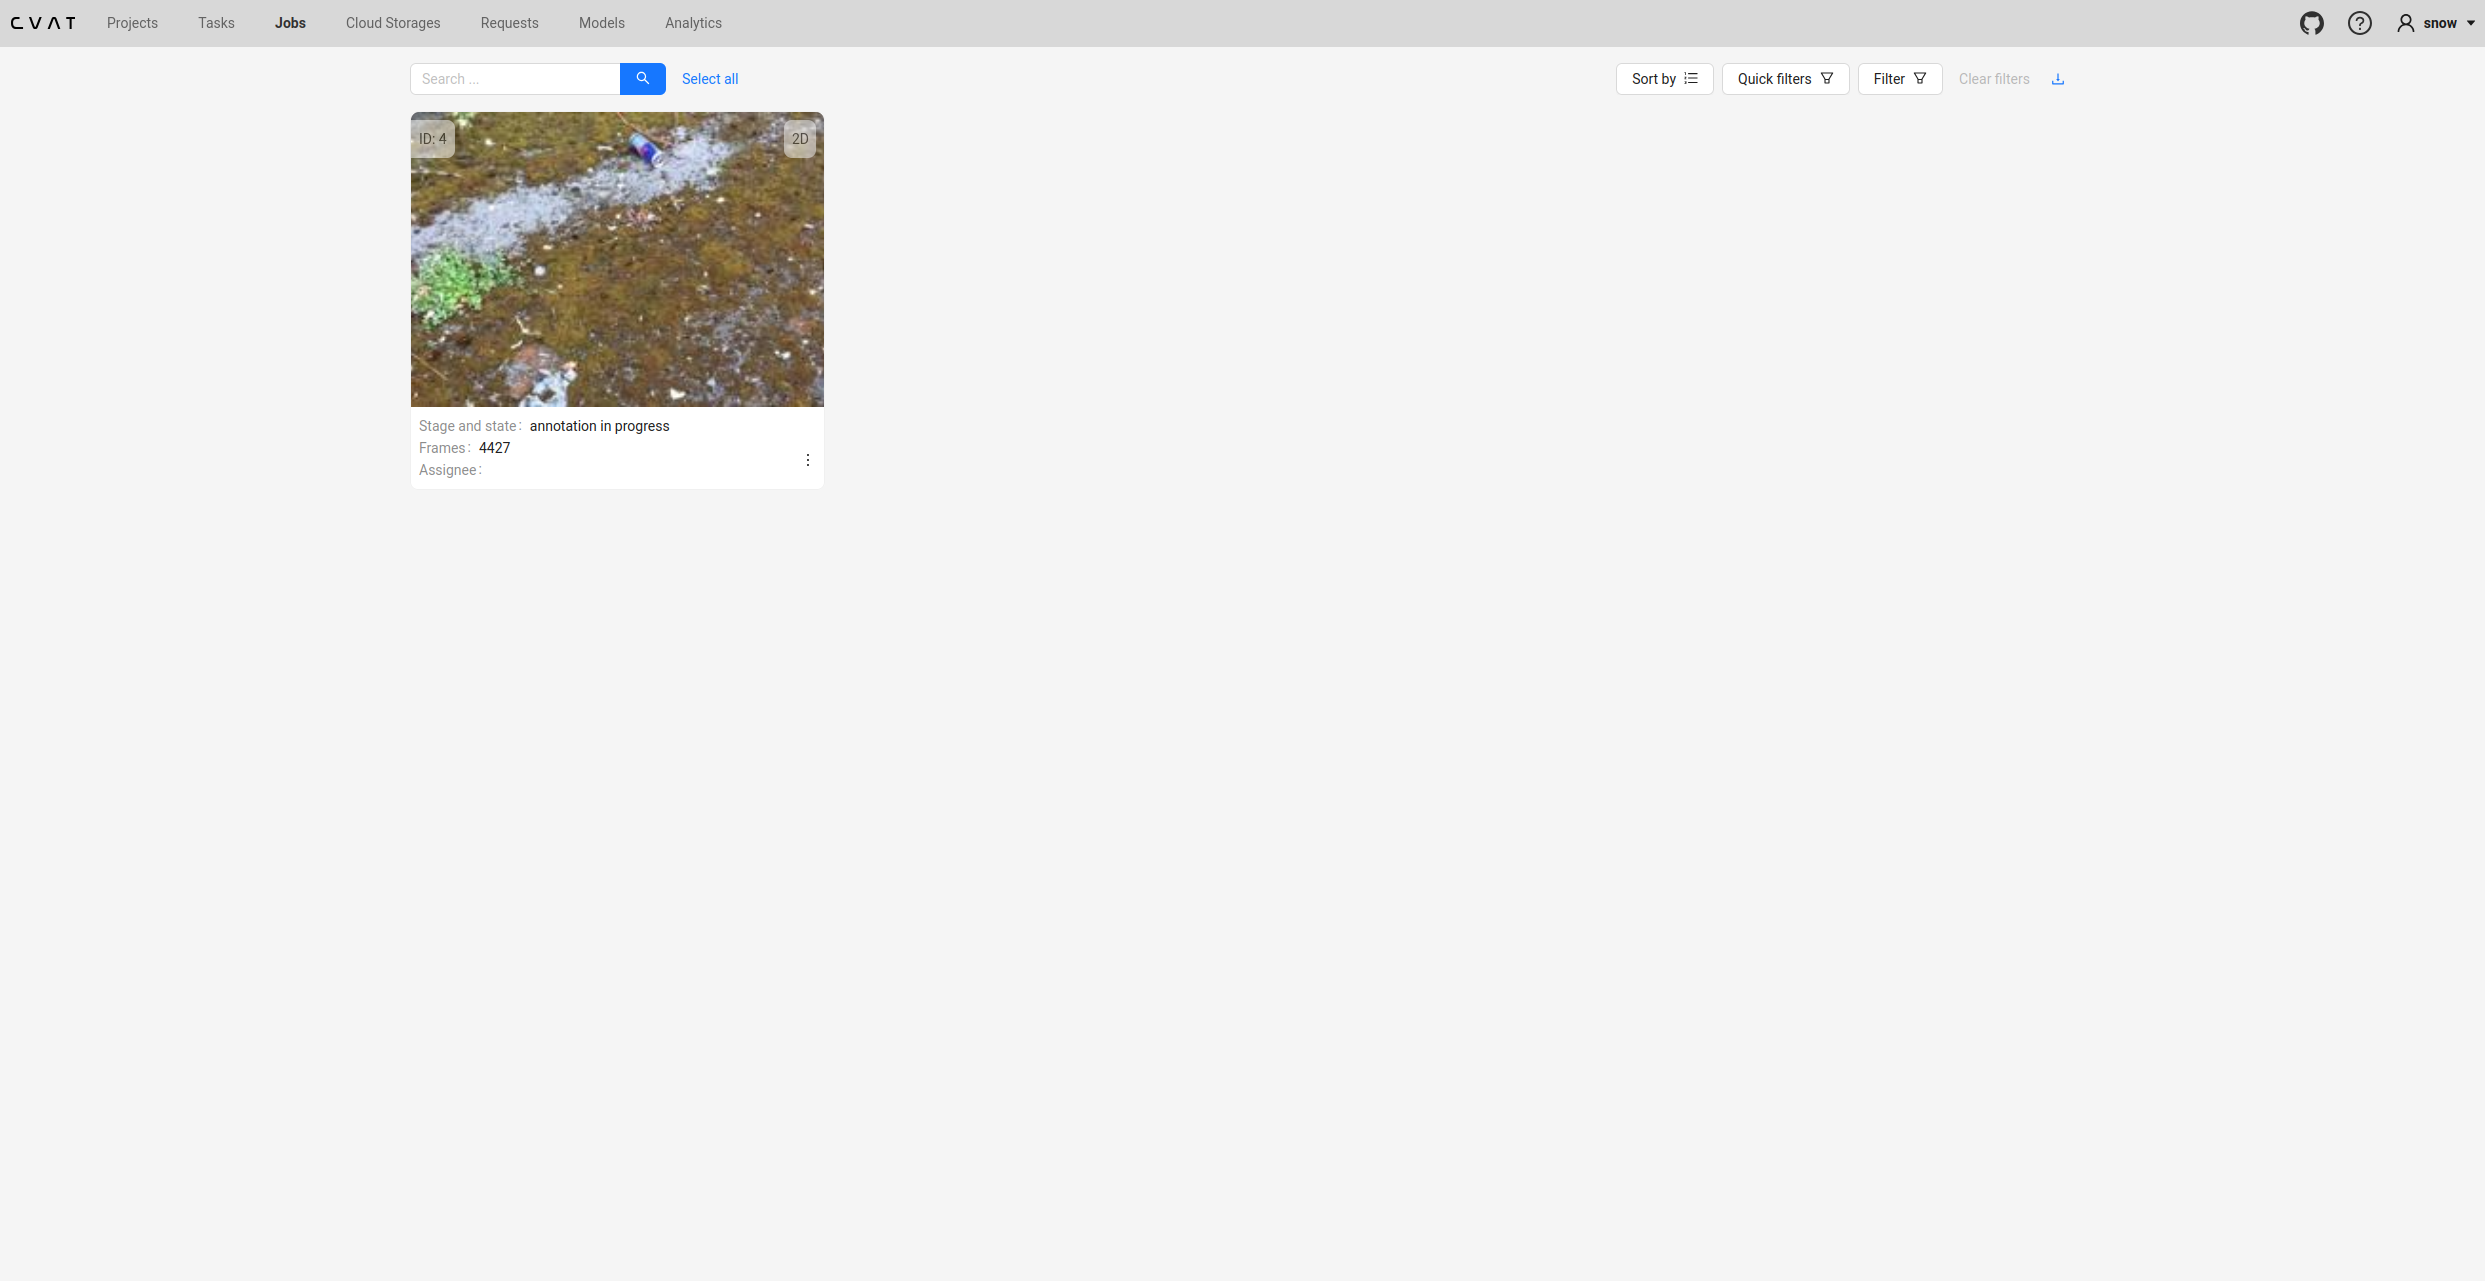
上传自己训练的yolo模型
这一步真的卡了好几天,只能看官网,然后网络还一直不好,下载还很慢,很崩溃。只能按照我踩的坑记录一下,如有问题,非常抱歉,尝试了很多可能记乱了。
配置文件
首先先创建模型文件夹,在cvat文件夹下运行
bash
mkdir -p serverless/pytorch/yolo_custom/nuclio
cd serverless/pytorch/yolo_custom/nuclio
模型权重
将准备好的模型pt权重移动到这个文件夹,前半部分用你的模型权重路径
bash
cp /home/snow/ultralytics-main/mycode/runs/detect/train-5/weights/best.pt ./main.py
这个命令行写入
python
# 创建 main.py
cat > main.py << 'EOF'
import json
import base64
import io
import numpy as np
from PIL import Image
from ultralytics import YOLO

_model = None

def init_context(context):
    """在容器启动时加载模型"""
    global _model
    context.logger.info("Loading custom YOLO model...")
    try:
        # 使用自定义权重文件(在容器内的路径)
        _model = YOLO("/opt/nuclio/best.pt")
        context.logger.info("Custom model loaded successfully!")
    except Exception as e:
        context.logger.error(f"Failed to load model: {str(e)}")

def handler(context, event):
    """处理推理请求"""
    global _model

    try:
        # 解析请求
        data = event.body
        if isinstance(data, bytes):
            data = json.loads(data)

        # 解码图片(base64)
        image_data = data.get("image", "")
        if not image_data:
            return context.Response(
                body=json.dumps({"error": "No image provided"}),
                status_code=400,
                content_type='application/json'
            )

        image_bytes = base64.b64decode(image_data)
        image = Image.open(io.BytesIO(image_bytes))

        # 获取阈值
        threshold = float(data.get("threshold", 0.5))

        # 推理
        results = _model.predict(source=image, verbose=False, conf=threshold)

        # 格式化结果为CVAT格式
        detections = []
        for r in results:
            if r.boxes is not None:
                for box, cls, conf in zip(r.boxes.xyxy, r.boxes.cls, r.boxes.conf):
                    x1, y1, x2, y2 = box.tolist()
                    detections.append({
                        "confidence": str(float(conf)),
                        "label": _model.names[int(cls)],
                        "points": [x1, y1, x2, y2],
                        "type": "rectangle"
                    })

        return context.Response(
            body=json.dumps(detections),
            status_code=200,
            content_type='application/json'
        )
    except Exception as e:
        context.logger.error(f"Inference error: {str(e)}")
        return context.Response(
            body=json.dumps({"error": str(e)}),
            status_code=500,
            content_type='application/json'
        )
EOF
function.yaml
这个文件真的问题好多,最后的版本是下面这样的,这个创建文件之后写入吧,改成命令行也可以,要根据自己的数据标签和类型进行一定修改。
bash
metadata:
  name: yolov8-custom-v2
  namespace: cvat
  annotations:
    name: YOLOv8 Custom
    type: detector
    spec: |
      [
        {"id": 0, "name": "Metal"},
        {"id": 1, "name": "Bun"},
        {"id": 2, "name": "Egg_hard"},
        {"id": 3, "name": "Tea"},
        {"id": 4, "name": "DryBattery"},
        {"id": 5, "name": "ExpiredDrugs"}
      ]

spec:
  description: Custom YOLOv8 model
  runtime: python:3.10
  handler: main:handler
  eventTimeout: 30s

  build:
    image: cvat.yolov8.custom.v2
    baseImage: ubuntu:22.04
    directives:
      preCopy:
        - kind: RUN
          value: apt-get update
        - kind: RUN
          value: apt-get install -y python3 python3-pip
        - kind: RUN
          value: apt-get install -y libgl1-mesa-glx libglib2.0-0
        - kind: RUN
          value: ln -sf /usr/bin/python3 /usr/bin/python
        - kind: RUN
          value: python -m pip install -i https://mirrors.aliyun.com/pypi/simple/ ultralytics opencv-python-headless Pillow numpy
        - kind: COPY
          value: . /opt/nuclio
        - kind: WORKDIR
          value: /opt/nuclio

  triggers:
    myHttpTrigger:
      numWorkers: 1
      kind: http

  platform:
    attributes:
      restartPolicy:
        name: always
启动Serverless组件
bash
# 检查nuclio是否运行
docker ps | grep nuclio

# 如果没有运行,启动它
docker compose -f docker-compose.yml -f components/serverless/docker-compose.serverless.yml up -d

# 等待几秒
sleep 5

# 确认运行
docker ps | grep nuclio
安装nuctl(如果未安装)
bash
# 检查是否已安装
which nuctl

# 如果没有,安装
cd /tmp
wget https://github.com/nuclio/nuclio/releases/download/1.13.0/nuctl-1.13.0-linux-amd64
chmod +x nuctl-1.13.0-linux-amd64
sudo mv nuctl-1.13.0-linux-amd64 /usr/local/bin/nuctl

# 验证
nuctl version
部署
最后一个命令很容易报错,大概率是上面function.yaml的问题,当然大部分实际上是网络问题(有时候魔法也没效果,反正我基本都镜像才解决),而且这个命令很慢,要有耐心。
bash
# 回到CVAT根目录
cd /home/snow/cvat  # 修改为你的实际路径

# 给脚本添加执行权限(如果需要)
chmod +x serverless/deploy_cpu.sh

# 部署
./serverless/deploy_cpu.sh serverless/pytorch/yolo_custom/nuclio
部署部分问题解决方法
以下解决方法是可以互通的,哪个能跑通就用哪个。
openvino
报错如下
bash
[+] Building 64.6s (2/2) FINISHED                                docker:default
 => [internal] load build definition from Dockerfile                       0.1s
 => => transferring dockerfile: 418B                                       0.0s
 => ERROR [internal] load metadata for docker.io/openvino/ubuntu22_runti  64.5s
------
 > [internal] load metadata for docker.io/openvino/ubuntu22_runtime:2023.3.0:
------
Dockerfile:1
--------------------
   1 | >>> FROM openvino/ubuntu22_runtime:2023.3.0
   2 |
   3 |     USER root
--------------------
ERROR: failed to build: failed to solve: openvino/ubuntu22_runtime:2023.3.0: failed to resolve source metadata for docker.io/openvino/ubuntu22_runtime:2023.3.0: unexpected status from HEAD request to https://docker.m.daocloud.io/v2/openvino/ubuntu22_runtime/manifests/2023.3.0?ns=docker.io: 401 Unauthorized
解决方法是改为国内镜像
bash
# 编辑Docker配置
sudo mkdir -p /etc/docker
sudo tee /etc/docker/daemon.json << 'EOF'
{
  "registry-mirrors": [
    "https://docker.m.daocloud.io",
    "https://dockerproxy.com",
    "https://docker.nju.edu.cn"
  ]
}
EOF

# 重启Docker
sudo systemctl restart docker

# 重新尝试拉取
docker pull openvino/ubuntu22_runtime:2023.3.0
gcr.io/iguazio/alpine:3.17
报错如下
bash
 => => naming to docker.io/library/cvat.openvino.base:latest               0.0s
 => => unpacking to docker.io/library/cvat.openvino.base:latest            0.6s
26.06.28 20:55:10.221 (W)     nuctl.platform.docker Failed to run container {"err": "stdout:\nUnable to find image 'gcr.io/iguazio/alpine:3.17' locally\ndocker: Error response from daemon: failed to resolve reference \"gcr.io/iguazio/alpine:3.17\": failed to do request: Head \"https://gcr.io/v2/iguazio/alpine/manifests/3.17\": dial tcp [2607:f8b0:400e:c1e::52]:443: i/o timeout\n\nRun 'docker run --help' for more information\n\nstderr:\n", "errVerbose": "\nError - exit status 125\n    /nuclio/pkg/cmdrunner/shellrunner.go:114\n\nCall stack:\nstdout:\nUnable to find image 'gcr.io/iguazio/alpine:3.17' locally\ndocker: Error response from daemon: failed to resolve reference \"gcr.io/iguazio/alpine:3.17\": failed to do request: Head \"https://gcr.io/v2/iguazio/alpine/manifests/3.17\": dial tcp [2607:f8b0:400e:c1e::52]:443: i/o timeout\n\nRun 'docker run --help' for more information\n\nstderr:\n\n    /nuclio/pkg/cmdrunner/shellrunner.go:114\nstdout:\nUnable to find image 'gcr.io/iguazio/alpine:3.17' locally\ndocker: Error response from daemon: failed to resolve reference \"gcr.io/iguazio/alpine:3.17\": failed to do request: Head \"https://gcr.io/v2/iguazio/alpine/manifests/3.17\": dial tcp [2607:f8b0:400e:c1e::52]:443: i/o timeout\n\nRun 'docker run --help' for more information\n\nstderr:\n", "stdout": "Unable to find image 'gcr.io/iguazio/alpine:3.17' locally\ndocker: Error response from daemon: failed to resolve reference \"gcr.io/iguazio/alpine:3.17\": failed to do request: Head \"https://gcr.io/v2/iguazio/alpine/manifests/3.17\": dial tcp [2607:f8b0:400e:c1e::52]:443: i/o timeout\n\nRun 'docker run --help' for more information\n", "stderr": ""}

Error - exit status 125
    /nuclio/pkg/cmdrunner/shellrunner.go:114

Call stack:
stdout:
Unable to find image 'gcr.io/iguazio/alpine:3.17' locally
docker: Error response from daemon: failed to resolve reference "gcr.io/iguazio/alpine:3.17": failed to do request: Head "https://gcr.io/v2/iguazio/alpine/manifests/3.17": dial tcp [2607:f8b0:400e:c1e::52]:443: i/o timeout

Run 'docker run --help' for more information

stderr:

    /nuclio/pkg/cmdrunner/shellrunner.go:114
Failed to run container with storage volume
    ...//nuclio/pkg/platform/local/client/store.go:
解决方法如下,这个我是拉的官方的再重新标签解决的(需要魔法),国内镜像没效果不知道为什么。
bash
# 1. 先拉取alpine官方镜像
docker pull alpine:3.17

# 2. 重新标签为gcr.io的镜像
docker tag alpine:3.17 gcr.io/iguazio/alpine:3.17

# 3. 验证
docker images | grep alpine

# 4. 清理Docker缓存
docker system prune -f
ubuntu镜像
报错如下
bash
Error - exit status 1
    /nuclio/pkg/cmdrunner/shellrunner.go:114

Call stack:
stdout:

stderr:
#0 building with "default" instance using docker driver

#1 [internal] load build definition from Dockerfile.processor
#1 transferring dockerfile: 1.15kB done
#1 DONE 0.0s

#2 [internal] load metadata for docker.io/library/ubuntu:22.04
#2 ERROR: unexpected status from HEAD request to https://docker.m.daocloud.io/v2/library/ubuntu/manifests/22.04?ns=docker.io: 401 Unauthorized
------
 > [internal] load metadata for docker.io/library/ubuntu:22.04:
------
Dockerfile.processor:6
--------------------
   4 |
   5 |     # From the base image
   6 | >>> FROM ubuntu:22.04
   7 |
   8 |
--------------------
ERROR: failed to build: failed to solve: ubuntu:22.04: failed to resolve source metadata for docker.io/library/ubuntu:22.04: unexpected status from HEAD request to https://docker.m.daocloud.io/v2/library/ubuntu/manifests/22.04?ns=docker.io: 401 Unauthorized

    /nuclio/pkg/cmdrunner/shellrunner.go:114
Failed to build
    /nuclio/pkg/dockerclient/shell.go:119
Failed to build docker image
    .../pkg/containerimagebuilderpusher/docker.go:70
Failed to build processor image
    /nuclio/pkg/processor/build/builder.go:267
Failed to deploy function
    ...//nuclio/pkg/platform/abstract/platform.go:227
这个解决方法更抽象,镜像和官方我都拉不下来,最后是skopeo手动拉取的
bash
# 1. 从清华镜像站下载ubuntu镜像(使用skopeo工具)
# 首先安装skopeo
sudo apt-get update && sudo apt-get install -y skopeo

# 2. 使用skopeo复制镜像
skopeo copy docker://docker.io/ubuntu:22.04 docker-archive:/tmp/ubuntu-22.04.tar

# 3. 导入镜像
docker load -i /tmp/ubuntu-22.04.tar
拉取成功之后要再次修改标签,就是给这个容器改个名字,我是下面这样改的,要根据自己拉取的容器名字进行修改。
bash
# 1. 查看刚才导入的镜像
docker images | grep 93ec1b09bc11

# 2. 给这个镜像打上正确的标签
docker tag 93ec1b09bc11 ubuntu:22.04

# 3. 验证
docker images | grep ubuntu
# 现在应该看到 ubuntu:22.04 了
自动化标注
恭喜模型部署成功,后面就很简单了。分为两种一种是一张一张标注,另一种是一次性标注所有。
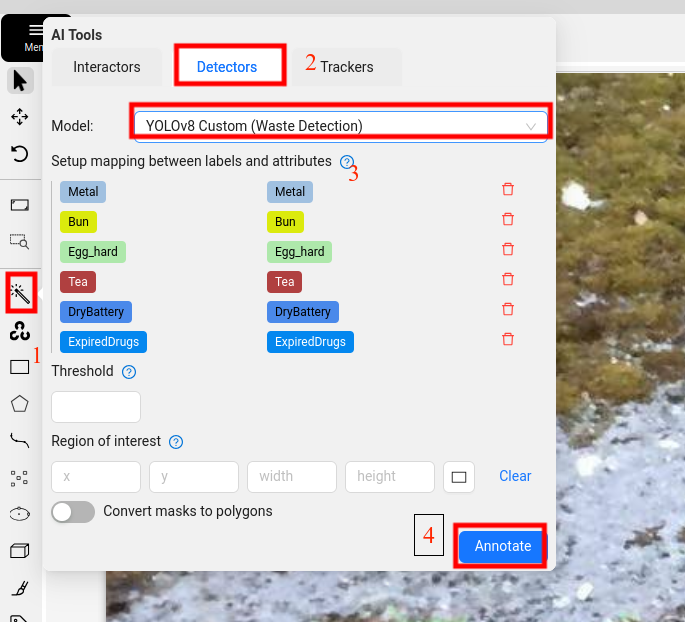
一张一张
在job项目里面有一个魔法棒,具体步骤如下图。
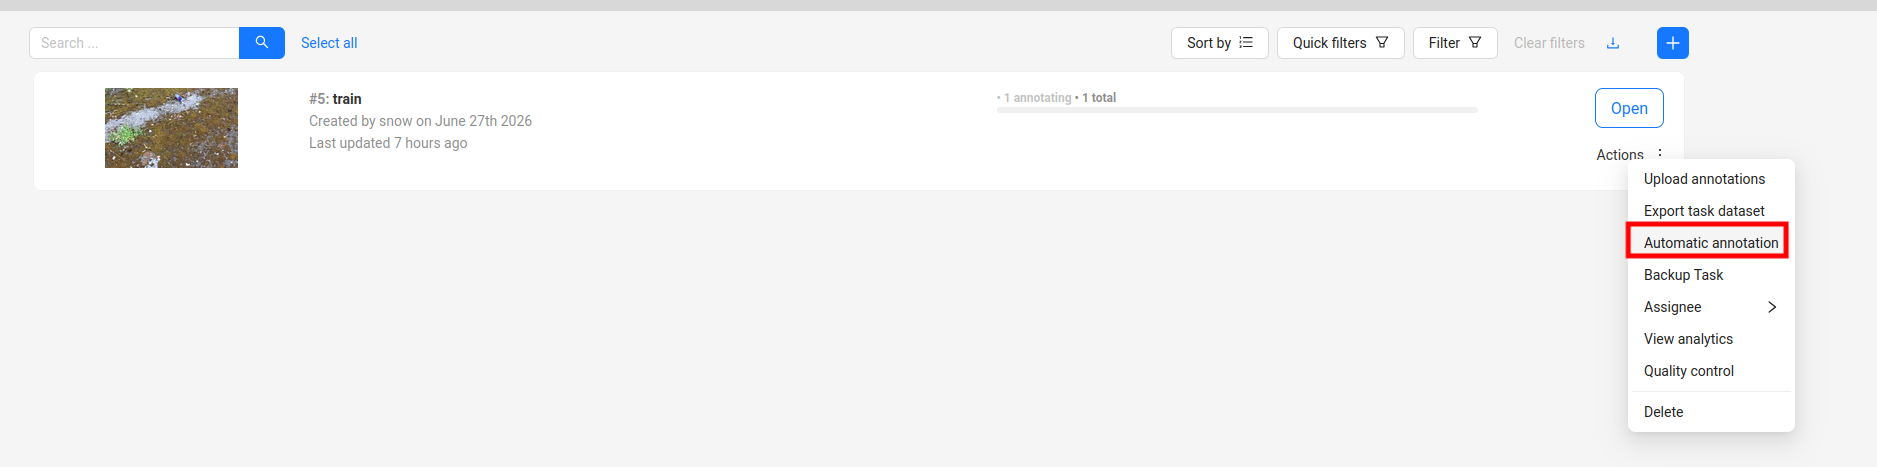
一次性
在task里面
总结
这部分就是我的一些碎碎念,前面所有内容已经介绍完了。之前训练yolo模型感觉能跑,结果还可以就行,但是这次开始研究怎么优化,怎么更加泛化,发现数据标注真的好难,一些物品根本看不清是什么,一些根本切分不开,到底是大框还是小框一系列问题。有些问题感觉就是二维图像固有的缺点,还有一些就是根据具体的任务需求进行改变,在标注之前要规定好标准,要不然不同标注可能使得模型崩掉(一会说那样一会说这样,模型也很苦恼),还有一些就是detect这个模型的问题了(比如这个方方的框真的很难框斜的物品,当然我知道有旋转框和分割)。体会到一种越改数据,模型越崩的感觉,只能重头再理理了。之前只觉得模型调参难,现在也是get到数据多重要了,当然调参我也还是不太会,虽然看过模型结构了(这个部分一年多前说要更新,我已经懒得更新了~),终究还是有很多需要学习的地方。