一、上传并解压安装包
bash
# 1. 进入目录并解压
cd /appdata
tar -xzvf oceanbase-all-in-one-4.3.5_bp6_20260410.el7.x86_64.tar.gz
cd oceanbase-all-in-one

# 2. 查看目录结构
ls -la

[root@k8s-node1 appdata]# cd oceanbase-all-in-one
[root@k8s-node1 oceanbase-all-in-one]# ls -la
总用量 12
drwxr-xr-x 6 root root   88 4月  10 16:22 .
drwxr-xr-x 5 root root  128 6月  30 14:13 ..
drwxr-xr-x 2 root root   58 4月  10 16:21 bin
drwxr-xr-x 3 root root   17 4月  10 16:22 obclient
drwxr-xr-x 4 root root   28 4月  10 16:21 obd
-rw-r--r-- 1 root root  666 4月  10 16:21 README.md
drwxr-xr-x 2 root root 4096 4月  10 16:22 rpms
-rw-r--r-- 1 root root   19 4月  10 16:21 VERSION
[root@k8s-node1 oceanbase-all-in-one]# 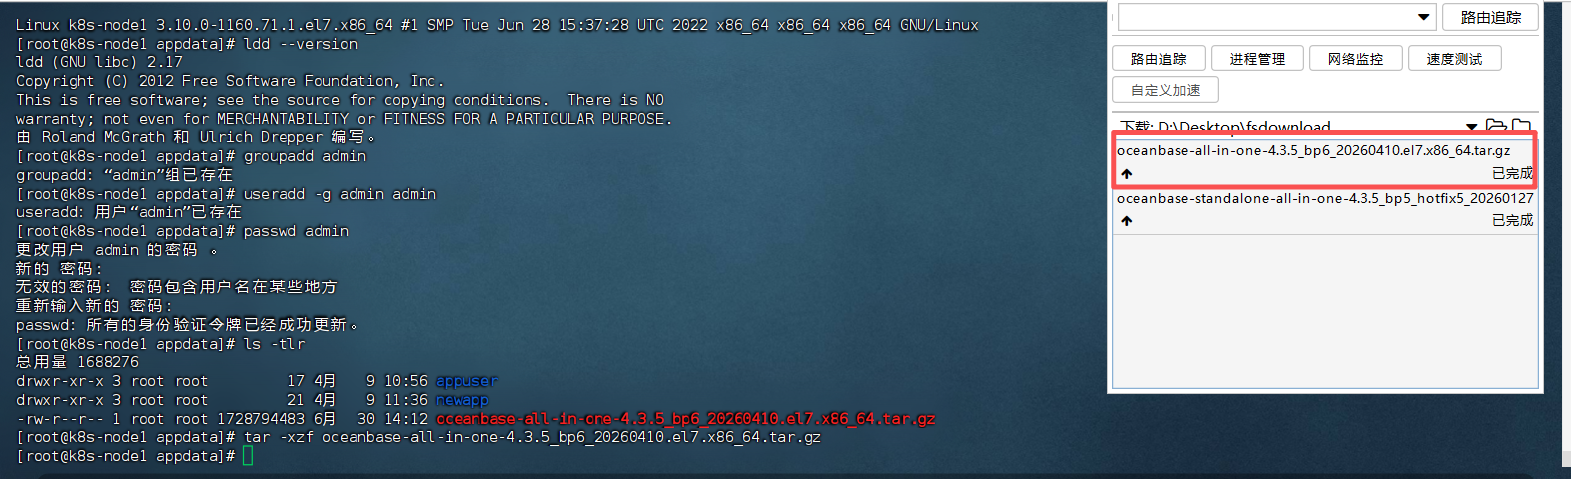
二、安装 OBD 工具
bash
# 1. 安装 OBD(不再会有 GLIBC 错误)
bash bin/install.sh

# 2. 加载环境变量
source ~/.oceanbase-all-in-one/bin/env.sh

# 3. 验证 OBD 是否可用
obd --version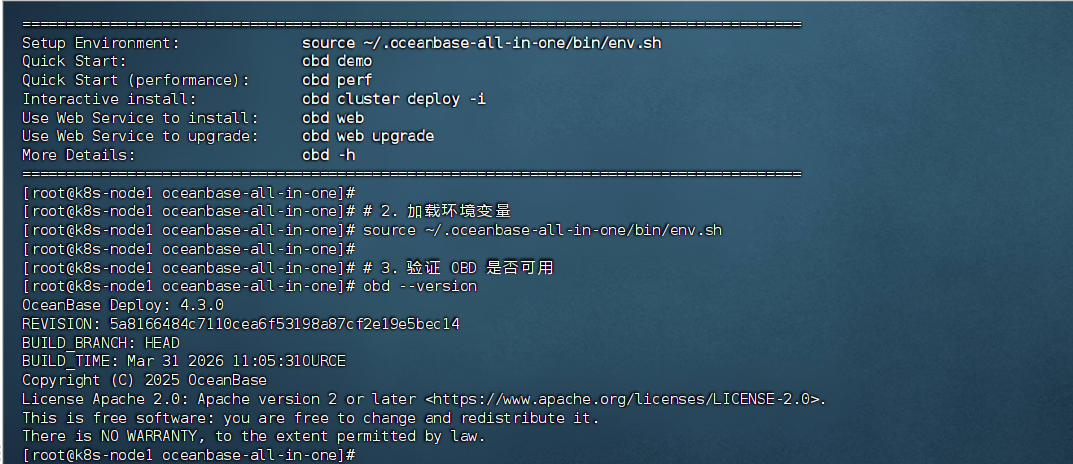
bash
[root@k8s-node1 ~]# python3 -c "import yaml; yaml.safe_load(open('/appdata/obcluster/config.yaml'))" && echo "✅ YAML 格式正确"
✅ YAML 格式正确
[root@k8s-node1 ~]# # 清理所有缓存
[root@k8s-node1 ~]# rm -rf /root/.obd/cluster/obcluster
[root@k8s-node1 ~]# rm -rf /root/.obd/local/obcluster
[root@k8s-node1 ~]# rm -f /root/.obd/lock/deploy_obcluster
[root@k8s-node1 ~]#
[root@k8s-node1 ~]# # 部署
[root@k8s-node1 ~]# obd cluster deploy obcluster -c /appdata/obcluster/config.yaml
Are you sure you want to deploy the database as the root user? [y/n] [Default: n]: y
+------------------------------------------------------------------------------------------------+
|                                            Packages                                            |
+--------------+-------------+------------------------+------------------------------------------+
| Repository   | Version/Tag | Release                | Hash                                     |
+--------------+-------------+------------------------+------------------------------------------+
| oceanbase-ce | 4.3.5.6     | 106000012026040916.el7 | a6be2be07f9664e391aea88080c558230a0942a7 |
+--------------+-------------+------------------------+------------------------------------------+
Repository integrity check ok
Load param plugin ok
Open ssh connection ok
Initializes observer work home ok
Parameter check ok
Remote oceanbase-ce-4.3.5.6-106000012026040916.el7-a6be2be07f9664e391aea88080c558230a0942a7 repository install ok
Remote oceanbase-ce-4.3.5.6-106000012026040916.el7-a6be2be07f9664e391aea88080c558230a0942a7 repository lib check ok
obcluster deployed
Please execute ` obd cluster start obcluster ` to start
Trace ID: 31c4d7bc-7454-11f1-aee4-bc24110c3fd2
If you want to view detailed obd logs, please run: obd display-trace 31c4d7bc-7454-11f1-aee4-bc24110c3fd2
[root@k8s-node1 ~]# obd cluster start obcluster
Get local repositories ok
Load cluster param plugin ok
Open ssh connection ok
[WARN] OBD-1011: (172.16.20.147) The recommended value of fs.aio-max-nr is 1048576 (Current value: 65536)
[ERROR] OBD-1007: (172.16.20.147) The value of the ulimit parameter "open files" must not be less than 655350 (Current value: 1024), Please execute `echo -e "* soft nofile 655350\n* hard nofile 655350" >> /etc/security/limits.d/nofile.conf` as root in 172.16.20.147. if it dosen't work, please check whether UsePAM is yes in /etc/ssh/sshd_config.
[WARN] OBD-1007: (172.16.20.147) The recommended number of core file size is unlimited (Current value: 0)
[WARN] OBD-1007: (172.16.20.147) The recommended number of stack size is unlimited (Current value: 8192)
[ERROR] OBD-1017: (172.16.20.147) The value of the "vm.max_map_count" must be within [327600, 1310720] (Current value: 65530, Recommended value: 655360), Please execute `echo "vm.max_map_count=655360" >> /etc/sysctl.conf; sysctl -p` as root in 172.16.20.147.
[ERROR] OBD-1017: (172.16.20.147) The value of the "vm.overcommit_memory" must be 0 (Current value: 1, Recommended value: 0), Please execute `echo "vm.overcommit_memory=0" >> /etc/sysctl.conf; sysctl -p` as root in 172.16.20.147.
[ERROR] OBD-1017: (172.16.20.147) The value of the "fs.file-max" must be greater than 6573688 (Current value: 1599489, Recommended value: 6573688), Please execute `echo "fs.file-max=6573688" >> /etc/sysctl.conf; sysctl -p` as root in 172.16.20.147.
[WARN] OBD-2000: (172.16.20.147) not enough memory. (Free: 556M, Need: 6G)
[WARN] OBD-1012: (172.16.20.147) clog and data use the same disk (/)
You can use the `obd cluster init4env obcluster` command to automatically configure system parameters
See https://www.oceanbase.com/product/ob-deployer/error-codes .
Trace ID: 5cb852d2-7454-11f1-8394-bc24110c3fd2
If you want to view detailed obd logs, please run: obd display-trace 5cb852d2-7454-11f1-8394-bc24110c3fd2
[root@k8s-node1 ~]# obd cluster display obcluster
Deploy "obcluster" is deployed
Trace ID: 67825b5e-7454-11f1-9e27-bc24110c3fd2
If you want to view detailed obd logs, please run: obd display-trace 67825b5e-7454-11f1-9e27-bc24110c3fd2
[root@k8s-node1 ~]# obd cluster init4env obcluster
Get local repositories ok
Open ssh connection ok
get system config ok
+-----------------------------------------------------+
|             System Parameter Change List            |
+---------------+----------------------+--------------+
| ip            | need_change_var      | target_value |
+---------------+----------------------+--------------+
| 172.16.20.147 | fs.aio-max-nr        | 1048576      |
| 172.16.20.147 | nofile               | 655350       |
| 172.16.20.147 | vm.max_map_count     | 655360       |
| 172.16.20.147 | vm.overcommit_memory | 0            |
| 172.16.20.147 | fs.file-max          | 6573688      |
+---------------+----------------------+--------------+
Are you sure to change the parameters listed above ? [y/n]: y
172.16.20.147: ( fs.aio-max-nr,nofile,vm.max_map_count,vm.overcommit_memory,fs.file-max ) have been successfully modified!
Trace ID: 7ffe831a-7454-11f1-846c-bc24110c3fd2
If you want to view detailed obd logs, please run: obd display-trace 7ffe831a-7454-11f1-846c-bc24110c3fd2
[root@k8s-node1 ~]# # 启动集群
[root@k8s-node1 ~]# obd cluster start obcluster
Get local repositories ok
Load cluster param plugin ok
Open ssh connection ok
[WARN] OBD-1007: (172.16.20.147) The recommended number of core file size is unlimited (Current value: 0)
[WARN] OBD-1007: (172.16.20.147) The recommended number of stack size is unlimited (Current value: 8192)
[WARN] OBD-2000: (172.16.20.147) not enough memory. (Free: 551M, Need: 6G)
[WARN] OBD-1012: (172.16.20.147) clog and data use the same disk (/)
cluster scenario: htap
Start observer ok
observer program health check ok
Connect to observer 172.16.20.147:2881 ok
oceanbase bootstrap ok
obshell start ok
obshell program health check ok
obshell bootstrap ok
Connect to observer 172.16.20.147:2881 ok
Wait for observer init ok
+-------------------------------------------------+
|                   oceanbase-ce                  |
+---------------+---------+------+-------+--------+
| ip            | version | port | zone  | status |
+---------------+---------+------+-------+--------+
| 172.16.20.147 | 4.3.5.6 | 2881 | zone1 | ACTIVE |
+---------------+---------+------+-------+--------+
obclient -h172.16.20.147 -P2881 -uroot@sys -p'Root123456' -Doceanbase -A

cluster unique id: 2947460a-67c3-5559-a615-b0b302f320ec-19f176ad749-06050304

obshell program health check ok
display obshell dashboard ok
+----------------------------------------------------------+
|                    obshell Dashboard                     |
+---------------------------+------+--------------+--------+
| url                       | user | password     | status |
+---------------------------+------+--------------+--------+
| http://172.16.20.147:2886 | root | 'Root123456' | active |
+---------------------------+------+--------------+--------+

obcluster running
Trace ID: b0b2fc84-7454-11f1-a6f9-bc24110c3fd2
If you want to view detailed obd logs, please run: obd display-trace b0b2fc84-7454-11f1-a6f9-bc24110c3fd2
[root@k8s-node1 ~]#
查看当前租户
bash
[root@k8s-node1 ~]# # 连接 sys 租户查看
[root@k8s-node1 ~]# obclient -h172.16.20.147 -P2881 -uroot@sys -p'Root123456' -e "SELECT tenant_id, tenant_name, compatibility_mode FROM oceanbase.DBA_OB_TENANTS;"
+-----------+-------------+--------------------+
| tenant_id | tenant_name | compatibility_mode |
+-----------+-------------+--------------------+
|         1 | sys         | MYSQL              |
+-----------+-------------+--------------------+
[root@k8s-node1 ~]#
oracle得企业版本
bash
一、环境准备与安装包说明

• 当前为 OceanBase 企业版 All-In-One 离线包

• 操作系统:CentOS / RHEL 7(el7)

• 部署方式:单机单节点(Standalone)

• 管理工具:OBD 4.1.0

二、解压后检查安装脚本

pwd
ls -la bin/


实际可用脚本:
• install_obd.sh:安装 OBD

• upgrade.sh:升级 OBD / 组件

• uninstall_obd.sh

• env.sh:环境变量初始化

三、安装 / 升级 OBD

1️⃣ 安装 OBD(首次)

bash bin/install_obd.sh


2️⃣ 已存在 OBD,执行升级

bash bin/upgrade.sh
# 提示后输入 y


3️⃣ 加载环境变量

source ~/.oceanbase-all-in-one/bin/env.sh


4️⃣ 验证 OBD 版本

obd --version


四、导入企业版 RPM 到 OBD 本地仓库

cp /appdata/oceanbase-standalone-all-in-one-with-ocp/rpms/oceanbase-standalone-*.rpm \
   /root/.obd/repo/


查看仓库内容:
ls -la /root/.obd/repo/ | grep oceanbase


✅ 期望看到:
• oceanbase-standalone-*.rpm

• oceanbase-standalone-libs-*.rpm

五、准备部署目录

mkdir -p /appdata/obcluster


六、编写 OBD 集群配置文件(✅ 最终可用版)

⚠️ 注意:mysql_port、rpc_port、zone 必须放在 global: 下

这是你第一次 YAML 报错的根本原因

cat > /appdata/obcluster/config.yaml << 'EOF'
oceanbase-ce:
  servers:
    - 172.16.20.147
  global:
    home_path: /home/admin/oceanbase
    data_dir: /appdata/ob_data
    redo_dir: /appdata/ob_data/redo
    log_dir: /appdata/ob_data/log
    memory_limit: 6G
    system_memory: 1G
    cpu_count: 4
    cluster_id: 1
    appname: obcluster
    root_password: Root123456
    proxyro_password: Proxyro123456
    tenant_name: ciom_tenant
    tenant_mode: oracle
    development_mode: true
    mysql_port: 2881
    rpc_port: 2882
    zone: zone1
EOF


七、校验 YAML 语法(强烈建议)

python3 -c "import yaml; yaml.safe_load(open('/appdata/obcluster/config.yaml'))" \
&& echo "✅ YAML 格式正确"


八、清理历史残留(防止部署失败)

rm -rf /root/.obd/cluster/obcluster
rm -rf /root/.obd/local/obcluster
rm -f  /root/.obd/lock/deploy_obcluster


九、部署 OceanBase 集群

obd cluster deploy obcluster -c /appdata/obcluster/config.yaml --force


部署成功后提示:
Please execute `obd cluster start obcluster` to start


十、启动集群

obd cluster start obcluster


⚠️ 常见警告(可忽略):
• core / stack size 未设为 unlimited

• 内存不足(你当时只剩 207MB)

• clog 与 data 共用磁盘

✅ 成功标志:
+---------------+---------+------+-------+--------+
| ip            | version | port | zone  | status |
+---------------+---------+------+-------+--------+
| 172.16.20.147 | 4.3.5.6 | 2881 | zone1 | ACTIVE |
+---------------+---------+------+-------+--------+


十一、连接数据库

obclient -h172.16.20.147 -P2881 -uroot@sys -p'Root123456' -Doceanbase -A


Obshell 管理地址:

http://172.16.20.147:2886
用户名:root
密码:Root123456


十二、当前部署结果总结

项目 状态

OBD 版本 ✅ 4.1.0

OB 版本 ✅ 4.3.5.6(CE 自动选中)

部署模式 ✅ 单机单节点

租户模式 ✅ Oracle

集群名 ✅ obcluster

启动状态 ✅ ACTIVE