摘要 :你的项目覆盖率 100%,但线上 Bug 还是漏了?覆盖率只能告诉你"代码被执行了",却无法告诉你"测试真的能抓住 Bug"。本文将带你深入变异测试(Mutation Testing) ------一种通过在源代码中故意注入微小缺陷来量化测试用例真实检测能力的技术,并使用 Python 生态中最流行的变异测试工具 mutmut 进行全流程实战演示。
一、覆盖率 100% 的虚假安全感
1.1 一个真实的"翻车"场景
来看一段简单的 Python 代码:
def calculate_discount(price: float, is_vip: bool) -> float:
    """计算折扣价格"""
    if is_vip:
        return price * 0.8  # VIP 打八折
    return price
你写了如下测试,覆盖率显示 100%:
def test_calculate_discount_vip():
    result = calculate_discount(100.0, True)
    assert result is not None  # ⚠️ 只断言了"不为空"

def test_calculate_discount_normal():
    result = calculate_discount(100.0, False)
    assert result == 100.0
pytest --cov 跑完,两行分支都被执行了,覆盖率 100%。但如果有人把 0.8 手滑改成了 0.9,测试依然通过------因为 result is not None 根本不管具体值。
这就是覆盖率的最大盲区:它只衡量"代码是否被执行",不衡量"测试是否能检测出错误"。
1.2 覆盖率的本质局限
| 指标 | 回答了什么问题 | 没回答什么问题 |
|---|---|---|
| 行覆盖率 | 这行代码被执行了吗? | 执行后结果验证了吗? |
| 分支覆盖率 | 每个分支走过了吗? | 走过的分支结果对吗? |
| 变异得分 | 代码被改坏了,测试能发现吗? | ------ |
我们需要一种能回答"测试用例是否真正具备检测 Bug 的能力"的方法------变异测试。
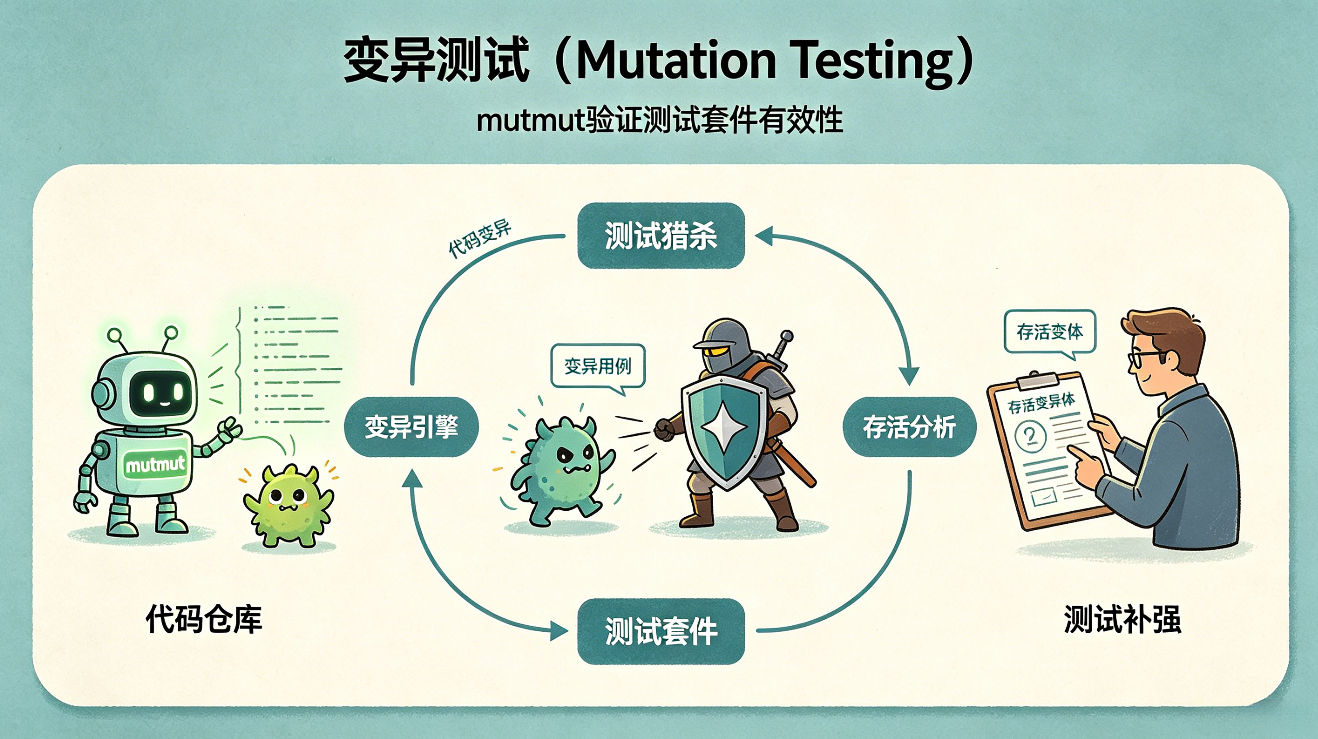
二、什么是变异测试?
2.1 核心思想
变异测试的思想非常直觉:
如果我把源代码偷偷改坏一点点,你的测试还能发现吗?如果不能,说明你的测试不够好。
具体流程如下:
原始代码 → 注入微小变异(模拟 Bug)→ 运行测试套件
    ├── 测试失败 → 变异被杀死(Killed) ✅
    └── 测试通过 → 变异存活(Survived) ❌ 测试盲区!
2.2 关键术语
| 术语 | 含义 | 类比 |
|---|---|---|
| Mutant(变异体) | 被修改了一处源代码的程序版本 | 一个"带 Bug 的克隆体" |
| Killed(杀死) | 测试在变异体上失败了,说明测试能检测到这个 Bug | 守卫抓住了入侵者 |
| Survived(存活) | 测试在变异体上全部通过,说明测试存在盲区 | 入侵者溜过去了 |
| Timeout(超时) | 变异导致死循环等,测试超时 | 入侵者把守卫拖住了 |
| Equivalent(等价变异) | 变异后语义等价,任何正确测试都不可能失败 | 化妆术,看起来变了实际没变 |
| Mutation Score(变异得分) | 杀死数 / (杀死数 + 存活数) × 100% |
守卫的拦截率 |
2.3 常见的变异操作
mutmut 会自动对源代码施加以下类型的变异:
# 算术运算符替换
price * 0.8   →   price / 0.8
price + 10    →   price - 10

# 关系运算符替换
if x > 5      →   if x >= 5
if a == b     →   if a != b

# 布尔值翻转
return True   →   return False
if flag:      →   if not flag:

# 常量修改
MAX_RETRY = 3  →  MAX_RETRY = 4

# 条件分支删除
if condition:   →   (删除整个 if 块,或无条件执行)
    do_something()
三、mutmut 快速上手
3.1 安装
pip install mutmut版本说明 :本文基于 mutmut 3.x(截至 2026 年 6 月,PyPI 最新版本为 3.6.0)。3.x 版本相比 2.x 在性能和配置方式上有较大改进,支持
pyproject.toml配置。
3.2 项目结构准备
假设我们有一个如下项目:
my_project/
├── pyproject.toml
├── src/
│   └── calculator.py
└── tests/
└── test_calculator.pysrc/calculator.py:
def add(a: float, b: float) -> float:
    return a + b


def is_eligible_for_bonus(age: int, years_of_service: int) -> bool:
    """判断是否有资格获得奖金"""
    if age >= 18 and years_of_service >= 3:
        return True
    return False


def classify_temperature(temp: float) -> str:
    """根据温度分类"""
    if temp < 0:
        return "极寒"
    elif temp < 15:
        return "寒冷"
    elif temp < 30:
        return "温暖"
    else:
return "炎热"tests/test_calculator.py(故意写得"看起来很完整"但实际有盲区):
from calculator import add, is_eligible_for_bonus, classify_temperature


def test_add():
    assert add(2, 3) == 5


def test_is_eligible_true():
    assert is_eligible_for_bonus(25, 5) == True


def test_is_eligible_false():
    assert is_eligible_for_bonus(17, 5) == False


def test_classify_hot():
    assert classify_temperature(35) == "炎热"


def test_classify_warm():
    assert classify_temperature(25) == "温暖"
先用 pytest --cov 看看覆盖率:
$ pytest --cov=calculator tests/

----------- coverage: platform linux, python 3.11 -----------
Name                    Stmts   Miss  Cover
--------------------------------------------
src/calculator.py          11      0   100%
--------------------------------------------
TOTAL                      11      0   100%

5 passed in 0.01s
覆盖率 100%!完美?让我们看看 mutmut 怎么说。
3.3 运行变异测试
# 基本运行(mutmut 自动检测 src/ 和 tests/)
mutmut run

# 指定变异路径(推荐)
mutmut run --paths-to-mutate src/
mutmut 会:
- 解析源代码的 AST(抽象语法树)
- 在每一个可变异的位置生成一个变异体
- 对每个变异体运行测试套件
- 记录每个变异体是被杀死还是存活
运行结束后,查看结果摘要:
mutmut results输出示例:
🎉 7 ⏰ 0 🤔 0 🙁 6其中每个 emoji 代表:
- 🎉 = Killed(变异被杀死,测试有效)
- 🙁 = Survived(变异存活,测试盲区)
- ⏰ = Timeout(超时)
- 🤔 = Suspicious(可疑,可能是测试运行时间过短)
在本例中,7 个变异被杀死,但还有 6 个变异存活------说明尽管覆盖率 100%,测试仍然有大量盲区!
3.4 查看具体存活的变异
mutmut show 3输出:
--- src/calculator.py
+++ src/calculator.py
@@ -8,7 +8,7 @@
 def is_eligible_for_bonus(age: int, years_of_service: int) -> bool:
     """判断是否有资格获得奖金"""
-    if age >= 18 and years_of_service >= 3:
+    if age > 18 and years_of_service >= 3:
         return True
     return False
这意味着:如果将 >= 改为 >,测试仍然通过------因为我们只测试了 age=25(远大于 18)和 age=17,却没有测试边界值 age=18!
3.5 将变异应用到磁盘
如果你想在本地仔细分析某个变异:
# 将第 3 号变异应用到源代码(直接修改文件)
mutmut apply 3

# 分析完后,记得恢复源代码!
git checkout src/calculator.py
四、实战:消灭存活变异
根据 mutmut results 暴露的 6 个存活变异,我们逐一修补测试。
4.1 边界值缺失:is_eligible_for_bonus
存活的变异 :age >= 18 → age > 18
修复:增加边界测试用例
def test_is_eligible_boundary_age():
    """精确测试 age=18 的边界"""
    assert is_eligible_for_bonus(18, 3) == True
    assert is_eligible_for_bonus(18, 2) == False

def test_is_eligible_boundary_service():
    """精确测试 years_of_service=3 的边界"""
    assert is_eligible_for_bonus(25, 3) == True
    assert is_eligible_for_bonus(25, 2) == False
4.2 分支覆盖不全:classify_temperature
存活的变异 :temp < 0 → temp < 1("极寒"分支阈值被篡改)
修复:增加各分支边界值测试
def test_classify_freezing():
    assert classify_temperature(-1) == "极寒"
    assert classify_temperature(0) == "寒冷"   # 0 不属于极寒!

def test_classify_cold_boundary():
    assert classify_temperature(14) == "寒冷"
    assert classify_temperature(15) == "温暖"

def test_classify_warm_boundary():
    assert classify_temperature(29) == "温暖"
    assert classify_temperature(30) == "炎热"
4.3 运算符变异:add
存活的变异 :a + b → a - b
问题 :assert add(2, 3) == 5 理论上应该能杀死这个变异。但如果测试用例使用了 0 作为参数,0 + 0 == 0 - 0,变异就会存活。检查一下是否存在这样的测试。
4.4 重新运行 mutmut
修补测试后重新运行:
# 清除缓存,重新运行所有变异
mutmut run --paths-to-mutate src/

# 查看结果
mutmut results
目标输出:
🎉 13 ⏰ 0 🤔 0 🙁 0变异得分:100%------所有注入的 Bug 都被测试检测到了!
五、配置与 CI/CD 集成
5.1 pyproject.toml 配置
在 pyproject.toml 中配置 mutmut:
[tool.mutmut]
paths_to_mutate = "src/"
tests_dir = "tests/"
# 排除不需要变异的文件
exclude_patterns = ["src/__init__.py"]
# 测试运行命令(默认自动检测 pytest)
runner = "python -m pytest -x --timeout=10 tests/"
5.2 在 CI 管道中运行
在 GitHub Actions 中集成变异测试:
# .github/workflows/mutation.yml
name: Mutation Testing

on:
    push:
        branches: [main]
    pull_request:
        branches: [main]

jobs:
    mutation-test:
        runs-on: ubuntu-latest
        steps:
            - uses: actions/checkout@v4

            - name: Set up Python
              uses: actions/setup-python@v5
              with:
                  python-version: "3.11"

            - name: Install dependencies
              run: |
                  pip install -e .
                  pip install pytest pytest-timeout mutmut

            - name: Run mutation testing
              run: |
                  mutmut run --paths-to-mutate src/

            - name: Check mutation score
              run: |
                  # 解析结果,如果变异得分低于 80% 则失败
                  mutmut results
                  # 可配合自定义脚本检查得分阈值
5.3 增量变异测试(大型项目必备)
对于大型项目,全量运行变异测试可能非常耗时(因为每个变异体都要完整跑一遍测试套件)。推荐策略:
# 只对增量变更的模块运行变异测试
mutmut run --paths-to-mutate src/payments/

# 搭配 git diff 自动识别变更文件
CHANGED=$(git diff --name-only origin/main -- 'src/*.py' | head -5)
for f in $CHANGED; do
    mutmut run --paths-to-mutate "$f"
done
六、变异得分的行业参考标准
| 变异得分 | 评价 | 建议 |
|---|---|---|
| < 50% | 🔴 危险 | 测试套件形同虚设,大量 Bug 无法被检出 |
| 50% ~ 70% | 🟡 一般 | 有一定检测能力,但仍有显著盲区 |
| 70% ~ 85% | 🟢 良好 | 测试质量较好,适合大多数项目 |
| 85% ~ 95% | 🟢 优秀 | 核心业务模块建议达到此标准 |
| > 95% | ⚠️ 审慎 | 可能存在等价变异,或投入产出比不高 |
务实建议 :核心业务逻辑(支付、风控、权限)追求 85%+ ;工具函数和辅助模块 70%+ 即可。不必盲目追求 100% 变异得分。
七、等价变异:变异测试的"噪音"
7.1 什么是等价变异
有时候变异后的代码和原代码语义完全等价,任何正确的测试都不可能杀死它:
# 原始代码
def get_items(items):
    if len(items) > 0:   # 条件:列表不为空
        return items[0]

# 变异后
def get_items(items):
    if len(items) >= 1:  # >= 1 和 > 0 在整数上完全等价!
return items[0]这个变异永远无法被杀死,它是一个等价变异(Equivalent Mutant)。
7.2 应对策略
- 人工标记:对识别出的等价变异进行记录和排除
- 变异算子选择:在配置中排除容易产生等价变异的算子
- 关注存活变异中的非等价部分:等价变异比例通常在 5%~15%,不会显著影响整体判断
八、性能优化技巧
变异测试最大的痛点是耗时------假设源码有 200 个可变异点,测试套件每次运行 10 秒,全量运行需要约 33 分钟。以下是优化策略:
8.1 使用 pytest-xdist 并行测试
pip install pytest-xdist

# 在 mutmut 配置中启用并行
[tool.mutmut]
runner = "python -m pytest -x -n auto tests/"
8.2 使用 --timeout 避免死循环变异
[tool.mutmut]
runner = "python -m pytest -x --timeout=10 tests/"
8.3 精准限定变异范围
# 只变异核心业务模块
mutmut run --paths-to-mutate src/core/,src/payments/
8.4 搭配 pytest --collect-only 预检
# 先确认测试用例能正常发现和收集
python -m pytest --collect-only tests/
九、mutmut vs 其他变异测试工具
| 特性 | mutmut | mutatest | cosmic-ray |
|---|---|---|---|
| 语言 | Python | Python | Python |
| 测试框架 | pytest / unittest | pytest | pytest / unittest |
| 易用性 | ⭐⭐⭐⭐⭐ | ⭐⭐⭐⭐ | ⭐⭐⭐ |
| 报告格式 | 终端 + 可应用磁盘 | HTML / JSON | JSON / SQLite |
| 并行支持 | 通过 pytest-xdist | 原生支持 | 原生支持 |
| 配置方式 | pyproject.toml |
CLI 参数 | 配置文件 |
| 适合场景 | 快速上手、中小项目 | 详细报告分析 | 大规模项目 |
推荐 :如果你是第一次引入变异测试,从 mutmut 开始------安装简单、上手快、与 pytest 无缝集成。
十、完整实战清单
以下是你在项目中落地变异测试的 Checklist:
✅ 1. 确保测试套件本身能正常运行(pytest 全绿)
✅ 2. pip install mutmut pytest-timeout
✅ 3. 配置 pyproject.toml 中的 [tool.mutmut] 段
✅ 4. 首次运行:mutmut run --paths-to-mutate src/core/
✅ 5. 分析存活变异:mutmut results + mutmut show
✅ 6. 补充测试用例,消灭高价值的存活变异
✅ 7. 重新运行,确认变异得分提升
✅ 8. 集成到 CI 管道,设置得分门禁(如 ≥ 80%)
✅ 9. 定期复查,随代码演进持续优化
十一、总结
| 维度 | 代码覆盖率 | 变异测试 |
|---|---|---|
| 衡量对象 | 代码是否被执行 | 测试是否能检测错误 |
| 核心问题 | "测了吗?" | "测对了吗?" |
| 盲区 | 假阳性(执行了但没断言) | 等价变异(无法检测的噪音) |
| 工具成本 | 低(pytest-cov 即可) | 中高(运行时间显著增加) |
| 适用阶段 | 始终需要 | 项目稳定后、核心模块 |
一句话总结:覆盖率告诉你测试"跑了哪些代码",变异测试告诉你测试"能抓住哪些 Bug"。两者结合,才能构建真正可靠的测试套件。
不要再被"覆盖率 100%"蒙蔽了。今天就在你的核心模块跑一次
mutmut run,你可能会惊讶地发现------那些"全绿"的测试背后,藏着多少漏网之鱼。
参考资料:
如果本文对你有帮助,欢迎 点赞 👍 收藏 ⭐ 关注 🔔 三连支持!你的支持是我创作的最大动力!