大家好,我是Java1234_小锋老师,最近更新 《一天学会 Vue3 + Vite + element-plus UI框架 视频教程》专辑,感谢大家支持。
本课程主要介绍和讲解 Vue3框架,Vite构建工具,以及element-plus UI框架。Vue3核心知识介绍,Vite构建工具使用,以及element-plus UI框架的基础组件,配置组件,Form 表单组件,Data 数据展示组件,Navigation导航组件,Feedback反馈组件,Container布局组件介绍和使用。
视频教程+课件+源码打包下载 :
链接:https://pan.baidu.com/s/1o-zRfndo1HHrS_uFroOiCw?pwd=1234
提取码:1234
具体位置 - > 第四阶段富客户端技术里面
Vue3专题 - 组件基础
组件是 Vue 应用的基本构建块:把页面拆成可复用的独立单元(按钮、卡片、表单、列表项等),每个单元有自己的模板、逻辑和样式。
掌握「单文件组件 + props 传参 + emit 事件 + 插槽」,就能搭出大部分常见界面。
1. 为什么需要组件?
没有组件时,所有 UI 和逻辑挤在一个大文件里,难维护、难复用:
vue
<!-- 不推荐:整页堆在一起 -->
<template>
  <div class="user-card">...</div>
  <div class="user-card">...</div>
  <!-- 重复很多遍 -->
</template>
拆成组件后,一处定义、多处使用,结构更清晰:
vue
<template>
  <UserCard name="小明" />
  <UserCard name="小红" />
</template>
2. 单文件组件(SFC)长什么样?
一个 .vue 文件通常分三块:
| 区块 | 作用 |
|---|---|
<template> |
结构(HTML) |
<script setup> |
逻辑(JS / TS) |
<style> |
样式(CSS) |
最小示例:
vue
<script setup>
/**
 * 打招呼组件 Demo
 * 展示最简单的单文件组件结构
 */
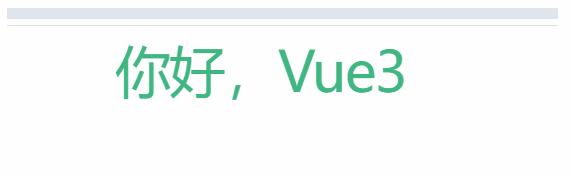
const msg = '你好,Vue3'
</script>

<template>
  <h1>{{ msg }}</h1>
</template>

<style scoped>
/* scoped:样式只作用于当前组件,不会污染全局 */
h1 {
  color: #42b883;
}
</style>
日常推荐用 <script setup>,写法更短,变量和函数可直接在模板里用。
运行截图:
3. 注册与使用组件
在父组件里 import 子组件,然后在模板里像标签一样用:
vue
<!-- App.vue -->
<script setup>
/**
 * 父组件:引入并使用 HelloWorld
 */
import HelloWorld from './components/HelloWorld.vue'
</script>

<template>
  <HelloWorld />
</template>
vue
<!-- components/HelloWorld.vue -->
<script setup>
/**
 * 子组件:简单展示一段文字
 */
const title = 'Hello World'
</script>

<template>
  <p>{{ title }}</p>
</template>
要点:
- 组件名建议用帕斯卡命名:
HelloWorld、UserCard - 模板里也可以写成
<hello-world />(kebab-case),效果等价 - 每个组件最好只做一件事,职责单一
4. Props ------ 父传子
父组件通过「属性」把数据传给子组件,子组件用 defineProps 声明接收:
vue
<!-- 父组件 -->
<script setup>
import UserCard from './UserCard.vue'
</script>

<template>
  <UserCard name="小明" :age="18" />
</template>
vue
<!-- UserCard.vue -->
<script setup>
/**
 * 用户卡片:通过 props 接收父组件数据
 */
// 声明 props(推荐带类型)
defineProps({
  name: {
    type: String,
    required: true
  },
  age: {
    type: Number,
    default: 0
  }
})
</script>

<template>
  <div class="card">
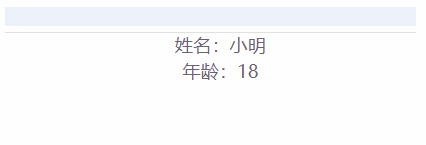
    <p>姓名:{{ name }}</p>
    <p>年龄:{{ age }}</p>
  </div>
</template>
注意:
- 静态字符串:
name="小明" - 动态值(数字、布尔、变量):必须加冒号,如
:age="18"、:user="userInfo" - 不要在子组件里直接改 props(单向数据流:父 → 子)
运行输出:
用脚本里拿到 props 对象时:
js
const props = defineProps({ name: String })
console.log(props.name)
5. 事件 ------ 子传父
子组件要通知父组件时,用 defineEmits 触发自定义事件:
vue
<!-- Counter.vue 子组件 -->
<script setup>
/**
 * 计数器:点击后把结果通过事件告诉父组件
 */
const emit = defineEmits(['change'])

/** 通知父组件:数值变成了 1 */
function handleClick() {
  emit('change', 1)
}
</script>

<template>
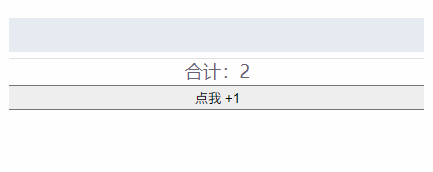
  <button @click="handleClick">点我 +1</button>
</template>
vue
<!-- 父组件 -->
<script setup>
/**
 * 父组件监听子组件的 change 事件
 */
import { ref } from 'vue'
import Counter from './Counter.vue'

const total = ref(0)

/** 收到子组件传来的增量 */
function onChange(n) {
  total.value += n
}
</script>

<template>
  <p>合计:{{ total }}</p>
  <Counter @change="onChange" />
</template>简单记:props 往下传数据,emit 往上报消息。
运行截图:
6. 插槽(slot)------ 父传内容
插槽让父组件可以向子组件「塞一段模板内容」:
vue
<!-- Card.vue -->
<script setup>
/**
 * 卡片容器:用默认插槽接收父组件传入的内容
 */
</script>

<template>
  <div class="card">
    <slot>这里是默认内容</slot>
  </div>
</template>
vue
<!-- 父组件使用 -->
<script setup>
import Card from './Card.vue'
</script>

<template>
  <Card>
    <h3>标题</h3>
    <p>插槽里可以放任意内容</p>
  </Card>
</template>
没有传内容时,会显示 <slot> 里的默认文案。