DeepSeek Harness 本地安装与启动指南
面向 Windows 用户的入门科普与实操教程
一、DeepSeek Harness 是什么?
DeepSeek Harness 是 DeepSeek 官方推出的智能体运行框架。简单来说,它不只是一个普通聊天页面,还可以把大模型、工作区、工具和插件组合起来,让 DeepSeek 在用户授权的范围内协助完成代码分析、文件处理和自动化任务。
它的命令行启动器叫作 dsh,当前通过 npm 包 @deepseek-ai/dsh 分发。安装后,可以启动一个只在本机访问的 Web 界面。
需要注意的是:DeepSeek Harness 本身运行在本地,但调用 DeepSeek 模型时仍会通过互联网连接 DeepSeek API,因此需要有效的 API Key,并可能产生 API 使用费用。
二、安装前需要准备什么?
1. Node.js
DeepSeek Harness 使用 Node.js 运行。先打开 PowerShell,检查版本:
powershell
node --version
npm --version
建议安装 Node.js 22.19.0 或更高版本。如果命令不存在,需要先从 Node.js 官方网站安装较新的 LTS 版本。
2. DeepSeek API Key
API Key 相当于访问 DeepSeek API 的密码。请从 DeepSeek 开放平台创建,并妥善保管。
安全原则:
- 不要把真实 Key 写进教程、截图或聊天记录。
- 不要提交到 Git、GitHub 或其他代码仓库。
- 不要直接硬编码进应用源代码。
- 如果 Key 曾经公开,应立即在控制台吊销并重新创建。
三、安装 DeepSeek Harness
在 PowerShell 中运行:
powershell
npm install --global @deepseek-ai/dsh这里的 --global 表示全局安装。完成后,无论当前位于哪个目录,都可以使用 dsh 命令。
验证安装:
powershell
dsh --version
dsh --help
如果能显示版本号和帮助信息,就说明命令行工具已经安装成功。
四、选择工作区
启动前,建议先进入准备交给 Harness 使用的项目目录:
powershell
cd "C:\你的项目目录"启动命令所在的目录会成为默认工作区。不要随意在包含大量隐私文件的目录中启动,也不建议直接把整个用户主目录作为工作区。
五、前台启动
运行:
powershell
dsh web --host 127.0.0.1 --port 8787看到类似下面的输出,代表服务已经启动:
text
dsh web: http://127.0.0.1:8787然后在浏览器中打开:
text
http://127.0.0.1:8787参数解释:
web:启动 Web 操作界面。--host 127.0.0.1:只允许本机访问,安全性高于监听所有网卡。--port 8787:指定服务使用 8787 端口。
前台运行时不要关闭 PowerShell 窗口。需要停止服务时,在该窗口按 Ctrl+C。
六、首次配置 API Key
首次打开页面后:
- 阅读内测声明并点击"继续"。
- 打开"设置"。
- 在 API Key 配置窗口输入新创建的 DeepSeek API Key。
- 点击"保存并继续"。
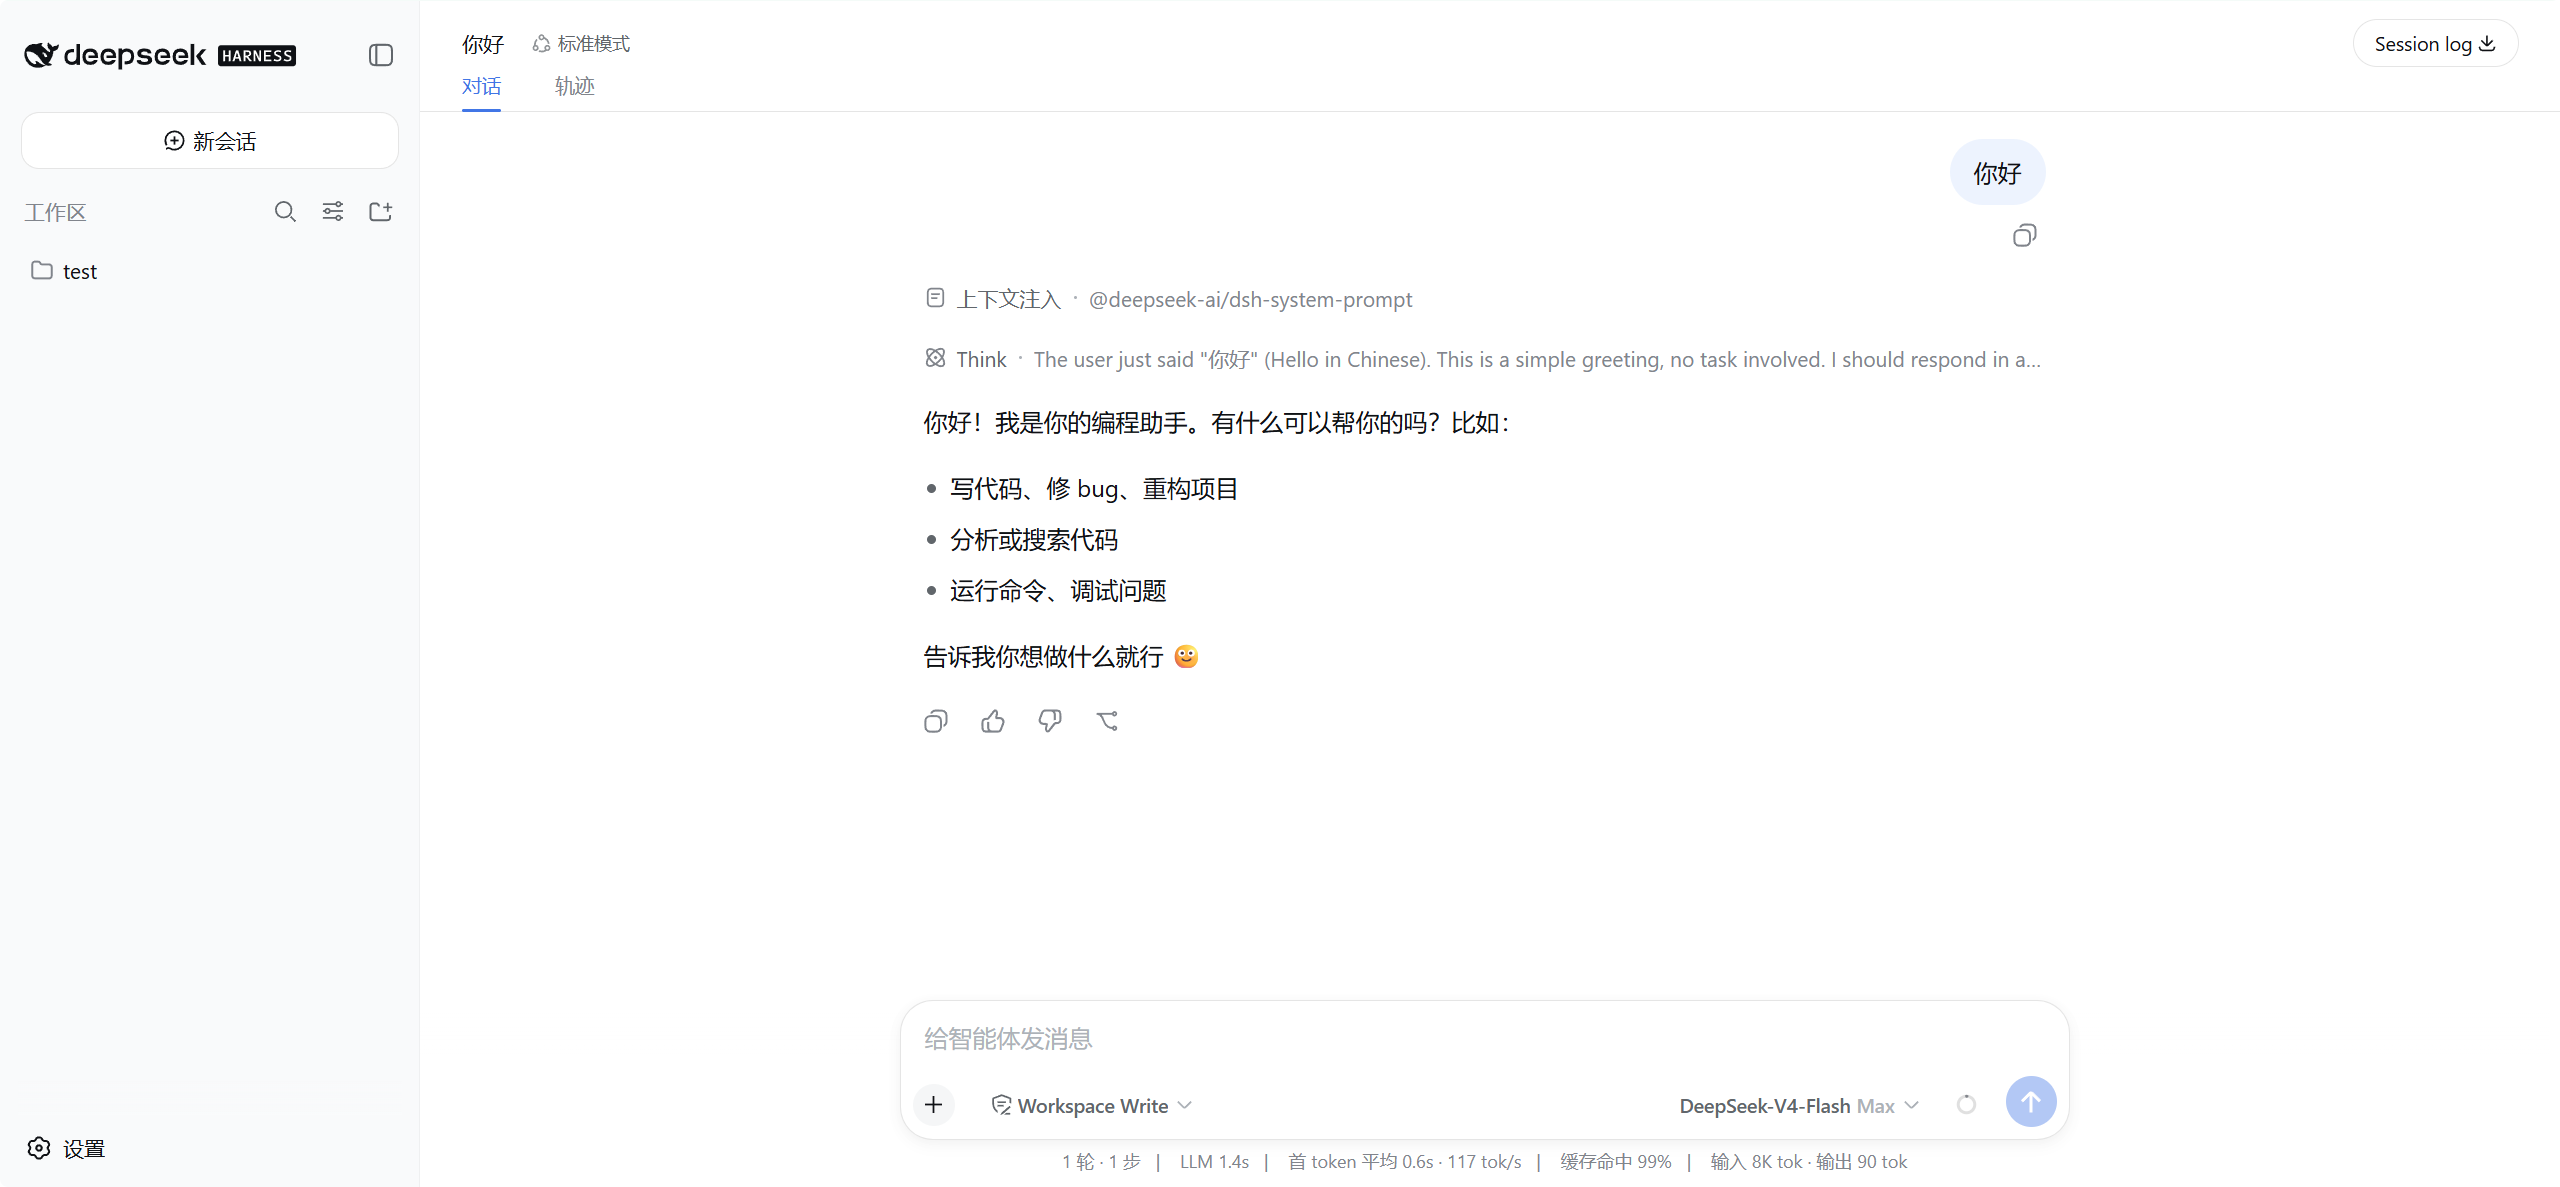
- 选择工作区,创建会话并发送一条简单消息进行测试。
建议先用不涉及隐私的测试内容,例如:
text
请用一句话介绍你自己。如果正常收到回答,说明本地 Harness、网络和 API Key 均已配置成功。
七、后台启动
如果不想一直保留 PowerShell 窗口,可以使用后台方式运行:
powershell
$workDir = "C:\你的项目目录"
$logDir = Join-Path $workDir "work\deepseek-harness"

New-Item -ItemType Directory -Force -Path $logDir | Out-Null

Start-Process `
  -FilePath "dsh.cmd" `
  -ArgumentList @("web", "--host", "127.0.0.1", "--port", "8787") `
  -WorkingDirectory $workDir `
  -WindowStyle Hidden `
  -RedirectStandardOutput (Join-Path $logDir "server.stdout.log") `
  -RedirectStandardError (Join-Path $logDir "server.stderr.log")
该命令会隐藏运行窗口,并把普通输出与错误信息分别保存到日志文件。
八、检查服务状态
查看 8787 端口是否正在监听:
powershell
Get-NetTCPConnection -LocalPort 8787 -State Listen查看普通日志:
powershell
Get-Content "C:\你的项目目录\work\deepseek-harness\server.stdout.log" -Tail 50查看错误日志:
powershell
Get-Content "C:\你的项目目录\work\deepseek-harness\server.stderr.log" -Tail 50九、停止后台服务
先找到监听 8787 端口的进程:
powershell
$connection = Get-NetTCPConnection -LocalPort 8787 -State Listen
$connection | Select-Object LocalAddress, LocalPort, OwningProcess
确认进程号后停止它:
powershell
Stop-Process -Id $connection.OwningProcess这只会停止当前监听该端口的进程,不会卸载 DeepSeek Harness,也不会删除配置。
十、常见问题
问题 1:找不到 dsh 命令
先重新打开 PowerShell,再运行:
powershell
npm config get prefix
npm list --global --depth=0
确认 npm 的全局命令目录已经加入系统 PATH。
问题 2:提示 Node.js 版本不满足要求
升级到较新的 Node.js 22 LTS,然后重新打开 PowerShell:
powershell
node --version确认版本满足依赖要求后,再重新安装 Harness。
问题 3:8787 端口被占用
可以换一个端口,例如 8080:
powershell
dsh web --host 127.0.0.1 --port 8080然后访问:
text
http://127.0.0.1:8080问题 4:页面能打开,但模型无法回答
依次检查:
- API Key 是否有效、是否已经被吊销。
- DeepSeek API 账户是否有可用余额。
- 网络是否能够访问 DeepSeek API。
- 错误日志中是否出现鉴权或连接错误。
问题 5:局域网其他设备无法访问
本教程使用 127.0.0.1,这是有意设置的安全限制,只允许当前电脑访问。除非了解防火墙、网络暴露和鉴权风险,否则不要改成 0.0.0.0。
十一、升级与卸载
升级到 npm 发布的最新版本:
powershell
npm install --global @deepseek-ai/dsh@latest查看当前版本:
powershell
dsh --version卸载:
powershell
npm uninstall --global @deepseek-ai/dsh卸载全局 npm 包不一定会自动删除用户配置和会话数据。如果需要清理配置,应先确认实际目录及备份需求,不要直接递归删除不确定的文件夹。
十二、最简命令清单
powershell
# 安装
npm install --global @deepseek-ai/dsh

# 验证
dsh --version

# 进入项目目录
cd "C:\你的项目目录"

# 启动
dsh web --host 127.0.0.1 --port 8787

# 浏览器访问
# http://127.0.0.1:8787
参考资料
- DeepSeek Harness 官方仓库:https://github.com/deepseek-ai/deepseek-harness
- DeepSeek 开放平台:https://platform.deepseek.com/
- Node.js 官方网站:https://nodejs.org/
社区封装exe版