最近上手了 DeepSeek 开源的 DeepSeek Harness(dsh)------一个"万物皆插件"的 Agent 运行时框架。模型适配器、工具注册表、会话日志、甚至 Agent 主循环本身,全都是可替换的插件。
这篇文章是我亲手做一个插件并发布到 GitHub 的完整复盘:从 5 分钟跑通第一个插件,到踩过的两个真实的坑,到配置化、打包、发布。全程实操,命令可复制。
⭐️⭐️⭐️
一、第一个Harness插件
我们从创建一个最小的 Harness 插件开始,并将其加载到 Web UI 中。
在 Harness 中,插件是一个导出 apply 函数的 TypeScript 模块。框架在加载时调用 apply,传入一个 ctx(上下文对象),你通过 ctx 注册能力:
在仓库根目录创建本教程使用的临时项目:
mkdir -p scratch-plugin/src目录结构如下:
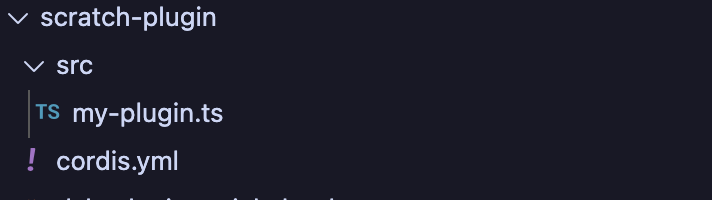
创建两个文件:
📄 scratch-plugin/src/my-plugin.ts
import type { Context } from '@deepseek-ai/cordis'
import { defineTool } from '@deepseek-ai/dsh-tools'

export const name = 'greet-tool'
export const inject = ['tools']

export function apply(ctx: Context) {
  ctx.tools.register(defineTool({
    name: 'greet',
    description: 'Greet someone by name.',
    parameters: {
      name: { type: 'string', required: true },
    },
    output: {
      schema: { type: 'string' },
      render: (_a, v) => [{ type: 'text', text: v }],
    },
    async execute(args) {
      return `Hello, ${args.name}!`
    },
  }))
}
📄 scratch-plugin/cordis.yml(注意用绝对路径)
- insert:
    - id: hello
      name: '/绝对路径/scratch-plugin/src/my-plugin.ts'
重新启动web ui:
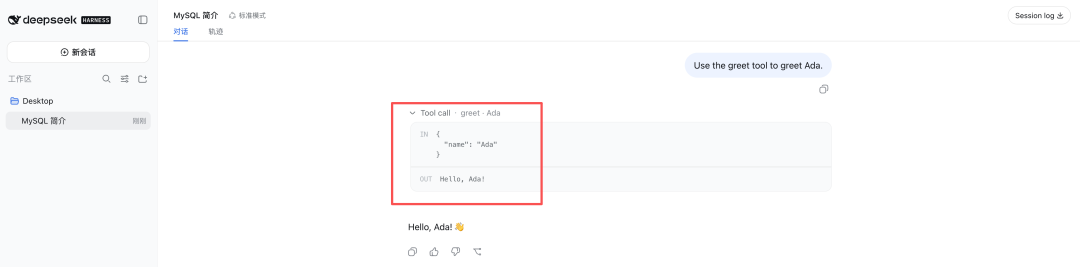
pnpm dsh web --patch ./scratch-plugin/cordis.yml在浏览器中打开 http://127.0.0.1:3080/,对 agent 说一句"Use the greet tool to greet Ada",模型就会调用你写的工具,返回 Hello, Ada! 🎉
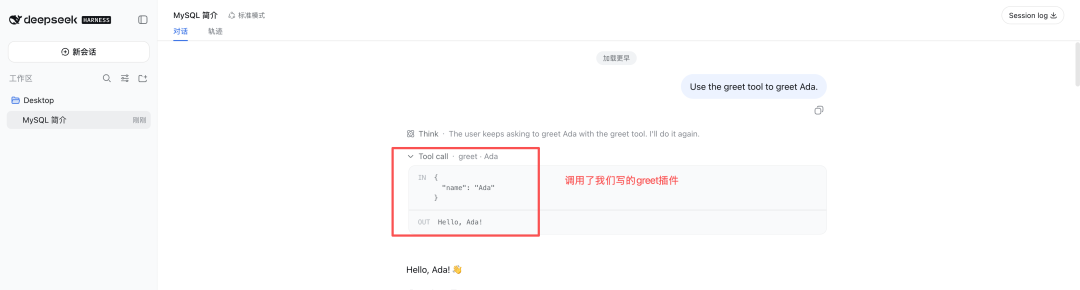
到这里,恭喜你,已经可以开发第一个插件了🎉🎉🎉
⭐️⭐️⭐️
二、插件配置:告别硬编码
本节内容继承上一节,上一节的execute函数```return Hello, ${args.name}!```
写死了打招呼方式,比如Hello,如果我想用"你好"就得改代码了,能不能在配置文件中改呢?
dsh 有条铁律:凡是两个部署可能想要不同的值,必须是配置字段。这也是harness规范要求。
只需改动两个步骤:
-
在插件中导出一个
Config类型和同名的 Schemastery schema;默认值直接写在 schema 中 -
在
scratch-plugin/cordis.yml新插入的本地插件行中添加配置
改动后的代码:
📄 scratch-plugin/src/my-plugin.ts
import type { Context } from '@deepseek-ai/cordis'
import Schemafrom '@deepseek-ai/schemastery'
import { defineTool } from '@deepseek-ai/dsh-tools'
export constname = 'greet-tool'
export const inject = 'tools'
export interface Config {
greeting: string
}
export const Config: Schema<Config> = Schema.object({
greeting: Schema.string().default('Hello'),
})
export function apply(ctx: Context, config: Config) {
ctx.tools.register(defineTool({
name:'greet',
description:'Greet someone by name.',
parameters: {
name: { type:'string', required:true, description:'The name to greet' },
},
output: {
schema: { type:'string' },
render: (_args, value) => { type:'text', text:value },
},
async execute(args) {
return`{config.greeting}, {args.name}!`
},
}))
}
📄 scratch-plugin/cordis.yml(注意用绝对路径)
- insert:
    - id: hello
      name: '/绝对路径/src/my-plugin.ts'
      config:
        greeting: '你好'
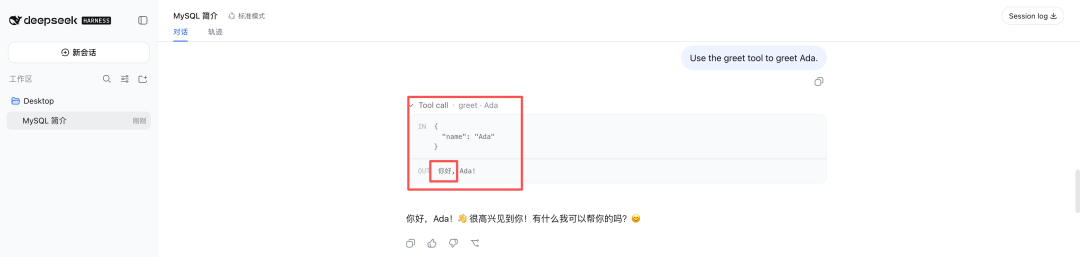
加载时 schema 校验配置,类型错误直接报错拒载(fail loud),缺省自动填默认值。
重启web ui后同样的提问会返回 "你好, Ada!"
⭐️⭐️⭐️
三、打包:从源码到可安装 Bundle
要让别人 dsh plugin add 一键安装,插件要变成带 dsh.bundle 声明的 npm 包。
最终目录结构如下:
📦 dsh-greet-plugin/
├── package.json(dsh.bundle 声明)
├── tsdown.config.ts(打包配置)
├── cordis.patch.yml(发布版配置层)
├── src/index.ts(插件源码)
└── lib/(构建产物,要提交进仓库!)
下面是具体打包步骤,
Step 0:创建项目目录
mkdir -p dsh-greet-plugin/srccd dsh-greet-pluginStep 1:创建 4 个核心文件
## 文件1:package.json
{ "name": "dsh-greet-plugin", "version": "0.1.0", "description": "A greet tool plugin for DeepSeek Harness (dsh).", "license": "MIT", "type": "module", "main": "lib/index.mjs", "types": "lib/index.d.mts", "files": ["lib", "cordis.patch.yml"], "scripts": { "build": "tsdown", "typecheck": "tsc --noEmit", "check": "pnpm typecheck && pnpm build" }, "peerDependencies": { "@deepseek-ai/cordis": "*" }, "devDependencies": { "@deepseek-ai/cordis": "link:../deepseek-harness/vendor/cordis", "@deepseek-ai/dsh-tools": "link:../deepseek-harness/packages/core/tools", "@deepseek-ai/schemastery": "link:../deepseek-harness/vendor/schemastery", "@types/node": "^22.10.0", "tsdown": "^0.22.2", "typescript": "^5.9.0" }, "dsh": { "bundle": { "patch": "./cordis.patch.yml" } }}# 文件2:tsdown.config.ts ------ 打包策略核心:
import { defineConfig } from 'tsdown'
export default defineConfig({ entry: ['src/index.ts'], outDir: 'lib', format: 'esm', dts: true, // 只 external cordis(宿主必有),dsh-tools/schemastery 打进 bundle, // git 分发零 registry 依赖 external: ['@deepseek-ai/cordis'],})# 文件3: cordis.patch.yml ------ 发布版(name 用包名,不再用绝对路径)- insert: - id: greet-plugin name: dsh-greet-plugin config: greeting: 'Hello'# 文件4: 把原来的src/my-plugin.ts 原样copy为:src/index.tsStep 2:安装依赖
pnpm installStep 3:构建
pnpm check产出:lib/index.mjs 和 lib/index.d.mts
💡 划重点 :lib/ 构建产物要提交进仓库(.gitignore 千万别忽略它)。用户 git 安装时拿到的是现成产物------不跑构建脚本,也就不需要 allowBuilds 授权,安装体验最顺滑。
⭐️⭐️⭐️
五、发布到 GitHub
先在 GitHub 建好空仓库,不要生成readme文件,否则push会有冲突。
然后在本地项目目录中执行四条命令:
git init -b main
git add . && git commit -m "v0.1.0"
git tag v0.1.0
git remote add origin git@github.com:你/dsh-greet-plugin.git
git push -u origin main --tags
打 tag 的意义:用户可以 pin 住版本安装,可复现部署。
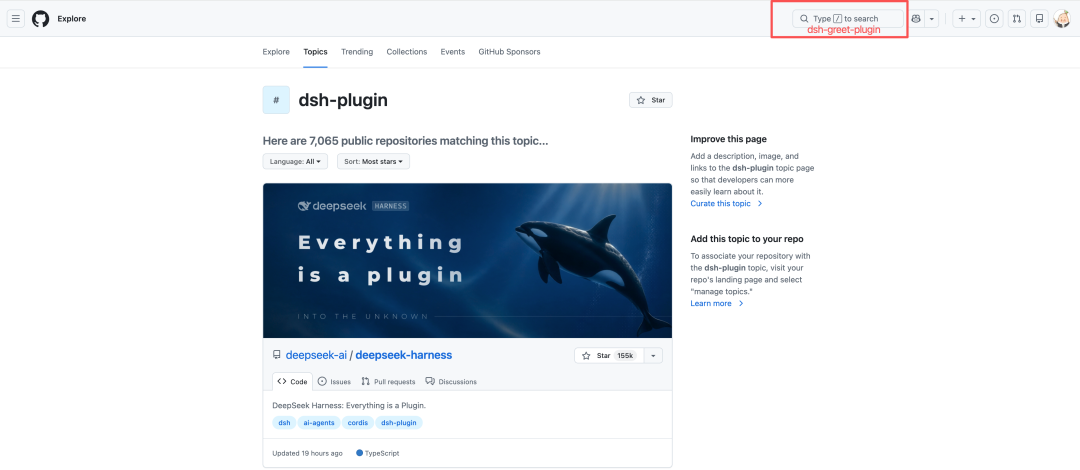
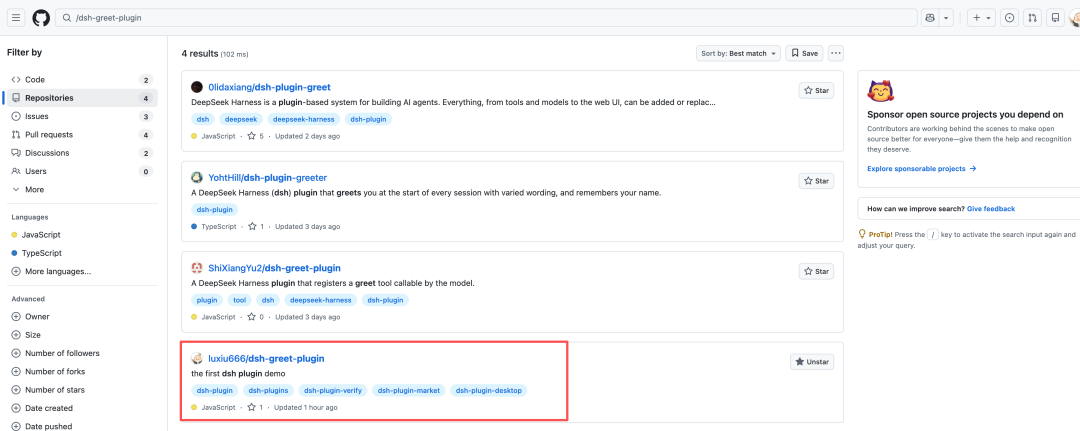
最后一步(只能网页上做):仓库 About → Topics 加上 dsh-plugin,社区就能在 GitHub topic 页发现你的插件。
登录:https://github.com/topics/dsh-plugin,搜索"dsh-greet-plugin "
⭐️⭐️⭐️
六、安装你的插件
🎉 至此,全世界任何人都可以这样安装你的插件:
新插件的github地址:git@github.com:luxiu666/dsh-greet-plugin.git
然后执行下面安装命令:
dsh plugin --profile web add github:luxiu666/dsh-greet-plugin#v0.1.0
重启web ui:
pnpm dsh web
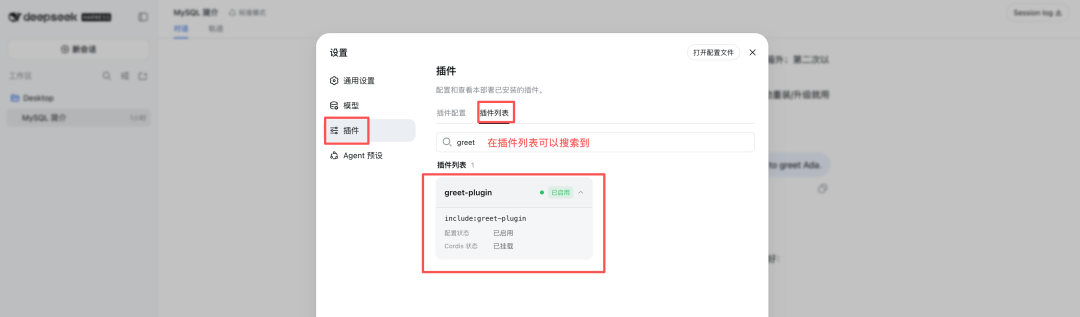
再次提问:可以看到已经调用刚才新安装的插件了
⭐️⭐️⭐️
写在最后
dsh 还在 developer preview 阶段,正是入场好时机------工具、LLM 适配器、沙箱后端、Web 界面节点,每一个能力接缝都留给社区插件。
关注我,你的第一个插件,也许就从今天开始。