目录
python代码
测试代码的版本:python310
运行前需安装
bash
pip install python-multipart
pip install fastapi uvicorn opencv-python numpy
代码:
python
import cv2
import numpy as np
from fastapi import FastAPI, File, UploadFile
from datetime import datetime

app = FastAPI()

@app.post("/locate")
async def locate(file: UploadFile = File(...)):
    # 1. 读取原始字节
    contents = await file.read()

    # 2. 【调试用】保存原始文件,验证传输完整性
    debug_path = f"debug_{datetime.now():%Y%m%d_%H%M%S}.jpg"
    with open(debug_path, "wb") as f:
        f.write(contents)
    print(f"[DEBUG] 已保存原始文件: {debug_path}, 大小: {len(contents)} bytes")

    # 3. 解码为 numpy 数组(你原有的逻辑)
    nparr = np.frombuffer(contents, np.uint8)
    img = cv2.imdecode(nparr, cv2.IMREAD_COLOR)

    # 4. 【可选】检查解码结果
    if img is None:
        return {"error": "图片解码失败,请检查LabVIEW编码格式"}
    print(f"[DEBUG] 解码成功: shape={img.shape}, dtype={img.dtype}")

    # 5. 后续 AI 推理逻辑...
    # result = model.predict(img)

    return {"status": "ok", "shape": list(img.shape)}
fastapi部署
部署:
bash
uvicorn main:app --host 0.0.0.0 --port 8000判断是否部署成功:
bash
netstat -anob | findstr :8000如果部署成功想关闭:
bash
taskkill /F /PID <调用netstat显示的PID号>效果如下:
bash
C:\Users\test>netstat -ano | findstr :8000
  TCP    0.0.0.0:8000           0.0.0.0:0              LISTENING       27376

C:\Users\test>taskkill /F /PID 27376
成功: 已终止 PID 为 27376 的进程。
LabVIEW代码
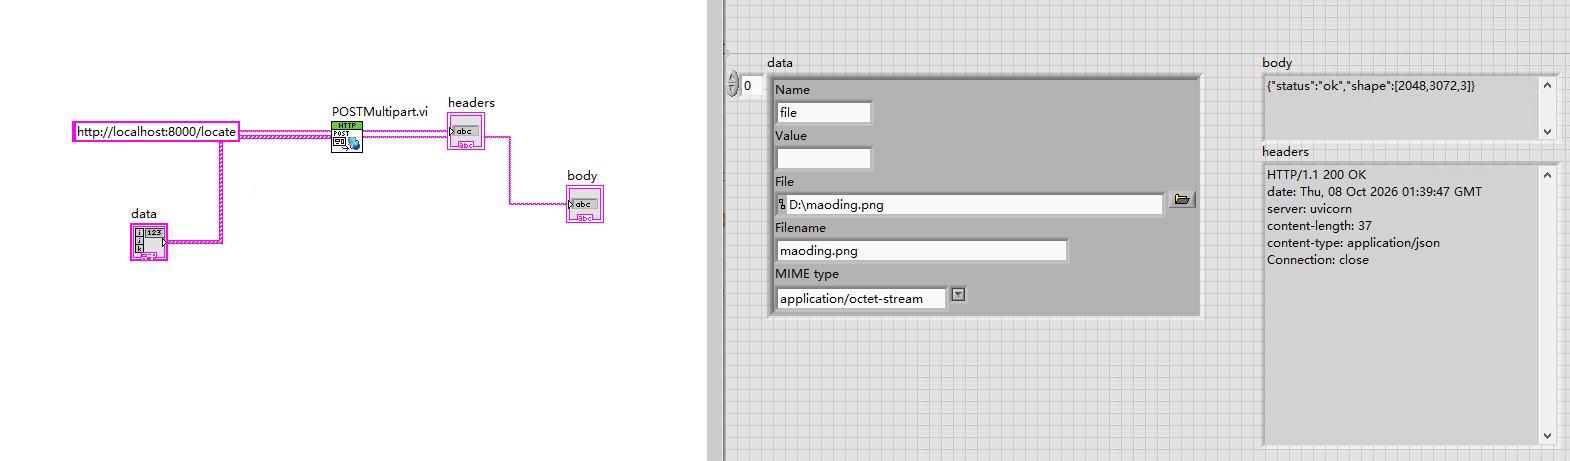
apipost
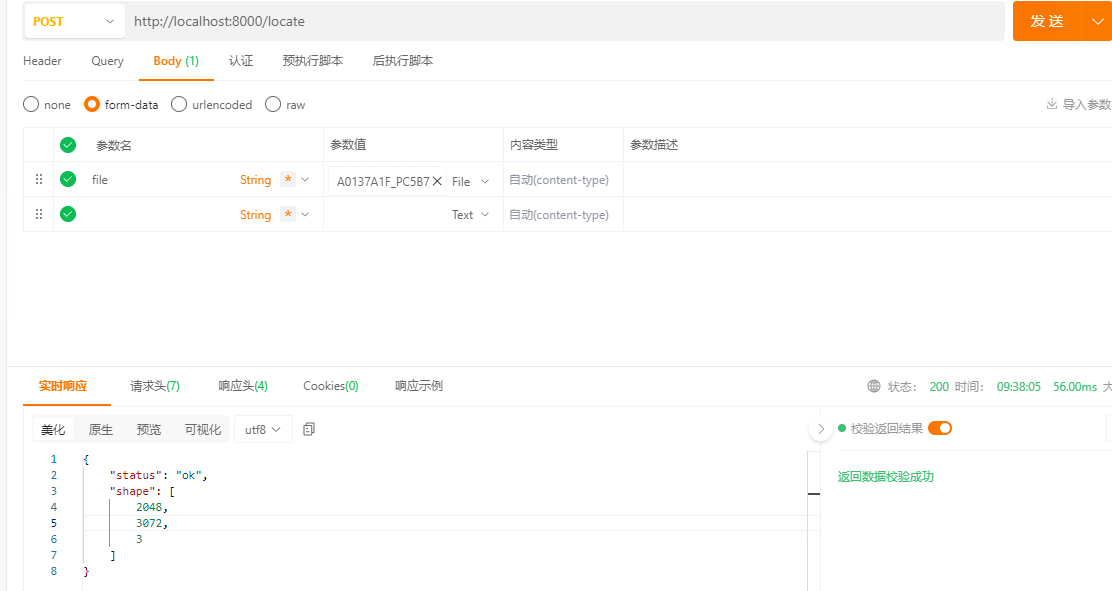
locate-anything
安装依赖包
python
pip install torch torchvision --index-url https://download.pytorch.org/whl/cu124
pip install locate-anything
下载模型
python
pip install modelscope
modelscope download --model nv-community/LocateAnything-3B- 默认路径:
C:\Users\test\.cache\modelscope\models\nv-community--LocateAnything-3B\snapshots\master
模型
推理代码:
python
import os
import re
import torch
from datetime import datetime
from PIL import Image, ImageDraw
from locate_anything import LocateAnything

# ================= 配置区 =================
IMAGE_PATH = "maoding.png"
MAX_SIZE = 1024
#CATEGORIES = ["large irregular circular hole with torn edges"]
CATEGORIES = ["large hole with diameter between 5% and 7% of image width"]
SAVE_DIR = r"D:\script\detect_results"
# ==========================================

# 1. 加载模型
model = LocateAnything(
    model_name=r"C:\Users\test\.cache\modelscope\models\nv-community--LocateAnything-3B\snapshots\master",
    device_map="auto",
    torch_dtype=torch.float16
)

# 2. 读取图片并自动等比缩放
orig_img = Image.open(IMAGE_PATH).convert("RGB")
ow, oh = orig_img.size
scale_ratio = min(MAX_SIZE / max(ow, oh), 1.0)
new_w = int(ow * scale_ratio)
new_h = int(oh * scale_ratio)
new_w = new_w if new_w % 2 == 0 else new_w + 1
new_h = new_h if new_h % 2 == 0 else new_h + 1

resized_img = orig_img.resize((new_w, new_h), Image.LANCZOS)
print(f"📐 原图 {ow}x{oh} → 缩放 {new_w}x{new_h}")

# 3. 执行检测(👈 打开SDK绘图)
result = model.detect(
    image=resized_img,
    categories=CATEGORIES, #提示词
    generation_mode="hybrid", #fast,slow,hybrid
    max_new_tokens=64, #越小,找的框就越少
    draw=True
)

# 4. 保存SDK原始标注图(缩放图上的效果)
os.makedirs(SAVE_DIR, exist_ok=True)
timestamp = datetime.now().strftime("%Y%m%d_%H%M%S_%f")

if result.get("annotated_image") is not None:
    sdk_path = os.path.join(SAVE_DIR, f"sdk_overlay_{timestamp}.jpg")
    result["annotated_image"].save(sdk_path, quality=95)
    print(f"✅ SDK标注图已保存: {sdk_path}")

# 5. 解析原始输出,映射坐标到原图
raw = result.get("raw_output", "") or ""

# 先拆成每个 <ref> 段
segments = re.split(r"(?=<ref>)", raw)
raw_detections = []

for seg in segments:
    ref_m = re.search(r"<ref>(.*?)</ref>", seg)
    if not ref_m:
        continue
    label = ref_m.group(1)

    boxes = re.findall(
        r"<box><(\d+)><(\d+)><(\d+)><(\d+)></box>",
        seg,
    )
    for x1, y1, x2, y2 in boxes:
        coords = [int(x1), int(y1), int(x2), int(y2)]

        px_x1 = coords[0] / 1000.0 * new_w
        px_y1 = coords[1] / 1000.0 * new_h
        px_x2 = coords[2] / 1000.0 * new_w
        px_y2 = coords[3] / 1000.0 * new_h

        if px_x2 <= px_x1 or px_y2 <= px_y1:
            continue

        orig_x1 = int(px_x1 / scale_ratio)
        orig_y1 = int(px_y1 / scale_ratio)
        orig_x2 = int(px_x2 / scale_ratio)
        orig_y2 = int(px_y2 / scale_ratio)

        orig_x1 = max(0, min(orig_x1, ow - 1))
        orig_y1 = max(0, min(orig_y1, oh - 1))
        orig_x2 = max(0, min(orig_x2, ow - 1))
        orig_y2 = max(0, min(orig_y2, oh - 1))

        raw_detections.append({
            "label": label,
            "bbox": [orig_x1, orig_y1, orig_x2, orig_y2],
        })

print(f"📋 原始解析: {len(raw_detections)} 个框")
detections = raw_detections

# 6. 在原图上手动绘制并保存(最终结果)
if detections:
    draw_img = orig_img.copy()
    draw = ImageDraw.Draw(draw_img)
    for det in detections:
        x1, y1, x2, y2 = det["bbox"]
        draw.rectangle([x1, y1, x2, y2], outline="red", width=4)

    orig_path = os.path.join(SAVE_DIR, f"orig_overlay_{timestamp}.jpg")
    draw_img.save(orig_path, quality=95)
    print(f"✅ 原图标注已保存: {orig_path}")
else:
    print("⚠️ 未检测到目标")

print(f"📝 原始输出: {raw}")- 用原图3072*2048会OOM,要缩小到1024以下
- 推理不要求是正方形的图形输入
- 推理输出的结果是0-1000的归一化像素坐标,需要转换
- max_new_tokens:32,64,128等等,越小找到的框就越少