1. 效果图
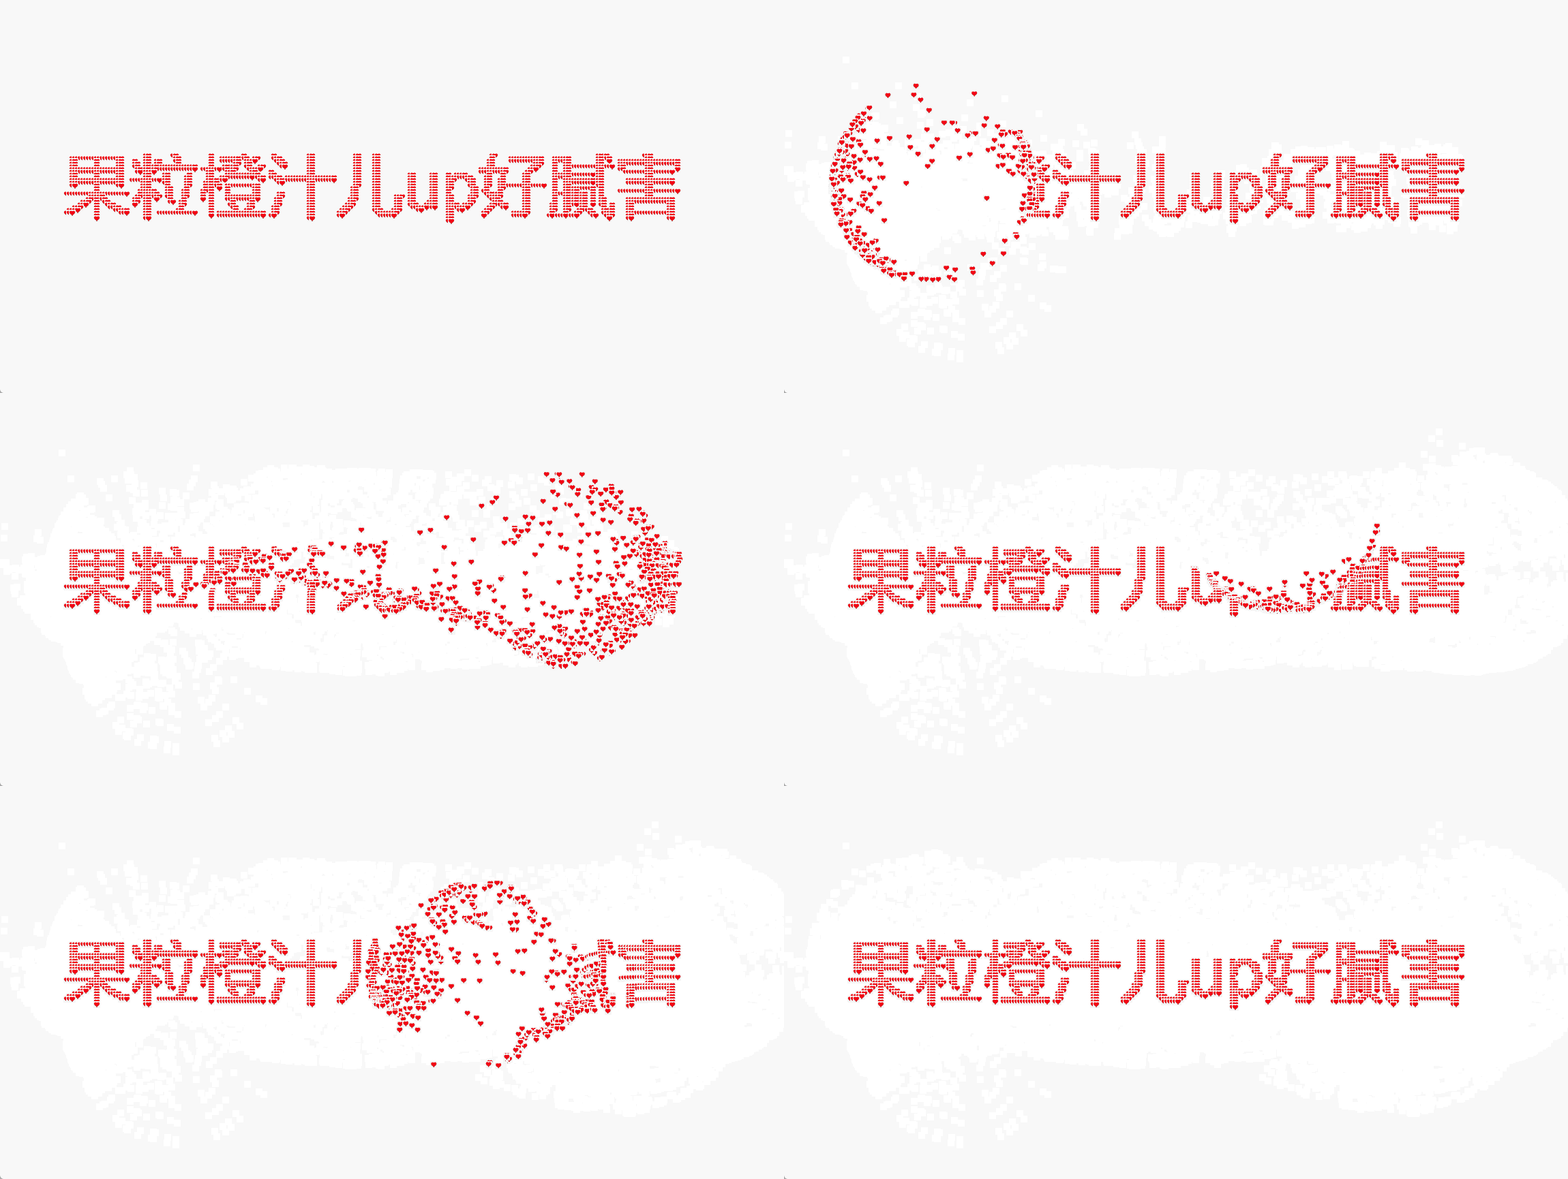
2.完整代码
css
<!DOCTYPE html>
<html lang="en">

<head>
  <meta charset="UTF-8">
  <meta name="viewport" content="width=device-width, initial-scale=1.0">
  <style>
    body,
    html {
      margin: 0;
      padding: 0;
      width: 100%;
      height: 100%;
      overflow: hidden;
    }

    canvas {
      display: block;
    }
  </style>
  <title>文本粒子动画</title>
</head>

<body>
  <canvas id="textCanvas"></canvas>
  <script>
    const canvas = document.getElementById('textCanvas');
    const ctx = canvas.getContext('2d');
    canvas.width = window.innerWidth;
    canvas.height = window.innerHeight;

    const particles = [];
    const fontSize = 100;
    const text = '果粒橙汁儿up好腻害'; // 这里更改粒子文案

    ctx.font = `${fontSize}px Arial`;
    ctx.fillStyle = 'black';
    ctx.textAlign = 'center';
    ctx.fillText(text, canvas.width / 2, canvas.height / 2);

    const imageData = ctx.getImageData(0, 0, canvas.width, canvas.height);

    class Particle {
      constructor(x, y) {
        this.type = 'default'; // 定义粒子类型 分'image'和'default'
        this.x = x;
        this.y = y;
        if (this.type === 'image') {
          this.size = 10; // 调整粒子大小
        } else {
          this.size = 2; // 调整粒子大小
        }
        this.baseX = this.x;
        this.baseY = this.y;
        this.density = (Math.random() * 30) + 1;
        this.image = new Image();
        this.image.src = './heart.jpeg'; // 使用自定义的图像 路径写自己存放图片的途径和图片名字
      }

      draw() {
        if (this.type === 'image') {
          ctx.drawImage(this.image, this.x - this.size / 2, this.y - this.size / 2, this.size, this.size);
        } else {
          // 绘制其他类型的粒子
          ctx.fillStyle = 'black'; // 这里更改粒子颜色
          // ctx.fillStyle = `rgba(${Math.random() * 255}, ${Math.random() * 255}, ${Math.random() * 255}`; // 随机彩色粒子
          ctx.beginPath();
          ctx.arc(this.x, this.y, this.size, 0, Math.PI * 2);
          ctx.closePath();
          ctx.fill();
        }
      }


      update() {
        let dx = mouse.x - this.x;
        let dy = mouse.y - this.y;
        let distance = Math.sqrt(dx * dx + dy * dy);
        let forceDirectionX = dx / distance;
        let forceDirectionY = dy / distance;
        let maxDistance = mouse.radius;
        let force = (maxDistance - distance) / maxDistance;
        let directionX = forceDirectionX * force * this.density;
        let directionY = forceDirectionY * force * this.density;

        if (distance < mouse.radius) {
          this.x -= directionX;
          this.y -= directionY;
        } else {
          if (this.x !== this.baseX) {
            let dx = this.x - this.baseX;
            this.x -= dx / 5;
          }
          if (this.y !== this.baseY) {
            let dy = this.y - this.baseY;
            this.y -= dy / 5;
          }
        }
      }
    }

    let mouse = {
      x: null,
      y: null,
      radius: 150
    };

    window.addEventListener('mousemove', function (event) {
      mouse.x = event.x;
      mouse.y = event.y;
    });

    function init() {
      for (let y = 0, y2 = imageData.height; y < y2; y += 4) {
        for (let x = 0, x2 = imageData.width; x < x2; x += 4) {
          if (imageData.data[(y * 4 * imageData.width) + (x * 4) + 3] > 128) {
            let positionX = x;
            let positionY = y;
            particles.push(new Particle(positionX, positionY));
          }
        }
      }
    }

    function animate() {
      requestAnimationFrame(animate);
      ctx.clearRect(0, 0, canvas.width, canvas.height);

      for (let i = 0; i < particles.length; i++) {
        particles[i].draw();
        particles[i].update();
      }
    }

    init();
    animate();
  </script>
</body>

</html>
代码出来的效果是黑色的,如果想要示例图那种爱心粒子,可以将type改成image,并且改变图片路径this.image.src,如果想要改变文案则改变text变量,如果要改变粒子颜色则改变ctx.fillStyle即可~
本案例使用的图片素材放在文章里啦,自取