一、安装ESP-IDF
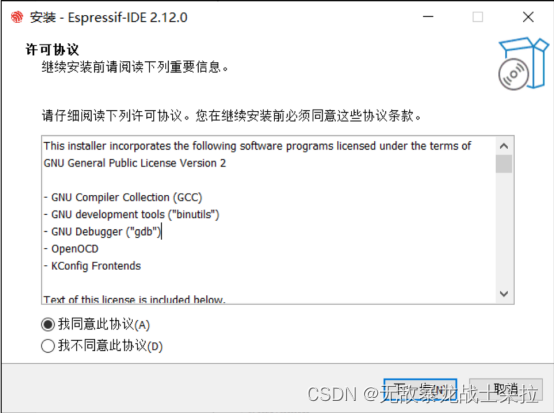
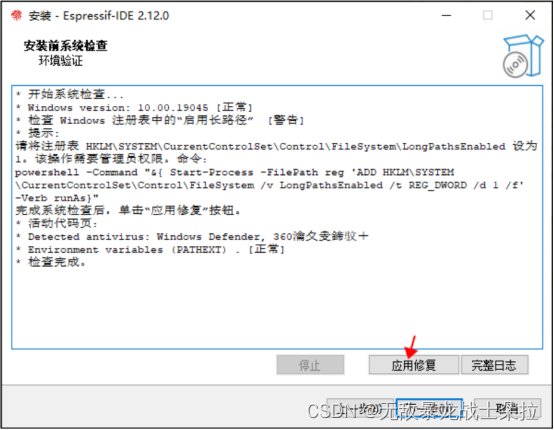
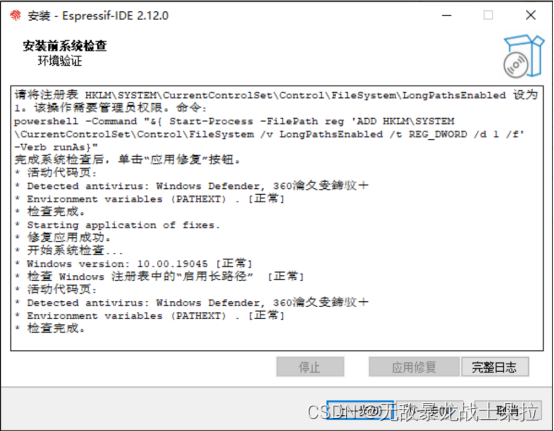
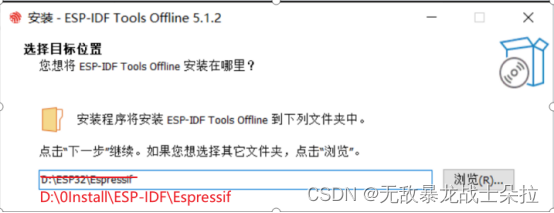
1、乐鑫官网下载安装 ESP-IDF


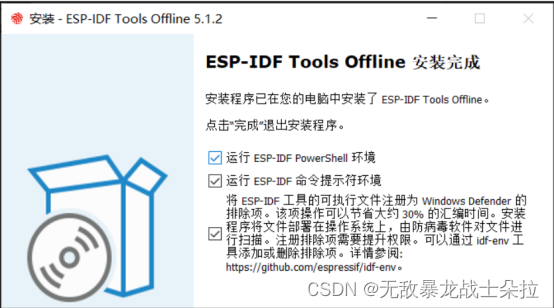
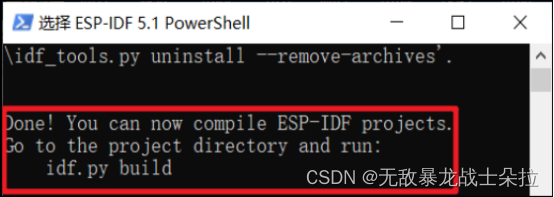
终端提示 "idf.py build" 安装成功。
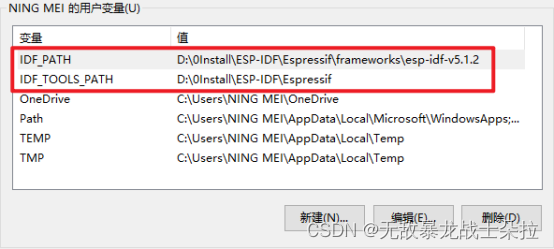
2、配置环境变量
此电脑------>属性------>高级系统设置------>环境变量
二、安装 VSCode
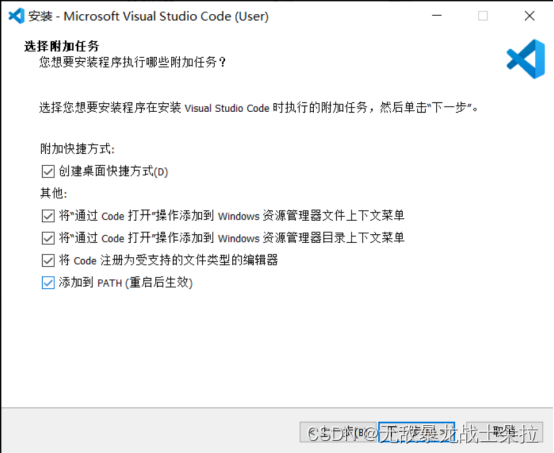
1、VS Code 官网下载安装 VS Code
内容忽略,过程全部打勾
2、插件下载
安装插件:Chinese、Espressif IDF

三、VS Code 配置 ESP-IDF
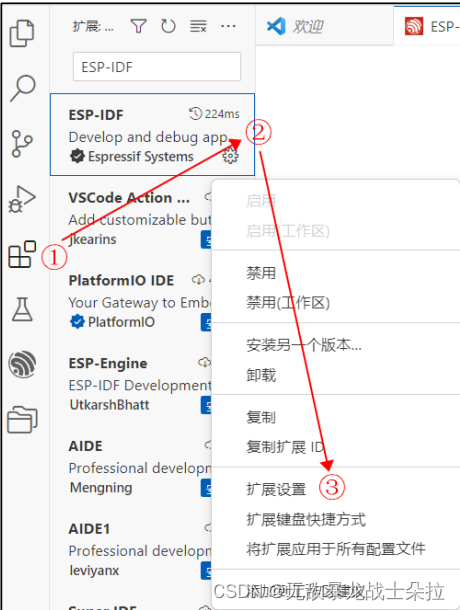
1、图示流程
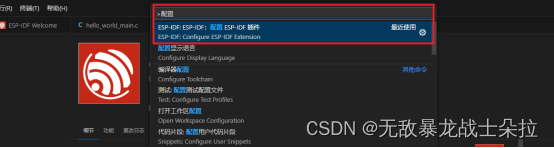
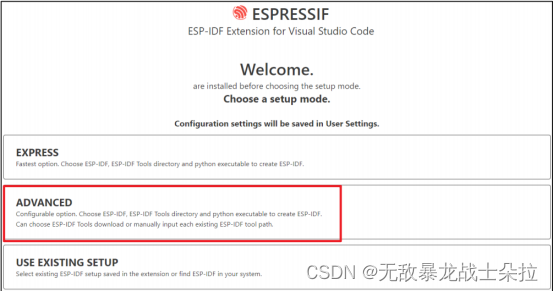
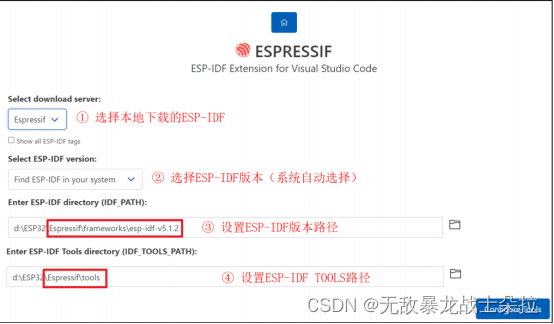

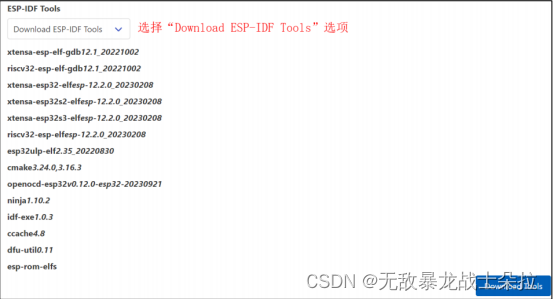

配置完成。
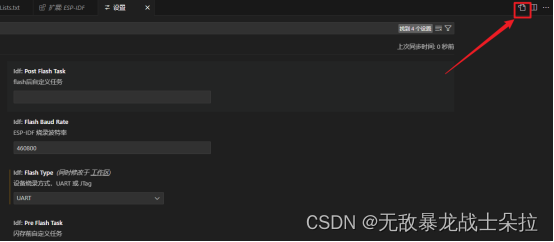
2、修改基本参数

添加个性化设置(可不设置):
打开设置 json 文件添加以下代码
{
/* 上面的部分是我自己创建的一些设置 */
"editor.insertSpaces": false, /* 自动插入空格禁用*/
editor.detectIndentation": false, /* 启用时根据文件内容进行重写*/
"editor.renderControlCharacters": true, /* 是否显示控制字符:启用*/
"editor.renderWhitespace": "all", /* 显示 4 个空格是.... */
"editor.tabSize": 4, /* tab 设置为 4 个空格*/
"editor.fontSize": 18, /* 代码字体大小*/
"editor.fontFamily": "Monaco, 'Courier New', monospace", /* 代码字体*/
"update.mode": "manual", /* 设置不自动更新*/
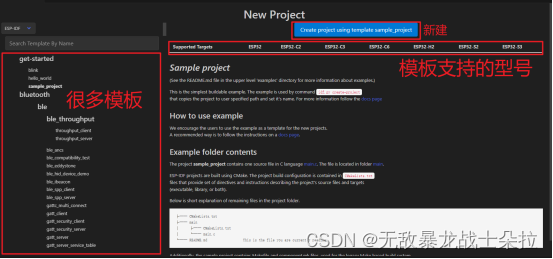
}四、ESP-IDF 新建工程
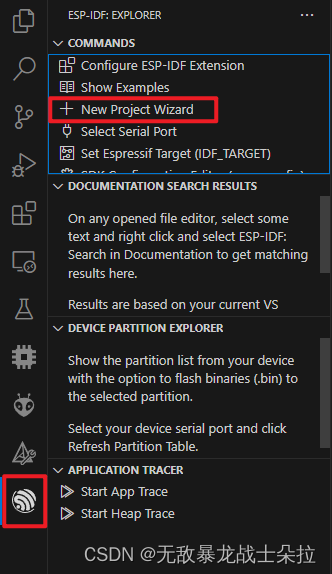
1、新建工程


2、工程文件解析
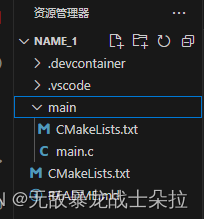
.devcontainer 文件夹通常与 VS Code 的 Remote - Containers 扩展一起使用,用于定义开发容器环境的配置。这个文件夹包含了用于创建和管理容器化开发环境的所有必需文件。
.vscode 文件夹通常位于项目的根目录下,用于存放 VS Code 的项目级设置和扩展配置。
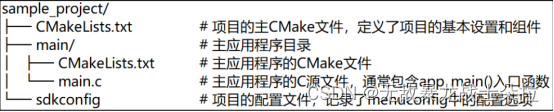
顶层 CMakeLists.txt 文件是 CMake 用于学习如何构建项目的主要文件,可以在这个文件中设置项目全局的 CMake 变量。每个项目都有一个顶层 CMakeLists.txt 文件,包含整个项目的构建设置。
cpp
CMakeLists.txt:

# 必须放在 CMakeLists.txt 文件的第一行,
# 它会告诉 CMake 构建该项目所需要的最小版本号。ESP-IDF 支持 CMake 3.16 或更高的版本
cmake_minimum_required(VERSION 3.16)

# 导入 CMake 的其余功能来完成配置项目、检索组件等任务
include($ENV{IDF_PATH}/tools/cmake/project.cmake)
# 会创建项目本身,并指定项目名称
project(name_1)
main 目录包含两个文件,main.c 定义了程序入口函数 app_main(),CMakeLists.txt 文件将组件添加到构建系统中
"sdkconfig" 项目配置文件,执行 idf.py menuconfig 时会创建或更新此文件,文件中保
存了项目中所有组件(包括 ESP-IDF 本身)的配置信息。 sdkconfig 文件可能会也可能不会被添加到项目的源码管理系统中。
3、编译上传工程文件

直接点击这个:

五、工程配置
ESP32s3N16R8工程配置(对应具体使用的开发板配置)
打开上图工程配置菜单
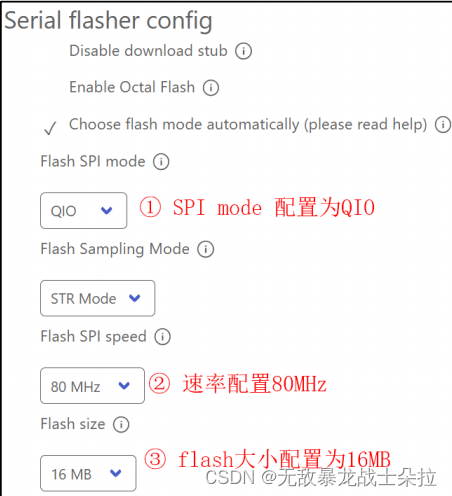
搜索"Flash",配置flash资源
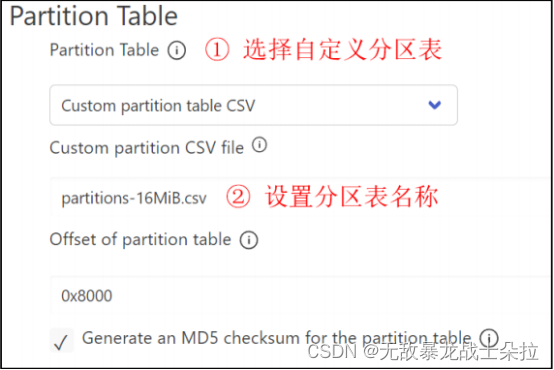
搜索"Partition Table"设置分区表
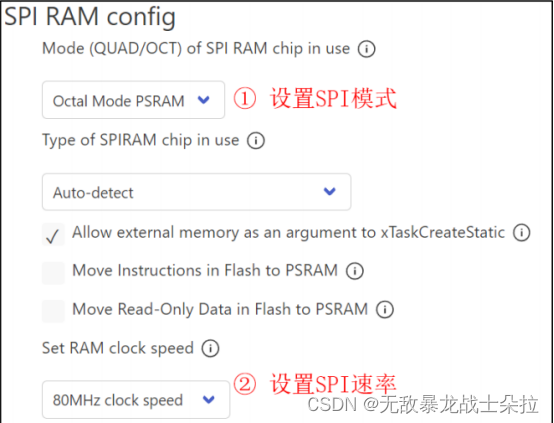
搜索"PSRAM"设置 PSRAM 参数
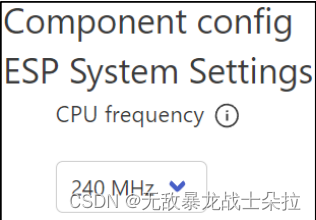
搜索"CPU frequency"设置 CPU 时钟频率
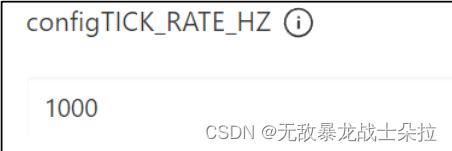
搜索"FreeRTOS"配置系统节拍时钟(tick clock)的频率
开命令面板,输入"打开分区表编辑器",配置各分区管理大小。

内容参考《DNESP32S3使用指南-IDF版.pdf》