Mesh快连
一、名词解释
Mesh快连是一种由多个节点组成的网络系统,这些节点可以相互连接,形成一个"网状"的结构。
二、如何使用
有线Mesh:
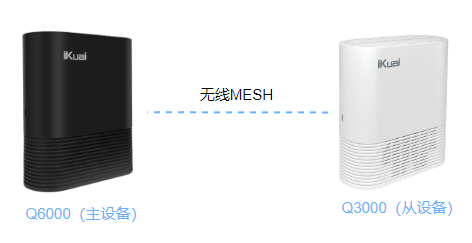
网络拓扑:
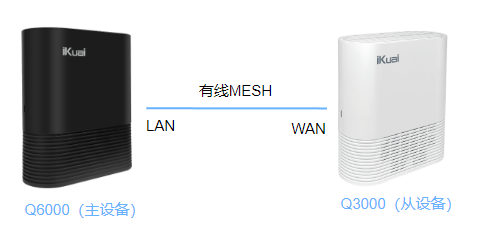
设备版本:3.7.12企业版。
配置要求:从设备需恢复默认配置。
拓扑说明:设备接入电源,Q6000作为主设备通过LAN口连接从设备Q3000的WAN口,WEB页面操作在主设备均可完成,从设备无需进入WEB页面。
**注意:**mesh从设备默认绑定主设备的LAN1接口,且不支持配置,LAN1接口如果没有开启DHCP服务,mesh网络将无法自动获取IP地址
实现目的:通过Mesh功能实现无线信号的延续。
按照拓扑图连接线路后,在网络设置--Mesh快连,开启Mesh快连。
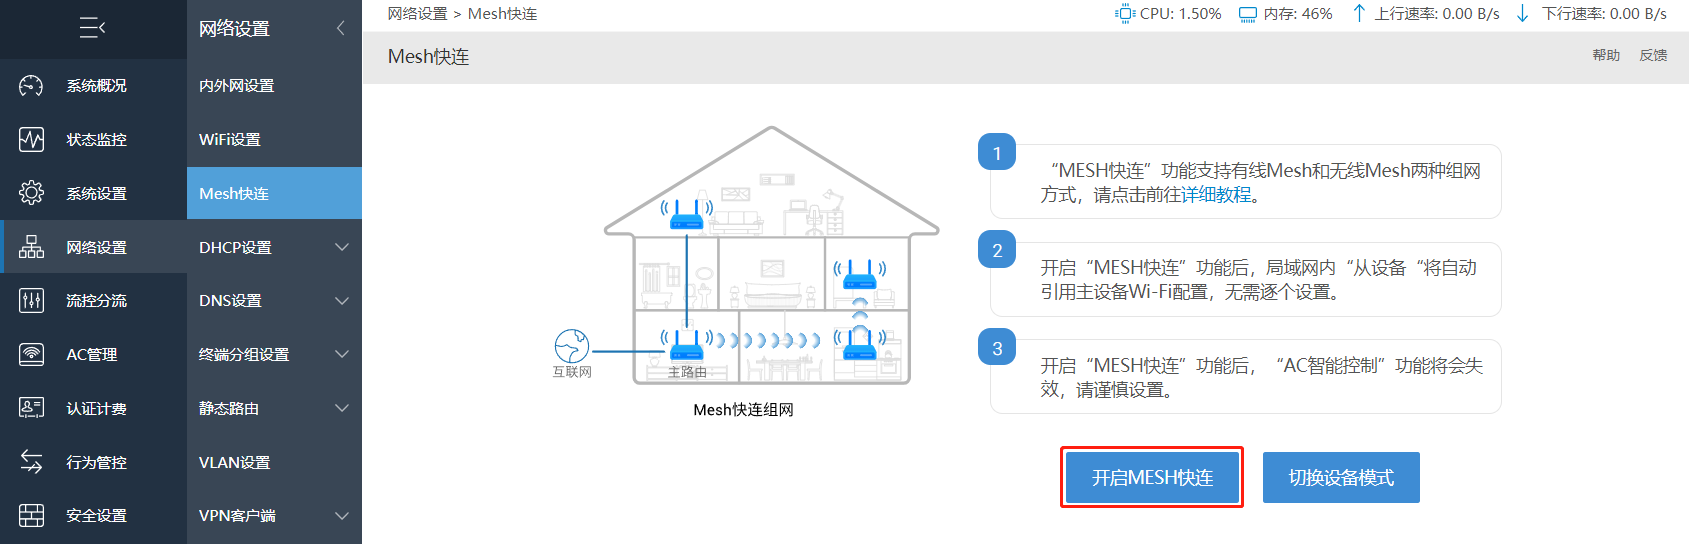
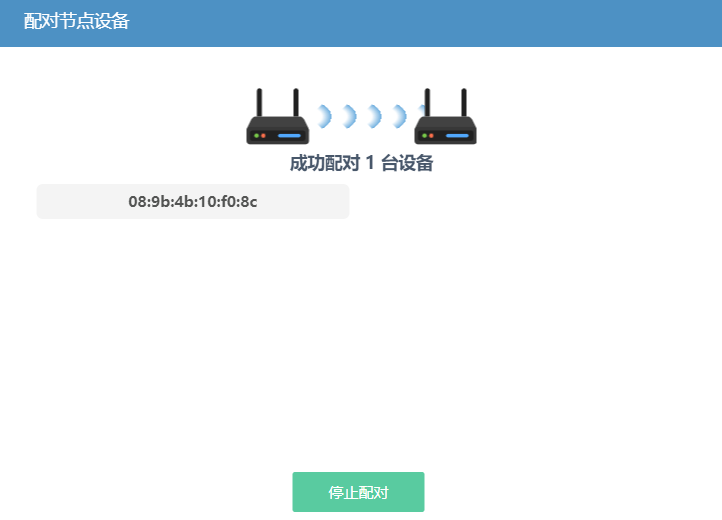
按照页面提示检查设备亮灯情况以及设备摆放位置。一切准备就绪后,点击开始配对。
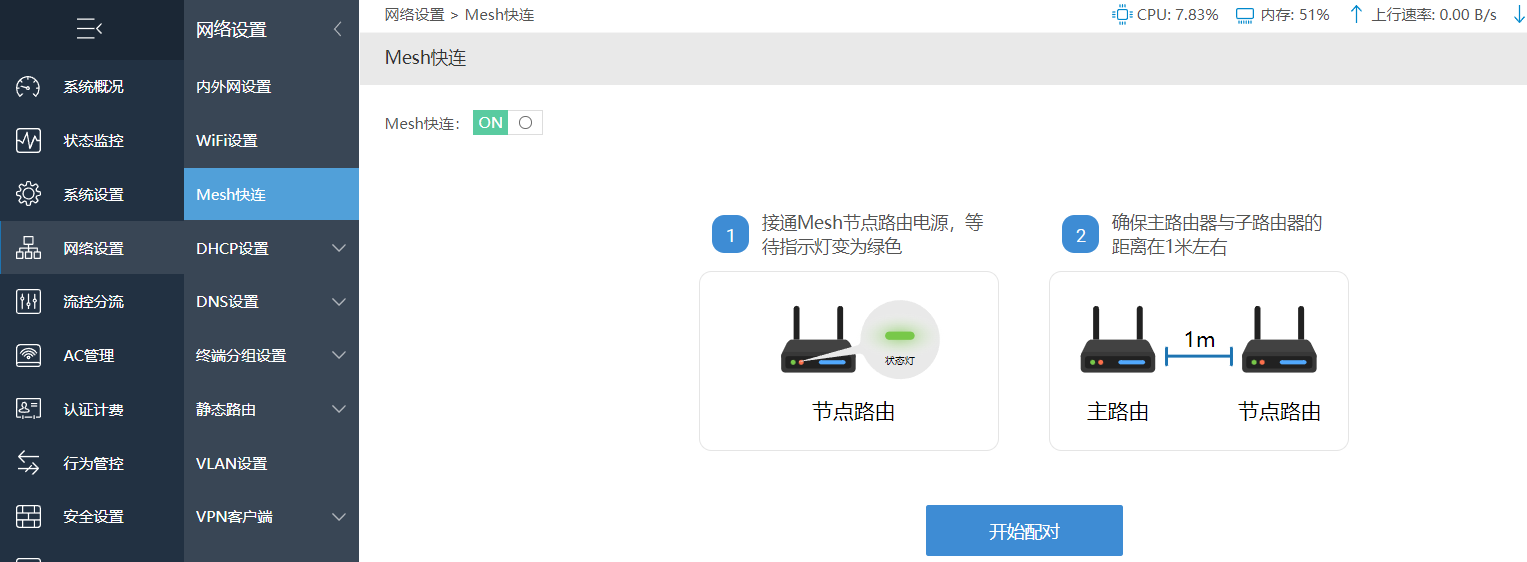
页面出现配对画面。
Mesh对接亮灯情况:
Q6000:
对接时:红绿灯交替闪烁。
对接成功:绿灯长亮。
Q3000:
对接时:彩灯交替闪烁,如对接时无灯闪烁,可按Mesh键3次。
对接成功:粉色灯长亮。
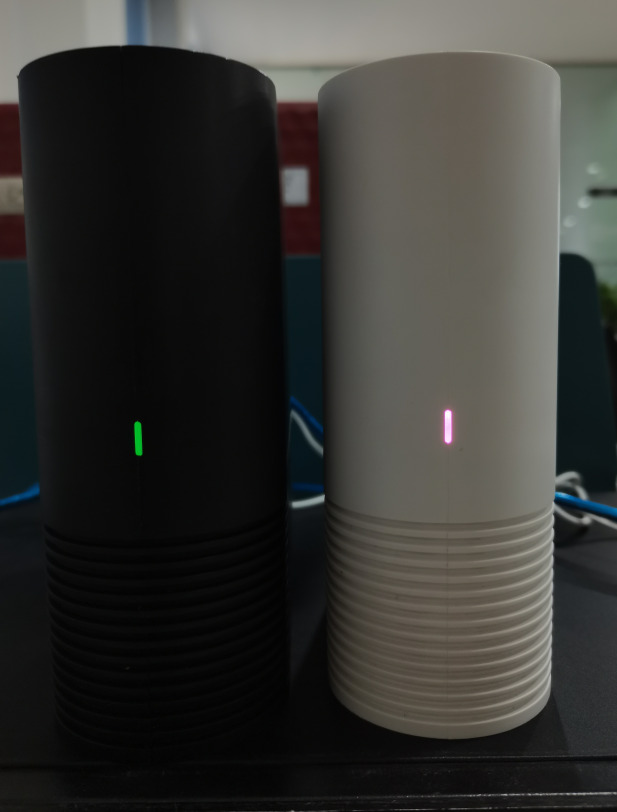
对接成功后设备灯显示效果:
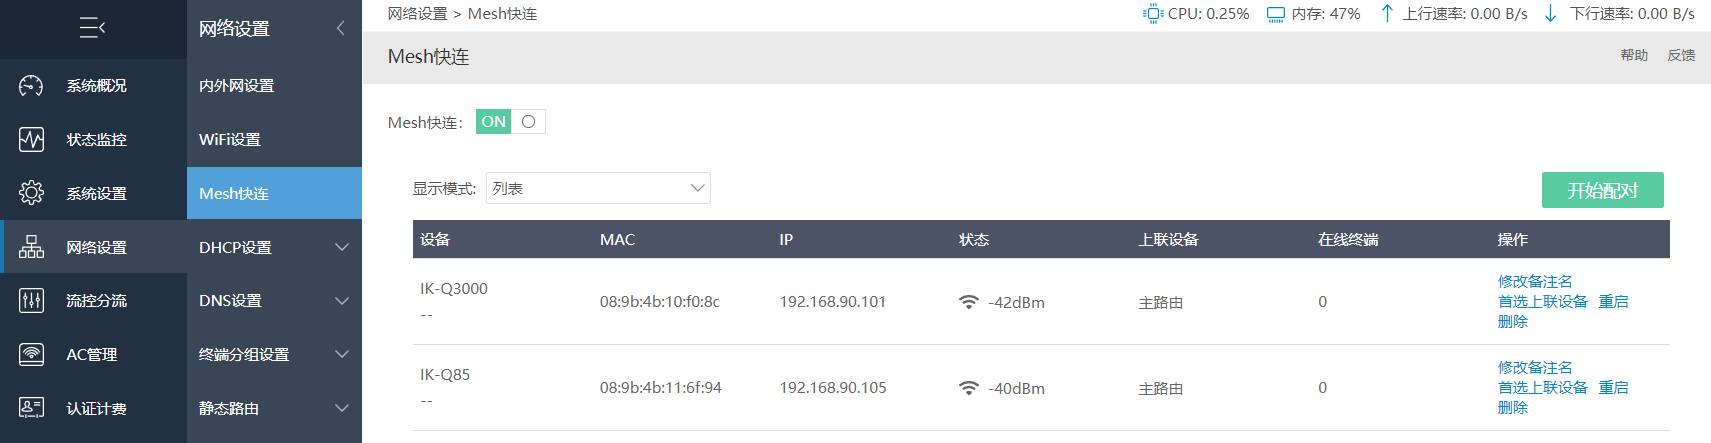
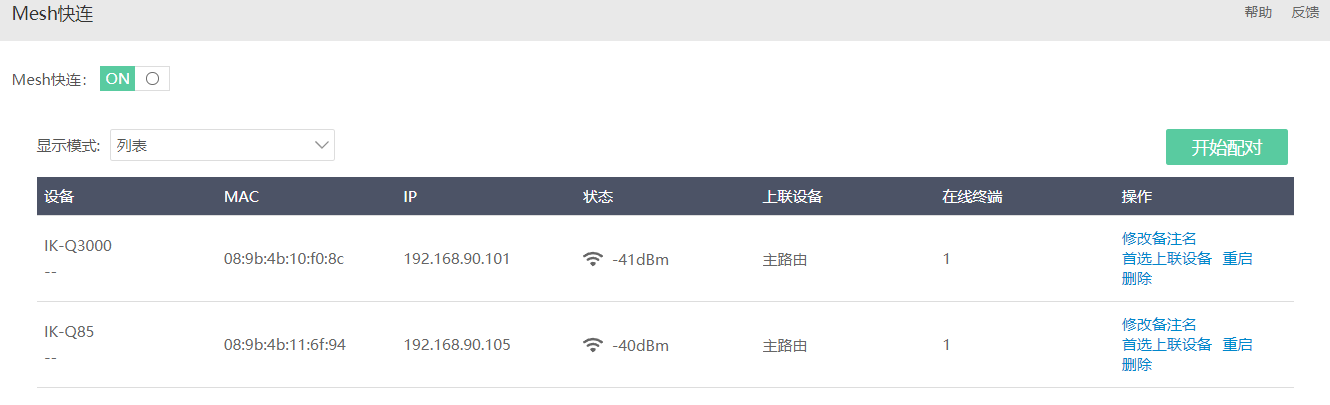
配对时页面会显示网络中所有从设备MAC地址,MAC地址全面扫描完成后,点击停止配对。

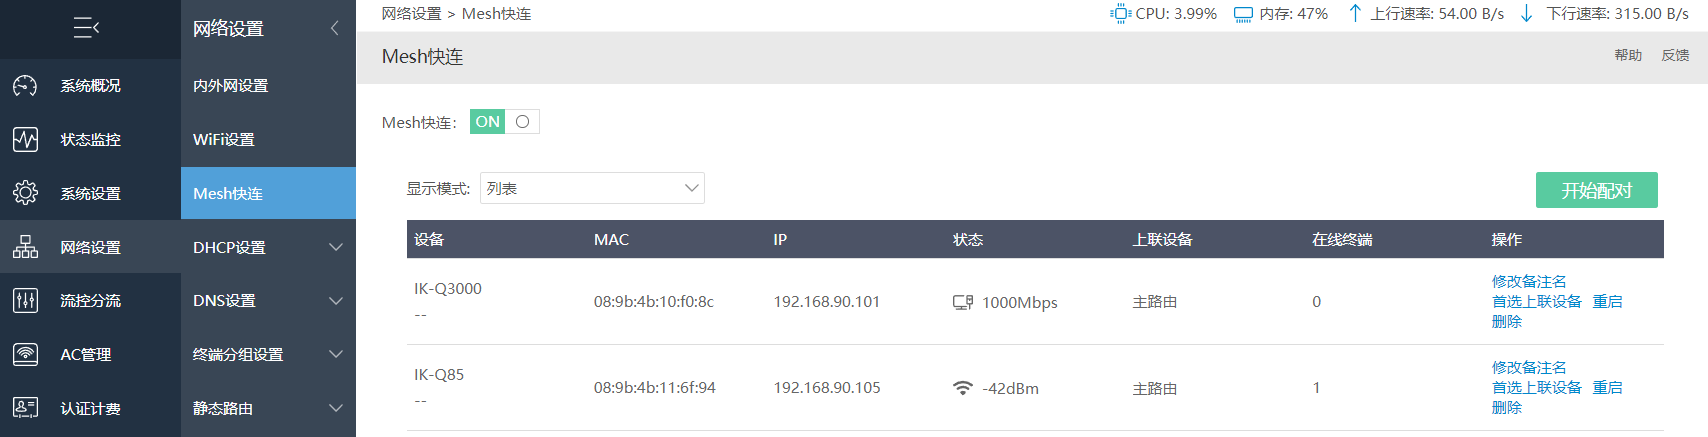
配对成功后,在列表模式下,会显示配对的设备名称、MAC地址、有线速率、上联设备。如网络中有多个上联设备情况下,可点击操作处"首选上联设备"选择对应上联设备MAC信息。
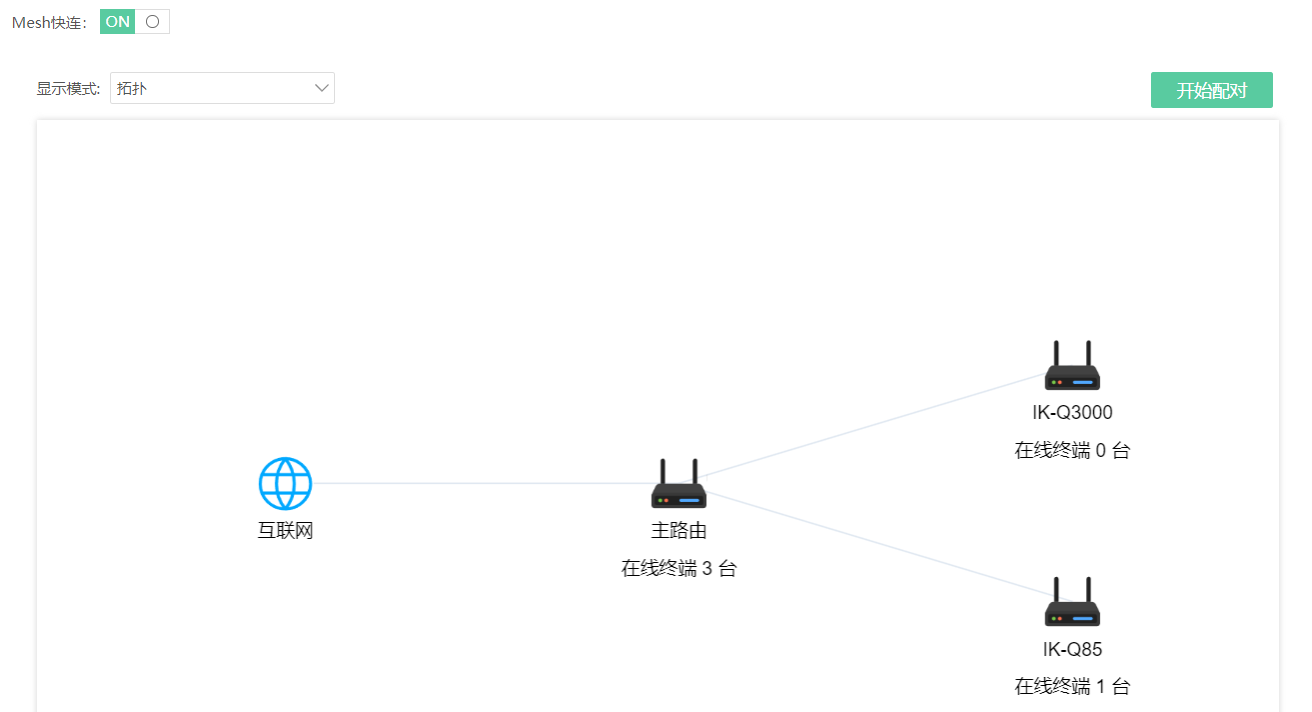
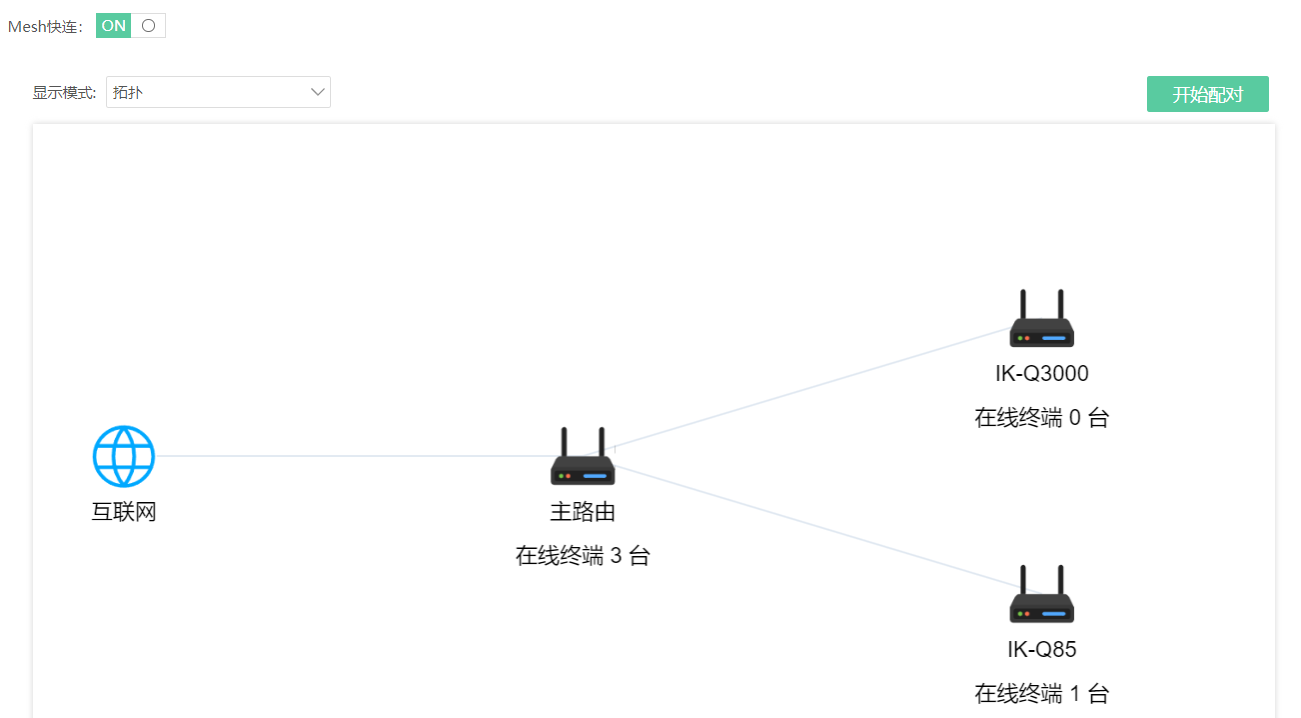
在显示模式中切换模式为"拓扑",显示当前Mesh组网拓扑图。
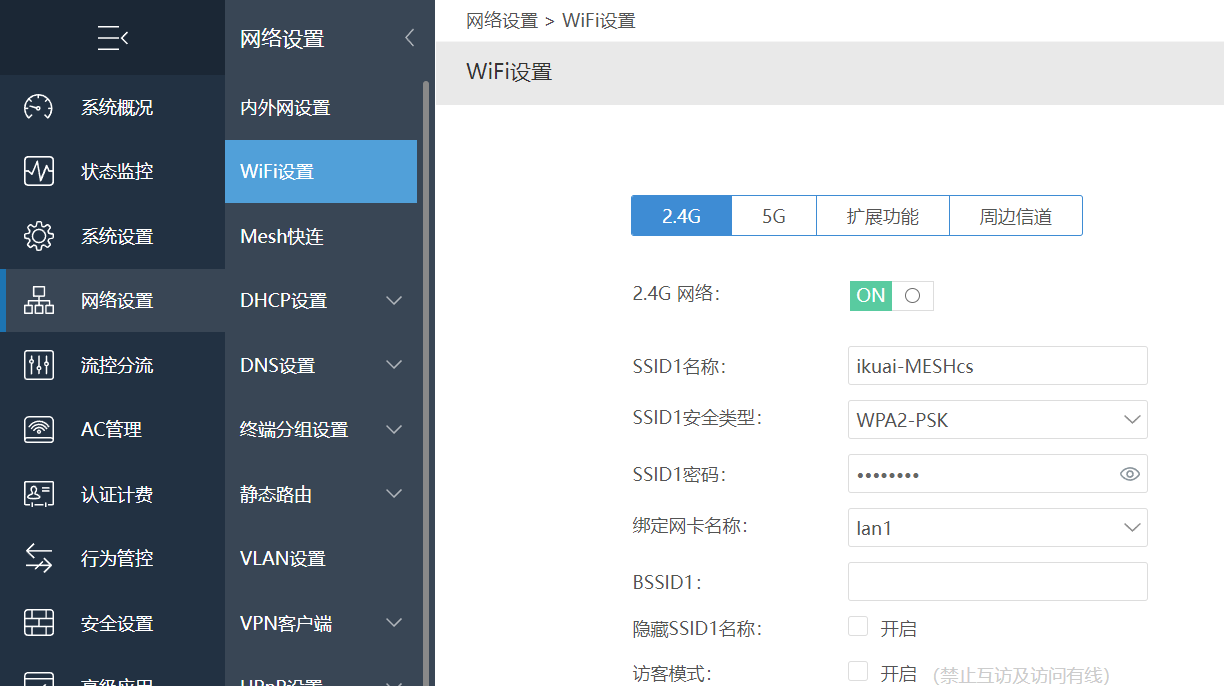
Mesh对接成功后设置无线名称,进行Mesh快连测试。
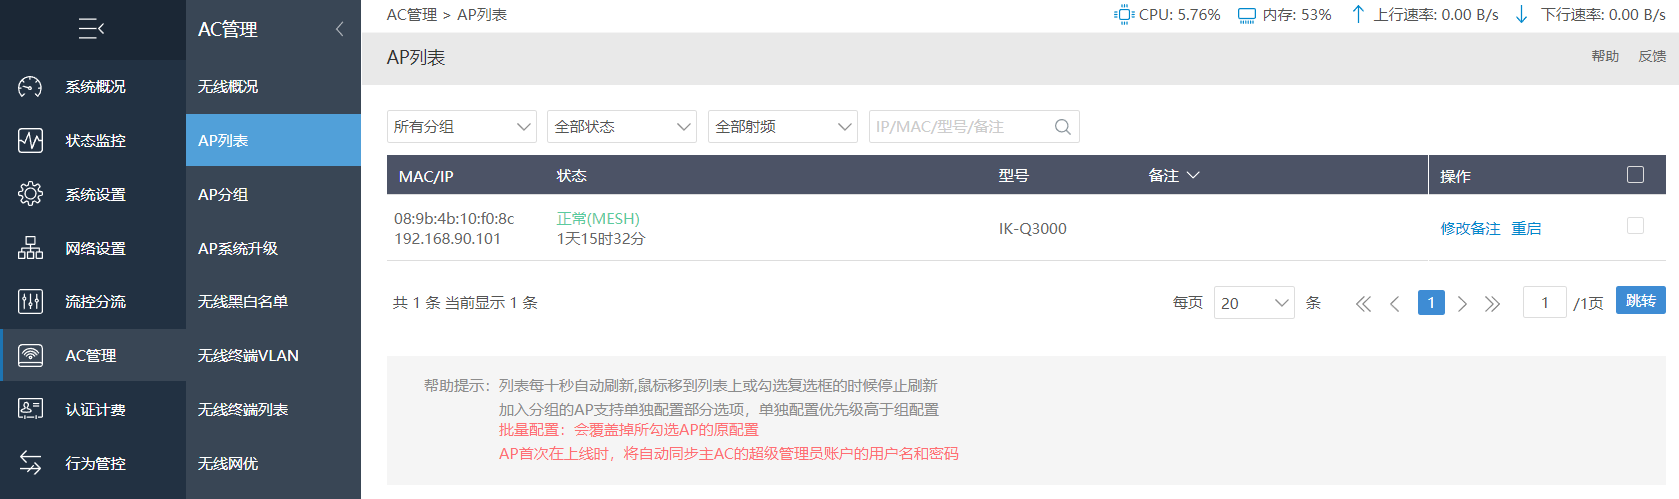
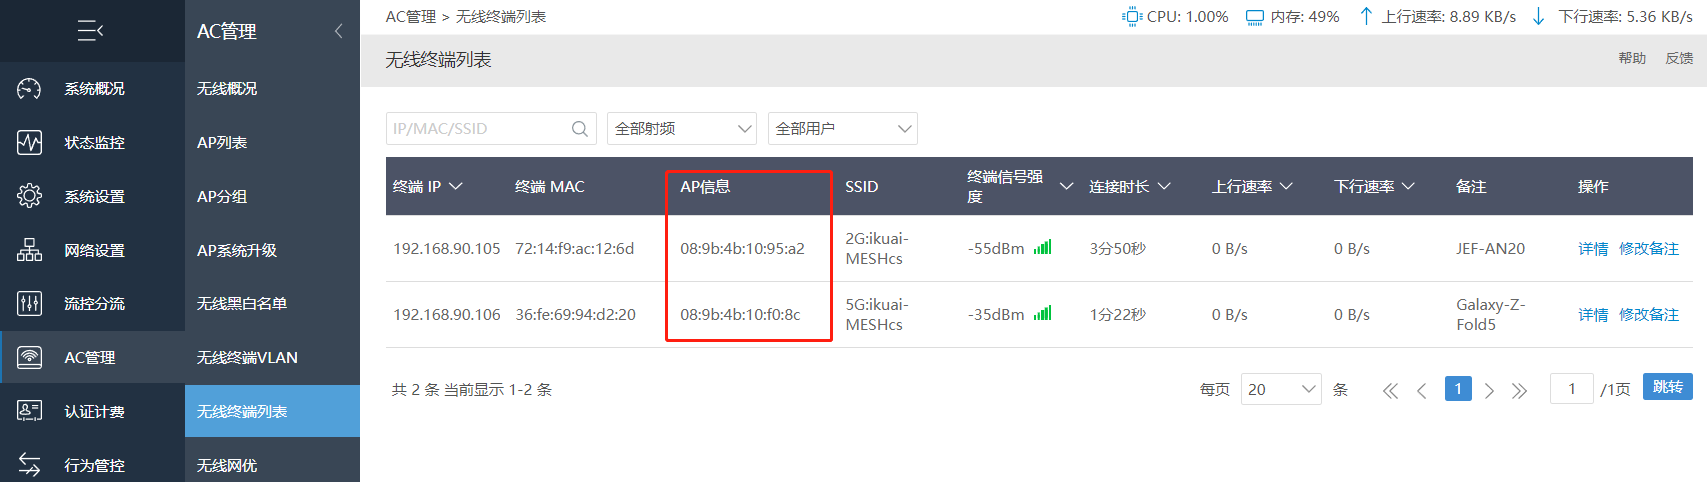
在AC管理--AP列表会显示Mesh设备。
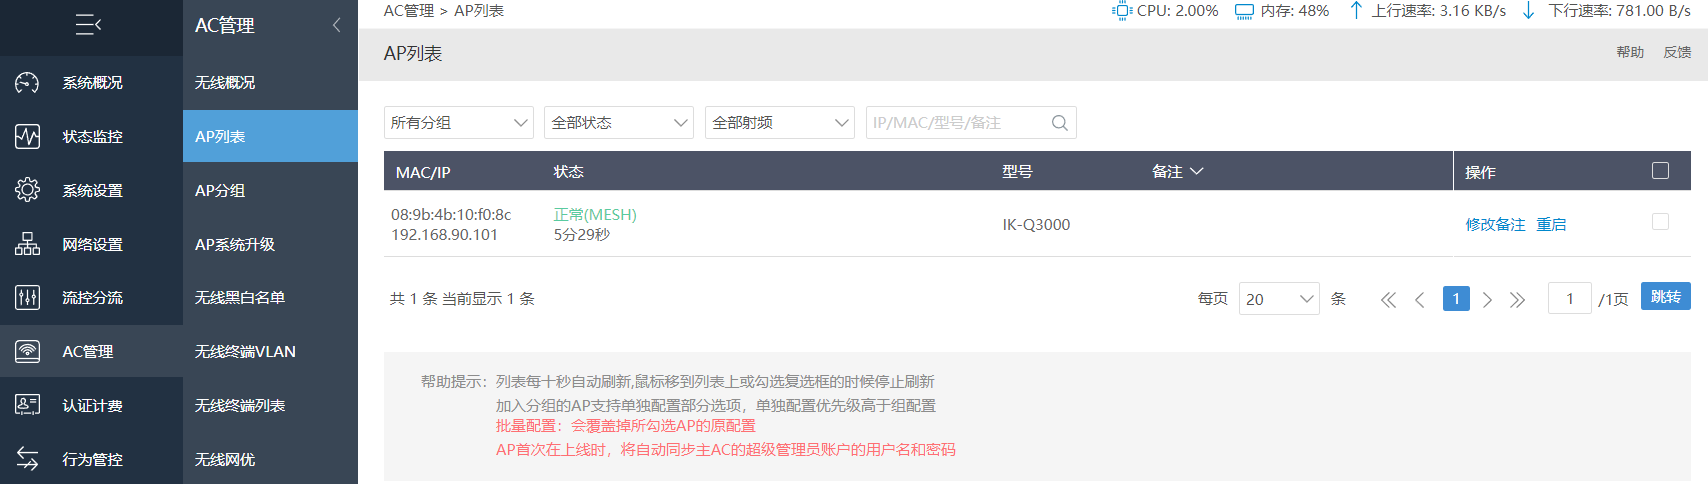
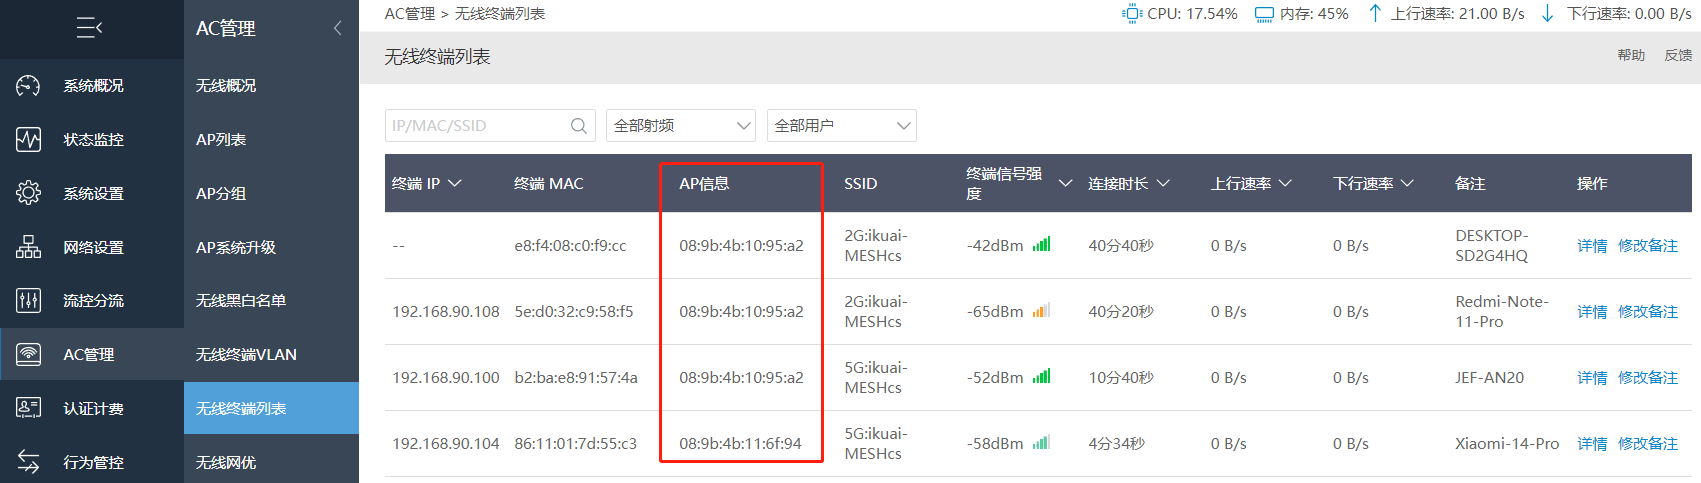
设备连接无线后,上网信息会显示到无线终端列表。在列表中可查看设备连接的AP信息,确认所连接的Mesh设备。
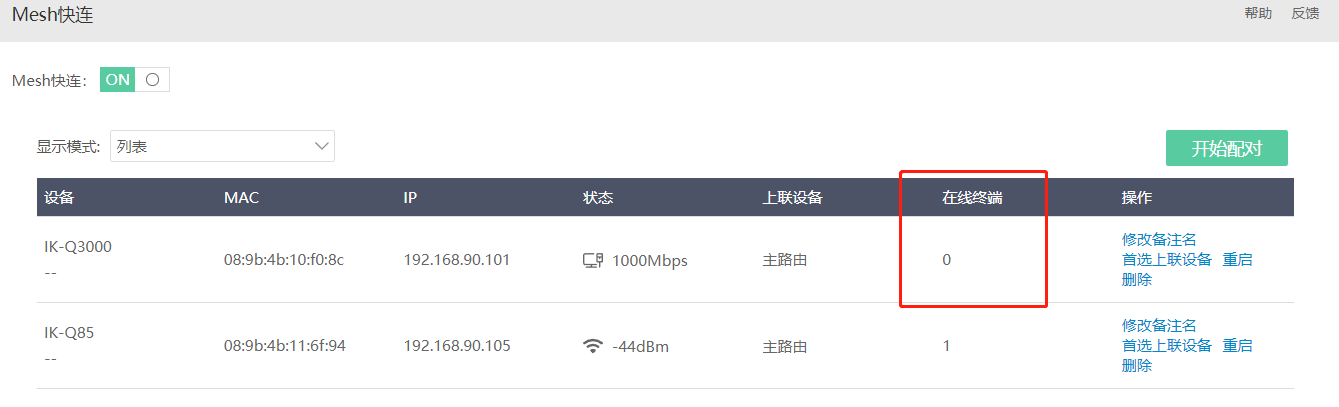
Mesh快连中也能查看对应从设备下在线终端。
无线Mesh:
网络拓扑:
设备版本:3.7.12企业版。
配置要求:从设备需恢复默认配置。
拓扑说明:设备接入电源,主设备连接外网线路。WEB页面操作在主设备均可完成,从设备无需进入WEB页面。
**注意:**mesh从设备默认绑定主设备的LAN1接口,且不支持配置,LAN1接口如果没有开启DHCP服务,mesh网络将无法自动获取IP地址
实现目的:通过Mesh功能实现无线信号的延续。
在网络设置--Mesh快连,开启Mesh快连。
按照页面提示检查设备亮灯情况以及设备摆放位置。一切准备就绪后,点击开始配对。
页面出现配对画面。
Mesh对接亮灯情况:
Q6000:
对接时:红绿灯交替闪烁。
对接成功:绿灯长亮。
Q3000:
对接时:彩灯交替闪烁,如对接时无灯闪烁,可按Mesh键3次。
对接成功:粉色灯长亮。
对接成功后设备灯显示效果:
配对时页面会显示网络中所有从设备MAC地址,MAC地址全面扫描完成后,点击停止配对。
配对成功后,在列表模式下,会显示配对的设备名称、MAC地址、设备信号状态、上联设备。如网络中有多个上联设备情况下,可点击操作处"首选上联设备"选择对应上联设备MAC信息。
在显示模式中切换模式为"拓扑"会显示当前Mesh组网拓扑图。
Mesh对接成功后设置无线名称,进行Mesh快连测试。

在AC管理--AP列表会显示Mesh设备。
设备连接无线后,上网信息会显示到无线终端列表。在列表中可查看设备连接的AP信息,确认所连接的Mesh设备。
Mesh快连中也能查看对应从设备下在线终端。
注意事项:
- Mesh快连目前仅支持组建4级(包含主路由)。
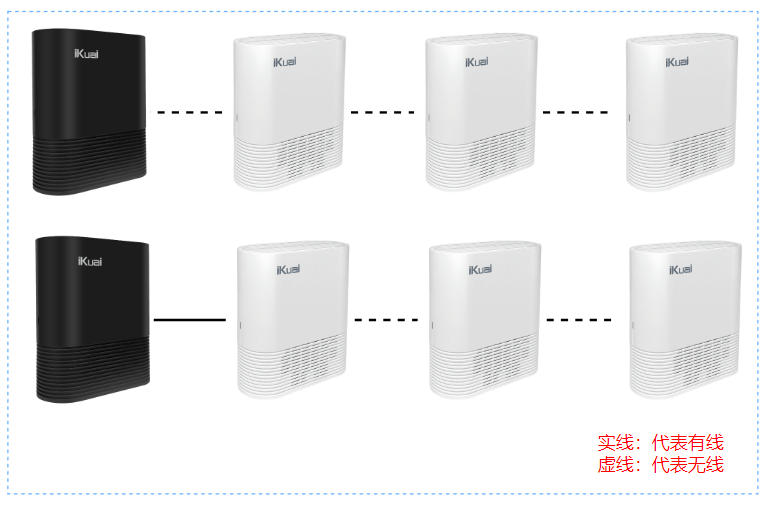
Mesh有效拓扑类型:
Mesh无效拓扑类型:
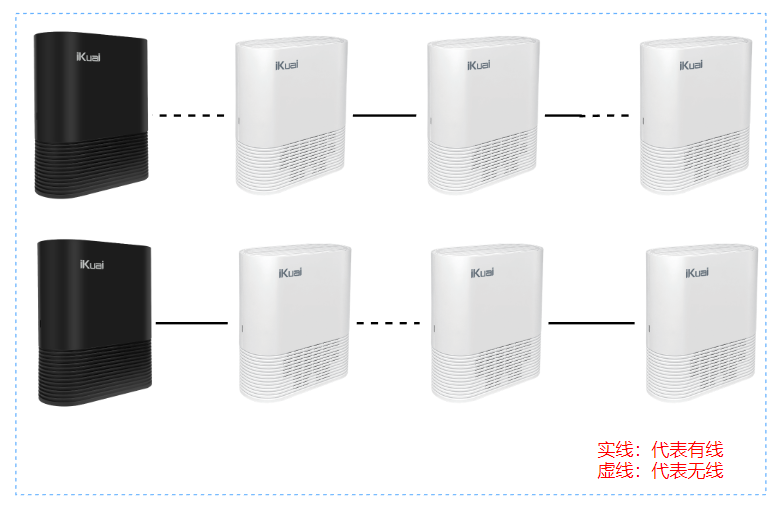
****简单的解释:****二级以下的节点,如果接一根线到另外一台的wan口, 这样可能会出异常(两台设备会互相连,导致死循环)
****解决的方法:****在Mesh快连的页面,将该二级节点设置首选上联设备为 主路由即可