需求
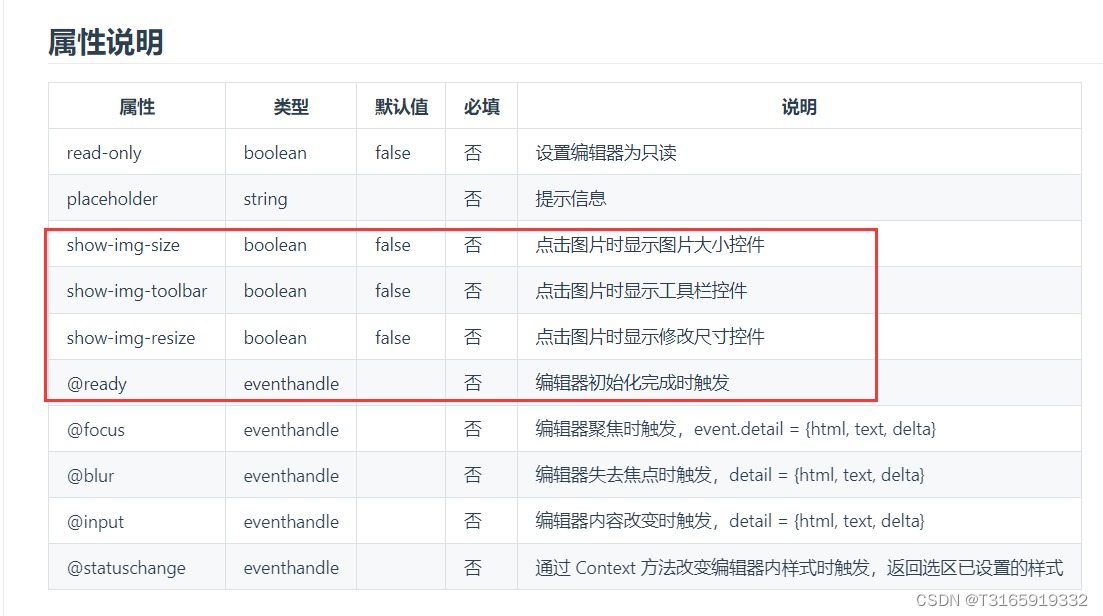
在editor中插入图片,并对图片进行编辑,简略看一下组件的属性,官网editor 组件 | uni-app官网

解决方案
首先要使用到@ready这个属性,然后官网有给代码粘过来,简单解释一下这段代码的意思(作用是在不同平台下获取编辑器的上下文,以便后续对编辑器进行操作,比如插入图片、获取内容等)
HTML
html
<editor id="editor" ref="editor" @ready="onEditorReady" >
</editor>
JS
javascript
onEditorReady() {
				// #ifdef MP-BAIDU
				this.editorCtx = requireDynamicLib('editorLib').createEditorContext('editor');
				// #endif

				// #ifdef APP-PLUS || MP-WEIXIN || H5
				uni.createSelectorQuery().select('#editor').context((res) => {
					this.editorCtx = res.context
				}).exec()
				// #endif
},然后添加一个按钮用来插入图片,这里直接上完整的代码
html
<template>
  <view class="addForum_app">
    <!-- 编辑器组件 -->
    <editor id="editor" ref="editor" placeholder="请输入内容..." @ready="onEditorReady"></editor>
    <!-- 图片选择按钮 -->
    <button type="primary" @click="selectPhoto">选择图片</button>
  </view>
</template>

<script>
export default {
  data() {
    return {
      editorCtx: null, // 编辑器上下文对象
    };
  },
  methods: {
    // 编辑器准备完成
    onEditorReady() {
      uni.createSelectorQuery().select('#editor').context((res) => {
        this.editorCtx = res.context;
      }).exec();
    },
    // 选择图片
    selectPhoto() {
      uni.chooseImage({
        count: 9, // 最多可以选择的图片数量
        sizeType: ['original', 'compressed'], // 可以指定是原图还是压缩图
        sourceType: ['album'], // 从相册选择
        success: (res) => {
          const tempFilePaths = res.tempFilePaths;
          // 遍历选中的图片路径,并使用 insertImage 方法将它们插入到编辑器中
          tempFilePaths.forEach((path) => {
            this.editorCtx.insertImage({
              src: path,
              success: function() {
                console.log('图片插入成功');
              }
            });
          });
        },
        fail: (err) => {
          console.error('选择照片失败:', err);
        }
      });
    }
  }
};
</script>
最后对图片的操作非常简单,查看官网的editor组件的属性即可。。。。