文章目录
- [1. props传递(父向子通信):](#1. props传递(父向子通信):)
- [2. 回调函数作为props(子向父通信):](#2. 回调函数作为props(子向父通信):)
- [3. Context API:](#3. Context API:)
- [4. Redux或MobX等状态管理库:](#4. Redux或MobX等状态管理库:)
-
- [4.1 Redux使用示例](#4.1 Redux使用示例)
- [5. refs:](#5. refs:)
1. props传递(父向子通信):
- 说明 : 父组件通过
props属性向子组件传递数据。 - 如何进行 : 在父组件中定义子组件时,通过属性名将值传给子组件,子组件通过
this.props接收。
js
// 父组件
import ChildProps from "./ChildProps";
function ParentProps() {
    const message = "我是父组件";
    return <ChildProps message={message} />;
}

export default ParentProps;


// 子组件
function ChildProps(props: any) {
    return (<div>
        <span>{props.message}</span>
        <br />
        <span>我是子组件</span>
    </div>);
}

export default ChildProps;
2. 回调函数作为props(子向父通信):
- 说明: 子组件通过调用父组件传递的回调函数,将信息传回给父组件。
- 如何进行 : 父组件定义一个方法,将其作为
prop传递给子组件;子组件在适当的时候调用这个函数,传递数据或事件信息。
js
// 父组件
import ChildrenEmit from "./ChildrenEmit";
function ParentEmit() {
    const handleButtonClick = (value: string) => {
        console.log(value, "ParentEmit: handleButtonClick");
    };
    return (
        <div>
            <ChildrenEmit onButtonClick={handleButtonClick}></ChildrenEmit>
        </div>
    );
}

export default ParentEmit;


// 子组件
function ChildrenEmit (props: { onButtonClick: (arg0: string) => void; }) {
    return (
        <button onClick={() => props.onButtonClick('按钮被点击了~')}>
            点击
        </button>
    )
}

export default ChildrenEmit;
3. Context API:
- 说明 : 方式:
React提供了一个Context API,允许你在组件树中传递数据,而无需手动逐层传递props。 - 如何使用 :创建一个
Context,使用React.createContext();在最顶层的组件中使用<MyContext.Provider value={value}>包裹需要共享状态的组件树;在消费组件中使用<MyContext.Consumer>或useContext(MyContext)来访问上下文中的值。
js
// MyContext.ts
// 创建Context
import { createContext } from "react";

export const MyContext = createContext('red');
js
// ParentContext.tsx
// 父组件
import { useContext } from "react";
import { MyContext } from "./MyContext";
import ChildrenContext from "./ChildrenContext";

const ParentContext = () => {
    const contextValue = useContext(MyContext);

    return (
        <MyContext.Provider value={contextValue}>
            <ChildrenContext />
        </MyContext.Provider>
    );
};

export default ParentContext;
js
// ChildrenContext.tsx
// 子组件
import { useContext } from "react";
import { MyContext } from "./MyContext";
import GrandsonContext from "./GrandsonContext";

const ChildrenContext = () => {
    const contentValue = useContext(MyContext);

    return (
        <div>
            <div>子组件颜色: {contentValue}</div>
            <GrandsonContext></GrandsonContext>
        </div>
    );
};
export default ChildrenContext;
js
// GrandsonContext.tsx
// 孙组件
import { useContext } from "react";
import { MyContext } from "./MyContext";
import GranddaughterContext from "./GranddaughterContext";

const GrandsonContext = () => {
    const contentValue = useContext(MyContext);

    return (
        <div>
            <div>孙组件1颜色: {contentValue}</div>
            <GranddaughterContext></GranddaughterContext>
        </div>
    );
};

export default GrandsonContext;
js
// GranddaughterContext.tsx
// 孙组件
import { useContext } from "react";
import { MyContext } from "./MyContext";

const GranddaughterContext = () => {
    const contentValue = useContext(MyContext);
    return (
        <div>
            <div>孙组件2颜色:{contentValue}</div>
        </div>
    );
};

export default GranddaughterContext;
4. Redux或MobX等状态管理库:
- 方式 :适用于大型应用,通过将状态提升到一个单一的
store中管理,任何组件都可以访问和修改store中的状态。 - 如何使用 :引入相应的库并设置
store,使用Provider组件将store包裹在应用的最外层,组件内部通过connect函数(Redux)或Observer(MobX)等与store连接,从而获取或改变状态。
4.1 Redux使用示例
这个例子展示了如何创建一个简单的计数器应用,通过Redux 管理状态。用户点击加减按钮时,会触发actions ,然后通过reducer 更新state ,最终React 组件根据新的state重新渲染。
- 安装
redux和 和react-redux库。
bash
npm install redux react-redux- 创建 Action
ts
// actions.ts
export const increment = () => {
    return { type: 'INCREMENT' };
  };

  export const decrement = () => {
    return { type: 'DECREMENT' };
};- 创建
reducer
ts
// reducer.ts
const initialState = { count: 0 };

function counterReducer(state = initialState, action: { type: any; }) {
  switch (action.type) {
    case 'INCREMENT':
      return { ...state, count: state.count + 1 };
    case 'DECREMENT':
      return { ...state, count: state.count - 1 };
    default:
      return state;
  }
}

export default counterReducer;- 创建
store
ts
// store.ts
import { createStore } from 'redux';
import counterReducer from './reducer';

const store = createStore(counterReducer);

export default store;- 创建组件使用
ts
import { connect } from 'react-redux';
import { increment, decrement } from './actions';
import { ReactElement, JSXElementConstructor, ReactNode, ReactPortal, MouseEventHandler } from 'react';

function ParentRedux(props: { count: string | number | boolean | ReactElement<any, string | JSXElementConstructor<any>> | Iterable<ReactNode> | ReactPortal | null | undefined; onIncrement: MouseEventHandler<HTMLButtonElement> | undefined; onDecrement: MouseEventHandler<HTMLButtonElement> | undefined; }) {
  return (
    <div>
      <h1>Counter: {props.count}</h1>
      <button onClick={props.onIncrement}>+</button>
      <button onClick={props.onDecrement}>-</button>
    </div>
  );
}

const mapStateToProps = (state: { count: any; }) => ({
  count: state.count,
});

const mapDispatchToProps = (dispatch: (arg0: { type: string; }) => any) => ({
  onIncrement: () => dispatch(increment()),
  onDecrement: () => dispatch(decrement()),
});

export default connect(mapStateToProps, mapDispatchToProps)(ParentRedux);- 根组件导入
js
import React from "react";
import "./App.css";
import { Provider } from 'react-redux';
import store from './page/redux/store';
import ParentProps from "./page/props/ParentProps";
import ParentEmit from "./page/emit/ParentEmit";
import ParentContext from "./page/context/ParentContext";
import ParentRefs from "./page/refs/ParentRefs";
import ParentRedux from "./page/redux/ParentRedux";

function App() {
    return (
        <div className="App">
            <div className="App-item">
                测试父子传参:<ParentProps></ParentProps>
            </div>
            <div className="App-item">
                测试子传父:<ParentEmit></ParentEmit>
            </div>
            <div className="App-item">
                测试context传参:<ParentContext></ParentContext>
            </div>
            <div className="App-item">
                测试refs传参:<ParentRefs></ParentRefs>
            </div>
            <Provider store={store}>
                <div className="App-item">
                    测试redux传参:<ParentRedux></ParentRedux>
                </div>
            </Provider>
        </div>
    );
}

export default App;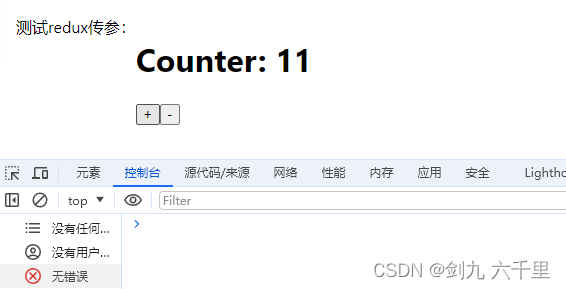
这个例子展示了如何创建一个简单的计数器应用,通过
Redux管理状态。用户点击加减按钮时,会触发actions,然后通过reducer更新state,最终React组件根据新的state重新渲染。
5. refs:
- 方式 :主要用于访问
DOM元素或在组件之间传递一个可变的引用。 - 如何使用 :可以通过
React.createRef()创建ref,然后将其附加到特定的React元素上。在组件中,可以通过this.myRef.current访问DOM元素或在类组件间传递ref以直接操作另一个组件的实例。
ts
// ParentRefs.tsx
// 父组件
import { useRef } from "react";
import ChildRefs from "./ChildRefs";

const ParentRefs = () => {
    const childRef = useRef<HTMLInputElement>(null);

    const handleClick = (): void => {
        childRef?.current?.focus();
    };

    return (
        <>
            <ChildRefs ref={childRef} />
            <button onClick={handleClick}>Focus Child Input</button>
        </>
    );
};

export default ParentRefs;
ts
// ChildRefs.tsx
// 子组件
import { forwardRef } from 'react';

const ChildRefs = forwardRef<HTMLInputElement>((props, ref) => {
    return (
        <div>
            <input type="text" ref={ref} />
        </div>
    );
});

export default ChildRefs;