Windows11 安装 Detectron2
- [1. 创建虚拟环境](#1. 创建虚拟环境)
- 2.配置Pytorch环境
- [3. 安装cocoapi](#3. 安装cocoapi)
- [4. 下载detectron2](#4. 下载detectron2)
-
- [4.1 修改setup.py](#4.1 修改setup.py)
- [4.2 修改 nms_rotated_cuda.cu(detectron2\detectron2\layers\csrc\nms_rotated\nms_rotated_cuda.cu)](#4.2 修改 nms_rotated_cuda.cu(detectron2\detectron2\layers\csrc\nms_rotated\nms_rotated_cuda.cu))
- [5. 开始下载依赖库以及编译环境](#5. 开始下载依赖库以及编译环境)
- 6.测试
- [7. demo代码](#7. demo代码)
- [8. 参考文章](#8. 参考文章)
1. 创建虚拟环境
bash
conda create -n detectron1 python=3.8
# 激活环境
conda activate detectron1
2.配置Pytorch环境
bash
pip3 install torch torchvision torchaudio --index-url https://download.pytorch.org/whl/cu1183. 安装cocoapi
bash
pip install pycocotools -i https://pypi.tuna.tsinghua.edu.cn/simple4. 下载detectron2
bash
git clone https://gitcode.com/facebookresearch/detectron2.git4.1 修改setup.py
bash
将"pycocotools>=2.0.2", 修改为"pycocotools"4.2 修改 nms_rotated_cuda.cu(detectron2\detectron2\layers\csrc\nms_rotated\nms_rotated_cuda.cu)
将using namespace detectron2之前的用下面代码覆盖
cpp
#include <ATen/ATen.h>
#include <ATen/cuda/CUDAContext.h>
#include <c10/cuda/CUDAGuard.h>
#include <ATen/cuda/CUDAApplyUtils.cuh>
/*#ifdef WITH_CUDA
#include "../box_iou_rotated/box_iou_rotated_utils.h"
#endif
// TODO avoid this when pytorch supports "same directory" hipification
#ifdef WITH_HIP
#include "box_iou_rotated/box_iou_rotated_utils.h"
#endif*/
#include "box_iou_rotated/box_iou_rotated_utils.h"
5. 开始下载依赖库以及编译环境
命令要在这个目录下执行,不要进入到detectron代码中去:

执行如下命令:
cpp
python -m pip install -e detectron2 -i https://pypi.tuna.tsinghua.edu.cn/simple等待编译完成即可。
6.测试
cpp
Study\ImageSegmentation\detectron2\demo>python demo.py --config-file ../configs/COCO-InstanceSegmentation/mask_rcnn_R_50_FPN_3x.yaml --input 000043.jpg input2.jpg --opts MODEL.WEIGHTS detectron2://COCO-InstanceSegmentation/mask_rcnn_R_50_FPN_3x/137849600/model_final_f10217.pkl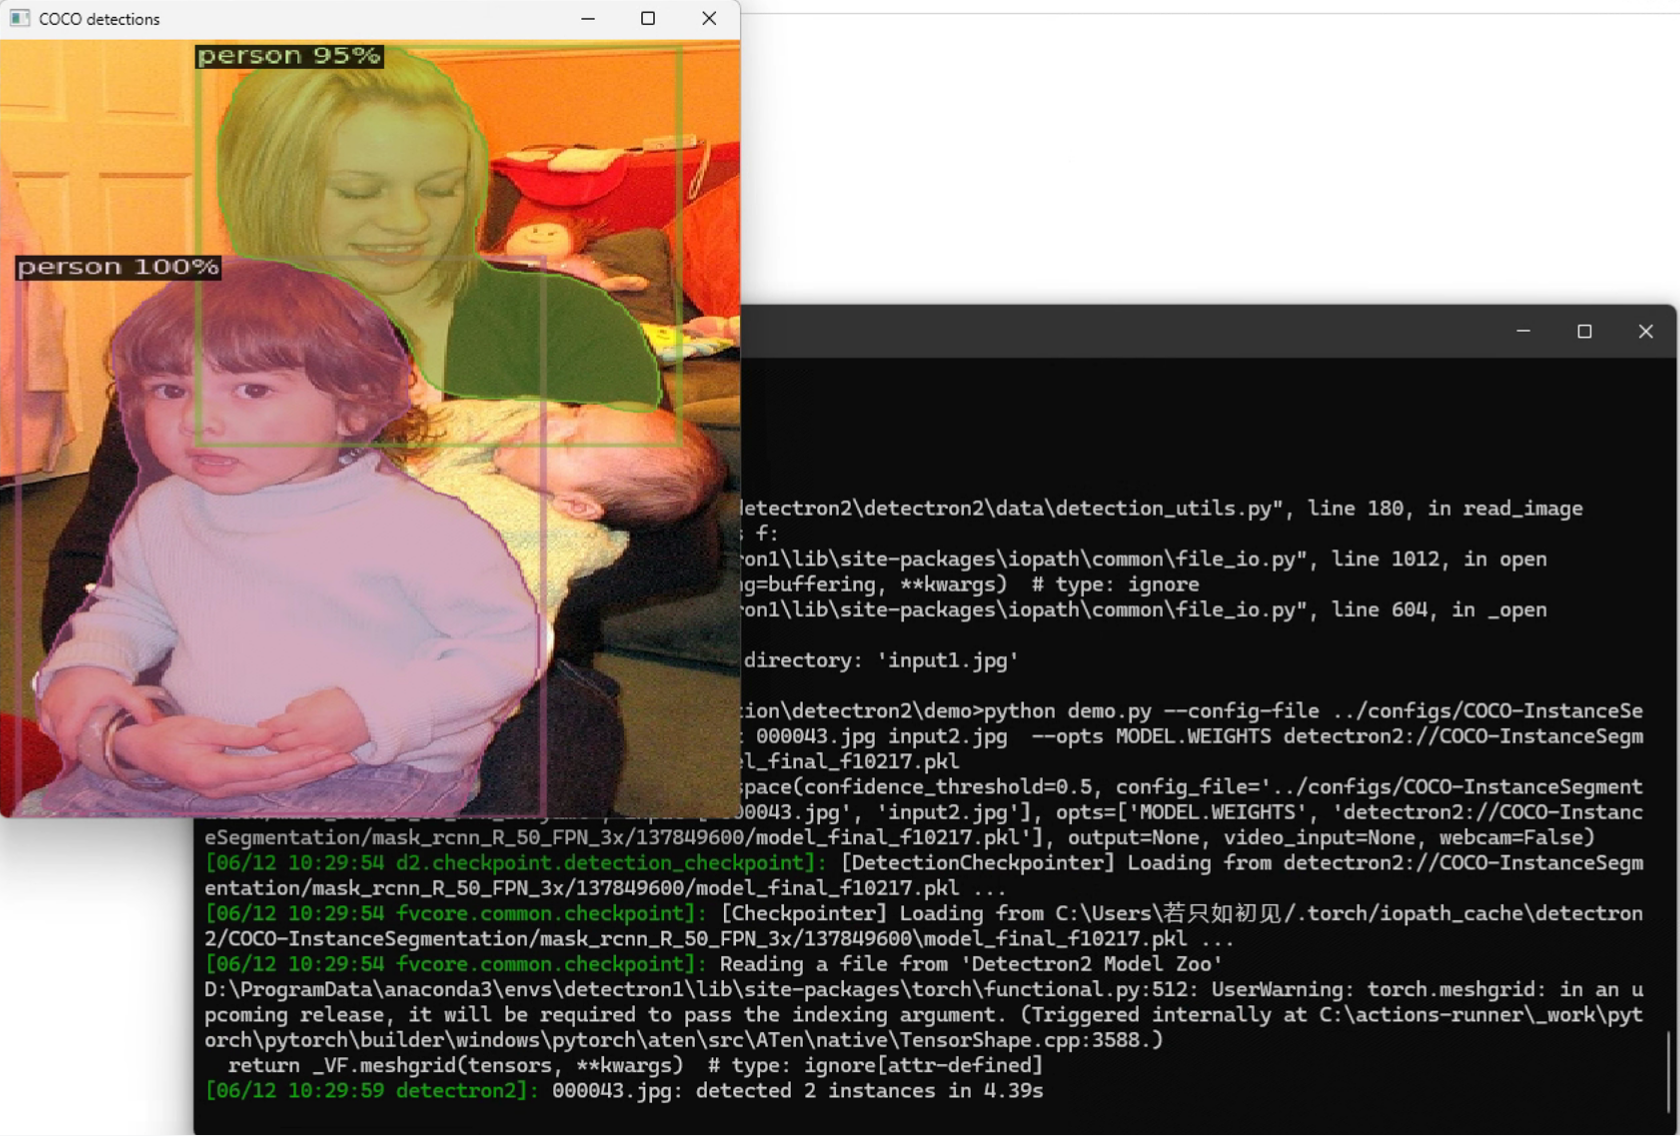
7. demo代码
python
import wget
import cv2

import torch
import detectron2
from detectron2.utils.logger import setup_logger
setup_logger()

# import some common libraries
import numpy as np
import os, json, cv2, random

# import some common detectron2 utilities
from detectron2 import model_zoo
from detectron2.engine import DefaultPredictor
from detectron2.config import get_cfg
from detectron2.utils.visualizer import Visualizer
from detectron2.data import MetadataCatalog, DatasetCatalog


TORCH_VERSION = ".".join(torch.__version__.split(".")[:2])
CUDA_VERSION = torch.__version__.split("+")[-1]
print("torch: ", TORCH_VERSION, "; cuda: ", CUDA_VERSION)
print("detectron2:", detectron2.__version__)

def progress_bar(current, total, width=80):
    progress = current / total
    bar = '#' * int(progress * width)
    percentage = round(progress * 100, 2)
    print(f'[{bar:<{width}}] {percentage}%')


if True:
    url = 'http://images.cocodataset.org/val2017/000000439715.jpg'
    save_path = 'input.jpg'

    try:
        wget.download(url, save_path, bar=progress_bar)
    except Exception as e:
        print(f'An error occurred: {e}')

im = cv2.imread("./input.jpg")
cv2.imshow('img', im)
cv2.waitKey(0)

cfg = get_cfg()
# add project-specific config (e.g., TensorMask) here if you're not running a model in detectron2's core library
cfg.merge_from_file(model_zoo.get_config_file("COCO-InstanceSegmentation/mask_rcnn_R_50_FPN_3x.yaml"))
cfg.MODEL.ROI_HEADS.SCORE_THRESH_TEST = 0.5  # set threshold for this model
# Find a model from detectron2's model zoo. You can use the https://dl.fbaipublicfiles... url as well
cfg.MODEL.WEIGHTS = model_zoo.get_checkpoint_url("COCO-InstanceSegmentation/mask_rcnn_R_50_FPN_3x.yaml")
predictor = DefaultPredictor(cfg)
outputs = predictor(im)

# look at the outputs. See https://detectron2.readthedocs.io/tutorials/models.html#model-output-format for specification
print(outputs["instances"].pred_classes)
print(outputs["instances"].pred_boxes)

# We can use `Visualizer` to draw the predictions on the image.
v = Visualizer(im[:, :, ::-1], MetadataCatalog.get(cfg.DATASETS.TRAIN[0]), scale=1.2)
out = v.draw_instance_predictions(outputs["instances"].to("cpu"))
cv2.imshow('results', out.get_image()[:, :, ::-1])
cv2.waitKey(0)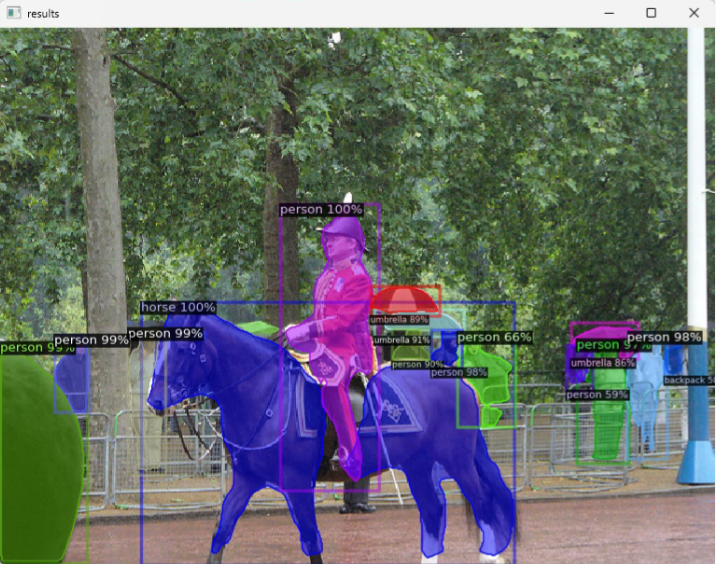
8. 参考文章
https://blog.csdn.net/weixin_45839733/article/details/129356470