概览
在只有方寸之间大小的手持设备上要想体面的向用户展示海量信息,滚动视图(ScrollView)无疑是绝佳的"东牀之选"。

在 SwiftUI 历史的长河中,总觉得苹果对于 ScrollView 视图功能的升级是在"挤牙膏"。这不,在本届最新 WWDC24 重磅打造的 SwiftUI 6.0 中就让我们来看看 ScrollView 又能挤出怎样的新花样吧?
在本篇博文中,您将学到如下精彩的内容:
- 概览
- [1. SwiftUI 6.0 之前的滚动世界](#1. SwiftUI 6.0 之前的滚动世界)
- [2. SwiftUI 6.0(iOS 18)中全新的 ScrollPosition 类型](#2. SwiftUI 6.0(iOS 18)中全新的 ScrollPosition 类型)
- [3. "新老搭配,干活不累"](#3. “新老搭配,干活不累”)
- [4. 如何判断当前滚动是由用户指尖触发的?](#4. 如何判断当前滚动是由用户指尖触发的?)
- [5. 实时监听滚动视图的内容偏移(ContentOffset)](#5. 实时监听滚动视图的内容偏移(ContentOffset))
- 总结
在 WWDC24 里,苹果对 SwiftUI 6.0 中滚动视图的全新升级无疑解了一众秃头码农们的额燃眉之急。
那还等什么呢?让我们马上开始滚动大冒险吧!
Let's rolling!!!😉
1. SwiftUI 6.0 之前的滚动世界
苹果从 SwiftUI 2.0 开始陆续"发力"向 ScrollView 增加了许多新特性,其中包括秃头码农们翘首跂踵的滚动位置读取与设置、滚动模式等高级功能。
在 SwiftUI 6.0 之前,我们是通过单一状态来读取和设置滚动位置的:
swift
struct ContentView: View {
    @State private var position: Int?

    var body: some View {
        ScrollView {
            LazyVStack {
                ForEach(0..<100) { index in
                    Text(verbatim: index.formatted())
                        .id(index)
                }
            }
            .scrollTargetLayout()
        }
        .scrollTargetBehavior(.viewAligned)
        .scrollPosition(id: $position)
    }
}
如上代码所示:滚动视图中滚动位置其实是由其子视图的 id 值来确定的,我们通过读取和更改 position 状态的值达到了把控滚动位置之目的。
2. SwiftUI 6.0(iOS 18)中全新的 ScrollPosition 类型
而从 SwiftUI 6.0 开始,苹果推出了全新的 ScrollPosition 类型专门由于描述 ScrollView 的滚动位置:
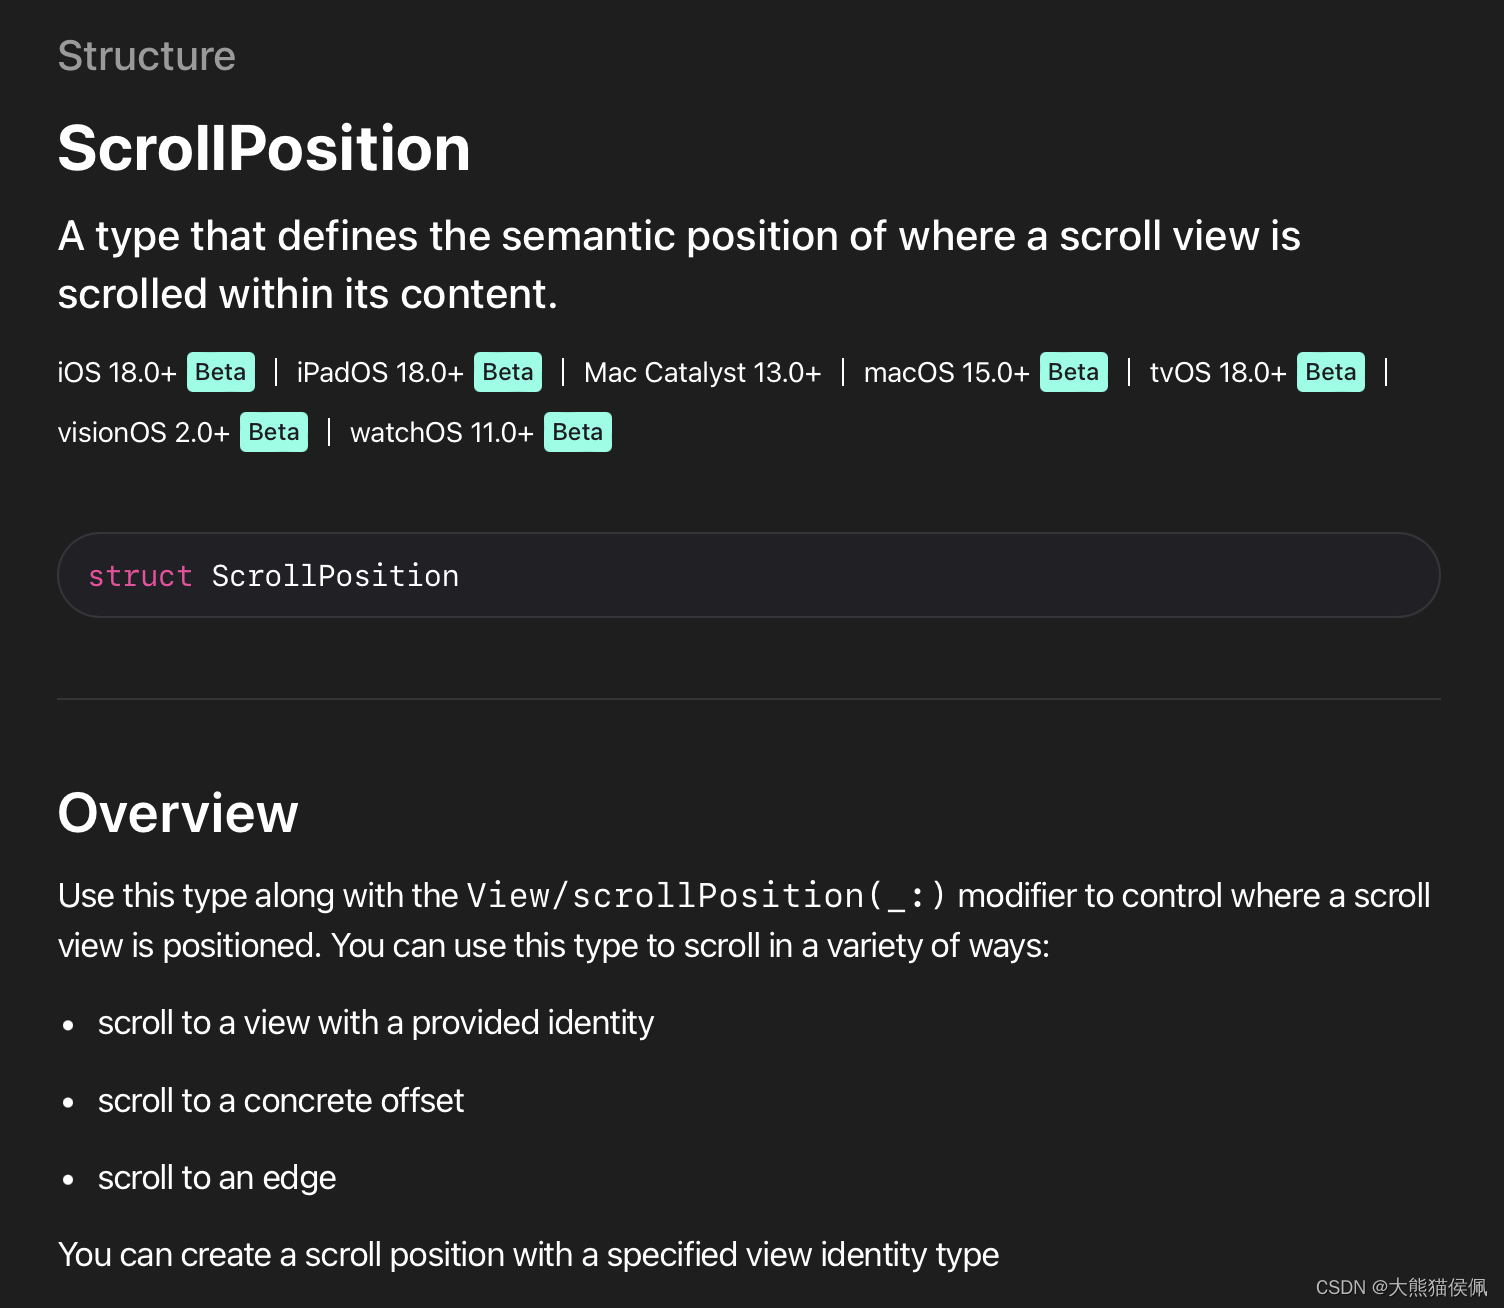
有了 ScrollPosition 坐镇,除了通过视图 id 以外我们还能够以多种方式来表示滚动位置了。比如,以滚动边缘(Edge)来描述和设置滚动视图的位置:
swift
struct ContentView: View {
    @State private var position = ScrollPosition(edge: .top)

    var body: some View {
        ScrollView {
            Button("Scroll to bottom") {
                position.scrollTo(edge: .bottom)
            }

            ForEach(1..<100) { index in
                Text(verbatim: index.formatted())
                    .id(index)
            }

            Button("Scroll to top") {
                position.scrollTo(edge: .top)
            }
        }
        .scrollPosition($position)
    }
}
除了使用 position.scrollTo(edge:) 方法滚动到特定的顶部和底部边缘以外,我们还可以一如既往的恣意滚动到任意 id 对应的子视图中去:
swift
struct ContentView: View {
    @State private var position = ScrollPosition(edge: .top)

    var body: some View {
        ScrollView {
            Button("Random Scroll") {
                let id = (1..<100).randomElement() ?? 0
                position.scrollTo(id: id, anchor: .center)
            }

            ForEach(1..<100) { index in
                Text(verbatim: index.formatted())
                    .id(index)
            }
        }
        .scrollPosition($position)
        .animation(.default, value: position)
    }
}
如上代码所示,当用户按下按钮时我们通过 position.scrollTo(id:, anchor:) 方法将视图滚动到了一个随机的位置上。
在 SwiftUI 6.0 中除了按照子视图的 id 滚动以外,我们还可以按照指定的偏移来滚动视图:
swift
struct ContentView: View {
    @State private var position = ScrollPosition(edge: .top)

    var body: some View {
        ScrollView {
            Button("Scroll to offset") {
                position.scrollTo(point: CGPoint(x: 0, y: 100))
            }

            ForEach(1..<100) { index in
                Text(verbatim: index.formatted())
                    .id(index)
            }
        }
        .scrollPosition($position)
        .animation(.default, value: position)
    }
}
注意,我们可以分别沿 x 和 y 轴来滚动视图:
swift
Button("Scroll to offset") {
    position.scrollTo(y: 100)
    position.scrollTo(x: 200)
}
3. "新老搭配,干活不累"
不过从目前(iOS 18)看来,使用新的 scrollPosition(_: anchor:) 视图修改器方法是无法监控到实时滚动位置的。
从下面的示意图中可以验证这一点 ------ 只有通过代码设置的滚动位置才能被 scrollPosition(_: anchor:) 方法所捕获到:
那么,如果大家希望实时监听滚动的位置又该如何是好呢?
别急,我们可以让新旧两种滚动机制珠联璧合从而达到"双剑合璧,秃头治愈"之神奇功效:
swift
struct ContentView: View {
    @State private var position = ScrollPosition(edge: .top)
    @State var curPosID: Int?
    @State var offsetY: CGFloat?

    var body: some View {
        ScrollView {
            ForEach(1..<100) { index in
                Text(verbatim: index.formatted())
                    .font(.largeTitle.weight(.heavy))
                    .padding()
                    .id(index)
            }
            .scrollTargetLayout()
        }
        .scrollPosition(id: $curPosID)
        .scrollPosition($position)
        .animation(.default, value: position)
        .safeAreaInset(edge: .bottom) {
            Button("Random Scroll") {
                let id = (1..<100).randomElement() ?? 0
                position.scrollTo(id: id, anchor: .top)
            }
        }
        .onChange(of: position) { old,new in
            print("用代码滚动视图的ID: \(new.viewID)")
            curPosID = new.viewID as? Int
        }
        .onChange(of: curPosID) { _,new in
            print("实时滚动视图的 ID: \(new)")
        }
    }
}
代码执行效果如下所示:
4. 如何判断当前滚动是由用户指尖触发的?
有时候我们需要了解:到底是用户实际滑动还是我们的代码引发了滚动。这在 SwiftUI 6.0 之前几乎是不可能的任务。
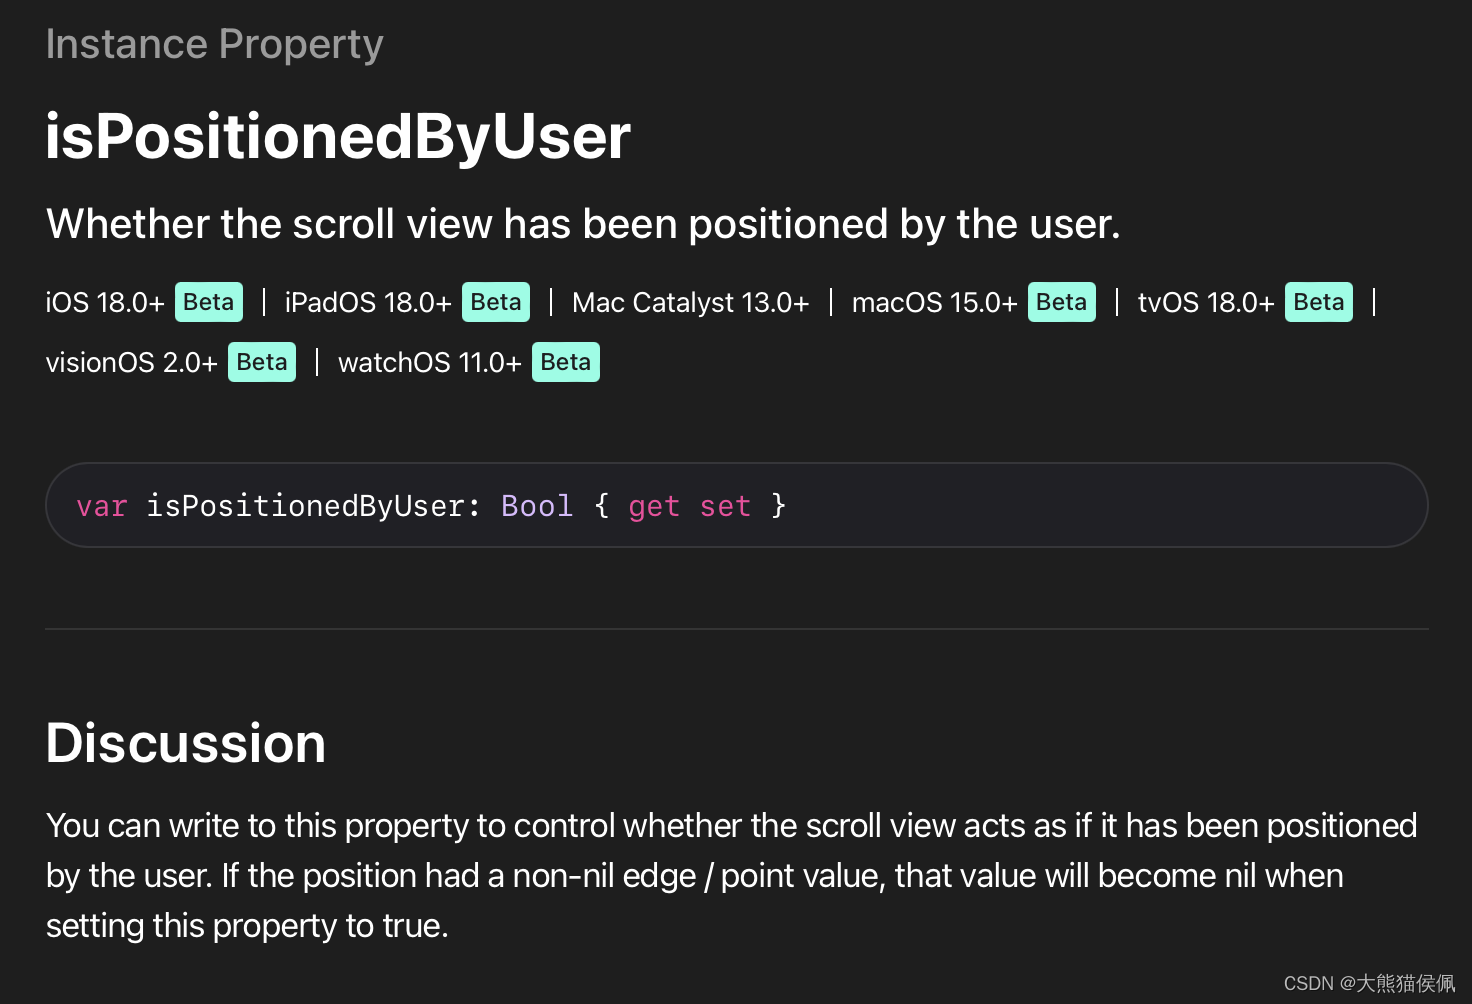
幸运的是,在 SwiftUI 6.0 中新降临 ScrollPosition 类型就包含一个 isPositionedByUser 属性,我们可以用它来明确滚动视图滚动的原因:
swift
struct ContentView: View {
    @State private var position = ScrollPosition(edge: .top)

    var body: some View {
        ScrollView {
            ForEach(1..<100) { index in
                Text(verbatim: index.formatted())
                    .font(.largeTitle.weight(.heavy))
                    .padding()
                    .id(index)
            }
        }
        .scrollPosition($position)
        .animation(.default, value: position)
        .safeAreaInset(edge: .bottom) {
            Button("Random Scroll") {
                let id = (1..<100).randomElement() ?? 0
                position.scrollTo(id: id, anchor: .top)
            }
        }
        .onChange(of: position) { old,new in
            print("是否由用户拖动引起的滚动:\(new.isPositionedByUser ? "是" : "否")")
        }
    }
}
从运行结果可以看到,只有当我们轻盈的指尖引起滚动时 isPositionedByUser 的值才会为真!
5. 实时监听滚动视图的内容偏移(ContentOffset)
从上面的讨论可知新的滚动机制能够让我们如虎添翼。不过虽然我们可以从 ScrollPosition 对象中获取到很多与滚动相关的信息,可是有一个滚动中至关重要的数据我们却对它束手无策:那就是滚动中内容视图实时的偏移值(ContentOffset)。
在正常情况下,通过直接访问 ScrollPosition 中的 point 属性将会一无所获:
swift
.onChange(of: position) { old,new in
    print("当前内容滚动偏移:\(new.point)")
}
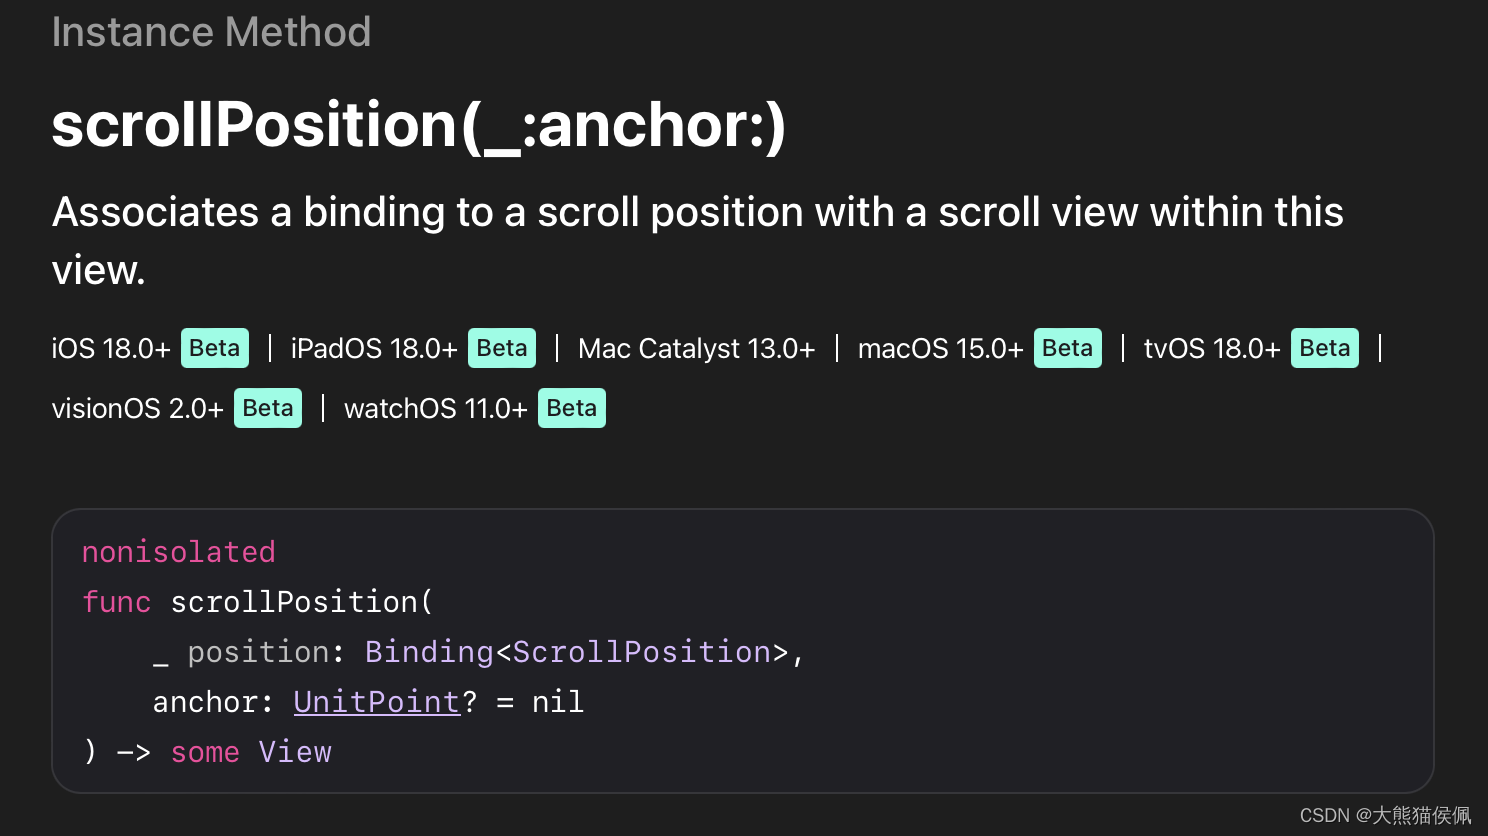
不过别担心,苹果在 SwiftUI 6.0 中又新增了一个 onScrollGeometryChange 修改器方法来专门解决此事:
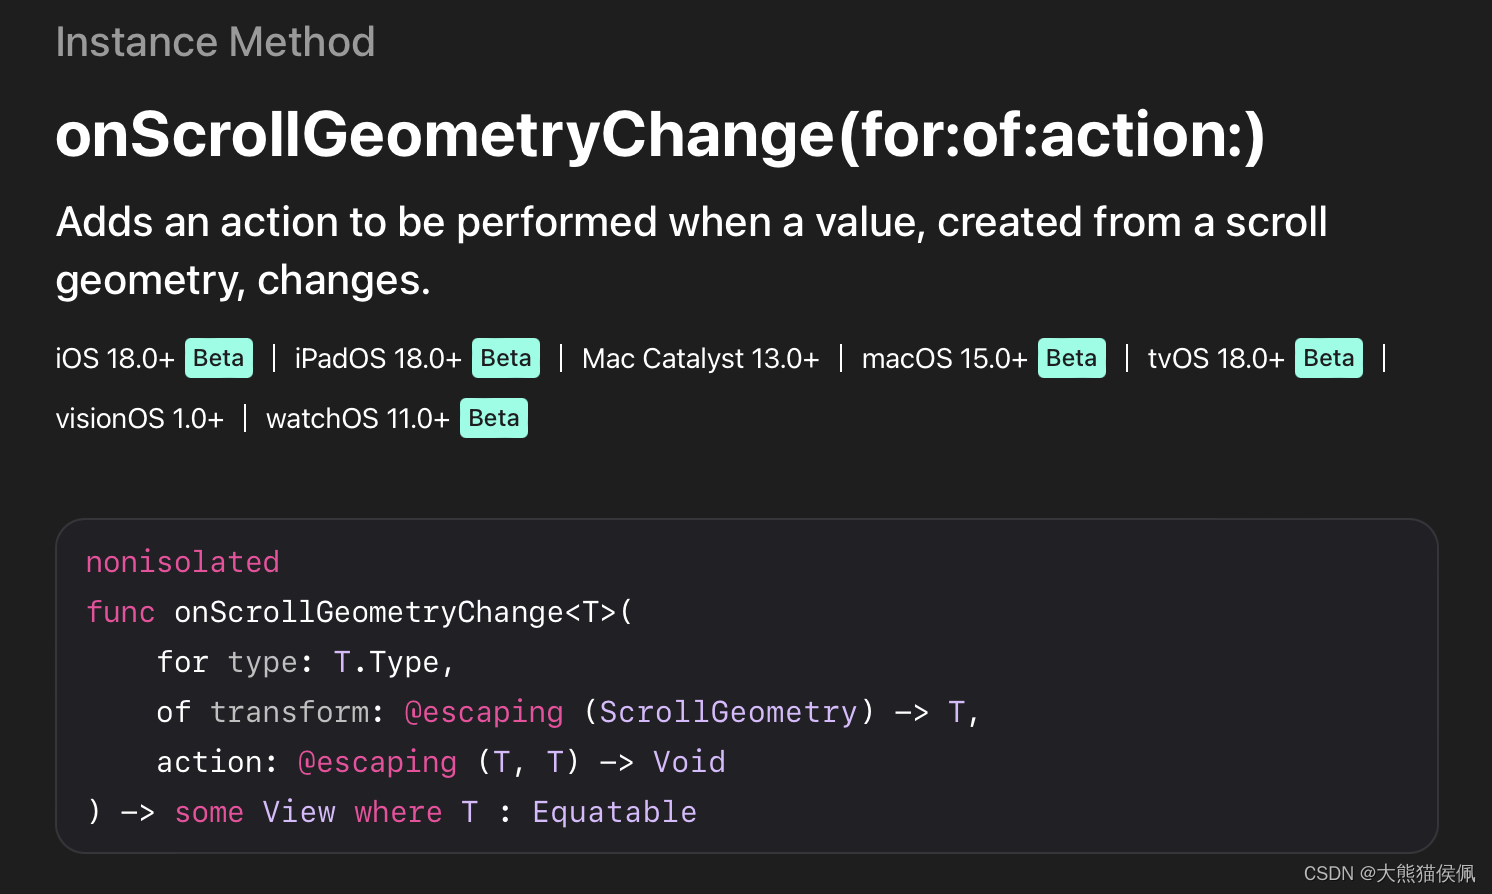
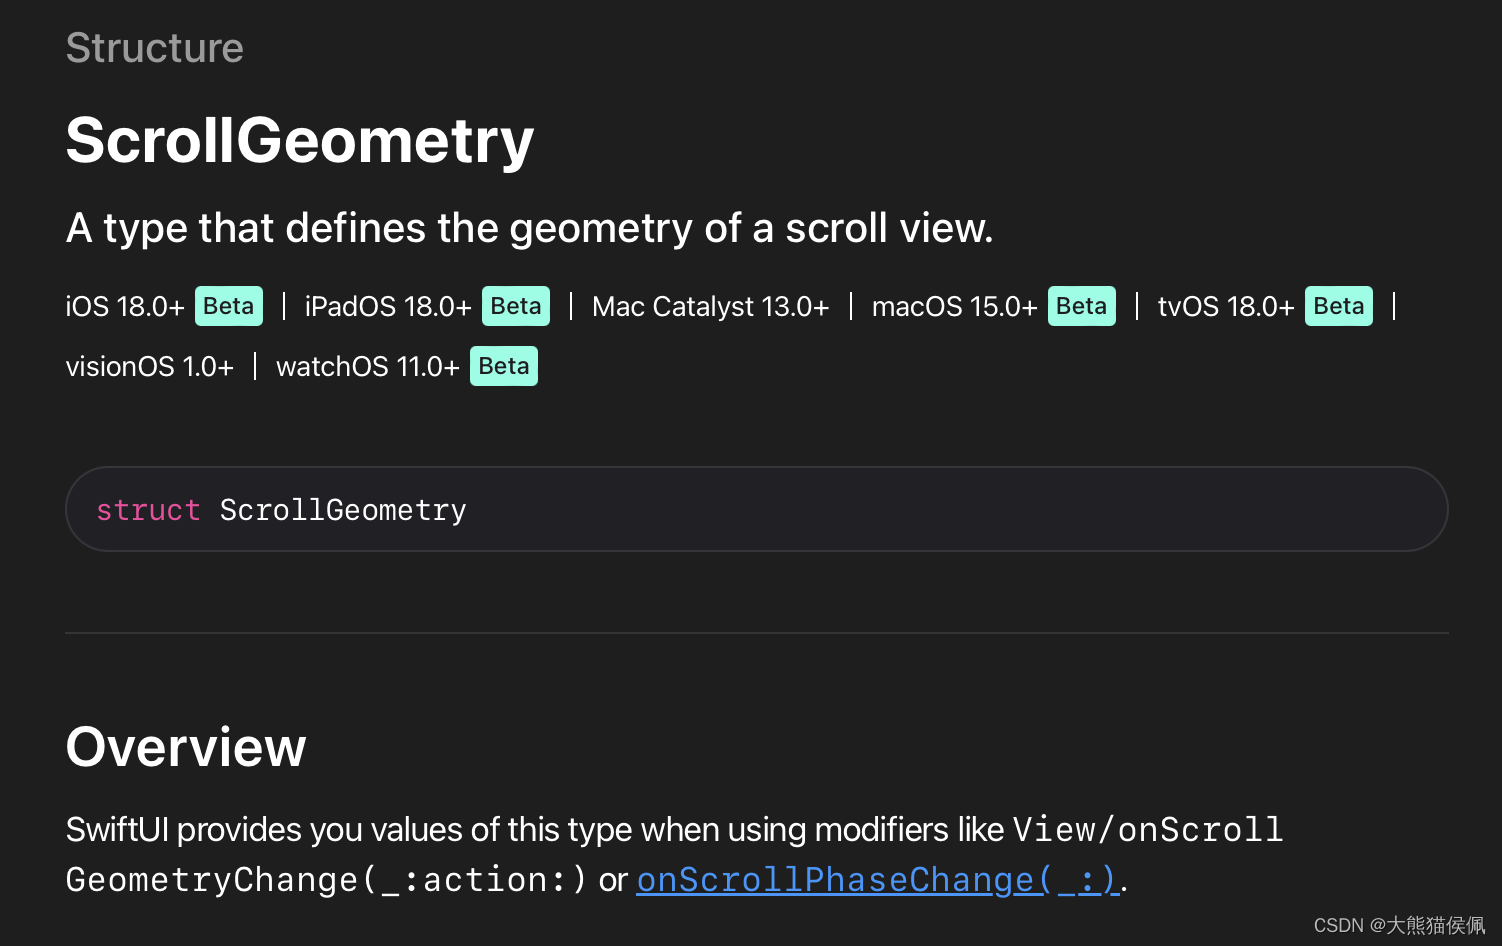
该方法可以在滚动几何构造发生变化时,执行我们想要的动作。注意它的 transform 闭包会传入一个 ScrollGeometry 类型的参数,我们可以用它来获取任何与滚动几何(Geometry)相关的信息:
现在,使用 onScrollGeometryChange() 修改器方法我们可以游刃有余的在滚动中实时获取滚动的偏移啦:
swift
struct ContentView: View {
    @State private var position = ScrollPosition(edge: .top)
    @State var curPosID: Int?
    @State var offsetY: CGFloat?

    var body: some View {
        ScrollView {

            ForEach(1..<100) { index in
                Text(verbatim: index.formatted())
                    .font(.largeTitle.weight(.heavy))
                    .padding()
                    .id(index)
            }
            .scrollTargetLayout()
        }
        .scrollPosition(id: $curPosID)
        .scrollPosition($position)
        .animation(.default, value: position)
        .safeAreaInset(edge: .bottom) {
            Button("Random Scroll") {
                let id = (1..<100).randomElement() ?? 0
                position.scrollTo(id: id, anchor: .top)
            }
        }
        .onChange(of: position) { old,new in
            print("用代码滚动视图的ID: \(new.viewID)")
            curPosID = new.viewID as? Int
        }
        .onChange(of: curPosID) { _,new in
            print("实时滚动视图的 ID: \(new)")
        }
        .onScrollGeometryChange(for: CGFloat.self, of: {
            geo in
            geo.contentOffset.y
        }, action: { old, new in
            offsetY = new
        })
        .onChange(of: offsetY) { _, new in
            guard let new else { return }
            print("当前 y 轴滚动偏移:\(new.formatted())")
        }
    }
}
最后,我们来看一下执行效果:
可以看到,有了 SwiftUI 6.0 对 iOS 18 和 iPadOS 18 中滚动视图的"重磅升级",秃头码农们现在终于可以心无旁骛、怡然自得的和 ScrollView 心照神交啦!棒棒哒!
总结
在本篇博文中,我们介绍了 SwiftUI 6.0(iOS/iPadOS 18)中滚动视图(ScrollView)的全新升级,其中包括 ScrollPosition 以及动态获取滚动实时偏移(Content Offset)等精彩内容。
感谢观赏,再会!😎