文章说明
本篇文章主要通过代码案例的方式,展示 poi-tl 生成 docx 文件的一些常用操作,主要涵盖以下内容 :
- 插入文本字符(含样式、超链接)
- 插入图片
- 插入表格
- 引入标签(通过可选文字的方式,这种方式也可以实现插入图片和插入表格)
当然 poi-tl 官方也有很详细的介绍,官网文档地址:https://deepoove.com/poi-tl/
项目初始化【必读】
项目创建好之后第一件事当然是引入依赖啦。
下面是 maven 引入的依赖,如果使用 Gradle 自行转成 Gradle 依赖。
xml
<!-- poi 依赖 -->
<dependency>
  <groupId>org.apache.poi</groupId>
  <artifactId>poi</artifactId>
  <version>5.2.5</version>
</dependency>
<!-- poi-tl -->
<dependency>
  <groupId>com.deepoove</groupId>
  <artifactId>poi-tl</artifactId>
  <version>1.12.2</version>
</dependency>
在 poi-tl 生成 docx 文件时,先搞清楚三个问题:
- 定义 docx 模板文件:要生成怎么样的文件,自行创建一个 docx 的模板文件
- 定义模板文件的数据:向模板文件中,添加数据
- 生成文件位置:实际开发中大多会通过网络的方式传递,这里只展示生成在本地文件
本篇文章展示一些关键代码,为了减少冗余,我们可以定义一个生成 docx 的工具类 PoitlUtils:
java
import com.deepoove.poi.XWPFTemplate;

import java.io.FileOutputStream;
import java.io.IOException;
import java.io.InputStream;
import java.util.Map;

/**
 * @author 17279
 */
public class PoitlUtils {

  /**
    * @param templateData 生成模板文件所需的所有数据
    * @param templateFilePath 模板文件路径(这里读取的是 resources 下的文件)
    * @param outputFilePath 模板文件输入的地址
    */
  public static void generateWordFile(Map<String, Object> templateData, String templateFilePath, String outputFilePath) {
    // 读取模板文件
    try (InputStream templateIn = PoitlUtils.class.getResourceAsStream(templateFilePath)) {
      // 生成模板文件
      XWPFTemplate template = XWPFTemplate.compile(templateIn).render(templateData);
      template.writeAndClose(new FileOutputStream(outputFilePath));
      // 这个目的是:生成文件之后调用 cmd 打开本地文件,实际生产不需要该操作
      // Runtime.getRuntime().exec(String.format("cmd /c %s", outputFilePath));
    } catch (IOException e) {
      e.printStackTrace();
    }
  }
}
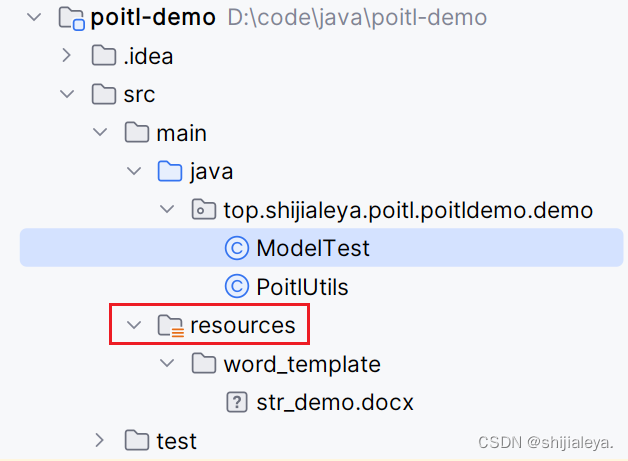
这里使用的所有 docs 模板文件,我都存放在 resources 的目录下。
插入文本
str_demo.docx 文件,文本使用 {{xxx}} 设置占位符:
{{str1}}
{{str2}}
{{str3}}
{{str4}}
{{?strArr1}}{{=#this}} {{/strArr1}}
案例代码:
java
// 模板文件
String templateFilePath = "/word_template/str_demo.docx";
// 输出文件
String outputFilePath = "D:/output.docx";
// 插入文本数据
Map<String, Object> templateData = new HashMap<String, Object>() {{
  // 直接插入 String
  put("str1", "直接插入 String");
  // 插入含有样式的文本
  put("str2", Texts.of("插入含有样式的文").color("ff0000").create());
  // 插入含超链接的文本
  put("str3", Texts.of("插入含有样式的文").link("http://www.shijialeya.top/").create());
  // 传入一个对象
  put("str4", Arrays.asList("键盘敲破", "工资过万"));
  // 遍历文本
  put("strArr1", Arrays.asList("派大星", "瘸老板", "海绵宝宝", "章鱼哥", "蟹老板"));
}};
// 文件生成
PoitlUtils.generateWordFile(templateData, templateFilePath, outputFilePath);
文档效果:
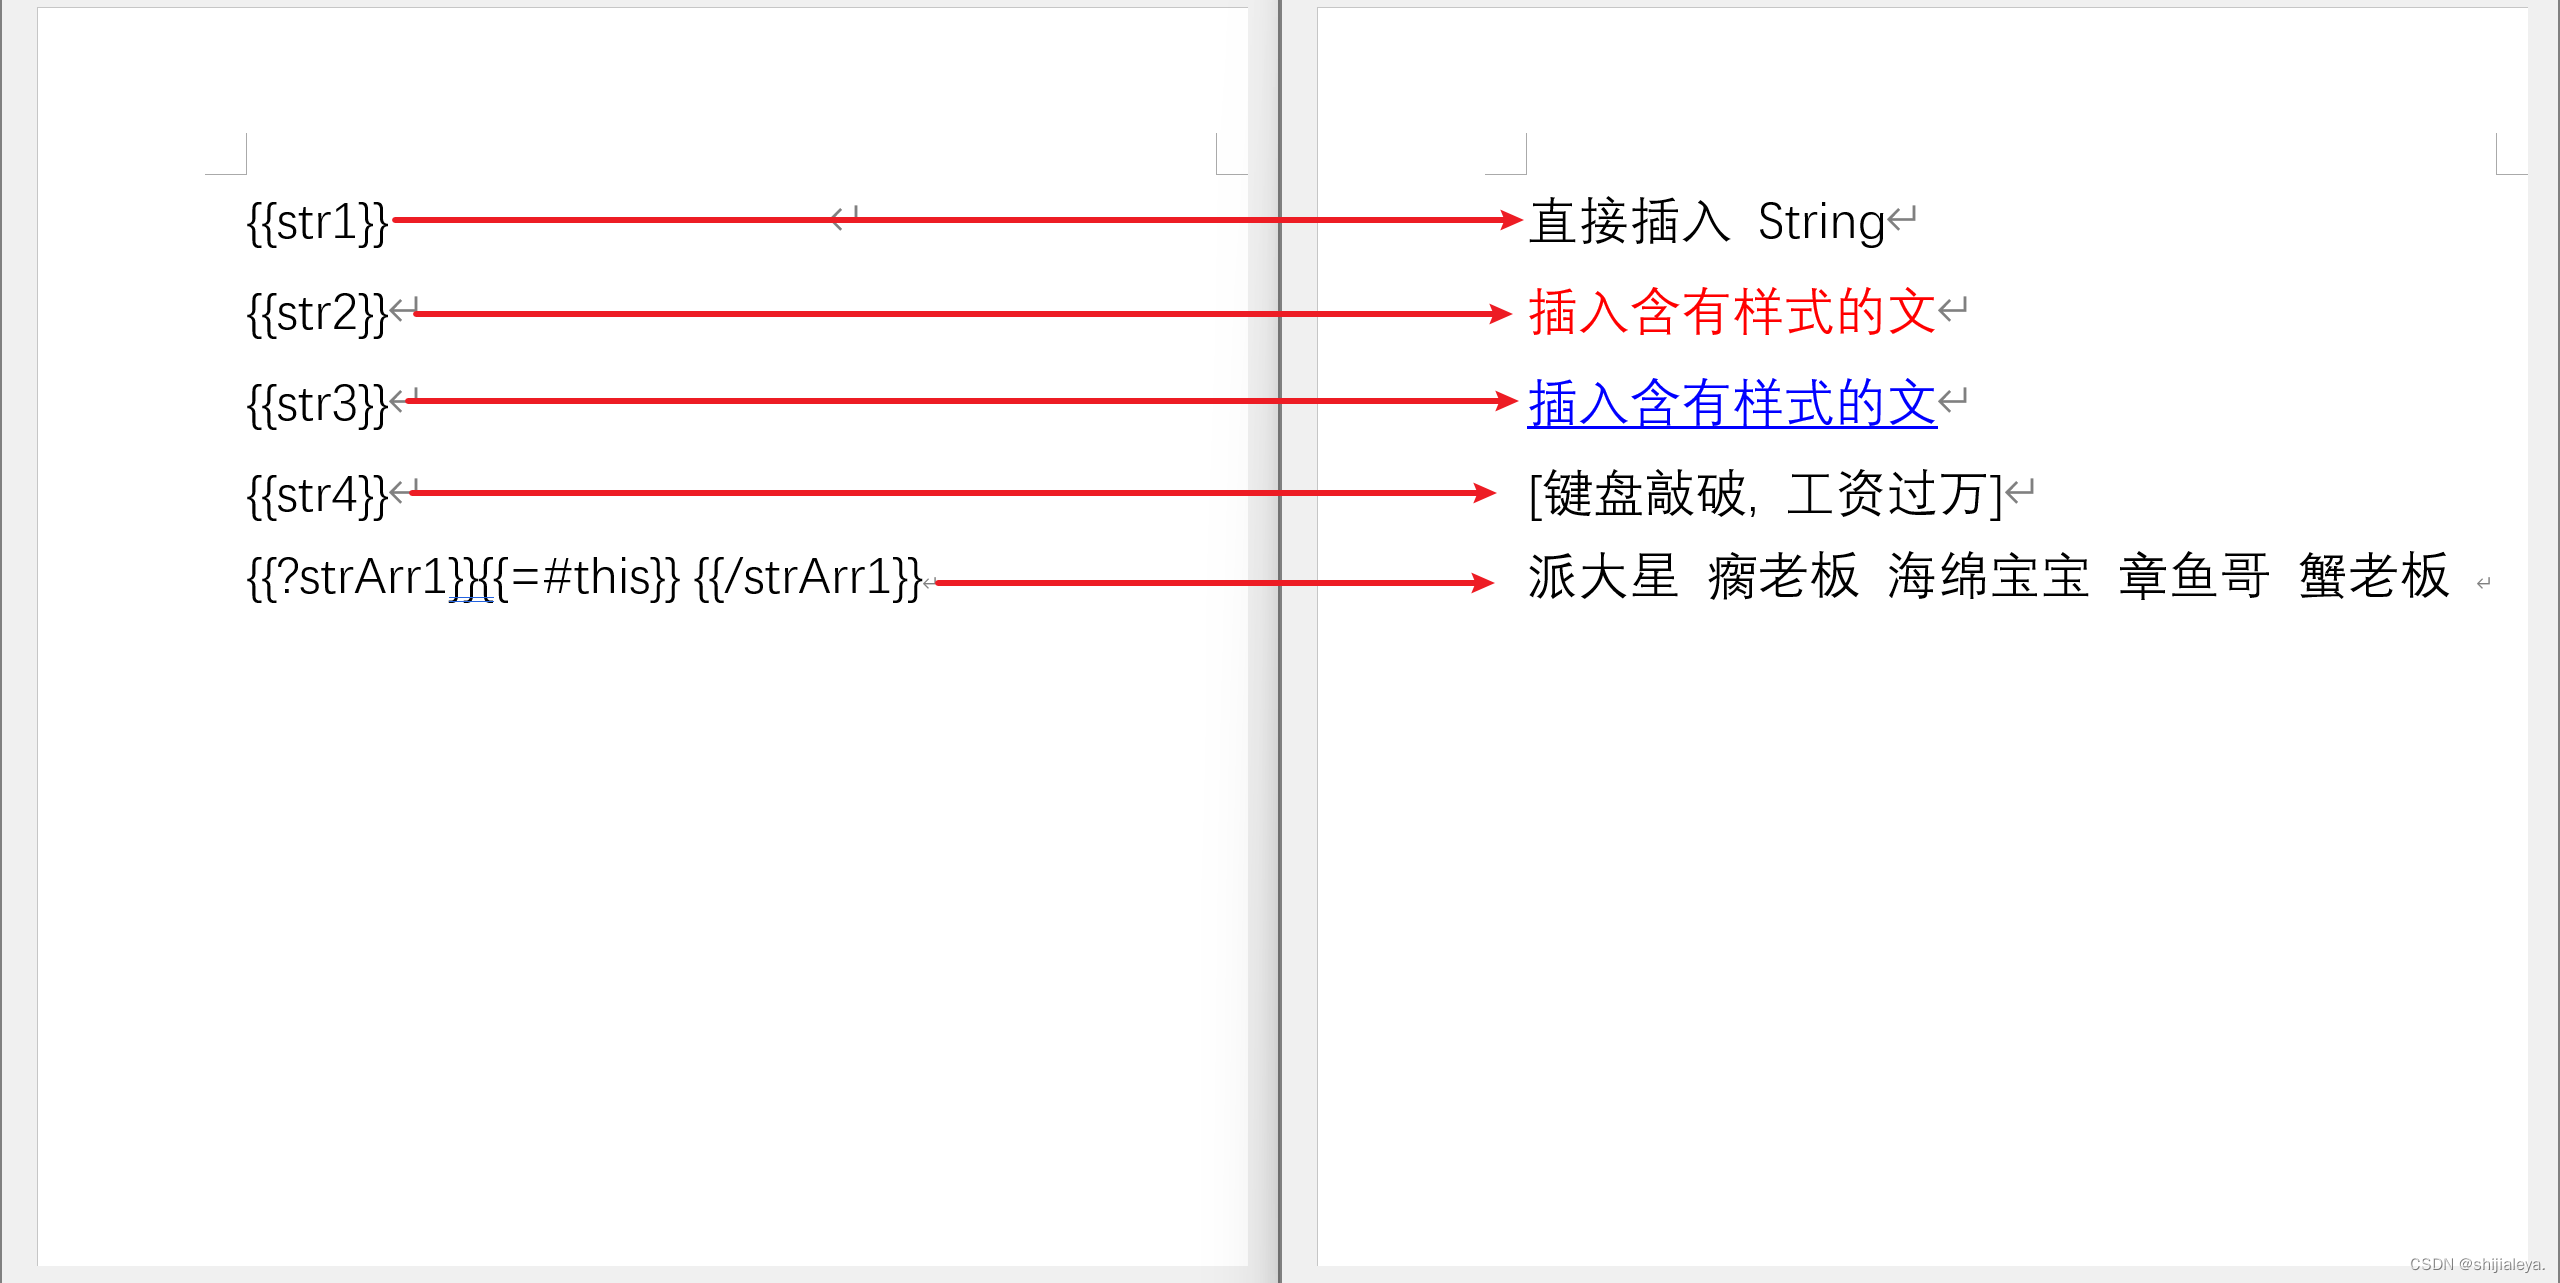
要注意 docx 文件上的 {``{xxx}} xxx 的前后不要有空格,如果将外面的文字复制到 word 可能会自动加空格。
插入图片
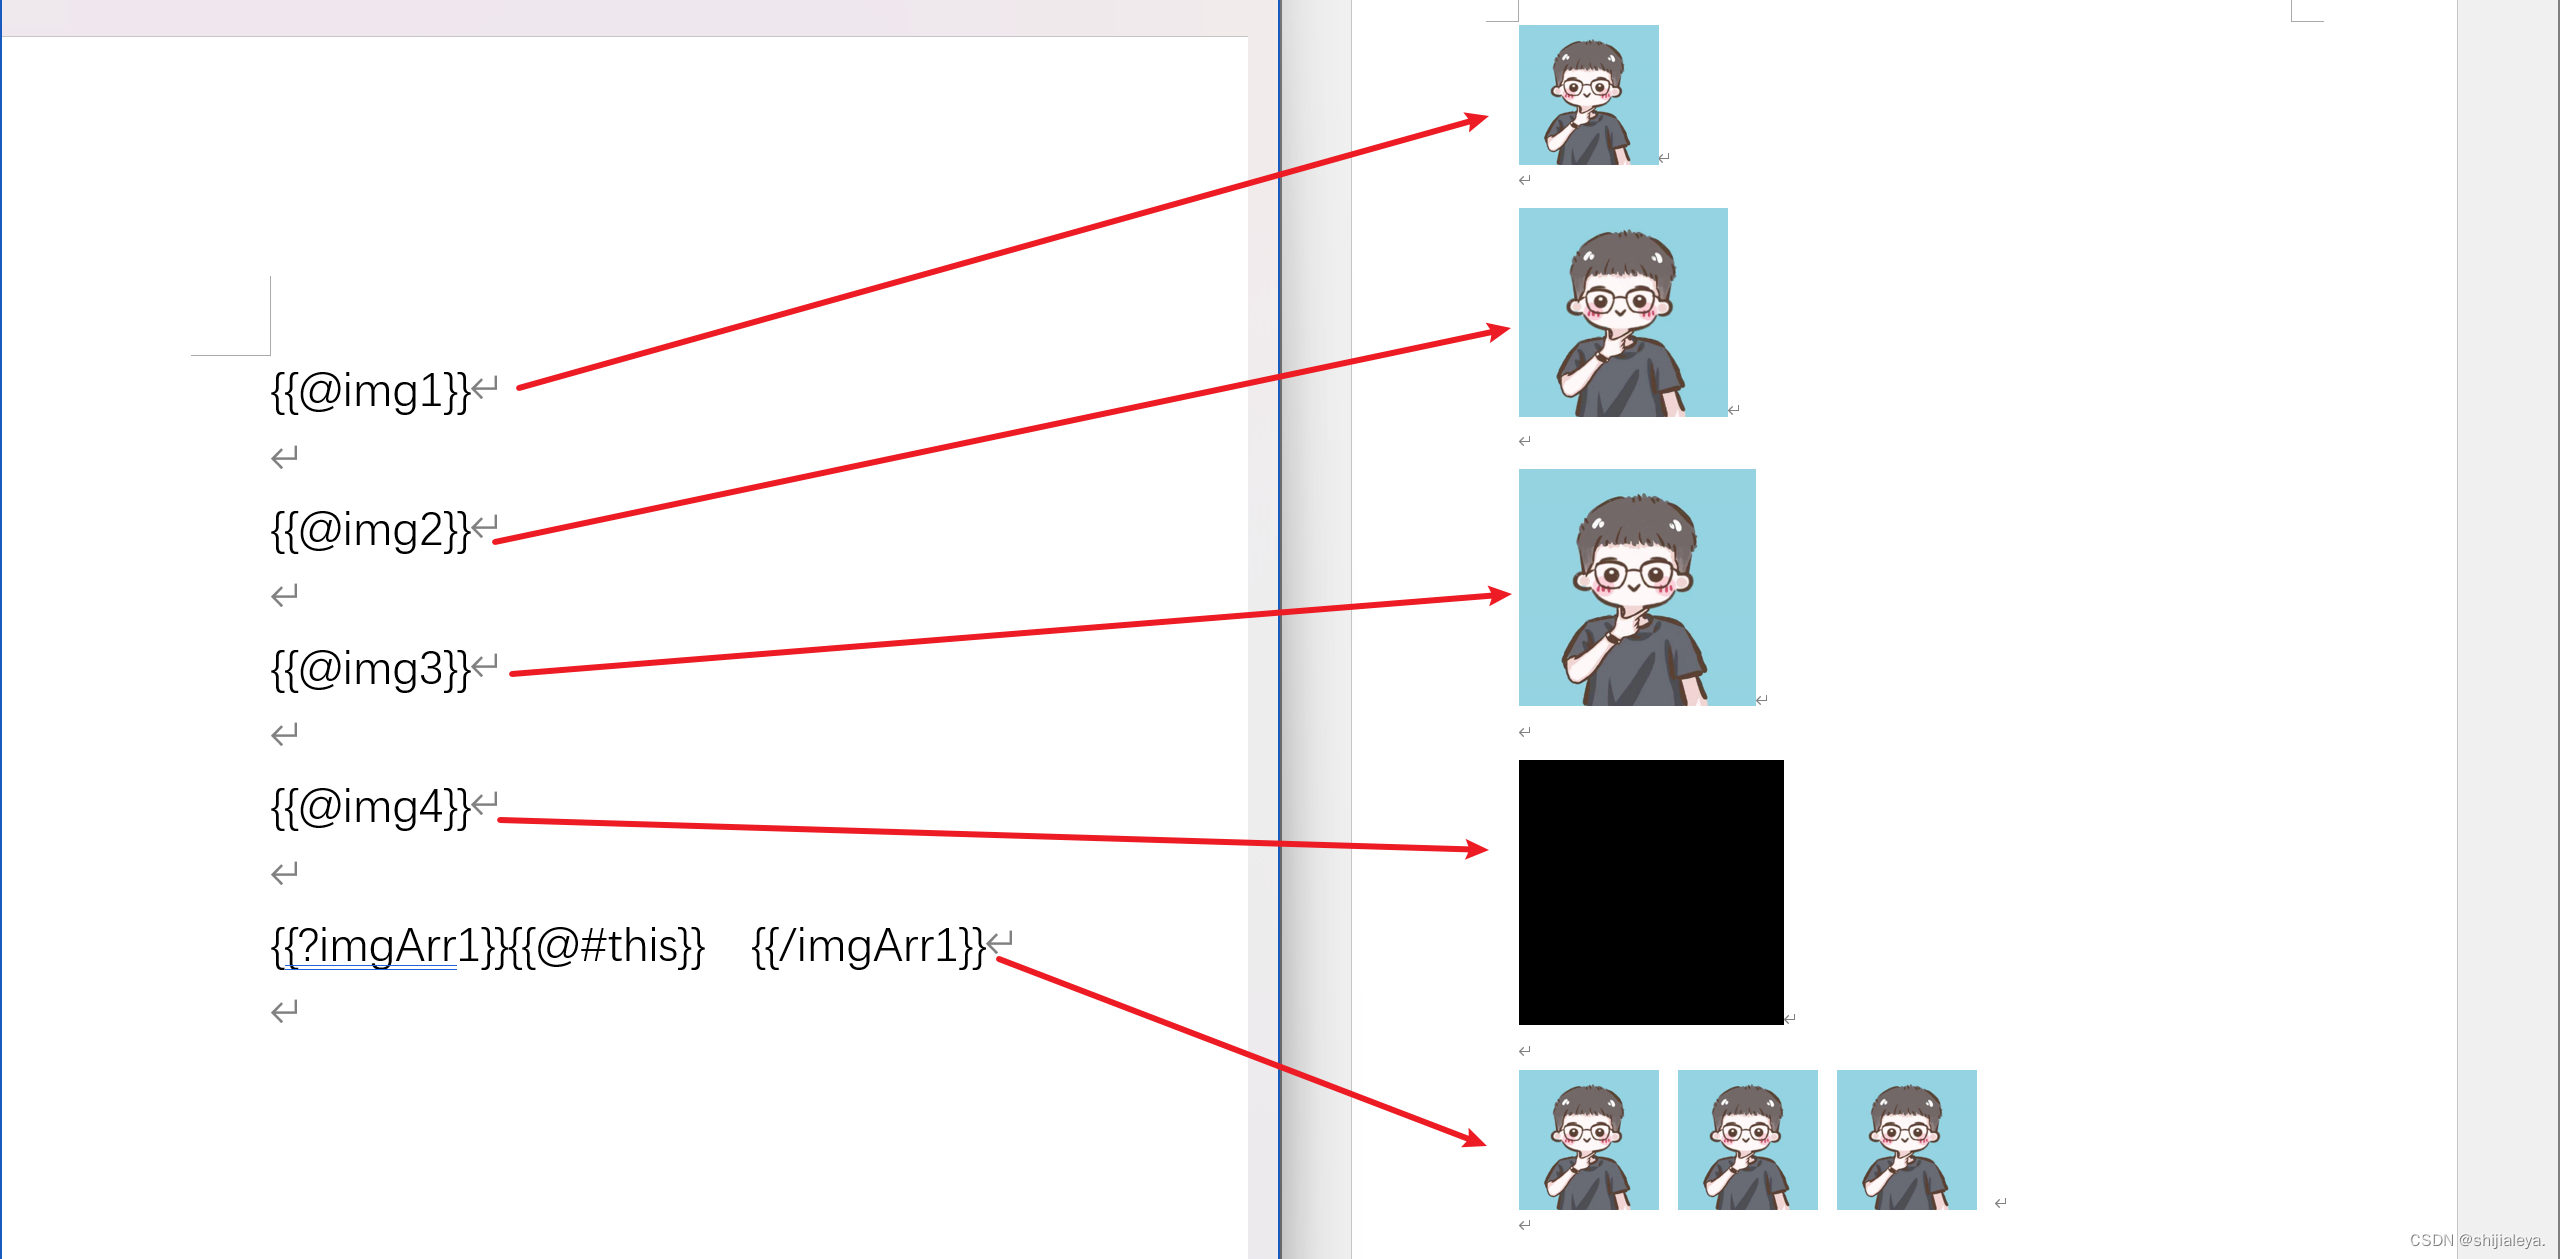
img_demo.docx 文件,图片通过 {{@xxx}} 设置占位符:
{{@img1}}

{{@img2}}

{{@img3}}

{{@img4}}

{{?imgArr1}}{{@#this}}  {{/imgArr1}}
案例代码:
java
// 模板文件
String templateFilePath = "/word_template/img_demo.docx";
// 输出文件
String outputFilePath = "D:/output.docx";
// 插入文本数据
Map<String, Object> templateData = new HashMap<String, Object>() {{
  // 直接插入本地图片(默认图片的宽度与文档的宽度一致)
  // put("img1", "C:/Users/17279/Pictures/head.jpg");
  // 插入本地图片,并设置图片大小
  put("img1", Pictures.ofLocal("C:/Users/17279/Pictures/head.jpg").size(100, 100).create());
  // 通过流的形式写入图片
  put("img2", Pictures.ofStream(new FileInputStream("C:/Users/17279/Pictures/head.jpg"), PictureType.JPEG).size(150, 150).create());
  // 写入网络图片
  put("img3", Pictures.ofUrl("http://file.shijialeya.top/head.jpg", PictureType.JPEG).size(170, 170).create());
  // 写入通过 Java 生成的图片
  put("img4", Pictures.ofBufferedImage(new BufferedImage(190, 190, BufferedImage.TYPE_BYTE_GRAY), PictureType.PNG).size(190, 190).create());

  // 遍历图片
  put("imgArr1", new ArrayList<Object>() {{
    add(Pictures.ofLocal("C:/Users/17279/Pictures/head.jpg").size(100, 100).create());
    add(Pictures.ofLocal("C:/Users/17279/Pictures/head.jpg").size(100, 100).create());
    add(Pictures.ofLocal("C:/Users/17279/Pictures/head.jpg").size(100, 100).create());
  }});
}};
// 文件生成
PoitlUtils.generateWordFile(templateData, templateFilePath, outputFilePath);
文档效果:
插入表格
tab_demo.docx 文件,图片通过 {{#xxx}} 设置占位符:
{{#tab1}}

{{#tab2}}

{{#tab3}}

合同名称	{{tab4.contractName}}
合同时间	{{tab4.contractDate}}	合同金额	{{tab4.money}}
合同公司	{{tab4.company}}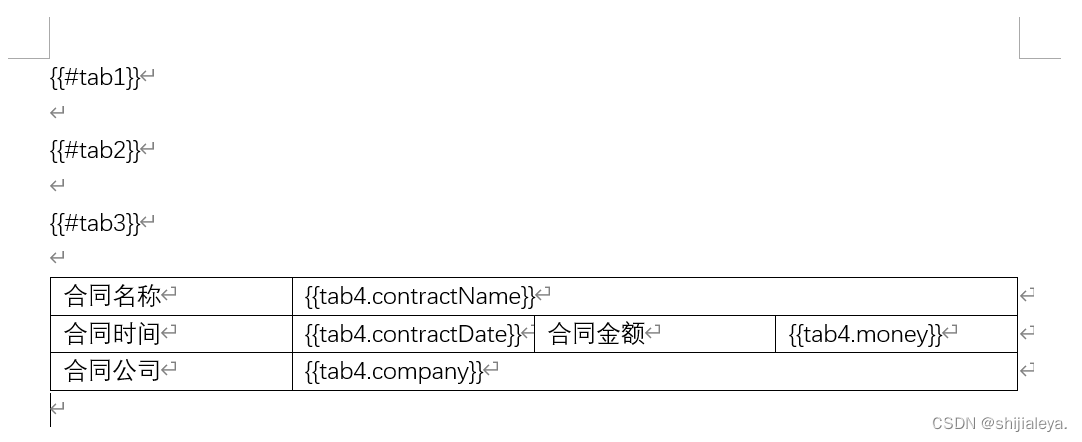
案例代码:
java
// 模板文件
String templateFilePath = "/word_template/tab_demo.docx";
// 输出文件
String outputFilePath = "D:/output.docx";
// 插入文本数据
Map<String, Object> templateData = new HashMap<String, Object>() {{
  // 插入一个基础表格
  String[][] tabData1 = {
    new String[]{"姓名", "性别", "年龄"},
    new String[]{"派大星", "16", "男"},
    new String[]{"章鱼哥", "35", "男"}
  };
  put("tab1", Tables.of(tabData1).create());

  // 插入一个含有样式的表格
  Tables.TableBuilder tabData2 = Tables
    // 创建一个指定宽度的表格(docx 文档的 80% 宽度)
    .ofPercentWidth("80%")
    // 表格设为水平居中
    .center()
    // 设置表格边框
    .border(BorderStyle.builder()
            // 边框样式
            .withType(XWPFTable.XWPFBorderType.DOUBLE)
            // 边框颜色
            .withColor("ff0000")
            // 边框粗细(边框为线条类型才会有效)
            .withSize(12)
            .build()
           );
  tabData2.addRow(Rows.of("姓名", "性别", "年龄")
                  // 设置文字颜色
                  .textColor("FFFFFF")
                  // 设置对应表格的背景颜色
                  .bgColor("4472C4")
                  // 文字居中
                  .center()
                  .create()
                 );
  tabData2.addRow(Rows.of("派大星", "16", "男").create());
  put("tab2", tabData2.create());

  // 合并单元格
  String[][] tabData3 = {
    new String[]{"姓名", "性别", "年龄"},
    new String[]{"派大星", "16", "男"},
    new String[]{"章鱼哥", "35", "男"},
    new String[]{"共2人", null, null},
  };
  put("tab3", Tables.of(tabData3)
      // 添加单元格合并规则
      .mergeRule(MergeCellRule
                 .builder()
                 // [纵坐标, 横坐标] 索引从零开始,合并 [3, 0] 到 [3, 2] 位置的表格
                 .map(MergeCellRule.Grid.of(3, 0), MergeCellRule.Grid.of(3, 2))
                 .build()
                )
      .create()
     );

  // 对应格式一定的表格,直接采用字符串替换即可
  put("tab4", new HashMap<String, Object>() {{
    put("contractName", "第一季度财务报告");
    put("contractDate", new SimpleDateFormat("yyyy-MM-dd").format(new Date()));
    put("company", "xxx有限责任公司");
    put("money", 10089.33);
  }});
}};
// 文件生成
PoitlUtils.generateWordFile(templateData, templateFilePath, outputFilePath);
文档效果: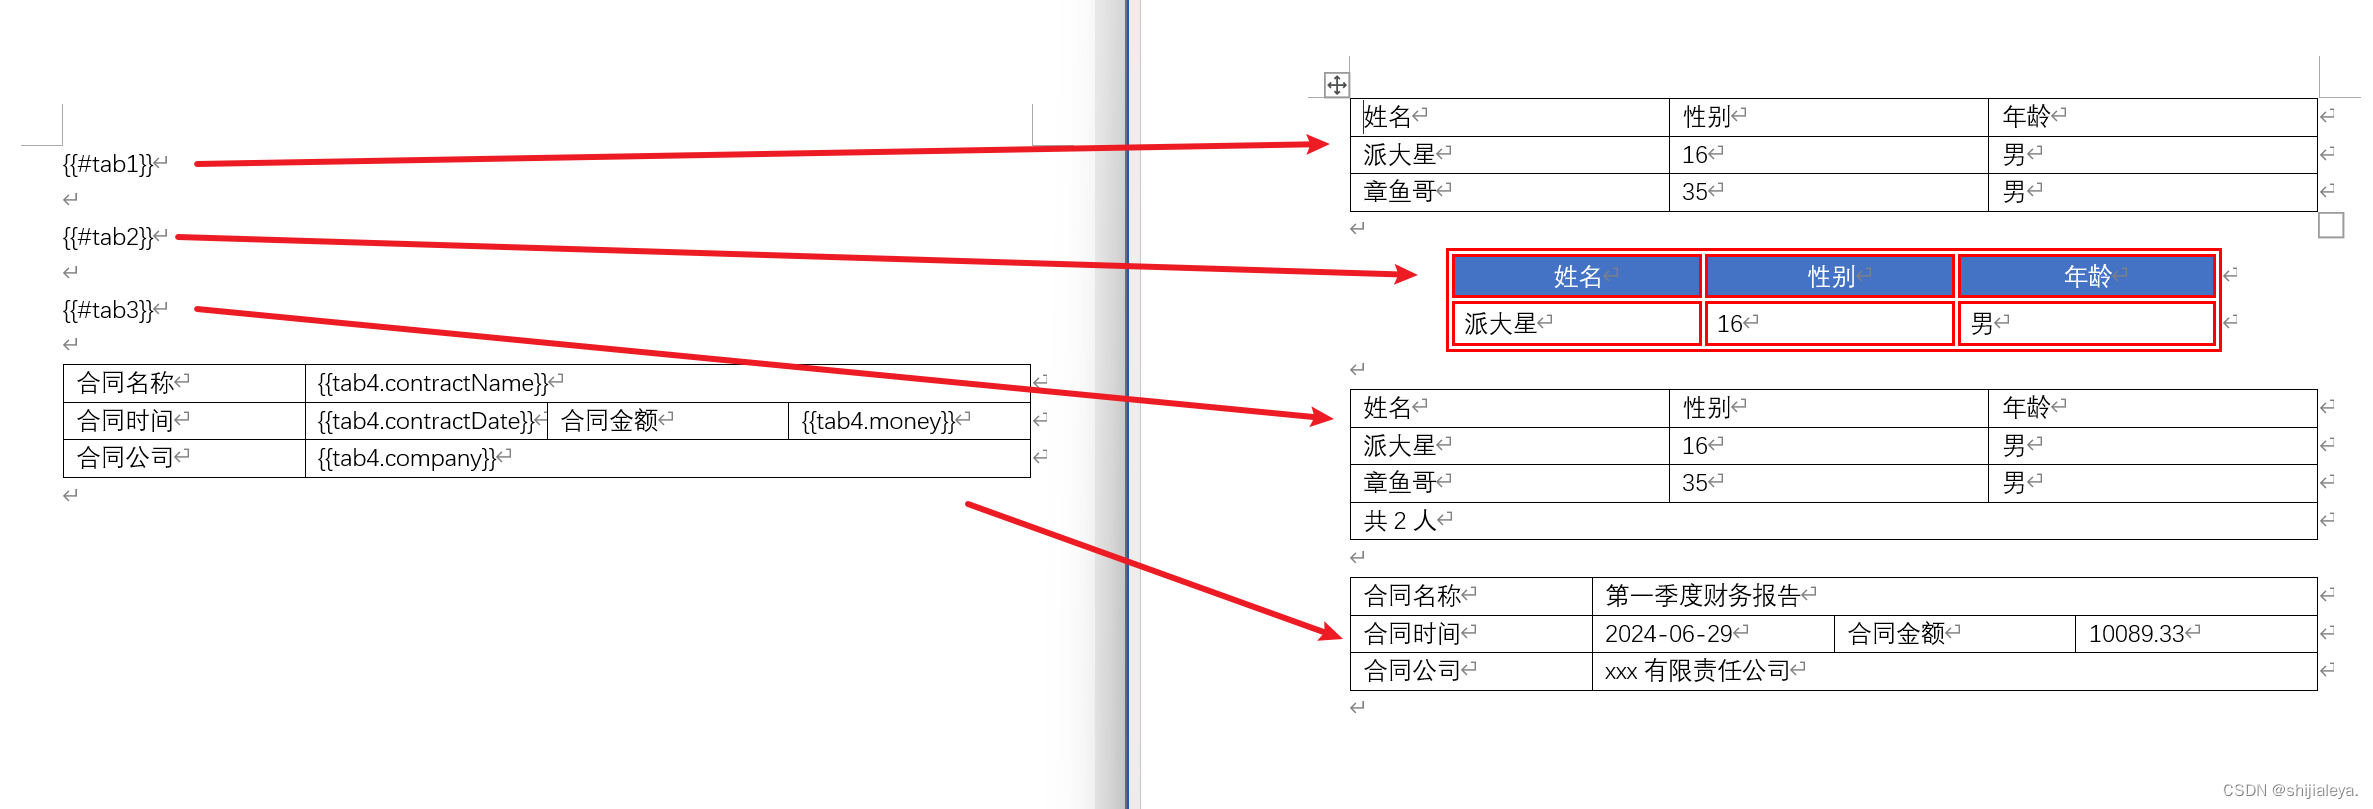
引入标签
插入图片
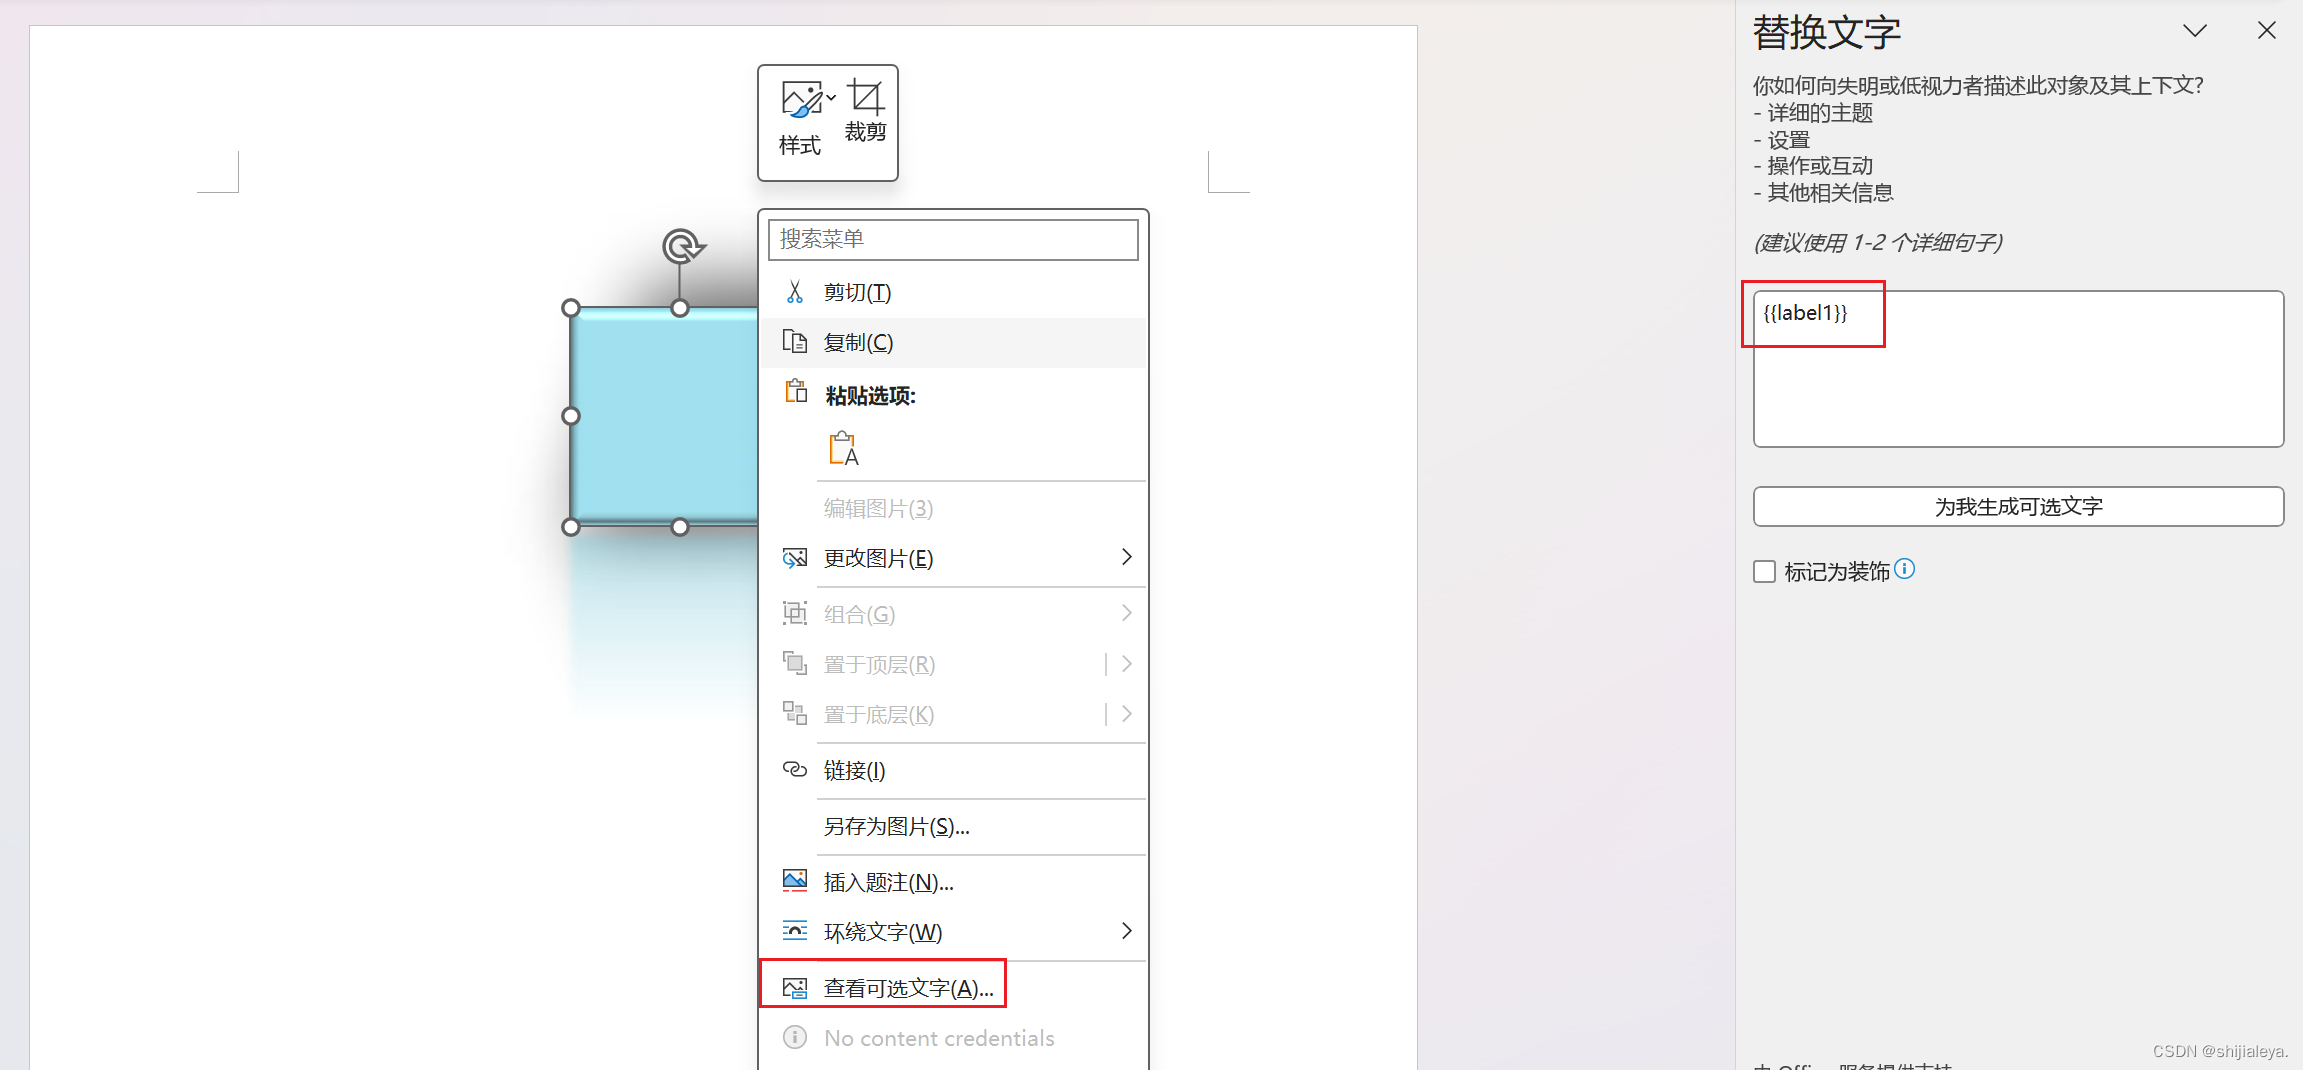
上面也有插入图片的方式,但是通过引入标签的方式插入图片时,可以先在 word 模板文件中提前编辑好图片的样式,通过替换图片的方式,会保留原本设置好的样式。
在 docx 模板文件中先插入一张图片,并且调整好图片的样式,之后右键图片选择【查看可选文字】,在可选文字中通过 {{xxx}} 的方式填写属性名称。
【特别提醒】貌似 WPS 没有可选文字的功能,不确定是不是 WPS 版本的原因,反正我没找到可选文字。
因此我特地把 WPS 卸载之后换成了 Office 工具。
案例代码:
java
// 模板文件
String templateFilePath = "/word_template/quote_demo01.docx";
// 输出文件
String outputFilePath = "D:/output.docx";
// 插入文本数据
Map<String, Object> templateData = new HashMap<String, Object>() {{
  // 直接插入本地图片,这里会保留模板文件的图片样式
  put("label1", Pictures.ofLocal("C:/Users/17279/Pictures/head.jpg").create());
}};
// 文件生成
PoitlUtils.generateWordFile(templateData, templateFilePath, outputFilePath);
文档效果:

插入单系列图表
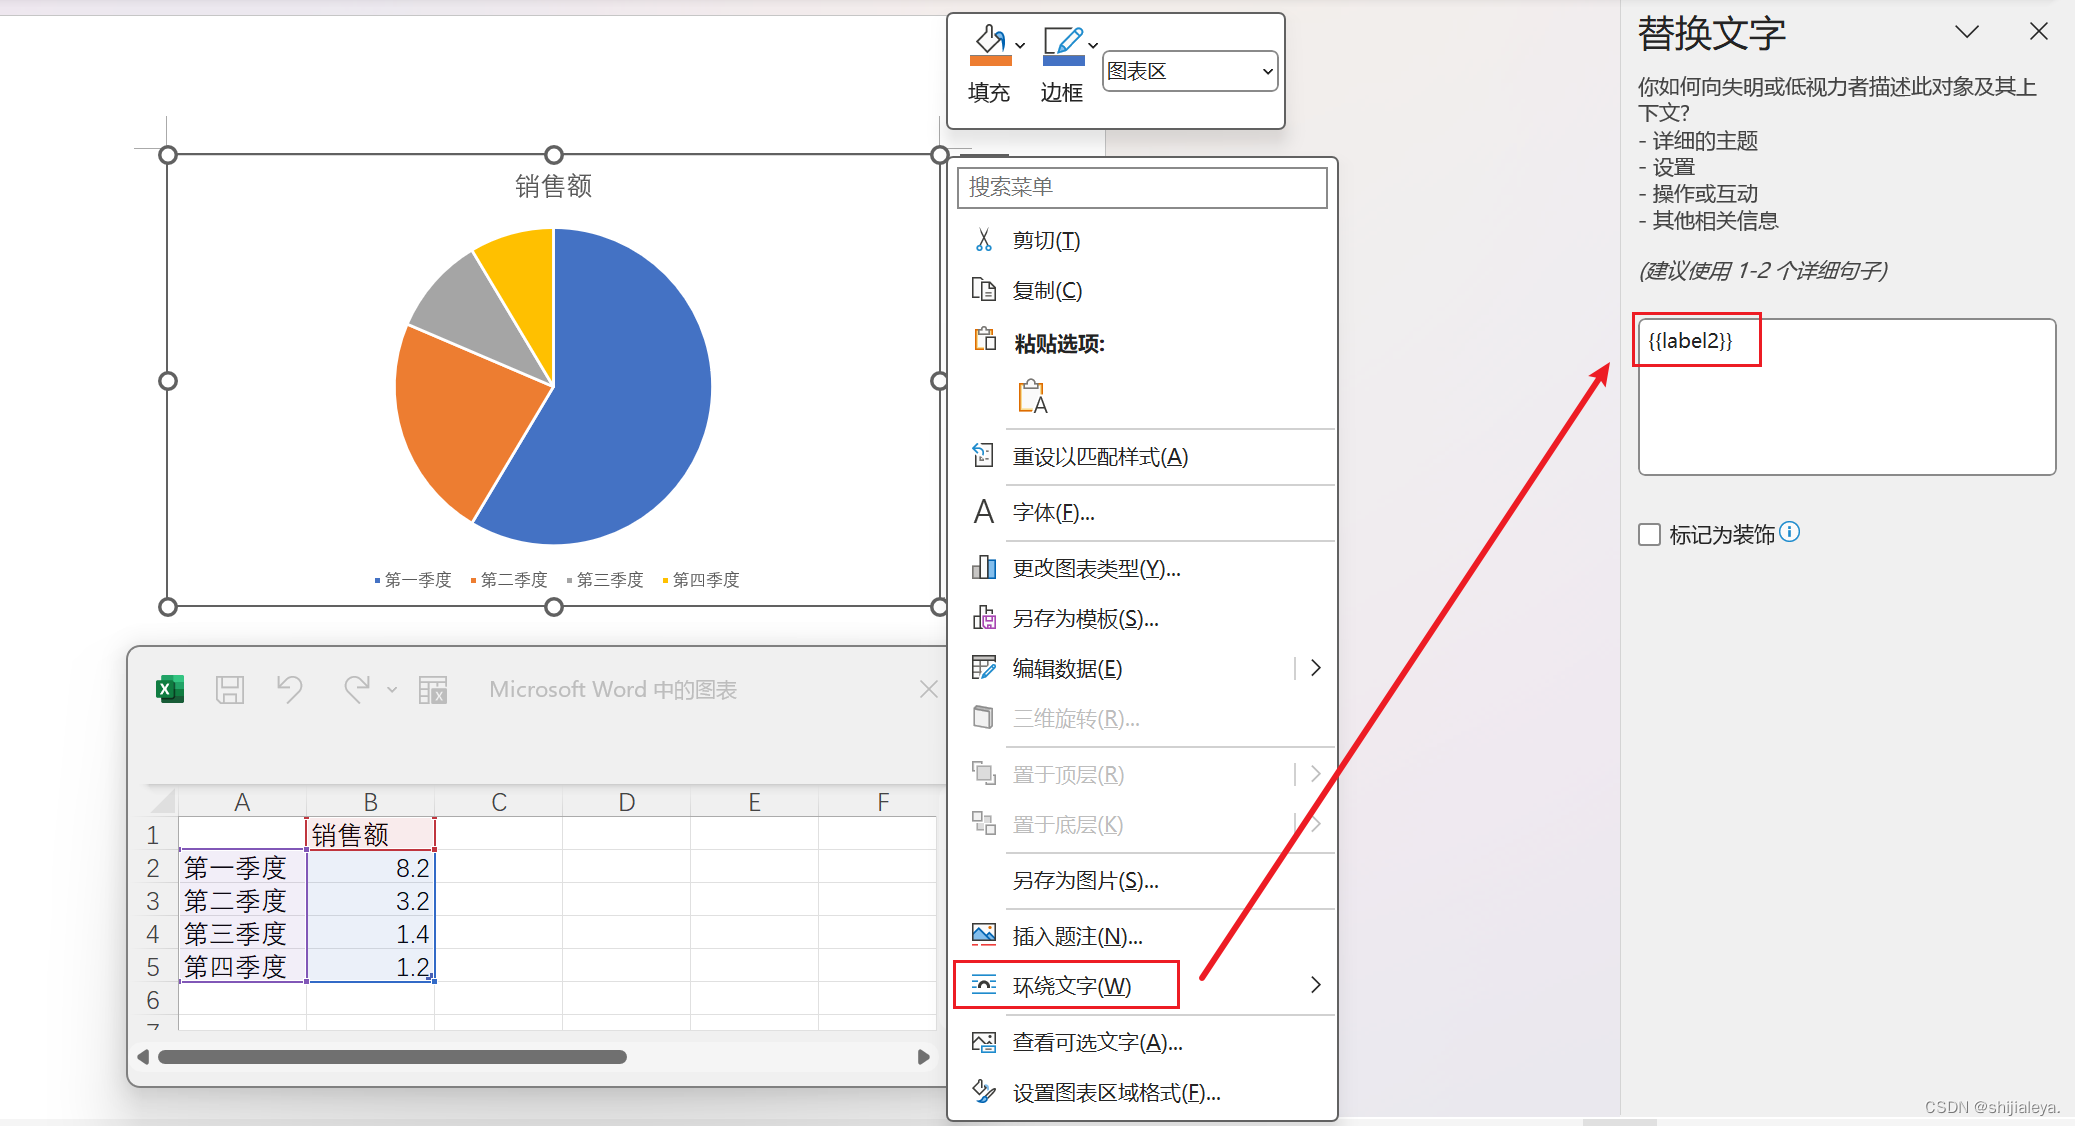
单系列图表指的是饼图(3D饼图)、圆环图等。
同引入标签插入图片一样,在插入图表的时候,需要在 docx 模板中创建一个单系列的图表,设置好样式,之后右键图表选择【查看可选文字】,在可选文字中通过 {{xxx}} 的方式填写属性名称。
案例代码:
java
// 模板文件
String templateFilePath = "/word_template/quote_demo02.docx";
// 输出文件
String outputFilePath = "D:/output.docx";
// 插入文本数据
Map<String, Object> templateData = new HashMap<String, Object>() {{
  // 添加单系列图表的表格数据
  put("label2", Charts
      .ofSingleSeries("商品类型", new String[]{"电器类", "数码类", "生活用品类", "食品类", "其他"})
      .series("数量", new Integer[]{30, 8, 25, 11, 3})
      .create());
}};
// 文件生成
PoitlUtils.generateWordFile(templateData, templateFilePath, outputFilePath);
文档效果:

插入多系列图表
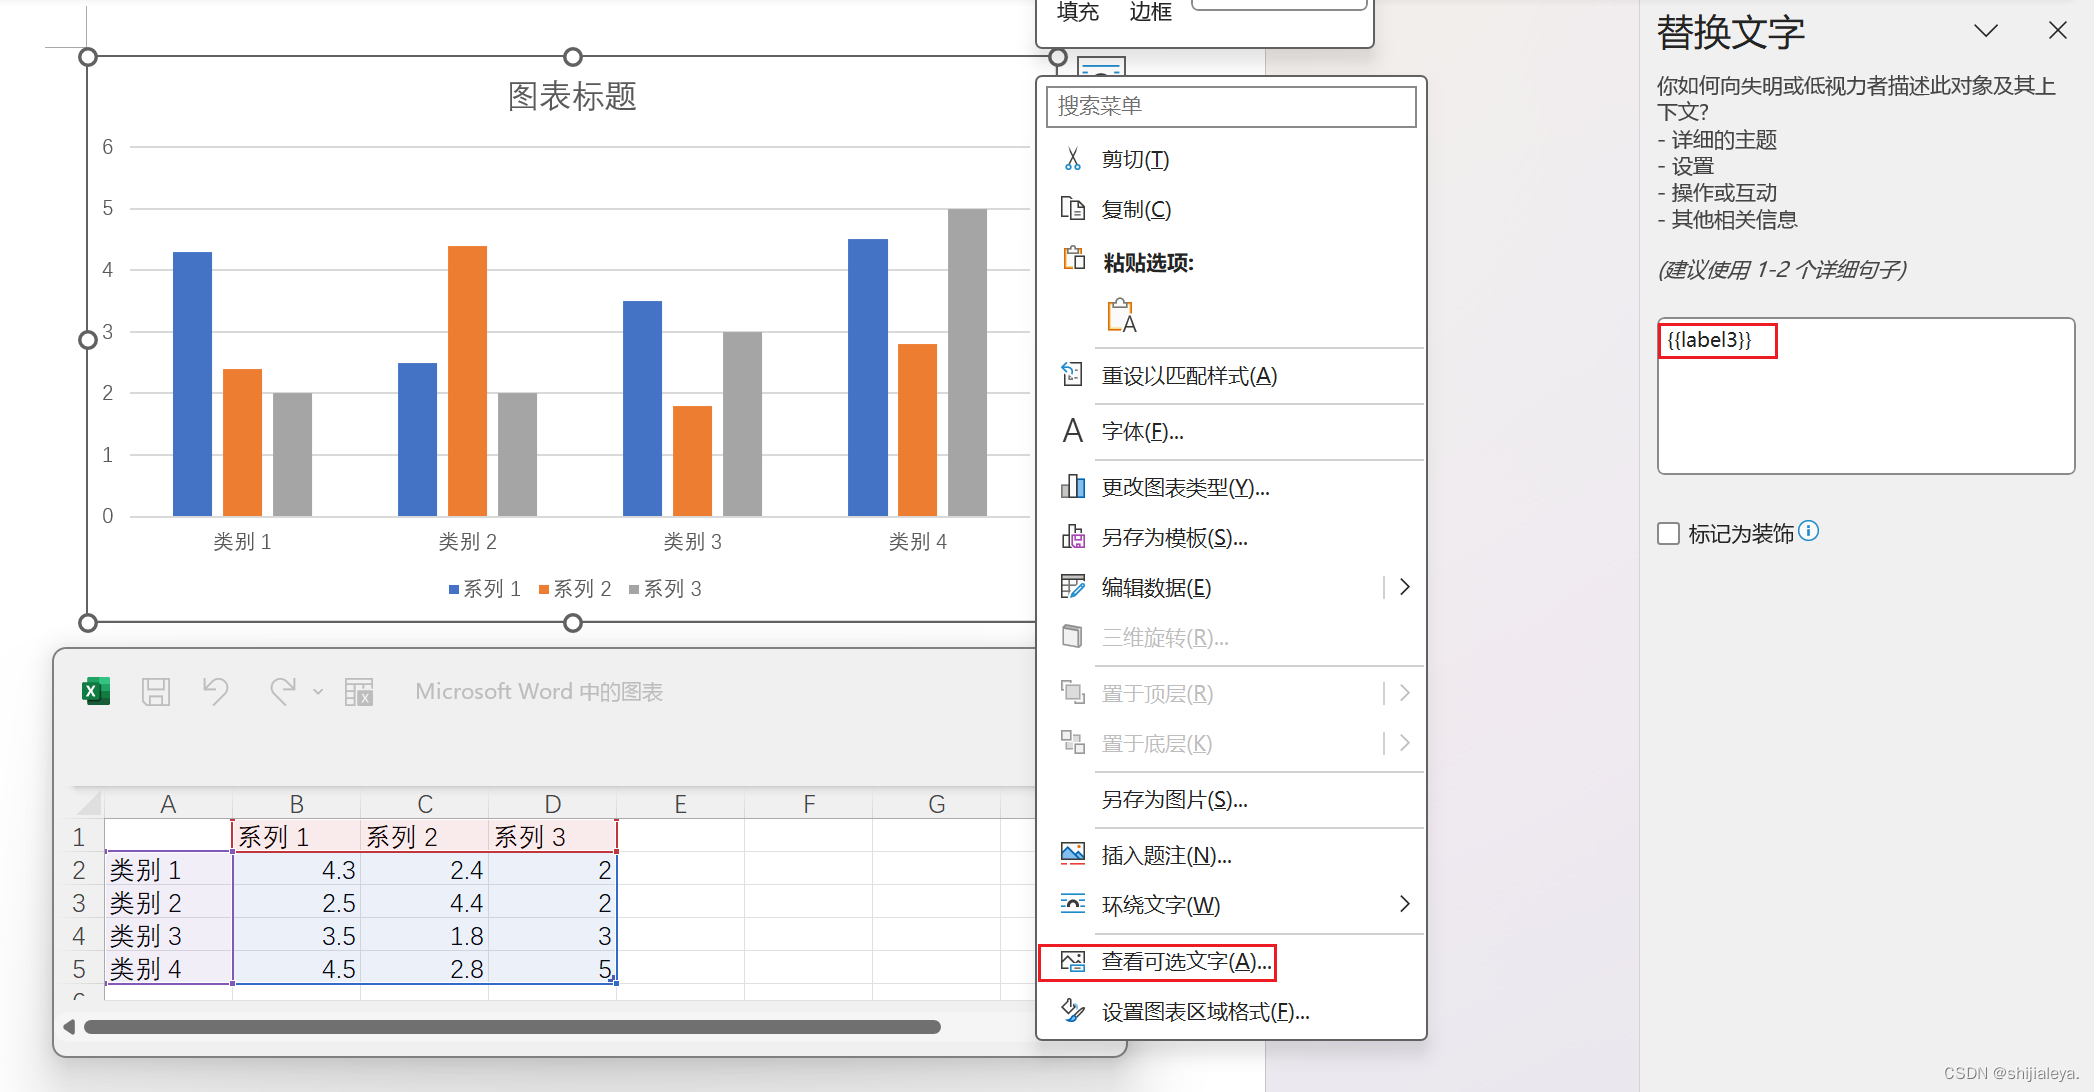
多系列图表指的是条形图(3D条形图)、柱形图(3D柱形图)、面积图(3D面积图)、折线图(3D折线图)、雷达图、散点图等。
模板文件如下:
案例代码:
java
// 模板文件
String templateFilePath = "/word_template/quote_demo03.docx";
// 输出文件
String outputFilePath = "D:/output.docx";
// 插入文本数据
Map<String, Object> templateData = new HashMap<String, Object>() {{
  // 添加单系列图表的表格数据
  put("label3", Charts
      .ofMultiSeries("销售额", new String[]{"第一季度", "第二季度", "第三季度", "第四季度"})
      .addSeries("电器类", new Integer[]{22, 25, 28, 25})
      .addSeries("数码类", new Integer[]{5, 10, 8, 4})
      .addSeries("其他", new Integer[]{30, 42, 22, 33})
      .create());
}};
// 文件生成
PoitlUtils.generateWordFile(templateData, templateFilePath, outputFilePath);
文档效果: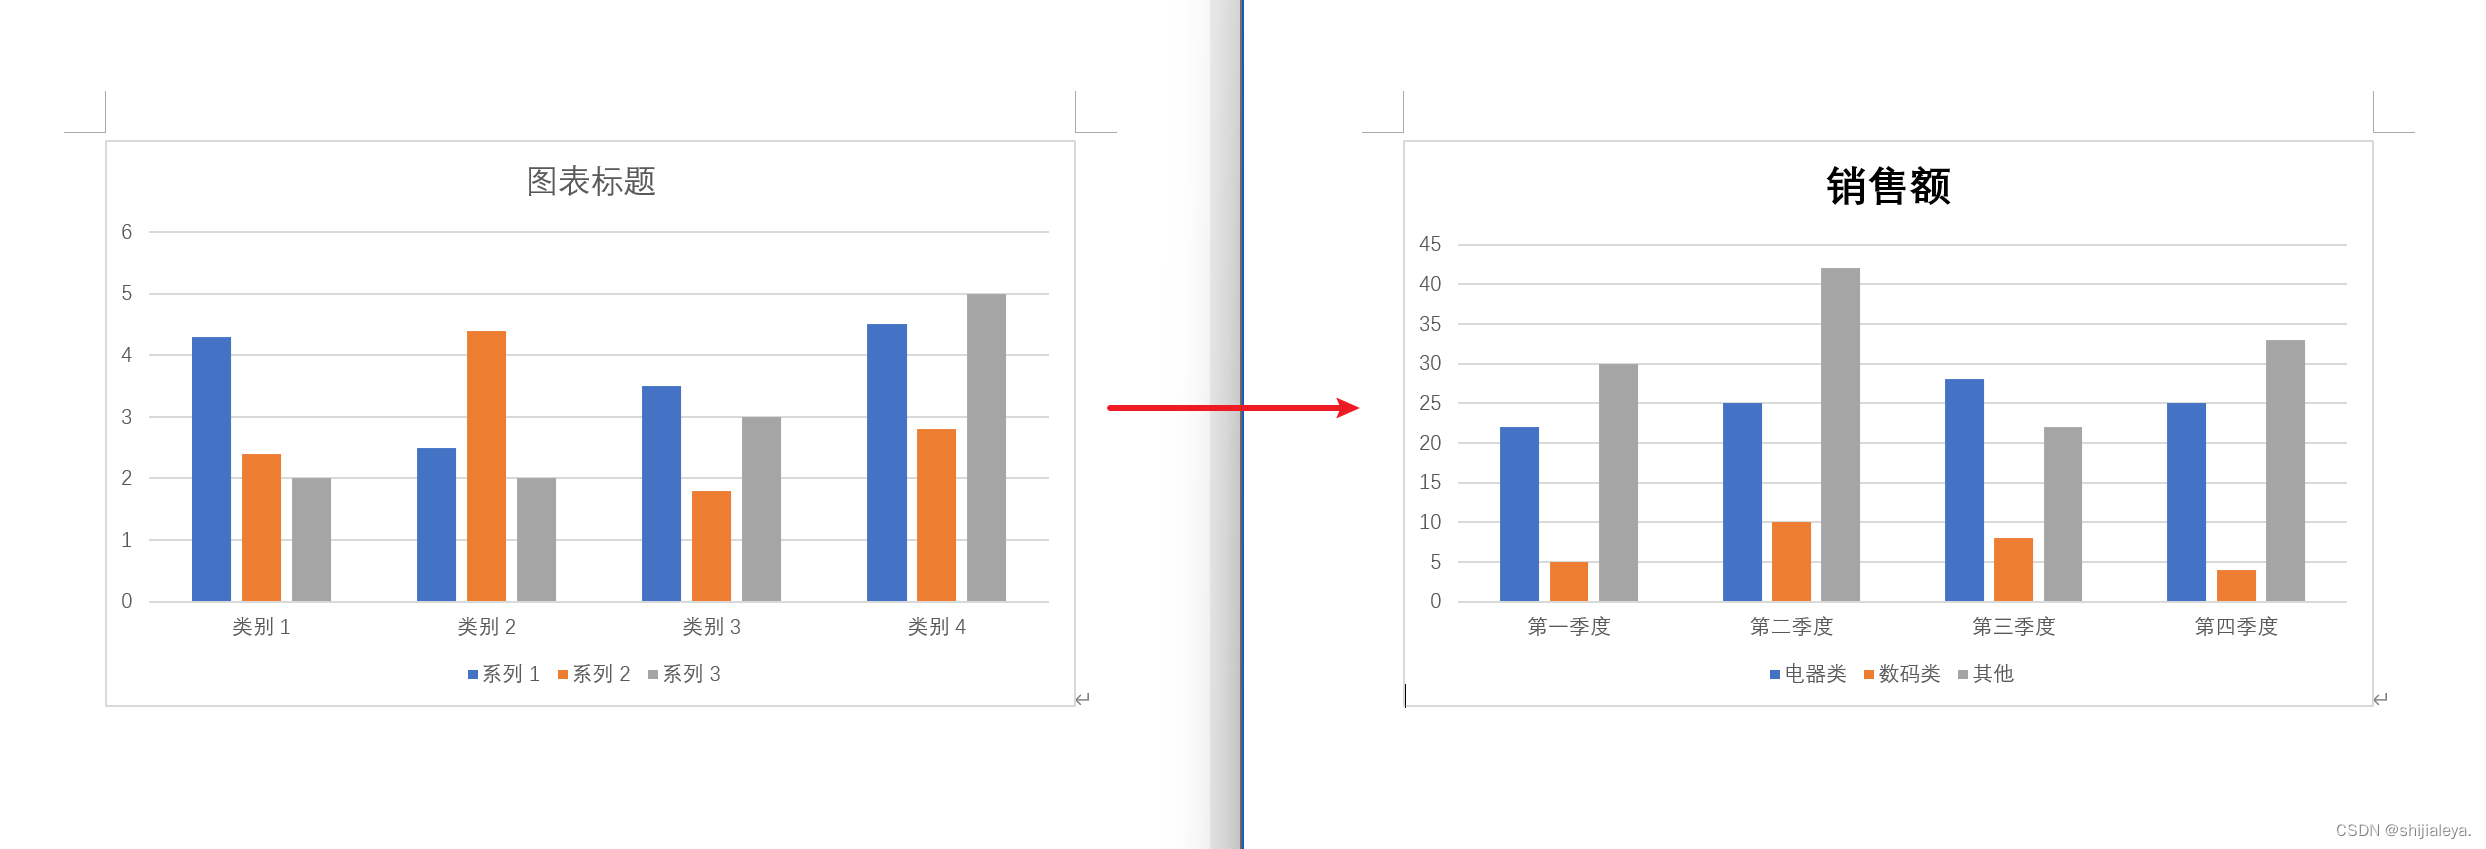
插入组合图表
组合图表指的是由多系列图表(柱形图、折线图、面积图)组合而成的图表。
模板文件如下:
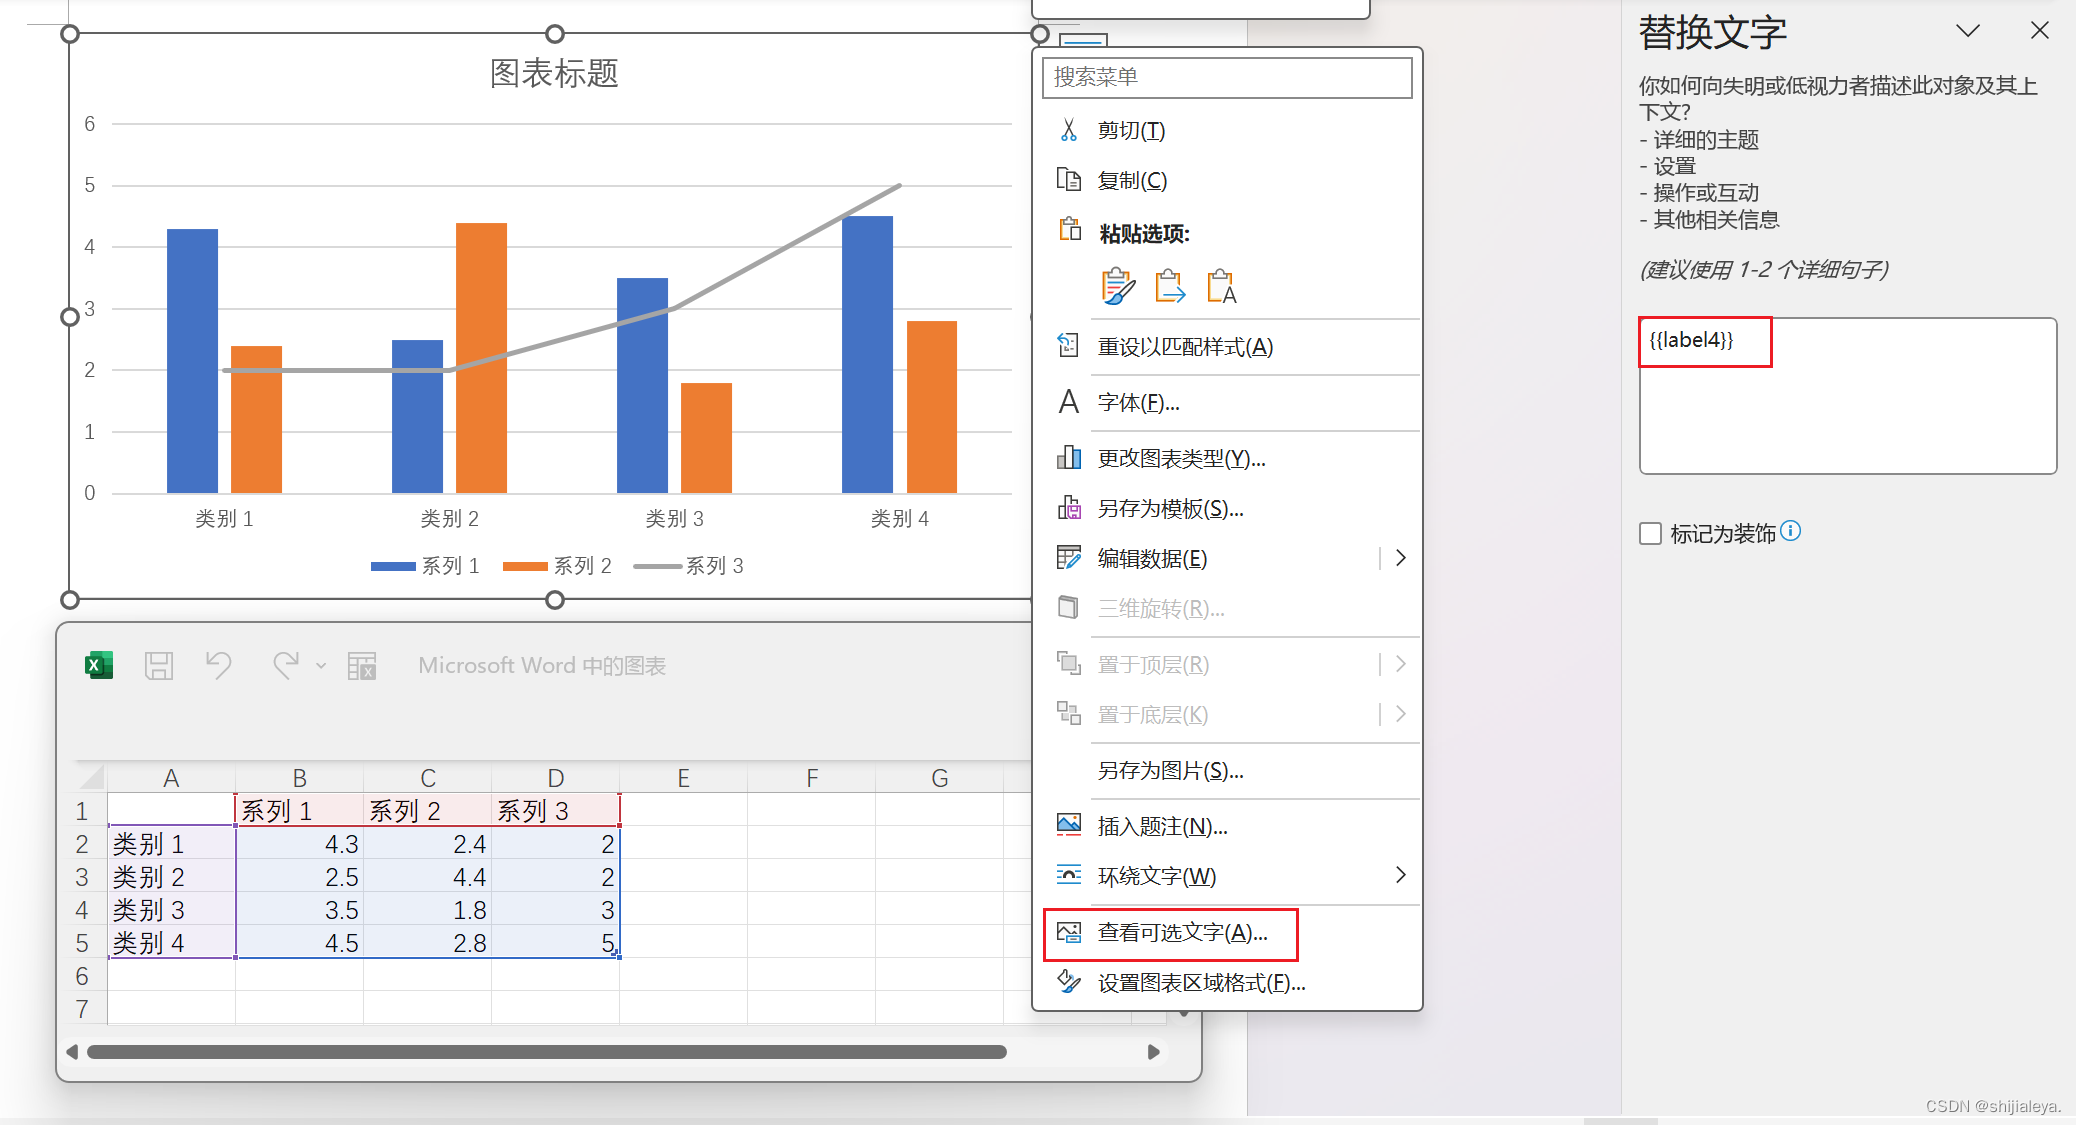
案例代码:
java
// 模板文件
String templateFilePath = "/word_template/quote_demo04.docx";
// 输出文件
String outputFilePath = "D:/output.docx";
// 插入文本数据
Map<String, Object> templateData = new HashMap<String, Object>() {{
  // 添加单系列图表的表格数据
  put("label4", Charts
      .ofComboSeries("汽车销售额", new String[]{"第一季度", "第二季度", "第三季度", "第四季度"})
      // 添加柱状图数据
      .addBarSeries("比亚迪", new Double[]{12.3, 11.5, 9.7, 12.0})
      .addBarSeries("广汽", new Double[]{6.2, 5.8, 5.7, 6.6})
      .addBarSeries("小米", new Double[]{0.0, 0.0, 10.2, 11.2})
      // 添加折线图数据
      .addLineSeries("国内均值", new Double[]{10.0, 12.2, 11.2, 9.8})
      .addLineSeries("全球均值", new Double[]{8.3, 10.2, 10.0, 8.8})
      .create());
}};
// 文件生成
PoitlUtils.generateWordFile(templateData, templateFilePath, outputFilePath);
文档效果:
