昇思MindSpore学习笔记4--数据集 Dataset
摘要:
昇思MindSpore数据集Dataset的加载、数据集常见操作和自定义数据集方法。
一、数据集 Dataset概念
MindSpore数据引擎基于Pipeline
数据预处理相关模块:
数据集Dataset加载原始数据,支持文本、图像、音频和自定义数据集。
数据变换Transforms
预加载数据集API一键下载
二、环境准备
安装minspore模块
!pip uninstall mindspore -y
!pip install -i https://pypi.mirrors.ustc.edu.cn/simple mindspore==2.3.0rc1
导入minspore、dataset等相关模块
import numpy as np
from mindspore.dataset import vision
from mindspore.dataset import MnistDataset, GeneratorDataset
import matplotlib.pyplot as plt
三、数据集加载
1.下载数据
# Download data from open datasets
from download import download

url = "https://mindspore-website.obs.cn-north-4.myhuaweicloud.com/" \
      "notebook/datasets/MNIST_Data.zip"
path = download(url, "./", kind="zip", replace=True)
输出:
Downloading data from https://mindspore-website.obs.cn-north-4.myhuaweicloud.com/notebook/datasets/MNIST_Data.zip (10.3 MB)

file_sizes: 100%|███████████████████████████| 10.8M/10.8M [00:00<00:00, 151MB/s]
Extracting zip file...
Successfully downloaded / unzipped to ./
2.加载数据集
train_dataset = MnistDataset("MNIST_Data/train", shuffle=False)
print(type(train_dataset))
输出:
<class 'mindspore.dataset.engine.datasets_vision.MnistDataset'>四、数据集迭代
数据迭代器
create_tuple_iterator
create_dict_iterator
默认访问数据类型为Tensor
若设置output_numpy=True,访问数据类型为Numpy
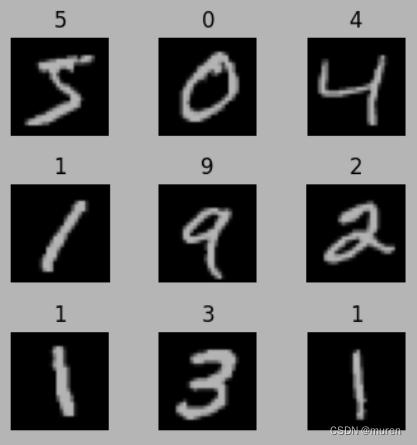
示例,迭代显示9张图片。
def visualize(dataset):
    figure = plt.figure(figsize=(4, 4))
    cols, rows = 3, 3

    plt.subplots_adjust(wspace=0.5, hspace=0.5)

    for idx, (image, label) in enumerate(dataset.create_tuple_iterator()):
        figure.add_subplot(rows, cols, idx + 1)
        plt.title(int(label))
        plt.axis("off")
        plt.imshow(image.asnumpy().squeeze(), cmap="gray")
        if idx == cols * rows - 1:
            break
plt.show()

visualize(train_dataset)
输出:
五、数据集常用操作
Pipeline引擎采用异步执行的设计。
dataset = dataset.operation()只在Pipeline中注册操作节点并不执行,并记录获取返回数据集对象的句柄,实际操作在整个Pipeline迭代时执行。
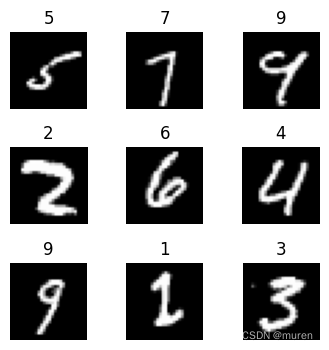
- shuffle
消除数据排列分布不均问题。
数据集加载时配置shuffle=True
MnistDataset("MNIST_Data/train", shuffle=True)采用dataset.shuffle()
train_dataset = train_dataset.shuffle(buffer_size=64)
visualize(train_dataset)
输出:
- map
为数据集指定列column添加数据变换Transforms,应用于该列的每个元素。
image, label = next(train_dataset.create_tuple_iterator())
print(image.shape, image.dtype)
输出:
(28, 28, 1) UInt8数据缩放处理,将图像统一除以255,数据类型由uint8转为了float32。
train_dataset = train_dataset.map(vision.Rescale(1.0/255.0,0), input_columns='image')
image, label = next(train_dataset.create_tuple_iterator())
print(image.shape, image.dtype)
输出:
(28, 28, 1) Float32- batch
将数据集按固定大小batch_size打包成若干批,以便后续处理。
打包后的数据增加一维,大小为batch_size
train_dataset = train_dataset.batch(batch_size=32)
image, label = next(train_dataset.create_tuple_iterator())
print(image.shape, image.dtype)
输出:
(32, 28, 28, 1) Float32六、自定义数据集
GeneratorDataset接口加载自定义数据集。
- 可随机访问数据集
实现__getitem__和__len__方法
通过索引/键直接访问对应位置的数据样本,例如datasetidx。
# Random-accessible object as input source
class RandomAccessDataset:
    def __init__(self):
        self._data = np.ones((5, 2))
        self._label = np.zeros((5, 1))

    def __getitem__(self, index):
        return self._data[index], self._label[index]

    def __len__(self):
        return len(self._data)

loader = RandomAccessDataset()
dataset = GeneratorDataset(source=loader, column_names=["data", "label"])

for data in dataset:
    print(data)
输出:
[Tensor(shape=[2], dtype=Float64, value= [ 1.00000000e+00,  1.00000000e+00]), Tensor(shape=[1], dtype=Float64, value= [ 0.00000000e+00])]
[Tensor(shape=[2], dtype=Float64, value= [ 1.00000000e+00,  1.00000000e+00]), Tensor(shape=[1], dtype=Float64, value= [ 0.00000000e+00])]
[Tensor(shape=[2], dtype=Float64, value= [ 1.00000000e+00,  1.00000000e+00]), Tensor(shape=[1], dtype=Float64, value= [ 0.00000000e+00])]
[Tensor(shape=[2], dtype=Float64, value= [ 1.00000000e+00,  1.00000000e+00]), Tensor(shape=[1], dtype=Float64, value= [ 0.00000000e+00])]
[Tensor(shape=[2], dtype=Float64, value= [ 1.00000000e+00,  1.00000000e+00]), Tensor(shape=[1], dtype=Float64, value= [ 0.00000000e+00])]

# list, tuple are also supported.
loader = [np.array(0), np.array(1), np.array(2)]
dataset = GeneratorDataset(source=loader, column_names=["data"])

for data in dataset:
    print(data)
输出:
[Tensor(shape=[], dtype=Int64, value= 1)]
[Tensor(shape=[], dtype=Int64, value= 2)]
[Tensor(shape=[], dtype=Int64, value= 0)]- 可迭代数据集
实现__iter__和__next__方法
可迭代获取数据样本,使用iter(dataset)的形式访问数据集时,可以读取从数据库、远程服务器返回的数据流。
# Iterator as input source
class IterableDataset():
    def __init__(self, start, end):
        '''init the class object to hold the data'''
        self.start = start
        self.end = end
    def __next__(self):
        '''iter one data and return'''
        return next(self.data)
    def __iter__(self):
        '''reset the iter'''
        self.data = iter(range(self.start, self.end))
        return self

loader = IterableDataset(1, 5)
dataset = GeneratorDataset(source=loader, column_names=["data"])
for d in dataset:
    print(d)
输出:
[Tensor(shape=[], dtype=Int64, value= 1)]
[Tensor(shape=[], dtype=Int64, value= 2)]
[Tensor(shape=[], dtype=Int64, value= 3)]
[Tensor(shape=[], dtype=Int64, value= 4)]- 生成器
属于可迭代数据集,直接依赖Python生成器类型generator返回数据,直至生成器抛出StopIteration异常。
# Generator
def my_generator(start, end):
    for i in range(start, end):
        yield i

# since a generator instance can be only iterated once, we need to wrap it by lambda to generate multiple instances
dataset = GeneratorDataset(source=lambda: my_generator(3, 6), column_names=["data"])

for d in dataset:
    print(d)
输出:
[Tensor(shape=[], dtype=Int64, value= 3)]
[Tensor(shape=[], dtype=Int64, value= 4)]
[Tensor(shape=[], dtype=Int64, value= 5)]