Vue3局部组件注册
composition模式
javascript
// composition模式
<template>
    <ChildCom />
</template>
<script setup>
// setup默认就注册了组件
import ChildCom from './components/ChildCom.vue'
</script>
options模式
javascript
<template>
    <ChildCom />
</template>
<script>
import ChildCom from './components/ChildCom.vue'
export default {
    components: {
        ChildCom
    }
}
</script>
Vue3全局组件注册
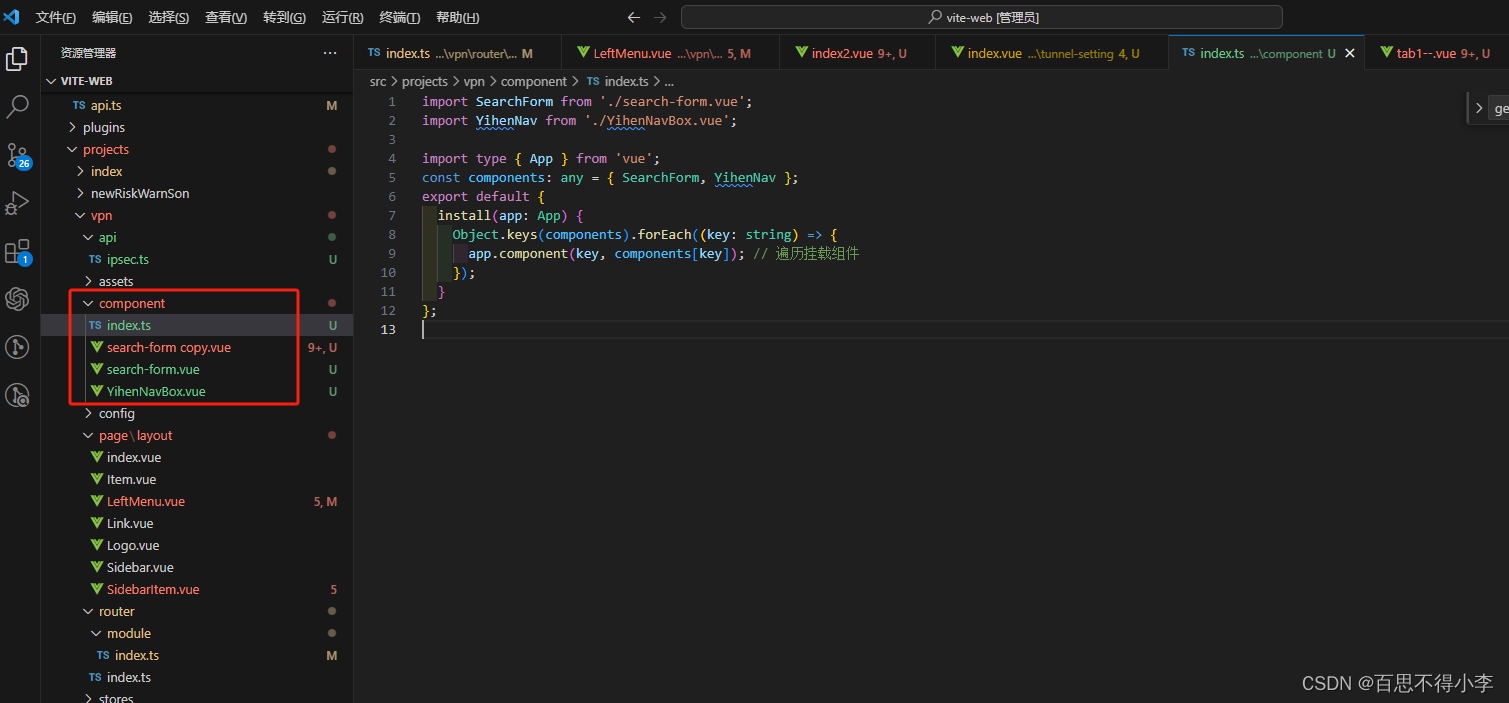
在项目component文件夹下新建index.ts,

index.ts代码如下:
javascript
import SearchForm from './search-form.vue';
import YihenNav from './YihenNavBox.vue';

import type { App } from 'vue';
const components: any = { SearchForm, YihenNav };
export default {
  install(app: App) {
    Object.keys(components).forEach((key: string) => {
      app.component(key, components[key]); // 遍历挂载组件
    });
  }
};
然后看看我们封装的全局公共组件YihenNav ,代码如下:
javascript
<template>
  <div>
    <div class="navBox">
      <el-menu
        :default-active="active"
        active-text-color="#1182FB"
        mode="horizontal"
        @select="handSelect"
      >
        <el-menu-item
          :index="navItem.code"
          v-for="(navItem, navIndex) in navList"
          :key="navIndex"
          >{{ navItem.name }}</el-menu-item
        >
      </el-menu>
    </div>
  </div>
</template>

<script setup lang="ts">
import { defineEmits } from 'vue';

defineProps({
  active: String,
  navList: Array
});

const emits = defineEmits(['navSwitch']);
const handSelect = (key) => {
  emits('navSwitch', key);
};
</script>

<style lang="less" scoped>
.navBox {
  margin: 8px;
  background: #ffffff;
  .el-menu {
    border: none;
  }
}
</style>
最后在main.ts里引入index.ts即可:
javascript
//main.ts
import globalComponent from './component/index';
const render = async(props: any = {}) => {
  app = createApp(App);
  app.use(globalComponent);
}
render();
然后在我们页面组件里使用,页面样式效果如下:

最开始前端会通过getBaseSettingInfo方法调后端接口获取详情,然后调updateBseSettingInfo接口方法编辑保存配置,完整代码如下:
javascript
<template>
  <div>
    <yihen-nav :active="activeIndex" :nav-list="navList" @navSwitch='navSwitch' />
    <el-form
    ref="ruleFormRef"
    style="margin-left:100px; max-width: 600px"
    :model="ruleForm"
    :rules="rules"
    label-width="auto"
    class="demo-ruleForm"
  >
  <el-form-item label="IKE密钥周期(秒):" prop="ike_key_period">
      <el-input v-model="ruleForm.ike_key_period" />
    </el-form-item>
    <el-form-item label="IPsec密钥周期(秒):" prop="ipsec_key_period">
      <el-input v-model="ruleForm.ipsec_key_period" />
    </el-form-item>
    <el-form-item label="预共享密钥:" prop="default_shared_secret">
      <el-input v-model="ruleForm.default_shared_secret" />
    </el-form-item>
     <el-form-item label="IKE端口设置:" prop="ike_port">
      <el-input v-model="ruleForm.ike_port" />
    </el-form-item>
     <el-form-item label="NAT端口设置:" prop="nat_port">
      <el-input v-model="ruleForm.nat_port" />
    </el-form-item>

    <el-button
            style="margin-left:20px;"
            type="primary"
            @click="submit"
          >保存配置</el-button>
  </el-form>

  </div>
</template>
<script lang="ts" setup>
import { validator } from '@vpn/utils/validate.ts';
import { getBaseSettingInfo, updateBseSettingInfo } from '@vpn/api/ipsec.ts';
import { ElMessage, FormRules } from 'element-plus';
import { ref, reactive, onMounted } from 'vue';
const activeIndex = ref<string>('0');
const navList = reactive([{
  name: '基本配置',
  code: '0'
}]);

const ruleFormRef = ref();

interface RuleForm {
  ike_key_period: number | string
  ipsec_key_period: number | string
  default_shared_secret: string
  ike_port: number | string
  nat_port:number | string
}
const ruleForm = ref<RuleForm>({
  ike_key_period: '',
  ipsec_key_period: '',
  default_shared_secret: '',
  ike_port: '',
  nat_port: ''
});

const rules = reactive<FormRules<RuleForm>>({
  ike_key_period: [
    { required: true, message: '请输入IKE密钥周期', trigger: 'blur' },
    { validator: validator.ikeTimeSecond, trigger: 'blur' }
  ],
  ipsec_key_period: [
    { required: true, message: '请输入IPsec密钥周期', trigger: 'blur' },
    { validator: validator.ipsecTimeSecond, trigger: 'blur' }
  ],
  default_shared_secret: [
    { required: true, message: '请输入预共享密钥', trigger: 'blur' }
  ],
  ike_port: [
    { required: true, message: '请输入IKE端口', trigger: 'blur' },
    { validator: validator.sshPort, trigger: 'blur' }
  ],
  nat_port: [
    { required: true, message: '请输入NAT端口', trigger: 'blur' },
    { validator: validator.sshPort, trigger: 'blur' }
  ]
});

const navSwitch = (key) => {
  console.log(key);
};

const submit = async() => {
  await ruleFormRef.value.validate();
  const res: any = await updateBseSettingInfo(ruleForm);
  if (res.code === 200) {
    ElMessage({
      type: 'success',
      message: '保存成功'
    });
  } else {
    ElMessage({
      type: 'error',
      message: '保存失败'
    });
  }
};

onMounted(() => {
  getBaseInfo();
});

const getBaseInfo = () => {
  getBaseSettingInfo()
    .then(res => {
      console.log('基本配置详情', res);
      // ruleForm = Object.assign(ruleForm, res.data);
      ruleForm.value = res.data;
    });
};

</script>
<style lang="less" scoped>
.txl {
  text-align: left;
}
</style>