opencv-python
Could not build wheels for opencv-python which use PEP 517 and cannot be installed
安装pip install opencv-python 输出
Collecting opencv-python
  Downloading https://files.pythonhosted.org/packages/77/f5/49f034f8d109efcf9b7e98fbc051878b83b2f02a1c73f92bbd37f317288e/opencv-python-4.4.0.42.tar.gz (88.9MB)
    100% |████████████████████████████████| 88.9MB 919kB/s
  Installing build dependencies ... done
  Getting requirements to build wheel ... done
    Preparing wheel metadata ... done
Requirement already satisfied: numpy>=1.13.1 in /usr/local/lib/python3.5/dist-packages (from opencv-python) (1.14.5)
Building wheels for collected packages: opencv-python
  Building wheel for opencv-python (PEP 517) ...
如果遇到以下过程后报错,则建议先更新pip后再执行安装。
更新命令:
pip install --upgrade pip setuptools wheel我遇到的问题是安装很慢,好像是卡在那里,基本10min以上,只能耐心等待,有一个指令好像是加上
--verbse可以看具体的执行过程。
H5PY
解决H5py 初始化问题:ImportError:DLL failed to load
最近在做毕业设计,突然发现原本可以在学校跑的代码,在家出BUG!
问题:H5py找不到 h5.pyx文件
此问题我理解为,在初始化h5py的时候,文件缺失,导致DLL;
无语。。第一个想到的解决办法:重新安装H5py
这个办法没用。。。。 因为本人用的anaconda,已经卸载+重装N遍发现没用。
裂开。。。第二个想到的解决办法:版本问题
我去查了H5py官网,发现较近的版本有:2.10.0 ,2.9.0 ,2.8.0 ,2.7.1等。。我挨个安装了一遍,都是不行最后一个有效的办法:在官网下载whl文件,手动下载
由于上面的操作,本人都是直接从conda上下载的H5py包,报的错又都是找不到文件,所以我觉得可能是conda上直接下载的文件有问题。
在这个网站可以选择和自己电脑系统匹配的whl文件包。
我的是这个:

这里要注意:Python的版本,电脑的位数。
- 关键步骤:
1、打开conda命令台,进入对应虚拟环境;
2、输入pip install D:\MSCOCO\h5py-2.10.0-cp36-cp36m-win_amd64.whl (注意这里改成自己下载的whl文件路径,前提是uninstall 以前的H5py);
3、sucessfully!
最后再返回代码,运行,没问题了!
本文转自 https://blog.csdn.net/qq_38883844/article/details/105069064,如有侵权,请联系删除。
OpenCL
Ubuntu安装OpenCL
下载 OpenCl SDK https://software.intel.com/content/www/us/en/develop/tools/opencl-sdk/choose-download.html ,选择linux平台,解压。
sudo ./install.sh安装 clinfo
$ clinfo

Number of platforms                               1
  Platform Name                                   Intel(R) CPU Runtime for OpenCL(TM) Applications
  Platform Vendor                                 Intel(R) Corporation
  Platform Version                                OpenCL 2.1 LINUX
  Platform Profile                                FULL_PROFILE
  Platform Extensions                             cl_khr_icd cl_khr_global_int32_base_atomics cl_khr_global_int32_extended_atomics cl_khr_local_int32_base_atomics cl_khr_local_int32_extended_atomics cl_khr_byte_addressable_store cl_khr_depth_images cl_khr_3d_image_writes cl_intel_exec_by_local_thread cl_khr_spir cl_khr_fp64 cl_khr_image2d_from_buffer cl_intel_vec_len_hint
  Platform Host timer resolution                  1ns
  Platform Extensions function suffix             INTEL

  Platform Name                                   Intel(R) CPU Runtime for OpenCL(TM) Applications
Number of devices                                 1
  Device Name                                     Intel(R) Core(TM) i7-6700 CPU @ 3.40GHz
  Device Vendor                                   Intel(R) Corporation
  Device Vendor ID                                0x8086
  Device Version                                  OpenCL 2.1 (Build 0)
  Driver Version                                  18.1.0.0920
  Device OpenCL C Version                         OpenCL C 2.0
  Device Type                                     CPU
  Device Profile                                  FULL_PROFILE
  Device Available                                Yes
  Compiler Available                              Yes
  Linker Available                                Yes
  Max compute units                               8
  Max clock frequency                             3400MHz
  Device Partition                                (core)
    Max number of sub-devices                     8
    Supported partition types                     by counts, equally, by names (Intel)
  Max work item dimensions                        3
  Max work item sizes                             8192x8192x8192
  Max work group size                             8192
  Preferred work group size multiple              128
  Max sub-groups per work group                   1
 .....
    Global                                        64 bytes
    Local                                         0 bytes
  Max size for global variable                    65536 (64KiB)
  Preferred total size of global vars             65536 (64KiB)
  Global Memory cache type                        Read/Write
.........
成功找到 Intel® HD Graphics
optional 安装 NEO https://github.com/intel/compute-runtime 选个版本
mkdir neo
cd neo
wget https://github.com/intel/compute-runtime/releases/download/20.30.17454/intel-gmmlib_20.2.2_amd64.deb
wget https://github.com/intel/compute-runtime/releases/download/20.30.17454/intel-igc-core_1.0.4427_amd64.deb
wget https://github.com/intel/compute-runtime/releases/download/20.30.17454/intel-igc-opencl_1.0.4427_amd64.deb
wget https://github.com/intel/compute-runtime/releases/download/20.30.17454/intel-opencl_20.30.17454_amd64.deb
wget https://github.com/intel/compute-runtime/releases/download/20.30.17454/intel-ocloc_20.30.17454_amd64.deb
wget https://github.com/intel/compute-runtime/releases/download/20.30.17454/intel-level-zero-gpu_0.8.17454_amd64.deb
sudo dpkg -i *.deb
本文转自 https://aiethan.blog.csdn.net/article/details/107834147,如有侵权,请联系删除。
nvidia.dali 模块安装方法
源码:
Release DALI v1.6.0 · NVIDIA/DALI · GitHub
CUPY
python 中安装cupy库。CuPy(A NumPy-compatible array library accelerated by CUDA)是NumPy兼容多维数组在CUDA上的实现,
因此安装时需要·==根据cuda版本安装 == nvcc -V
# For CUDA 10.1
pip install -i https://pypi.tuna.tsinghua.edu.cn/simple cupy-cuda101 # 根据自己的版本
注意:!!!
- cupy只能存在一个版本,可以用
pip list查询之前是否安装过,如果有需要先卸载:pip uninstall cupy-cudaxxx,再重新安装。- 自己安装发现(某篇博客评论也有提到):++cuda112版本不能在windows中使用++,即使你的版本和cupy版本一致也不可以。如果要必须使用,建议cuda退回11.1(以及之前的版本应该都可以,但是未测试),在重新安装cupy可以正常使用
安装完成,import cupy as cp 后运行程序提示"ImportError: CuPy is not correctly installed"
在不断的卸载、安装cupy,以及各种更新相关依赖包(inda、wheel、pip等)之后,运行程序依旧不断提示"ImportError: CuPy is not correctly installed"
崩溃之前发现有人设置了系统的环境变量,那么这个问题可能是环境变量的问题,于是一不做二不休把电脑和pycharm的环境变量统一修改了一下:
1)电脑环境变量设置
路径:电脑---右键属性---高级系统设置---高级---环境变量。
在用户变量中的Path变量,添加CUDA10.0安装路径到系统内
C:\Program Files\NVIDIA GPU Computing Toolkit\CUDA\v10.0\bin
C:\Program Files\NVIDIA GPU Computing Toolkit\CUDA\v10.0\libnvvp
C:\Program Files\NVIDIA GPU Computing Toolkit\CUDA\v10.0\lib\x64
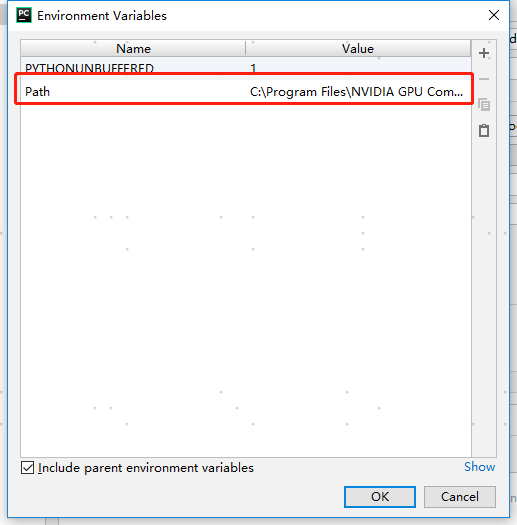
C:\Program Files\NVIDIA GPU Computing Toolkit\CUDA\v10.0\extras\CUPTI\libx642)Pycharm环境变量设置
路径:Run---Edit Configurations...---Enviroment variables 添加环境变量
本文转自 https://blog.csdn.net/Zhangrx_/article/details/115006360,如有侵权,请联系删除。