导读
这是一系列关于 SpringBoot Web框架实战 的教程,从项目的创建,到一个完整的 web 框架(包括异常处理、拦截器、context 上下文等);从0开始,到一个可以直接运用在生产环境中的web框架。而且所有源码均开源:https://github.com/xiongxianhe/springboot
注:本系列项目的构建工具均使用 IntelliJ IDEA
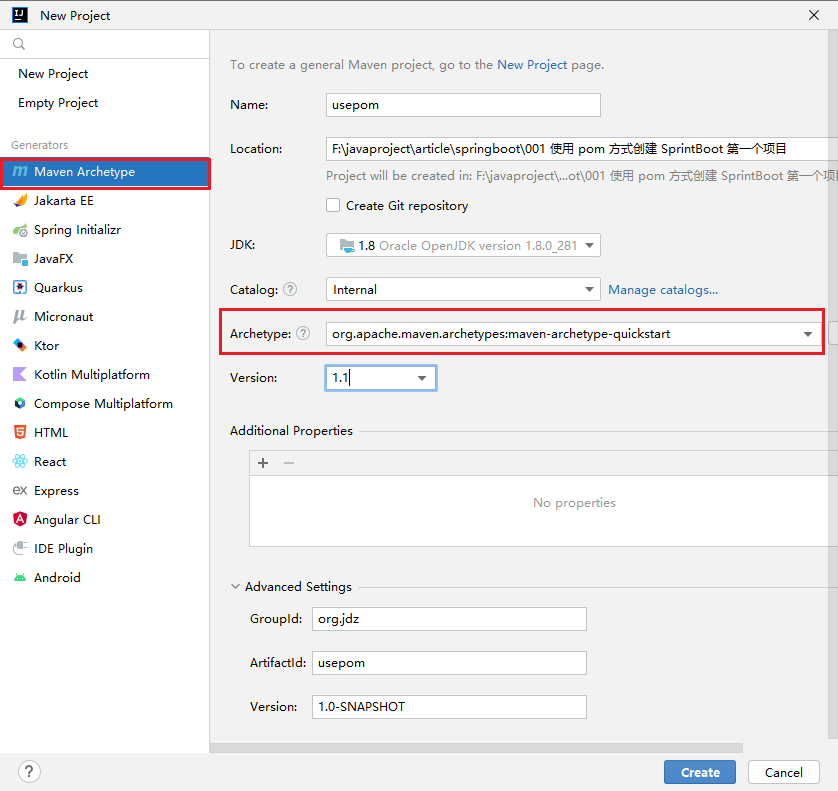
1. 创建项目
-
选择
Maven Archetype -
在 Archetype 中选择
org.apache.maven.archetypes:maven-archetype-quickstart -
其他属性内容,根据实际情况进行填写,如下图:
2. 配置 pom.xml 文件
等待 maven 加载相关依赖后,呈现如下相关文件结构:
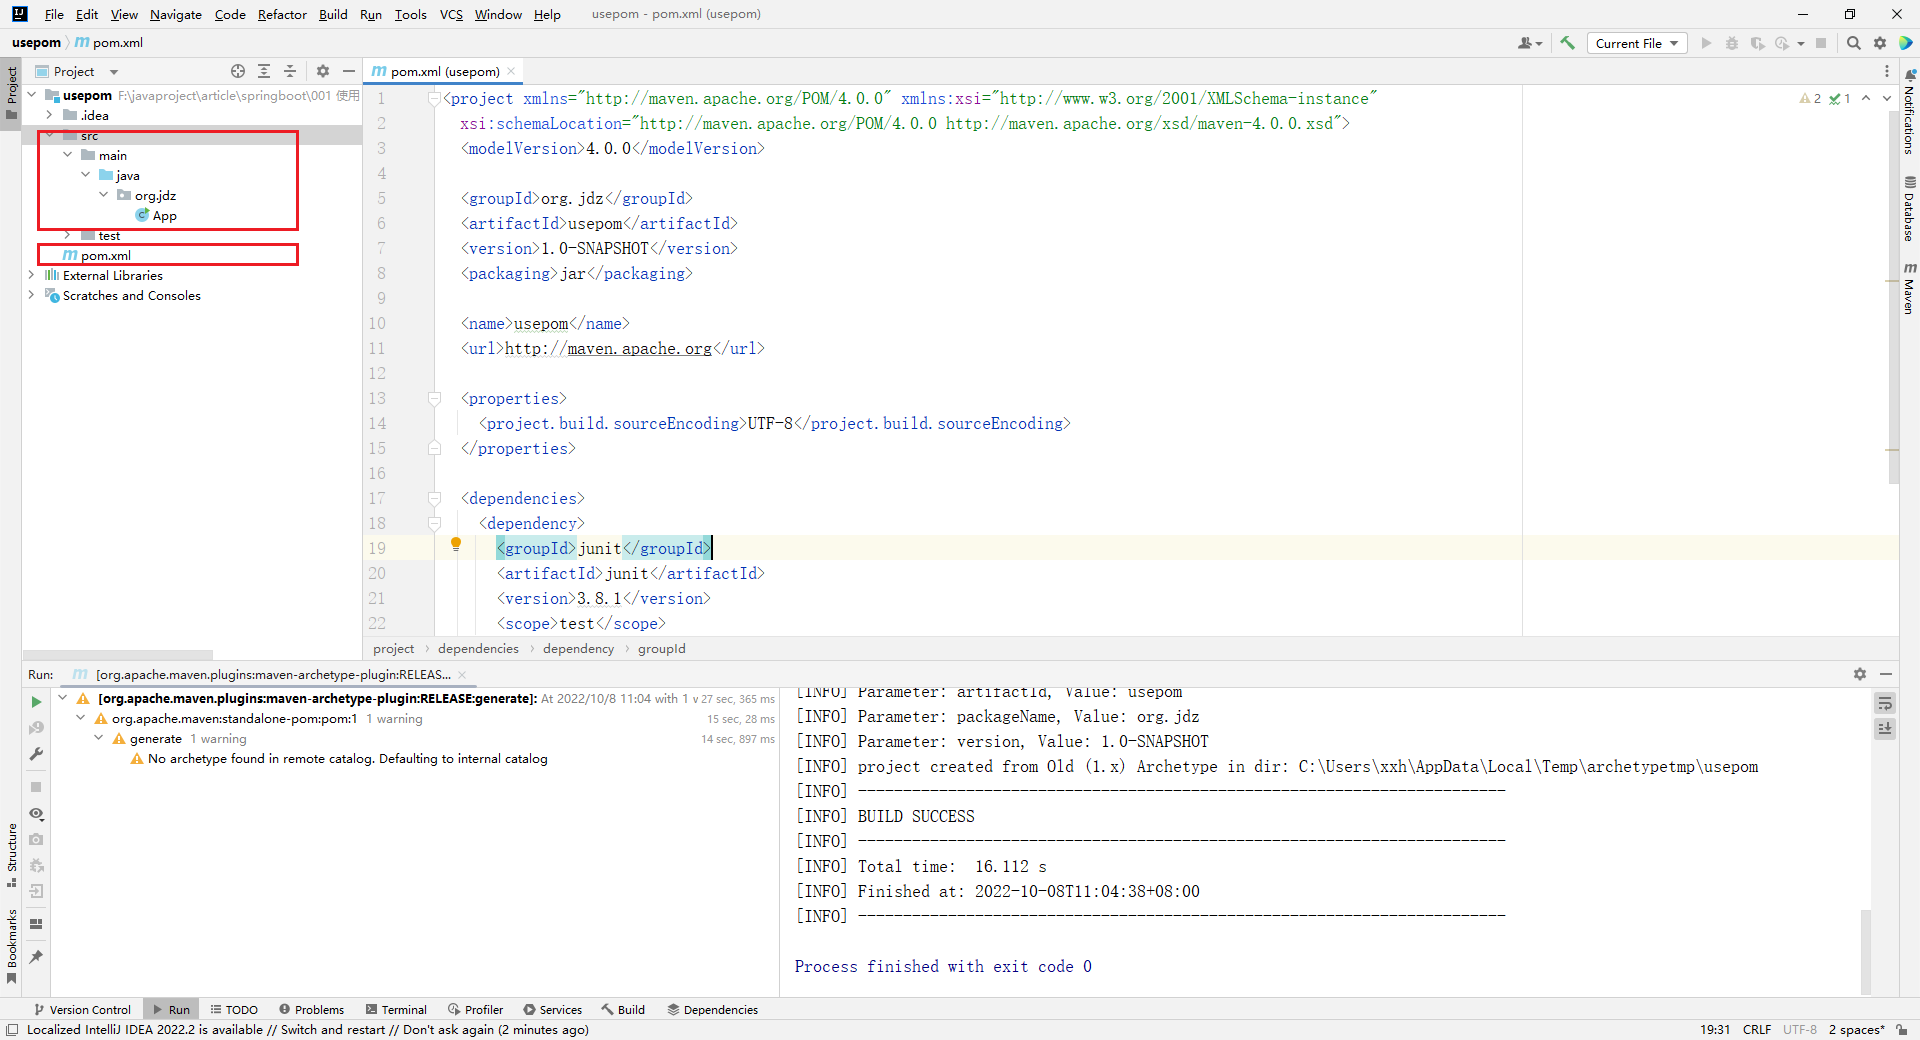
打开 pom.xml 文件,默认文件内容如下:
xml
<project xmlns="http://maven.apache.org/POM/4.0.0" xmlns:xsi="http://www.w3.org/2001/XMLSchema-instance"
  xsi:schemaLocation="http://maven.apache.org/POM/4.0.0 http://maven.apache.org/xsd/maven-4.0.0.xsd">
  <modelVersion>4.0.0</modelVersion>

  <groupId>org.jdz</groupId>
  <artifactId>usepom</artifactId>
  <version>1.0-SNAPSHOT</version>
  <packaging>jar</packaging>

  <name>usepom</name>
  <url>http://maven.apache.org</url>

  <properties>
    <project.build.sourceEncoding>UTF-8</project.build.sourceEncoding>
  </properties>

  <dependencies>
    <dependency>
      <groupId>junit</groupId>
      <artifactId>junit</artifactId>
      <version>3.8.1</version>
      <scope>test</scope>
    </dependency>
  </dependencies>
</project>
增加 SpringBoot 相关配置
主要配置:
xml
<!--应用的父项目-->
<parent>
    <groupId>org.springframework.boot</groupId>
    <artifactId>spring-boot-starter-parent</artifactId>
    <version>2.7.3</version>
</parent>

<dependencies>
    <!-- 这里的依赖没有指明版本,这是由于在spring-boot-dependencies中都已经指明了版本 -->
    <dependency>
      <groupId>org.springframework.boot</groupId>
      <artifactId>spring-boot-starter-web</artifactId>
    </dependency>
</dependencies>
相关插件
xml
<!-- 这个插件,可以将应用打包成一个可执行的jar包;-->
<build>
    <plugins>
      <plugin>
        <groupId>org.springframework.boot</groupId>
        <artifactId>spring-boot-maven-plugin</artifactId>
      </plugin>
    </plugins>
</build>
完整的 pom.xml 内容:
xml
<project xmlns="http://maven.apache.org/POM/4.0.0" xmlns:xsi="http://www.w3.org/2001/XMLSchema-instance"
  xsi:schemaLocation="http://maven.apache.org/POM/4.0.0 http://maven.apache.org/xsd/maven-4.0.0.xsd">
  <modelVersion>4.0.0</modelVersion>

  <groupId>org.jdz</groupId>
  <artifactId>usepom</artifactId>
  <version>1.0-SNAPSHOT</version>
  <packaging>jar</packaging>

  <name>usepom</name>
  <url>http://maven.apache.org</url>

  <!--应用的父项目-->
  <parent>
    <groupId>org.springframework.boot</groupId>
    <artifactId>spring-boot-starter-parent</artifactId>
    <version>2.7.3</version>
  </parent>

  <properties>
    <project.build.sourceEncoding>UTF-8</project.build.sourceEncoding>
  </properties>

  <dependencies>
    <!-- 这里的依赖没有指明版本,这是由于在spring-boot-dependencies中都已经指明了版本 -->
    <dependency>
      <groupId>org.springframework.boot</groupId>
      <artifactId>spring-boot-starter-web</artifactId>
    </dependency>

    <dependency>
      <groupId>junit</groupId>
      <artifactId>junit</artifactId>
      <version>3.8.1</version>
      <scope>test</scope>
    </dependency>
  </dependencies>

  <!-- 这个插件,可以将应用打包成一个可执行的jar包;-->
  <build>
    <plugins>
      <plugin>
        <groupId>org.springframework.boot</groupId>
        <artifactId>spring-boot-maven-plugin</artifactId>
      </plugin>
    </plugins>
  </build>
</project>
pom.xml 配置好,更新 maven,如下图:

3. 编写代码
main 入口文件
java
package org.jdz;

import org.springframework.boot.SpringApplication;
import org.springframework.boot.autoconfigure.SpringBootApplication;

/**
 * Hello world!
 *
 */
@SpringBootApplication
public class App
{
    public static void main( String[] args )
    {
        System.out.println( "Hello World!" );
        SpringApplication.run(App.class, args);
    }
}
@SpringBootApplication
@SpringBootApplication用来标注应用的主配置类,那么SpringBoot就可以通过启动这个主配置类的main方法来启动SpringBoot应用。
到此,一个 SpringBoot 项目就已创建完成,点击运行,输入如下图:
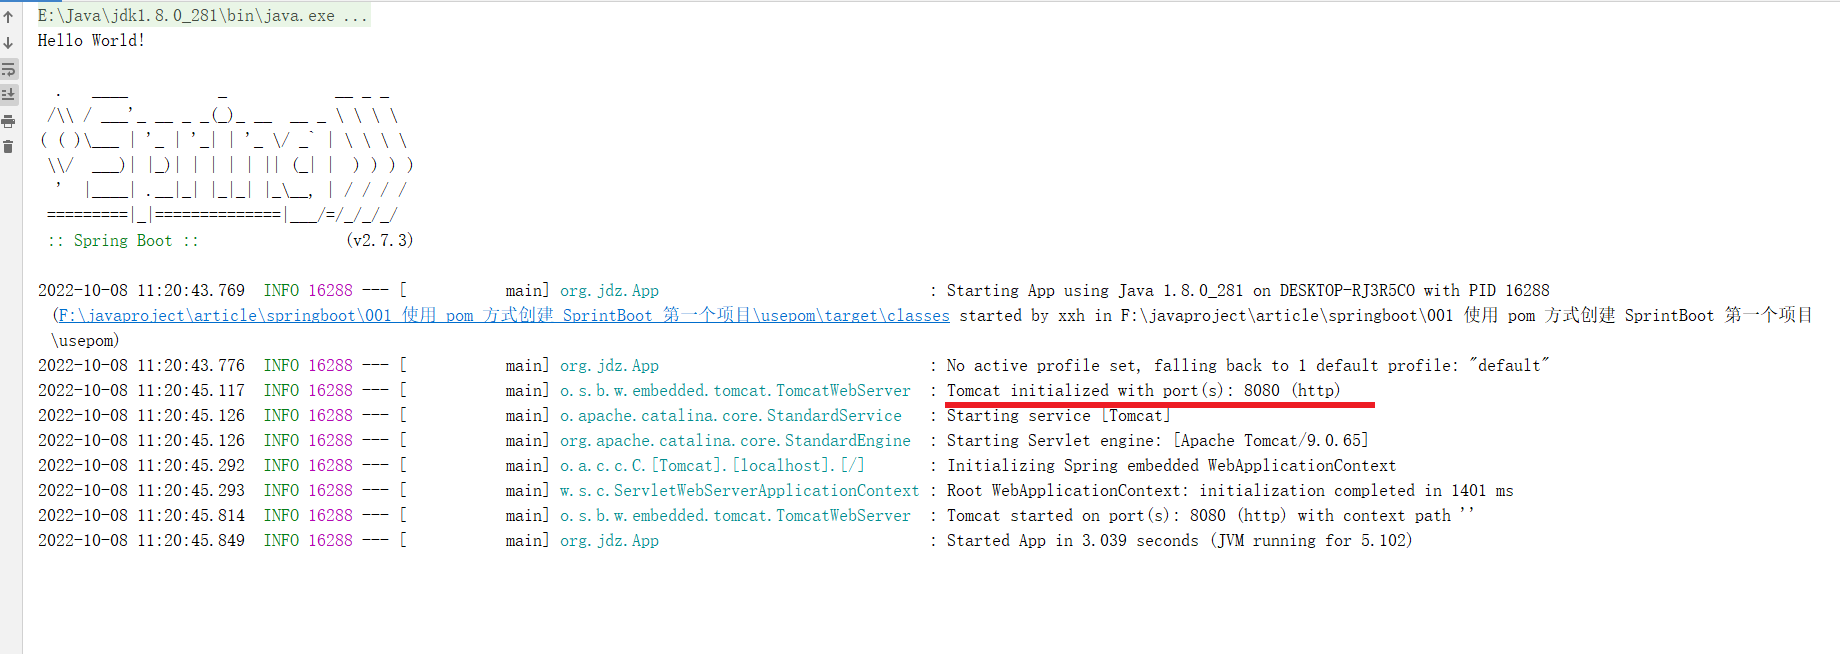
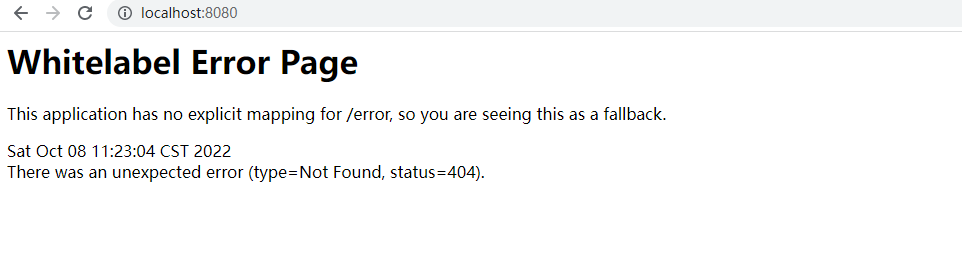
SpringBoot 内置 Tomcat 并启动 8080 为 web 端口,在浏览器上访问 http://localhost:8080/ , 出现如下图所示,即 SpringBoot 已正常启动
4. 输出 hello springboot
controller 类编写
- 新建 controller 包
- 在 controller 包下新建 HelloController.java
注:
- 新建 controller 包 不是必须
- 类文件名 HelloController 的命名格式不是必须
- 只需要 Controller 类中的类名增加
@Controller即可
java
package org.jdz.controller;


import org.springframework.stereotype.Controller;
import org.springframework.web.bind.annotation.RequestMapping;
import org.springframework.web.bind.annotation.ResponseBody;

@Controller
public class HelloController {

    @RequestMapping("/hello")
    @ResponseBody
    public String hello() {
        return "Hello Spring Boot.";
    }
}
重启启动项目,并访问: http://localhost:8080/hello ,此时页面输出:
html
Hello Spring Boot.完整的目录结构:
app
├─pom.xml
├─target
|   ├─usepom-1.0-SNAPSHOT.jar
|   ├─usepom-1.0-SNAPSHOT.jar.original
|   ├─test-classes
|   |      ├─org
|   |      |  ├─jdz
|   |      |  |  └AppTest.class
|   ├─surefire-reports
|   |        ├─org.jdz.AppTest.txt
|   |        └TEST-org.jdz.AppTest.xml
|   ├─maven-status
|   |      ├─maven-compiler-plugin
|   |      |           ├─testCompile
|   |      |           |      ├─default-testCompile
|   |      |           |      |          ├─createdFiles.lst
|   |      |           |      |          └inputFiles.lst
|   |      |           ├─compile
|   |      |           |    ├─default-compile
|   |      |           |    |        ├─createdFiles.lst
|   |      |           |    |        └inputFiles.lst
|   ├─maven-archiver
|   |       └pom.properties
|   ├─generated-test-sources
|   |           ├─test-annotations
|   ├─generated-sources
|   |         ├─annotations
|   ├─classes
|   |    ├─org
|   |    |  ├─jdz
|   |    |  |  ├─App.class
|   |    |  |  ├─controller
|   |    |  |  |     └HelloController.class
├─src
|  ├─test
|  |  ├─java
|  |  |  ├─org
|  |  |  |  ├─jdz
|  |  |  |  |  └AppTest.java
|  ├─main
|  |  ├─java
|  |  |  ├─org
|  |  |  |  ├─jdz
|  |  |  |  |  ├─App.java
|  |  |  |  |  ├─controller
|  |  |  |  |  |     └HelloController.java