1、整体功能概述
安卓项目中使用Retrofit2 实现和自定义接口的网络交互,通过Postman模拟服务端,创建自定义接口。
作用
- 前后端开发进度对不齐时,客户端可利用本功能模拟测试数据。
- 备忘。
缺点
- retrofit模拟接口需要配置响应数据类,若接口响应体字段较多,或者数据类型不规则,配置起来比较麻烦。
- 建议使用
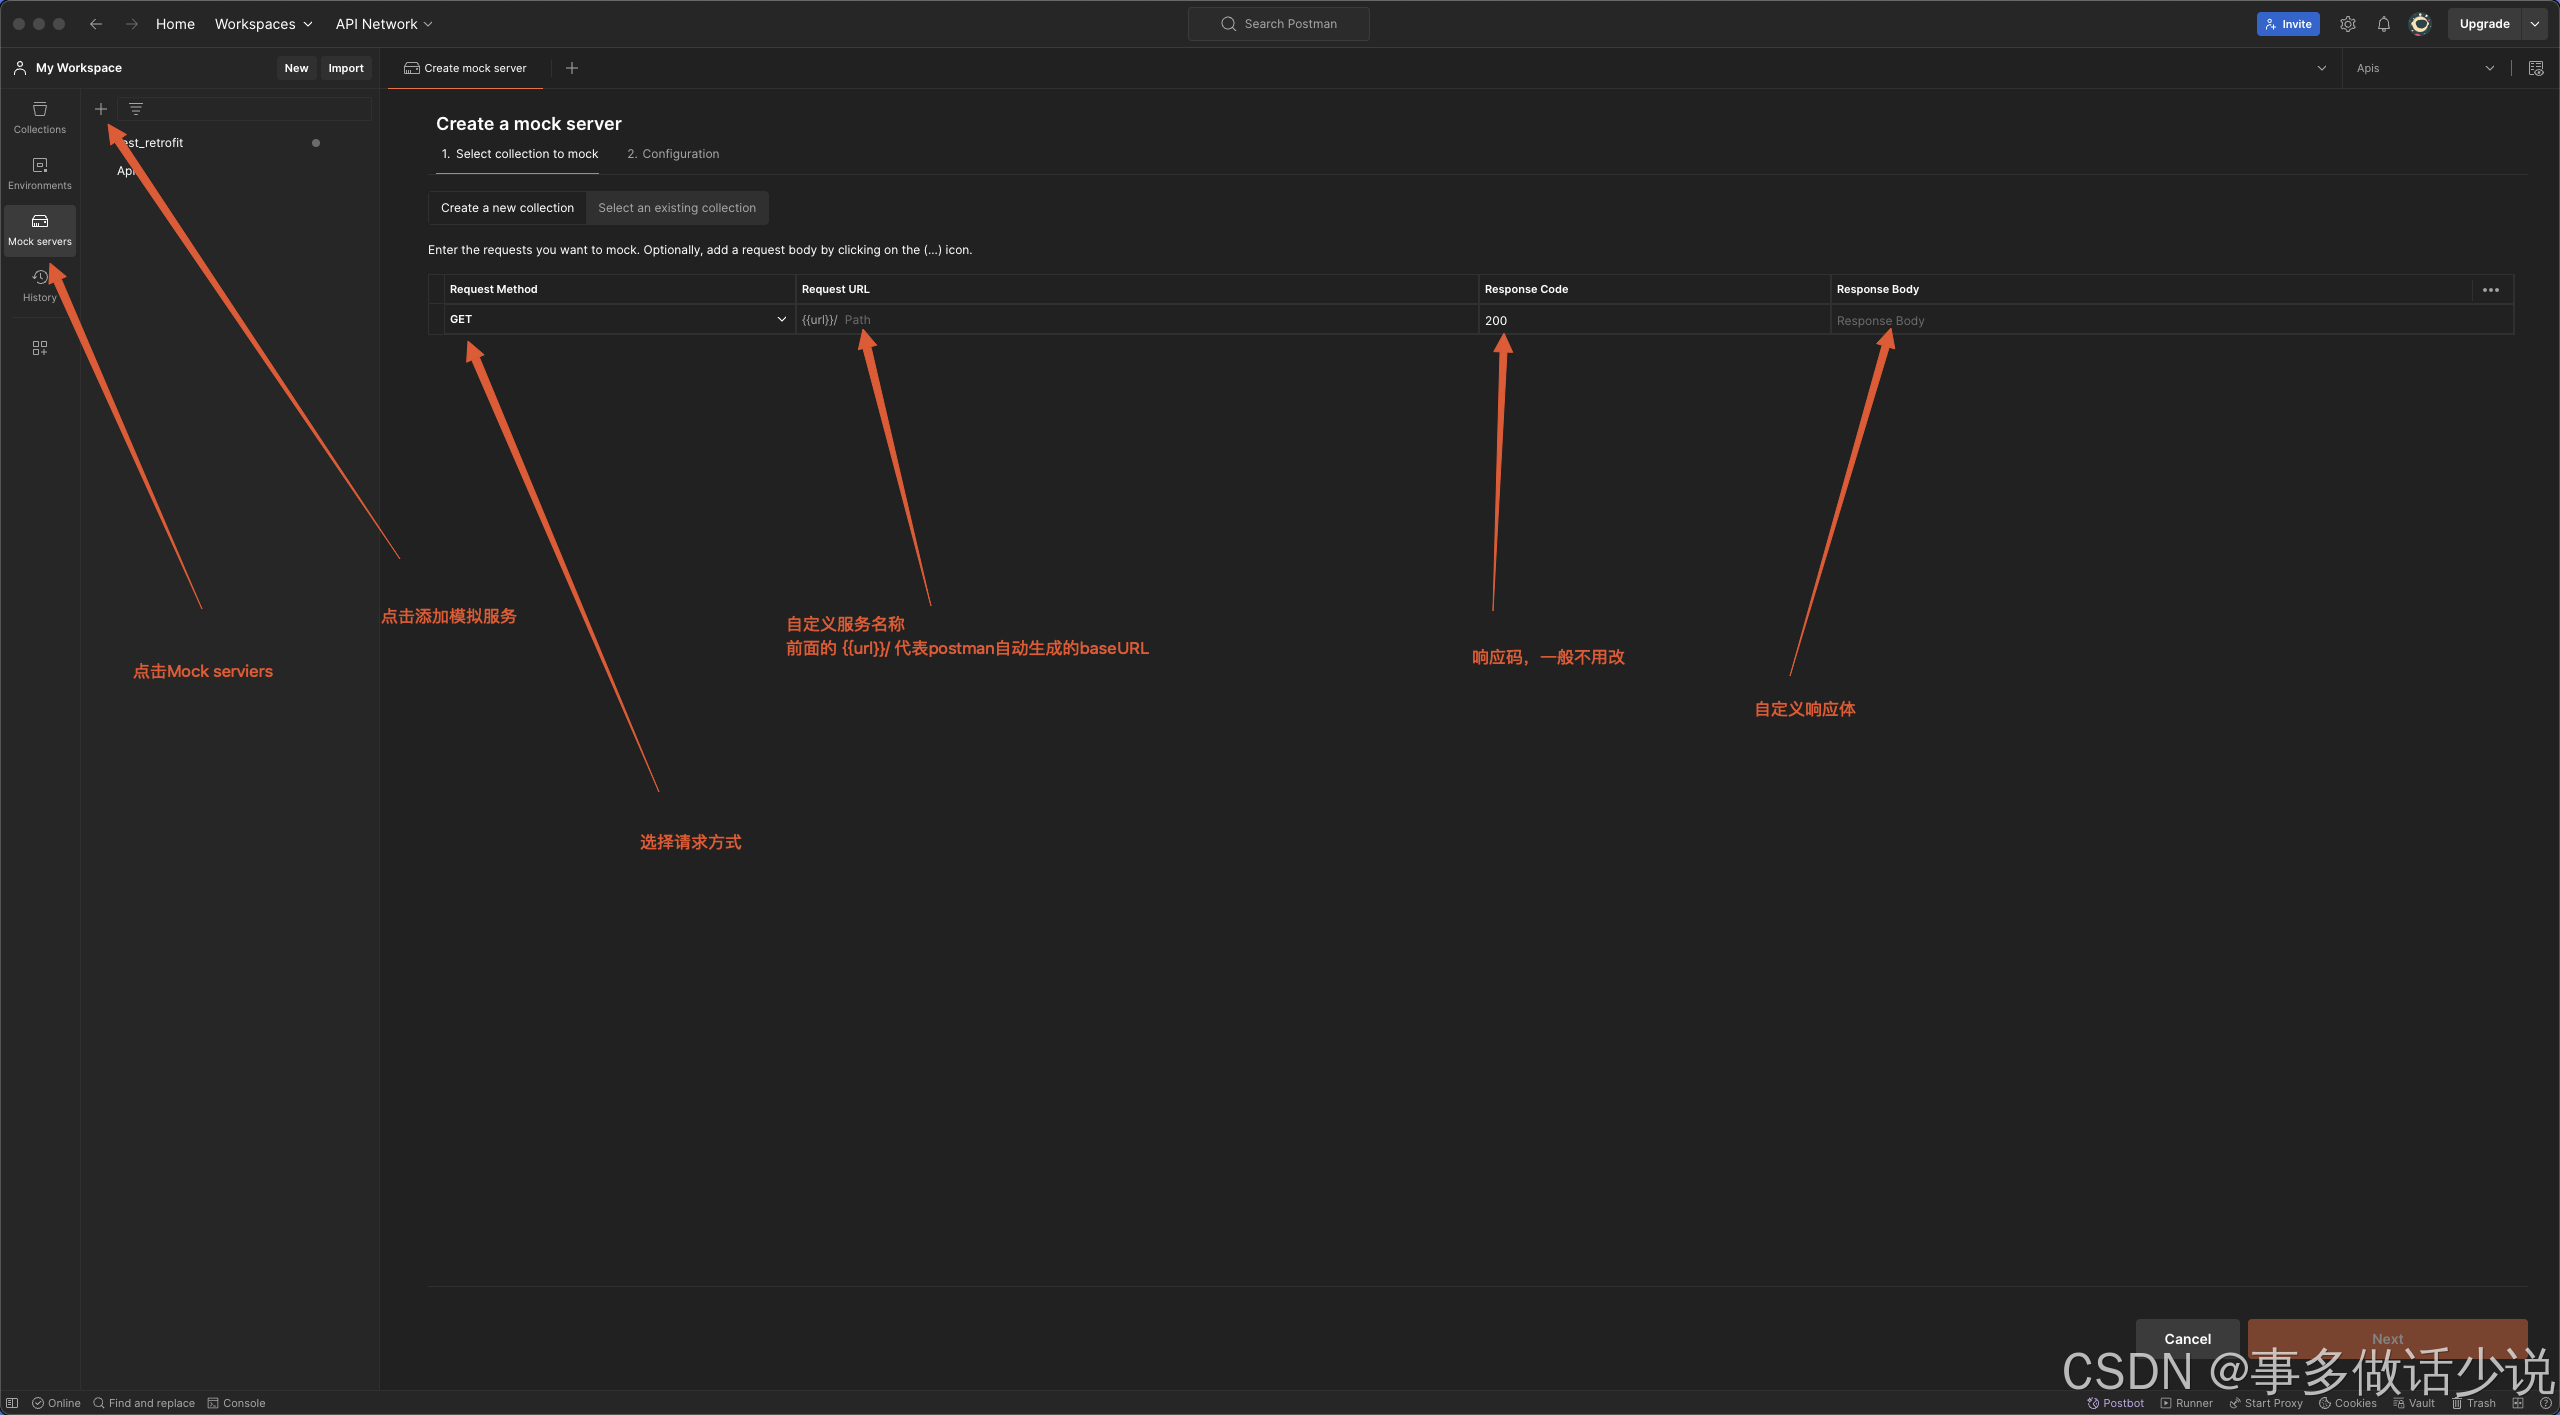
2、postman mock接口
使用Postman mock 同一URL下不同的功能接口,表示如下:
bash
// 功能接口URL
https://myapi.com/myservice1
https://myapi.com/myservice2
https://myapi.com/myservice3
...
注:https: //myapi.com/会被替换成postman生成的URL,最终可调用的完整URL长这样:
https://随机生成的字符串.mock.pstmn.io/myservice
流程

完成后点击右下角 next 。


点击右上角 view Collection Docs查看接口信息

如上,模拟生成了一个url下两个不同的功能接口,按照样例访问即可。
3、Retrofit2进行网络交互
在Android项目(本文以空白项目为例)中设置retrofit2
项目整体结构
如下图所示:

1)首先配置Retrofit客户端
kotlin
// RetrofitClient.kt

package com.example.retrofit

import retrofit2.Retrofit
import retrofit2.converter.gson.GsonConverterFactory

object RetrofitClient {
    private const val SERVICE_BASE_URL = "https://你生成的随机字符串.mock.pstmn.io"

  // 配置retrofit实例
    val serviceRetrofit: Retrofit by lazy {
        Retrofit.Builder()
            .baseUrl(SERVICE_BASE_URL)
            .addConverterFactory(GsonConverterFactory.create())
            .build()
    }

	//配置接口实例
    val service1: Service1 by lazy {
        serviceRetrofit.create(Service1::class.java)
    }

    val service2: Service2 by lazy {
        serviceRetrofit.create(Service2::class.java)
    }

}
2)配置接口
kotlin
// ApiService.kt

package com.example.retrofit

import retrofit2.Call
import retrofit2.http.GET

// 配置接口协议方法、路径、响应
interface Service1 {
    @GET("/myservice1")
    fun getService1(): Call<Service1Response>
}

interface Service2 {
    @GET("/myservice2")
    fun getService2(): Call<Service2Response>

}
3)响应体数据类
业务中接口数据通常会非常复杂,建议使用Gson 或JsonObject简化响应体。
本文举例的响应较为简单。
kotlin
/**
 * Response.kt
 * @tip: 根据响应体设置数据类
 */
package com.example.retrofit

data class Service1Response(
    val goal1: String
)

data class Service2Response(
    val goal2: String
)
4)请求体类
仅测试用,无特殊要求可以不写。
5)调用
xml
xml
<!--  activity_main.xml  -->

<?xml version="1.0" encoding="utf-8"?>
<LinearLayout xmlns:android="http://schemas.android.com/apk/res/android"
    android:layout_width="match_parent"
    android:layout_height="match_parent"
    android:orientation="vertical"
    android:gravity="center"
    android:padding="16dp">

    <TextView
        android:id="@+id/textView1"
        android:layout_width="wrap_content"
        android:layout_height="wrap_content"
        android:text="Response from Service 1"
        android:layout_marginBottom="10dp"/>

    <TextView
        android:id="@+id/textView2"
        android:layout_width="wrap_content"
        android:layout_height="wrap_content"
        android:text="Response from Service 2"/>
</LinearLayout>
MainActivity
kotlin
package com.example.testretrofit

import androidx.appcompat.app.AppCompatActivity
import android.os.Bundle
import android.widget.TextView
import com.example.retrofit.RetrofitClient
import com.example.retrofit.Service1Response
import com.example.retrofit.Service2Response
import retrofit2.Call
import retrofit2.Callback
import retrofit2.Response

class MainActivity : AppCompatActivity() {
    private lateinit var textView1: TextView
    private lateinit var textView2: TextView

    override fun onCreate(savedInstanceState: Bundle?) {
        super.onCreate(savedInstanceState)
        setContentView(R.layout.activity_main)

        textView1 = findViewById(R.id.textView1)
        textView2 = findViewById(R.id.textView2)

        RetrofitClient.service1.getService1().enqueue(object : Callback<Service1Response> {
            override fun onResponse(call: Call<Service1Response>, response: Response<Service1Response>) {
                if (response.isSuccessful) {
                    println("getService1调用成功")
                    println(response.body())

                    runOnUiThread {
                        response.body()?.let {
                            textView1.text = it.goal1
                        }
                    }
                } else {
                    // 处理错误响应
                    println("getService1响应错误")
                }
            }

            override fun onFailure(call: Call<Service1Response>, t: Throwable) {
                // 处理请求失败
                println("getService1响应失败")
            }
        })


        RetrofitClient.service2.getService2().enqueue(object : Callback<Service2Response> {
            override fun onResponse(call: Call<Service2Response>, response: Response<Service2Response>) {
                if (response.isSuccessful) {
                    println("getService2调用成功")
                    println(response.body())
                    runOnUiThread {
                        response.body()?.let {
                            textView2.text = it.goal2
                        }
                    }
                } else {
                    // 处理错误响应
                    println("getService2响应错误,状态码: ${response.code()}, 错误信息: ${response.message()}")
                }
            }

            override fun onFailure(call: Call<Service2Response>, t: Throwable) {
                // 处理请求失败
                println("getService2响应失败,错误: ${t.message}")
            }
        })


    }
}
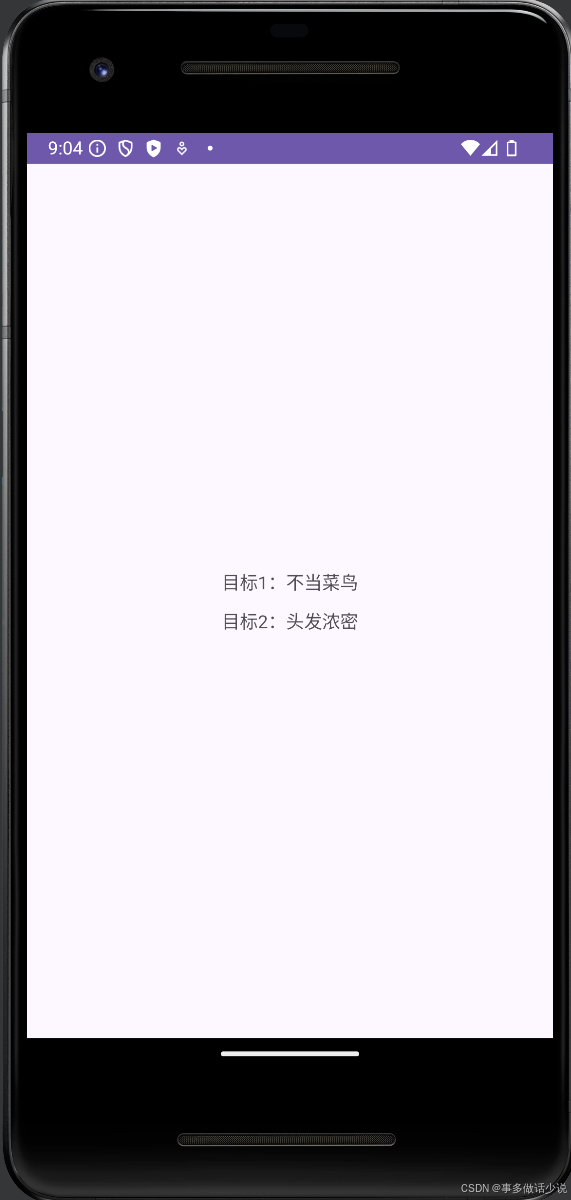
实测
模拟器一定一定选择新一点的api版本!
不然跟我一样和GPT怒耗半天
