setState
在开发中不能直接通过修改state的值来使界面发生变化,必须通过setState来修改才能使页面发生变化。
使用setState修改时,两次的修改结果会合并 ,在合并时会比较参数的变化 ,如果发生变化会覆盖原来的,然后再执行render

setState的其他用法:
1.setState可以接受一个函数,可以获取之前的state和props
js
//
this.setState((state,props)=>{
  return data
})- 处理异步调用
js
//如果希望在数据更新后获取对应的结果可以传入一个回调函数
this.setState({data:"aa"},()=>{
      console.log("更新后的data:",this.state.data)
})
setState的异步更新

ref
使用ref获取 dom
js
class App extends Component {
  constructor() {
    super();
    this.state = {};
    this.myRef = createRef();
  }
   cli() {
    console.log(this.myRef);
  }
  render() {
    return (
      <div>
           <span ref={this.myRef}>aaa</span>
            <button onClick={() => this.cli()}>ss</button>
      </div>
    );
  }
}
使用ref获取组件实例
js
class App extends Component {
  constructor() {
    super();
    this.state = {};
    this.myRef = createRef();
  }
   cli() {
    console.log(this.myRef.current); //可以使用组件内的方法 this.myRef.current.xxx()
  }
  render() {
    return (
      <div>
            <Son ref={this.myRef}></Son>
            <button onClick={() => this.cli()}>ss</button>
      </div>
    );
  }
}
ref转发
ref不能用于函数式组件,需要使用forwardRef进行转发
js
export const Son = forwardRef(function (props, ref) {
  return (
    <div>
      <h1 ref={ref}>ss</h1>
      <myContext.Consumer>
        {(value) => {
          return <h1>{value.name}</h1>;
        }}
      </myContext.Consumer>
    </div>
  );
});
双向绑定
js
change(e){
     this.setState({
     username:e.target.value
  })
}
<input value={username} onChange={(e)=>this.change(e)}>
高阶组件
高阶函数 返回类组件
js
import { PureComponent } from "react";
function time(Com) {
  return class Time extends PureComponent {
    constructor() {
      super();
    }
    render() {
      const { time } = this.props;
      return (
        <div>
          <div>{Com.name}es6的语法</div>
          <Com time={time}></Com>
        </div>
      );
    }
  };
}
export default time;
在导出时作为参数传入
js
import { Component, forwardRef } from "react";
import time from "./time";
class Son extends Component {
  render() {
    const { name } = this.context;
    return (
      <div>
        {name}

      </div>
    );
  }
}
export default time(Son);
高阶函数 返回函数式组件
js
export function tests(ELe) {
  return forwardRef(function (props, ref) {
    return (
      <>
        <ELe data={props.data} time={"2023"}></ELe>
      </>
    );
  });
}
js
import { Component, forwardRef } from "react";
import {tests}from "./time";
class Son extends Component {
  render() {
    const { name } = this.context;
    return (
      <div>
        {name}

      </div>
    );
  }
}
export default time(Son);
this.forceUpdate()强制更新
createPortal
将子节点挂载到其他地方
js
index.html中:
<body>
<div id="root"></div>
<div id="portal"> </div>
</body>
----------------------------------
import React from "react";
import { createPortal } from "react-dom";
class App extends React.Component {
render() {
return (
<div>
<div>
<h1>123</h1>
{createPortal(<h2>456</h2>, document.querySelector("#portal"))}
</div>
</div>
);
}
}
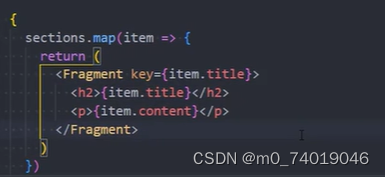
export default App;fragment
js
import React, { Fragment } from "react";
 return (
      <Fragment>
        <div>xxxx</div>
      </Fragment>
    );
语法糖
  return (
      <>
        <div>xxxx</div>
      </>
    );
如果需要在Fragment添加key时不能省略
StrictMode

严格模式会检查:

react-transition-group 动画
npm install react-transition-group --save
主要组件

in 为true时,触发进入状态
in为false时,触发退出状态

例子:

js
<CssTransition  in ={isShow} classNams='why'>

</CssTransition>
js
.why-enter{

}
.why-enter-active{

}
.why-exit{

}
.why-exit-active{

}
其他属性

例子:


SwitchTransition

编写css
css模块化

例子:


css in js

安装 styled-components:npm i styled-components
基本使用
定义 styled-components
js
import styled from "styled-components";

export const AppWrapper = styled.div`
  .select {
    color: red;
    .title {
      border: 1px solid black;
      font-size: 20px;
    }
    &:hover {
      background-color: cyan;
    }
  }

  .content {
    background-color: blue;
  }
`;
在组件中使用
js
import React, { Fragment } from "react";
import { AppWrapper } from "./style";
class App extends React.Component {
  render() {
    return (
      <>
        <AppWrapper>
          <div className="select ">
            xxxx
            <span className="title">span</span>
          </div>
          <div className="content">00000000000</div>
        </AppWrapper>
      </>
    );
  }
}
export default App;
传递变量
在组件中定义变量
js
import React, { Fragment } from "react";
import { AppWrapper, SelectWrapper } from "./style";
import Fun from "./fun";
class App extends React.Component {
  render() {
    const size = "30";
    return (
      <>
        <AppWrapper>
          <div className="select ">
            xxxx
            <span className="title">span</span>
          </div>
          <div className="content">00000000000</div>
          <SelectWrapper color={"yellow"} size={"30"}>
            <div className="s">sssssss</div>
          </SelectWrapper>
        </AppWrapper>
        <Fun data={"111"}></Fun>
      </>
    );
  }
}
export default App;
使用组件传递的变量
js
//定义的变量也可以
const myColor='red'
export const SelectWrapper = styled.div`
  .s {
    color: ${(props) => props.color};
    font-size: ${(props) => props.size}px;
  }
  .a {
    color:${myColor}
  }
`;
样式继承

设置主题

设置的主题样式可以通过props.theme.来获取

添加class
可以借助classnames来动态添加class
npm i classnames
