目录
一、概要
查看本文需完成(01)Unity使用在线AI大模型(使用百度千帆服务)的阅读和实操,本文档接入指南的基础上使用Unity + C#调用百度千帆大模型,需要阅读者有一定的Unity开发基础。
此功能本质上就是拿Python大模型,大模型问答处理都是在Python中执行,而Unity只是在这个基础上包一层"壳"。那么就涉及到Unity该怎么去和Python进行通信的问题了,本文采用C#内的Process类,需要提前在Python代码内做可传入外部程序调用并传出参数方法,再将Python文件打包成.exe格式的文件。当然在Unity和Python通信的方面也可以用Socket的方式或者其他方式,不一定非要是Process哈~
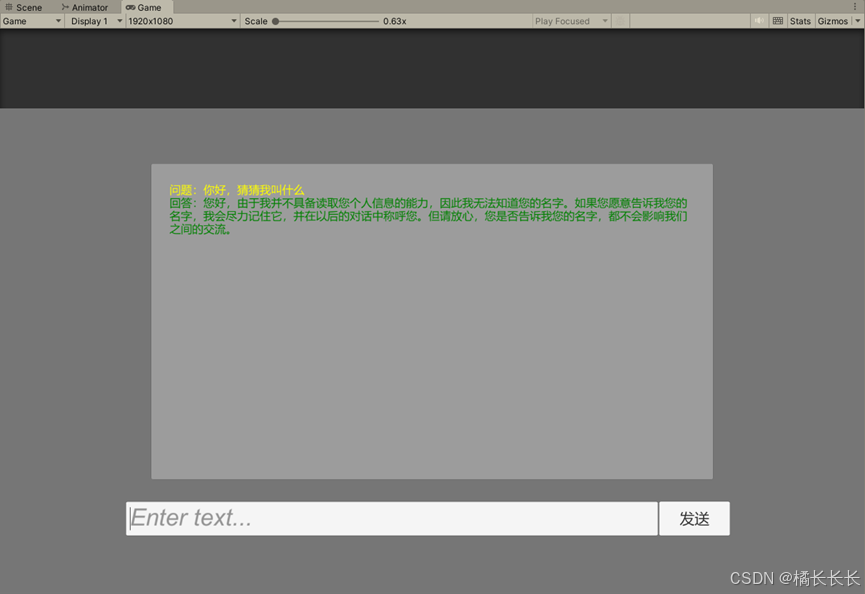
先看达成效果:
二、改造Python代码
1.在上面提到,想要Python在外部被调用到需要先将Python源码做成可传入传出参数的方法,代码如下:
python
import sys
import os
import qianfan
# 这两行必须存在,使传回到Unity的消息不会变成乱码
import io
sys.stdout = io.TextIOWrapper(sys.stdout.buffer, encoding='utf-8')

#
os.environ["QIANFAN_ACCESS_KEY"] = "xx"
os.environ["QIANFAN_SECRET_KEY"] = "xx"

chat_comp = qianfan.ChatCompletion()
def qf(sendmessage):
    resp = chat_comp.do(model="ERNIE-Bot", messages=[{
        "role": "user",
        "content": str(sendmessage)
    }])
    return resp["result"]

s = str(qf(sys.argv[1]))
print(s)
2.接下来需要将Python代码打包成可执行的.exe文件,首先需要在PyCharm终端下载cx_Freeze依赖包,安装命令:pip install cx_Freeze
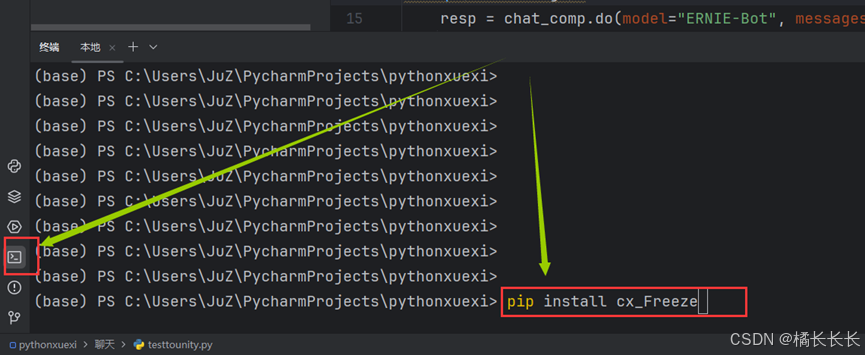
3.将Python代码打包为.exe文件,继续在终端内输入命令,命令:cxfreeze ++聊天/testtounity.py++ --target-dir dist
4.上述命令中标记下划线的 { ++聊天/testtounity.py++} 是你需要打包Python文件的相对路径
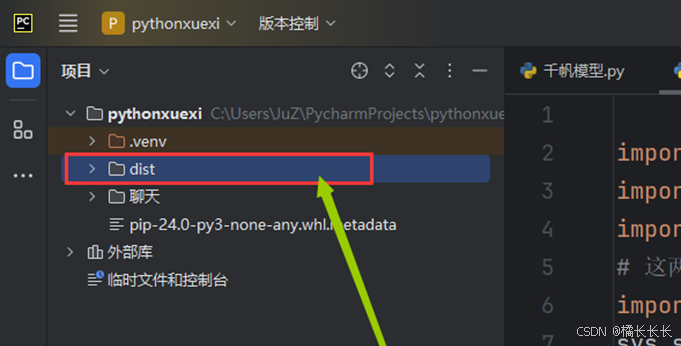
5.打包成功后这里会出现一个名为dist的文件夹
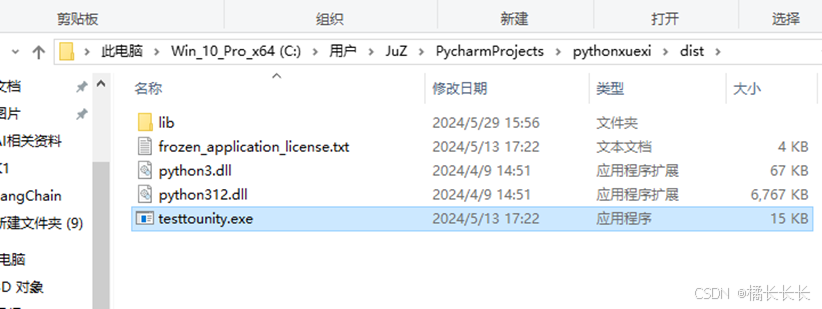
6.在磁盘中找到这个文件夹,找到已经打包为.exe文件的Python脚本,记住这个路径,待会要调用
三、制作Unity场景
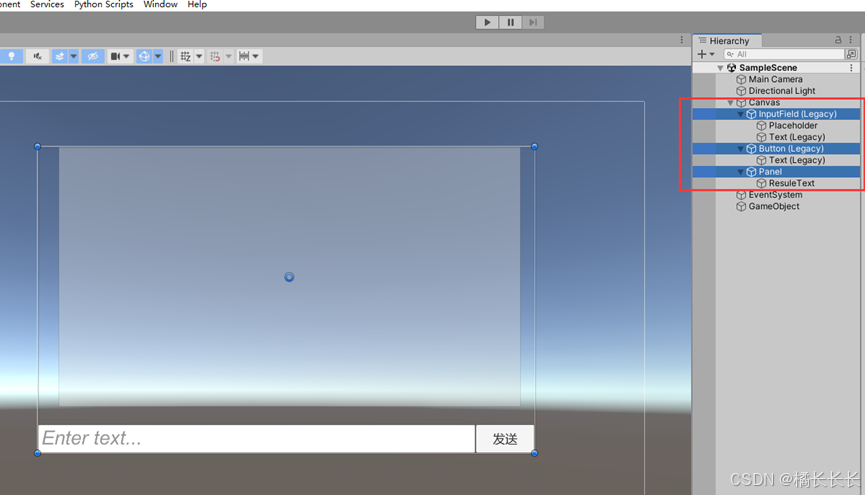
1.在界面中创建输入框(InputField,用于发送消息的内容)、按钮(Button,用于点击发送事件)、面板(Panel+Text,用于显示对话记录)
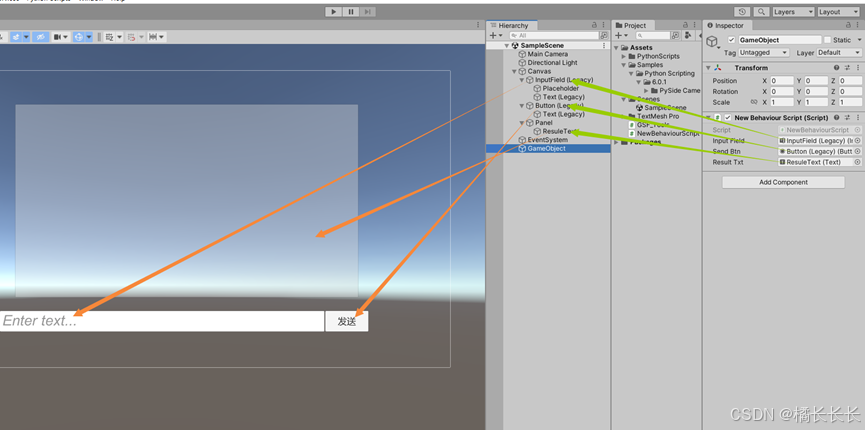
2.新建C#代码页,粘贴以下代码:
python
using System.Diagnostics;
using UnityEngine;
using UnityEngine.UI;
public class NewBehaviourScript : MonoBehaviour
{
    public InputField _InputField;
    public Button SendBtn;
    public Text ResultTxt;
    private static string resultMessage = string.Empty;
    private void Start()
    {
        SendBtn.onClick.AddListener(SendBtnFunc);
    }
    private void SendBtnFunc()
    {
        ResultTxt.text += "<color=yellow>" + "问题:" + _InputField.text + "</color>" + "\n";
        RunPythonScript(_InputField.text);
        ResultTxt.text += "<color=green>" + "回答:" + resultMessage + "</color>" + "\n";
    }
    private static void RunPythonScript(string argvs)
    {
        Process p = new Process();
        p.StartInfo.FileName = @"C:\Users\JuZ\PycharmProjects\pythonxuexi\dist\testtounity.exe";
        p.StartInfo.UseShellExecute = false;
        p.StartInfo.Arguments = argvs;
        p.StartInfo.RedirectStandardOutput = true;
        p.StartInfo.RedirectStandardError = true;
        p.StartInfo.RedirectStandardInput = true;
        p.StartInfo.CreateNoWindow = true;
        p.Start();
        p.BeginOutputReadLine();
        p.OutputDataReceived += new DataReceivedEventHandler(Get_data);
        p.WaitForExit();
    }
    private static void Get_data(object sender, DataReceivedEventArgs eventArgs)
    {
        if (!string.IsNullOrEmpty(eventArgs.Data))
        {
            resultMessage = string.Empty;
            resultMessage = eventArgs.Data;
        }
    }
}
3.修改代码页中下述的代码,将路径改为刚刚打包为.exe的Python脚本(本文档2-5)文件的绝对路径:p.StartInfo.FileName = @"++C:\Users\JuZ\PycharmProjects\pythonxuexi\dist\testtounity.exe++";
4.至此,运行Unity!